Sealing a concrete bird bath is straightforward: clean the surface thoroughly, let it dry completely, repair any cracks with a suitable mortar or filler, then apply a bird-safe waterproofing sealer in two thin coats and let it cure before refilling. The trickier part is choosing the right product and not rushing the prep, which is where most people run into trouble. If you’re wondering why your concrete bird bath turns red, the cause is often mineral buildup, rust staining, or moisture-related reactions that sealing can help reduce sealer. This guide walks you through the whole process, including what to do with a leaking or cracked bath, how to handle other materials like stone and terracotta, and how to winterize once you're done.
How to Seal a Concrete Bird Bath: Stop Leaks and Cracks

Marcus Henley
20 Apr 2026
Should you actually seal your bird bath?
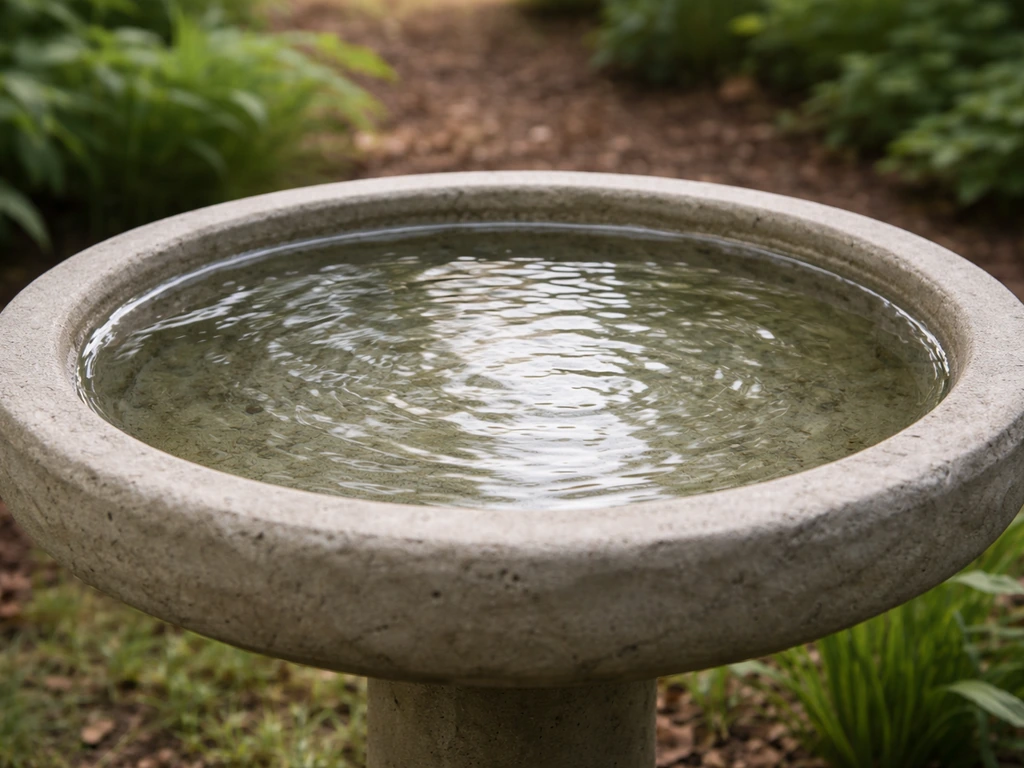
Yes, in most cases sealing is worth doing, but it's not always mandatory. Concrete is naturally porous, which means it absorbs water, and over time that absorbed moisture causes real problems: hairline cracks become deep fractures, especially after freeze-thaw cycles, and algae roots deeper into the surface. A good sealer cuts water absorption dramatically, extends the life of the bath, and makes routine cleaning much easier because algae and mineral deposits have less to grip.
That said, there are times to hold off. If your bath is new, unsealed concrete that has never been treated, you're fine to seal it right away after a proper cure period (typically 28 days for fresh concrete). But if the bath has old paint, a failing previous coating, or significant structural damage, you need to strip or repair first before adding any new layer. Sealing over a problem doesn't fix it, and a sealer is not a crack filler or patching mortar. It's also worth noting that a breathable, penetrating sealer is almost always a better choice for bird baths than a thick film-forming coating, because film coatings can trap moisture inside the concrete and eventually peel or blister.
When sealing genuinely isn't necessary: if you live in a mild climate with no hard freezes, your bird bath has no cracks, and it holds water fine, a penetrating sealer is still helpful for longevity but not urgent. If you're dealing with a very old bath that's mostly decorative and structurally compromised, you might get more mileage from replacing it than chasing leaks with sealers.
Choosing the right sealer for your material
The product you pick matters a lot, and it needs to match both the material and the fact that birds will be drinking from this water. For product selection help, see also the best sealant for concrete bird bath as a related comparison point when you’re choosing your waterproofing sealer. Choosing the best cement for bird baths matters too, especially if you need a cementitious waterproofing coating rather than just a penetrating sealer. If you want the best concrete mix for bird bath performance, start with the right cement and water-cement ratio before you seal or waterproof. Here's how to think through the options by material type.
| Material | Best Sealer Type | Key Consideration | Bird-Safe Notes |
|---|---|---|---|
| Concrete / Cement | Silane/siloxane penetrating sealer or cementitious waterproof coating | Breathable sealers prevent moisture trap; film-formers can peel | Look for NSF/ANSI 61 or potable water ratings; products like DamSeal are specifically marketed for bird baths |
| Natural Stone (porous) | Silane/siloxane penetrating sealer | Stone is often more porous than concrete; test coverage first | Same potable water standard applies; penetrating sealers don't alter surface chemistry significantly |
| Terracotta / Ceramic | Waterproof ceramic glaze, food-grade epoxy sealer, or penetrating silane/siloxane | Unglazed terracotta is extremely porous and may need multiple coats | Avoid solvent-based products; water-based or food-grade options are safest |
| Metal (cast iron, aluminum) | Rust-inhibiting primer + epoxy or polyurethane topcoat, or rubberized waterproof paint | Metal doesn't absorb water but joints and seams corrode and leak | Use non-toxic, water-safe topcoats; avoid lead-based paints entirely |
For concrete specifically, silane/siloxane products like Sikagard H 1000 or PROSOCO Siloxane PD are excellent choices because they penetrate the concrete and create a hydrophobic barrier inside the pores without forming a surface film. This means water beads off the surface but water vapor can still move through the material, which prevents the moisture-trapping that causes spalling.
Sikagard H 1000 covers roughly 250 to 400 square feet per gallon depending on how porous your concrete is, so a typical bird bath needs only a small amount. For leaking baths or bare concrete that needs a waterproof coating rather than just water repellency, a cementitious waterproofing product is better.
DamSeal by DamTite is one of the few coatings explicitly marketed for bird baths and fountains, and products based on a two-component polymer-modified cementitious system can bridge small cracks while maintaining a water-safe finish once cured.
Whichever product you land on, look for potable water ratings or language like 'safe for drinking water contact. A sealer with an [NSF/ANSI 61 potable water contact](https://www. nsf. org/newsroompdf/NSF-ANSI61_watemarked.
pdf) listing helps ensure the coating is intended not to introduce unsafe substances into drinking water contact. ' CWS100, for example, holds an NSF/ANSI 61-CAN certification for drinking water contact. That's the standard to look for if you can find it. If you're also thinking about paint alongside sealing, the choice of paint matters independently of the sealer, and it's worth researching bird-safe paint options before you commit.
If you're also painting your bird bath, choosing the best paint for concrete bird bath surfaces that is bird-safe and water-resistant matters just as much as the sealer. If you are also painting your bird bath, choose the best paint for concrete bird bath so the finish stays durable and bird-safe.
Prep checklist: clean, dry, and ready to seal
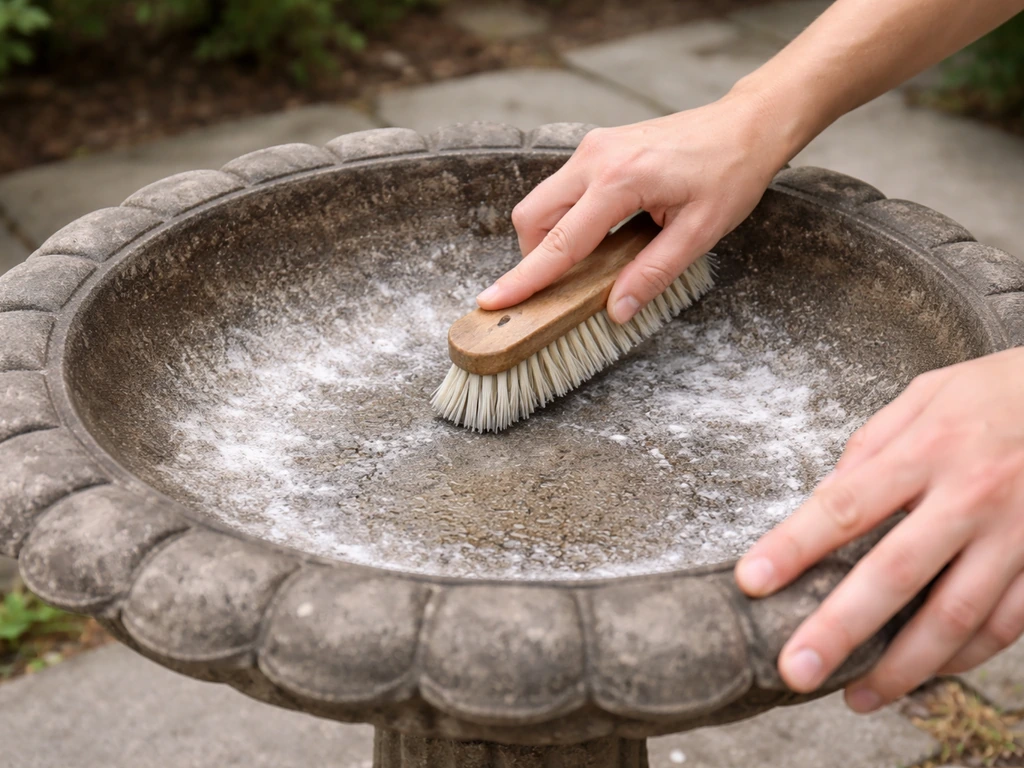
Rushed prep is the number one reason sealers fail. No matter how good the product is, if you apply it over a dirty, damp, or efflorescence-covered surface, it won't bond properly and you'll be doing the job again within a season. Here's the full prep sequence.
- Empty the bird bath completely and scrub it with a stiff brush using a diluted white vinegar solution (1 part vinegar to 3 parts water) or a dedicated concrete cleaner to remove algae, mineral deposits, and biological buildup.
- Rinse thoroughly, then inspect for efflorescence (that white chalky crust). If present, treat it with a diluted acid-based efflorescence remover or stronger vinegar solution, scrub it off, and rinse again. Do not skip this step — sealing over efflorescence traps the salts underneath and they'll push the sealer off from the inside.
- Allow the surface to dry completely. After rinsing or any wet treatment, give it at least 24 to 48 hours of drying time in good conditions before sealing. Glaze 'N Seal specifically recommends at least 48 hours after efflorescence removal before sealing. If you've had rain or high humidity, extend that window.
- Check for cracks, chips, and structural damage. Mark anything that needs repair before sealing (see the crack repair section below).
- Lightly roughen very smooth or glazed surfaces with a wire brush or fine sandpaper to improve sealer adhesion, especially if you're applying a film-forming product.
- Test a small area first if you're using a new product. Sikagard H 1000's product data specifically recommends a test patch to confirm coverage, aesthetics, and performance before doing the full job.
Fixing cracks and leaks before you seal anything
This is critical and worth spelling out clearly: a sealer is not a crack filler. If your bird bath is actively leaking or has visible cracks, repair those first, then seal. Applying a silane/siloxane sealer over a cracked surface won't stop water from entering through the crack, as Sikagard's own documentation states it will not inhibit water penetration through unsound or cracked surfaces. You need actual repair material in the crack before the sealer goes on.
Small hairline cracks
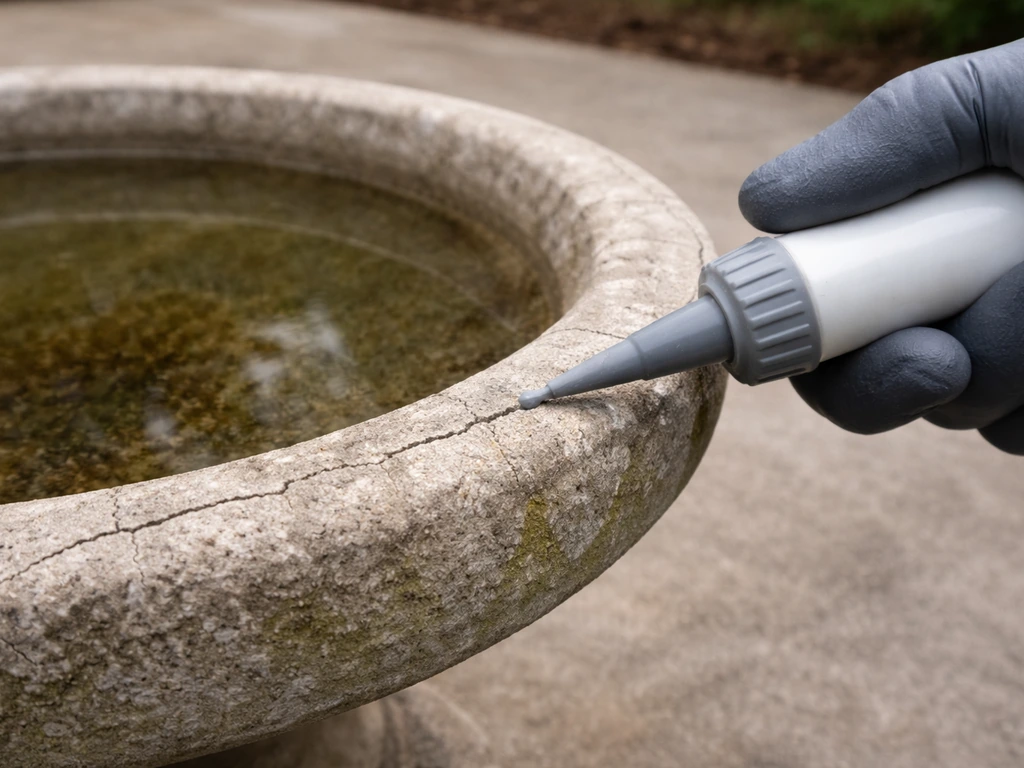
For hairline cracks under about 1/8 inch wide, a hydraulic cement or a polymer-modified crack filler works well. Clean the crack out with a wire brush to remove loose material, dampen the crack slightly (this helps hydraulic cement bond), pack the filler in firmly, and smooth it flush with the surrounding surface. Let it cure according to the product directions before moving on to sealing.
Larger cracks and structural damage
For cracks wider than 1/8 inch, or areas where chunks of concrete have broken away, you need a proper repair mortar rather than a crack filler. Look for a polymer-modified, non-shrink repair mortar that meets ASTM C928 (products like FastSet Repair Mortar or SPECCRETE Highway Repair 928 meet this standard). The non-shrink part matters because shrinking mortar will pull away from the edges of the crack as it cures, reopening the gap.
Widen the crack slightly with a chisel or grinder to create a mechanical key (a shape the mortar can grab into), clean it out, dampen the area, pack the mortar in, and feather the edges smooth. Give it the full cure time specified by the manufacturer before applying sealer.
Actively leaking baths
If the bath loses visible water overnight and you can't pinpoint a single crack, it's likely seeping through multiple pores or micro-cracks throughout the basin. In that case, after doing any visible crack repairs, follow up with a full cementitious waterproofing coating (not just a penetrating sealer) applied to the entire interior surface. A two-component polymer-modified cementitious coating with crack-bridging properties, like Water Guard 491, is designed exactly for this scenario. It bonds well to damp concrete and forms a continuous waterproof membrane rather than just a pore treatment.
Step-by-step: sealing a concrete bird bath
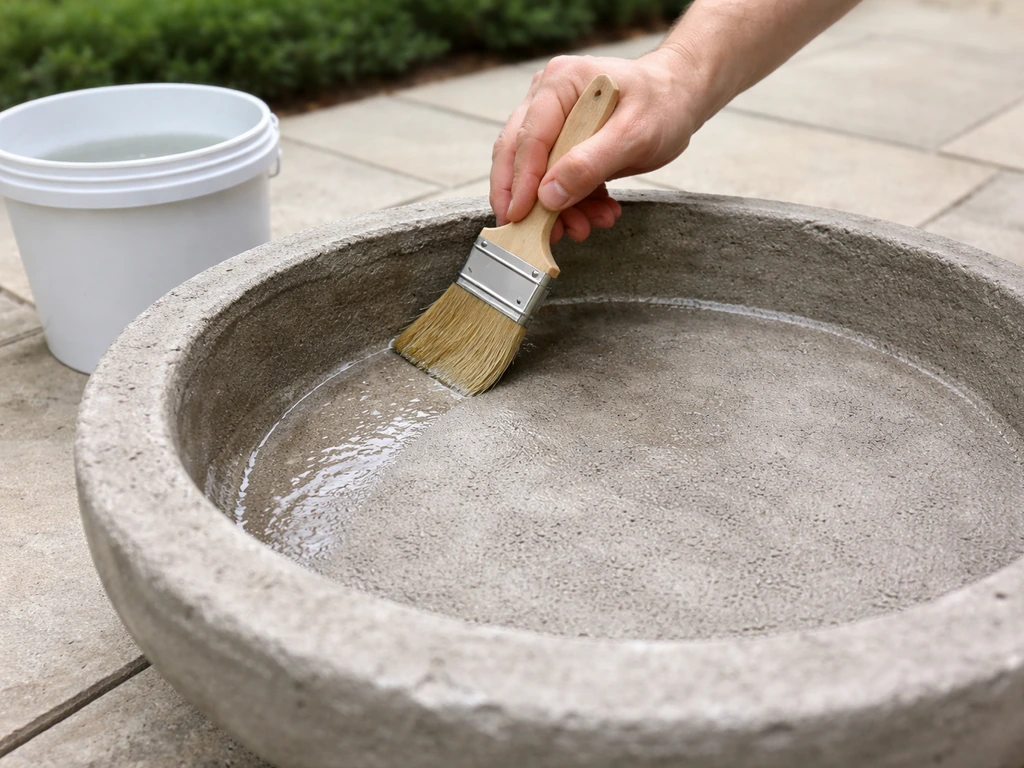
Once the surface is clean, dry, and repaired, here's how to apply the sealer. The steps below cover both penetrating sealers (for water repellency on sound concrete) and cementitious waterproof coatings (for leaking or heavily porous baths).
- Gather your materials: sealer or waterproofing coating, a clean paintbrush or low-nap roller, mixing container if using a two-part product, gloves, eye protection, and good ventilation if working with any solvent-based products.
- Mix your product if required. Two-component cementitious coatings need to be mixed to the right consistency before application. Single-component penetrating sealers like silane/siloxane products are typically ready to use.
- Apply the first coat evenly across the entire interior basin and work up the exterior sides. Use a brush for edges and detailed areas, a roller for flat expanses. Don't glob it on — thin, even coats bond better and cure more predictably than thick single coats.
- Allow the first coat to dry before applying the second. For penetrating sealers like Sikagard H 1000, drying time is typically 4 to 6 hours at 70°F and 50% relative humidity. Cooler or more humid conditions extend that window. For film-forming or cementitious coatings, check the product data sheet but plan on a minimum of 4 to 6 hours between coats.
- Apply the second coat perpendicular to the first (crosshatch pattern) for more even coverage and fewer missed spots.
- Allow the full cure before exposing to water or birds. Penetrating sealers are often walkable (or in this case 'bird usable') within 24 hours, but topical and cementitious coatings may need 24 to 48 hours for full dry and potentially longer for a complete cure. When in doubt, wait 48 hours minimum, rinse the basin with fresh water two or three times before refilling, and check the manufacturer's guidance on potable water contact timing.
One practical note on cure conditions: don't seal on a hot, sunny day when the surface is baking. Heat causes sealers to dry too fast before they've penetrated or bonded properly. Aim for moderate temperatures (60 to 80°F is ideal) and low humidity. Also avoid sealing if rain is in the forecast within the next 24 hours, since rain before the sealer cures can prevent proper bonding and leave a cloudy or blotchy finish.
Sealing stone, terracotta, ceramic, and metal bird baths
While concrete gets most of the attention, other materials need sealing too, and the approach changes based on what you're working with.
Natural stone
Porous natural stone (sandstone, limestone, rough granite) behaves very similarly to concrete and benefits from the same silane/siloxane penetrating sealers. The main difference is porosity, which is often higher in stone than in dense concrete, so you may go through more product. The prep sequence is identical: clean, dry 24 to 48 hours, repair chips if present, then apply in thin even coats. Non-porous polished stone doesn't really need sealing and typically won't absorb a penetrating sealer anyway.
Terracotta and unglazed ceramic
Terracotta is extremely porous, which is exactly why unglazed terracotta bird baths lose water so fast. A silane/siloxane sealer can help, but for serious waterproofing you're better off with a food-grade epoxy sealer or a dedicated terracotta waterproofer applied in multiple coats. The basin interior is the priority. Prep is the same: scrub clean, dry completely (terracotta dries slowly, so give it 48 hours minimum), then apply. Two to three thin coats are often needed on terracotta to get consistent coverage. If the bath has an existing glaze, check that it's sound and not flaking before doing anything else.
Glazed ceramic
A fully glazed ceramic bird bath usually holds water well on its own, and the glaze itself is essentially a waterproof coating. If yours is leaking, the problem is almost certainly a crack in the glaze or the ceramic body. For hairline glaze cracks, a food-grade epoxy filler or clear waterproof sealant applied carefully to the crack can stop the leak.
If the ceramic body is structurally cracked through, sealing is a temporary fix at best, and replacement is worth considering. A note on the best glue and repair products for ceramic baths is worth exploring separately if you're doing a structural repair. A good rule of thumb is to choose the best glue and repair products for your bath material so the sealant holds and stays bird-safe best glue for concrete bird bath.
Metal (cast iron, aluminum, copper)
Metal baths don't absorb water but they corrode at seams, welds, and drainage holes, and those corroded areas eventually leak. Start by wire-brushing any rust or corrosion away down to bare metal, then wipe clean with a degreaser. Apply a rust-inhibiting primer, then follow with a waterproof topcoat: a non-toxic, water-safe epoxy or polyurethane coating works well. Rubberized undercoating products can also seal seams effectively. The critical thing with metal is getting the rust off completely before coating, because coating over active rust just delays the problem. Let primer and topcoat cure fully, typically 24 to 48 hours, before refilling.
Winterizing a concrete bird bath after sealing
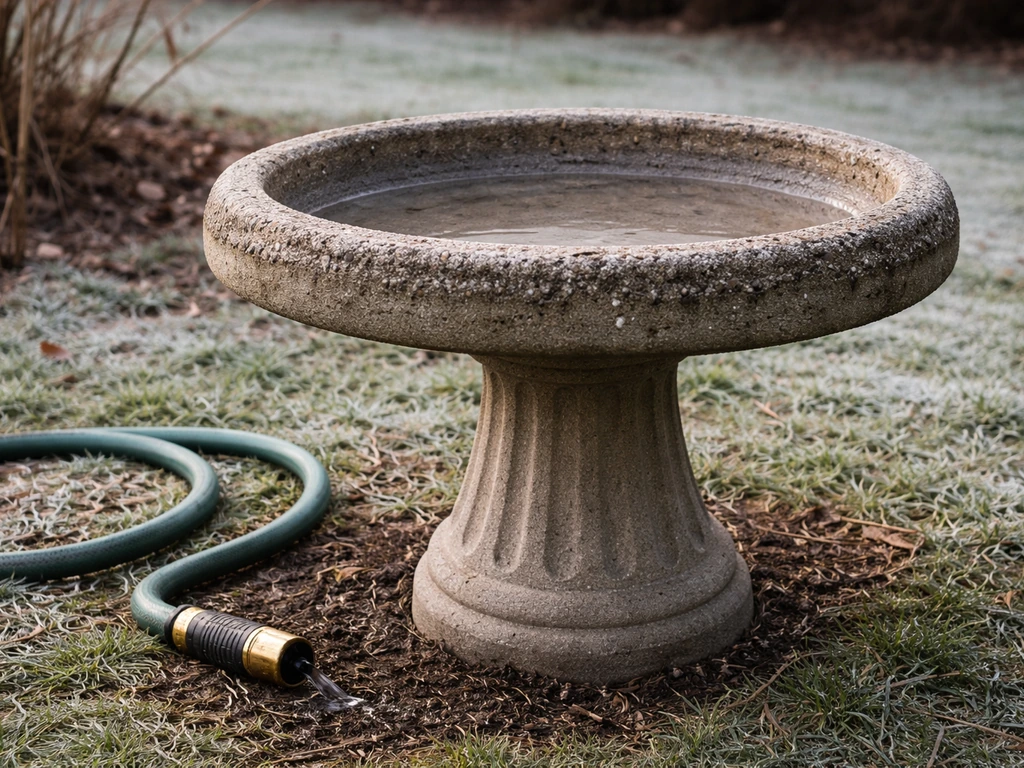
Sealing your concrete bird bath is one of the best things you can do to help it survive winter, but sealing alone isn't enough in climates with hard freezes. The freeze-thaw cycle is the main enemy of concrete: water seeps in, freezes and expands (water expands about 9% when it turns to ice), and that expansion forces existing cracks wider and creates new ones. A good silane/siloxane sealer significantly reduces water absorption, which means less water is inside the concrete to freeze in the first place. But you still need to take a few additional steps.
- Drain the basin completely before the first hard freeze. Standing water in the bowl will freeze, expand, and crack or chip the basin even on a sealed bath.
- If you want to keep it active through mild winters, use a bird bath heater to prevent freezing, but don't rely on this alone in very cold climates with sustained sub-zero temperatures.
- Store lightweight or unglazed terracotta and ceramic baths indoors through winter, as these materials are far less freeze-tolerant than dense concrete and sealing won't make them frost-proof.
- Turn heavy concrete baths upside down or cover with a weatherproof tarp if you can't bring them in, to prevent water from pooling in the basin and freezing.
- Inspect the bath for new cracks each spring before refilling. Catch and repair hairline cracks early, before the next winter cycle makes them worse.
- Plan to re-seal every one to three years depending on your climate and the type of sealer used. Penetrating silane/siloxane sealers typically last longer than topical coatings before needing reapplication.
One thing worth doing before winter arrives: check the condition of your sealer by dripping a little water on the basin surface. If it beads up and rolls off, the sealer is still working. If it soaks straight in, it's time to clean and re-seal before temperatures drop. That simple test takes about 10 seconds and can save you from finding a cracked basin in March.
Done right, a sealed concrete bird bath can last for decades. The process isn't complicated, it's mostly about patience during prep and not cutting corners on drying time. Pick a bird-safe product, repair cracks before you seal, apply in thin coats, and give it time to cure. Your birds won't complain about a two-day wait, and you'll avoid redoing the job next season.
FAQ
How can I tell if my concrete bird bath sealer is actually working after I apply it?
If the water beads right after sealing but starts sinking in after a week or two, it usually means the surface was still damp, had efflorescence, or the sealer got applied too thickly. Strip and re-clean until the surface is dry and clean, then reapply in thin coats, and extend cure time before refilling.
Can birds use the bird bath immediately after sealing?
Bird-safe sealers are typically safe once cured, but you should still keep birds away until full cure is reached on the label (not just “touch dry”). If you must use the bath sooner, offer a temporary alternate water source and only return it after the sealer reaches its stated potable or drinking-water-contact cure condition.
What should I do if staining shows up or worsens after sealing?
Red or brown staining that appears after sealing is often mineral bleed (efflorescence) or rust migration that the sealer can trap but not remove. Clean thoroughly first, use a stain remover designed for concrete, and let it dry completely before resealing. If the staining keeps reappearing, the underlying moisture source or crack path needs additional repair.
Is it okay to seal if the concrete looks dry but feels slightly damp?
For products that are breathable and penetrating, best bonding depends heavily on surface moisture control, so sealing over damp concrete is a common failure cause. Wait until the concrete is dry enough to stop darkening when you mist the surface with water (no dark spot should develop after a few minutes), then proceed with thin coats.
What if my bird bath still leaks even after I repaired visible cracks?
If the bath keeps losing water overnight but you cannot see cracks, test for leaks by drying the basin, then checking where water reappears or darkens after a few hours, sometimes at the drain and base seams. If it is truly seepage through pores, switch from a penetrating sealer to a continuous cementitious waterproofing membrane on the entire interior, after repairing any visible defects.
Should I apply a thicker coat to make sealing faster or stronger?
A thicker coat is not better. Thick application can prevent full penetration, increase curing issues, and lead to tacky spots or premature wear. Plan for two thin, even coats with the recommended recoat window, and stop if you see pooling or gloss buildup.
Can I use any waterproof sealant I have on hand, like roofing caulk or deck sealer?
Do not use construction-grade silicone, roofing tar, or unknown “mold killers” as sealants. Even if they stop leaks, many are not formulated for drinking-water contact. Use a sealer that explicitly mentions potable water contact or drinking-water-safe performance, and verify it is compatible with concrete and your existing coating.
Can I seal over existing paint on a concrete bird bath?
Yes, but you must treat paint as a different system. If paint is peeling or failing, the sealer can adhere poorly and trap moisture beneath. Strip or thoroughly remove loose coating, let concrete dry fully, then seal. If the paint is intact and well bonded, choose a product specifically intended to bond over that coating, or plan for removal if you cannot confirm compatibility.
How should I winterize a sealed bird bath so freezing does not still crack it?
For freeze-thaw climates, you will get better performance if you both reduce water uptake and manage residual water in corners. After sealing, keep the bath drained during the coldest periods, or tilt it so water can fully drain, and never leave a filled, sealed basin that can freeze solid.
Do I need to reapply sealant at the rim or only seal the interior bottom?
Most penetrating sealers are not meant for ongoing abrasion at the waterline rim. If birds spill water and splash deposits around the rim, lightly reapply or spot-treat the waterline after the first season, and keep an eye on hairline cracks at the rim where wear concentrates.
How long should I wait before refilling, and what weather conditions change that timing?
Temperature and humidity change how long you should wait between coats and before refilling. If it is cooler than recommended, extend cure time rather than rushing, and avoid sealing when rain is likely within the cure window, since early moisture exposure can cause cloudy areas or reduced bonding.
Next Article
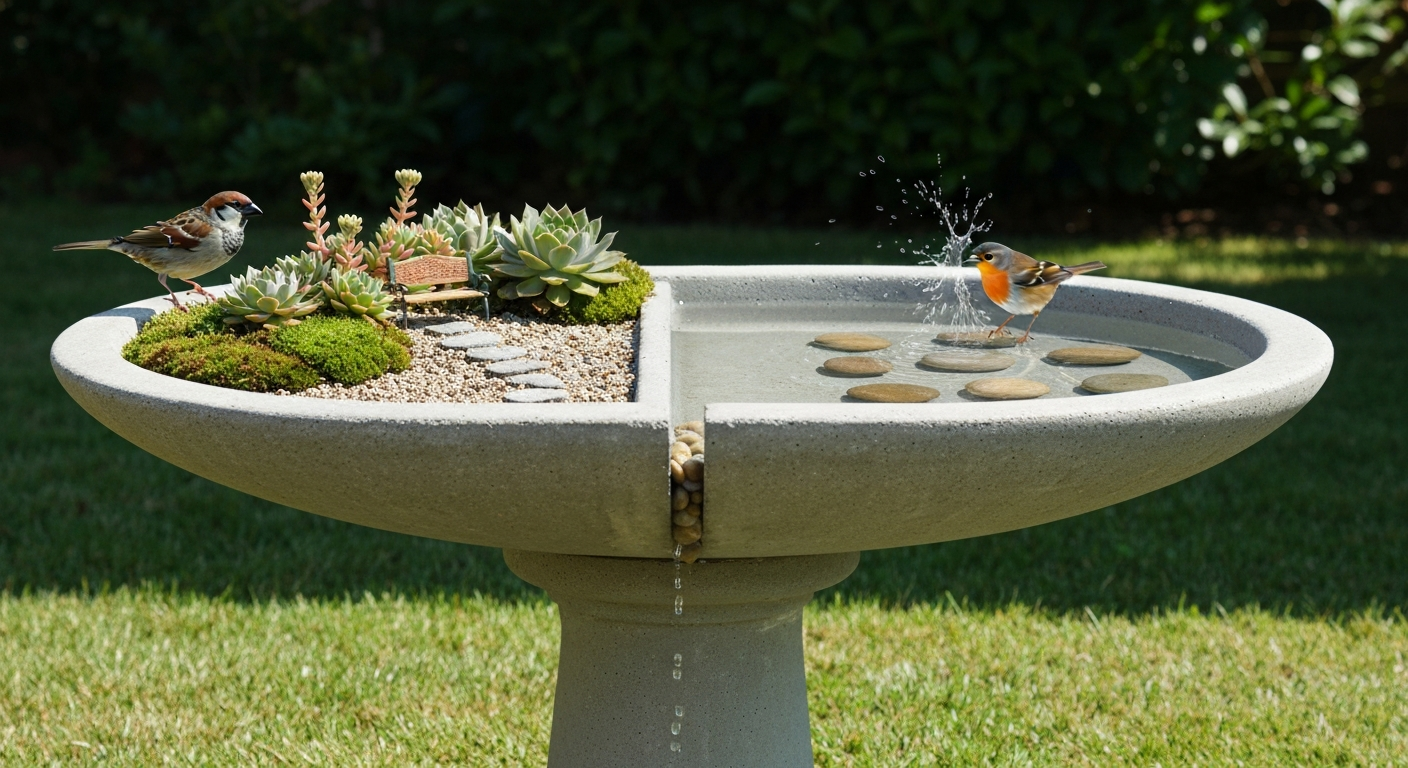
How to Make a Fairy Garden in a Bird Bath: Safe Build & Care
Create a bird-safe fairy garden in a bird bath: step-by-step build, plant choices, safety, care, troubleshooting