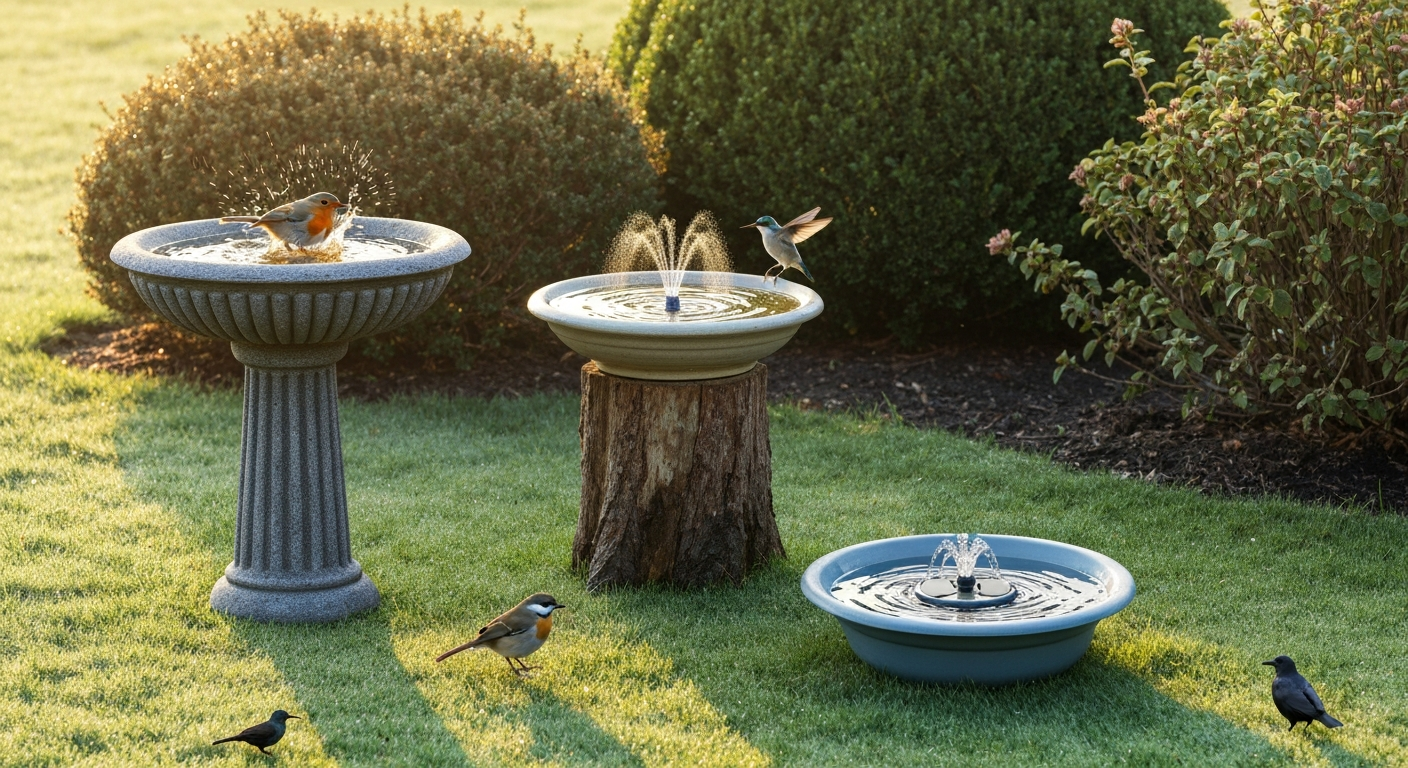
Mold on a bird bath top is more than an eyesore. Quaternary Ammonium Compounds (Fact Sheet), NPIC (Oregon State Univ.) notes that Quaternary ammonium compounds (“quats”) are widely used EPA‑registered surface disinfectants but have variable efficacy against different organisms, may leave residues and in some formulations can be toxic to wildlife (and to cats/other animals) if misapplied, check product label and NPIC fact sheet before use around birds Quaternary Ammonium Compounds (Fact Sheet) — NPIC (Oregon State Univ.). It can harbor pathogens like Aspergillus and Salmonella that sicken the birds you're trying to attract, and it can pose real risks to you when you go to clean it without protection. The good news: with the right dilution, a scrub brush, and a few minutes of contact time, you can eliminate even stubborn growth safely and keep it from coming back.
bird bath top mold: identify, clean, prevent & replace guide

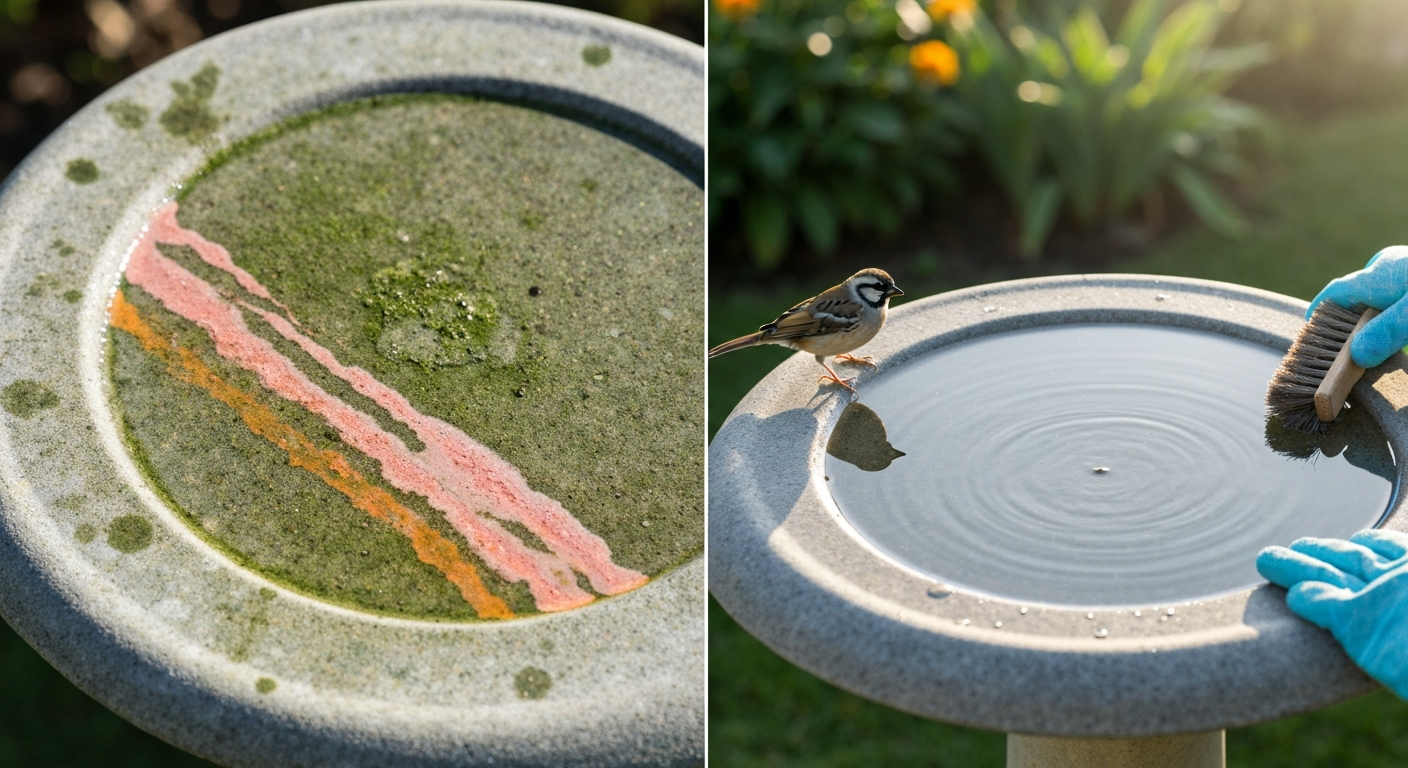
Why mold on bird bath tops is worth taking seriously
I've cleaned hundreds of bird baths over the years, and the ones that get neglected longest are always the tops. The basin collects obvious debris and discolored water, but the top surface and the underside of a concrete or ceramic dish can quietly grow a thick biofilm that birds step in, preen from, and drink. Cornell Lab's research is clear: birdbath water should be changed every one to two days in warm weather and the basin scrubbed regularly. That cadence matters because fecal contamination from visiting birds can transmit Salmonella and Mycoplasma (the agent behind house finch conjunctivitis) through the water. Add stagnant conditions and you get a surface that supports mold, bacteria, and algae simultaneously.
Beyond bird health, there's the human side. Disturbing dry, crusty mold patches without a mask or gloves exposes you to spores and potentially contaminated dust. CDC mold-cleanup guidance specifically recommends at minimum an N95 respirator when disturbing visible mold, along with gloves and eye protection. That guidance exists for a reason, and it applies just as much to your backyard as to an indoor cleanup job.
Mold, algae, biofilm, or mineral stain? How to tell them apart
Before you reach for bleach, spend sixty seconds identifying what you're actually dealing with. The cleaning approach differs, and misidentifying the growth can mean unnecessary chemical use or, worse, an ineffective clean that leaves pathogens behind.
| Growth type | Appearance | Texture | Odor | Where it shows up |
|---|---|---|---|---|
| Green algae | Bright to dark green film or coating | Slimy when wet, thin film when dry | Mild earthy or fishy | Sun-exposed basin surfaces and top edges |
| Cyanobacteria (blue-green algae) | Blue-green scum, sometimes turquoise or brownish | Slick surface scum, can form mats | Musty or pond-like | Still, warm, nutrient-rich water surface |
| Fungal mold | White, black, grey, or green fuzzy or velvety patches | Dry and powdery or fluffy, raised | Musty, earthy, sometimes strong | Porous dry surfaces, crevices, underside of tops |
| Bacterial biofilm (incl. Serratia) | Pink, orange, or dark slimy coating | Slick, gel-like, reappears quickly | Slightly sour or absent | Damp surfaces with organic residue, inside lips of bowls |
| Lichen | Crusty, foliose, or leafy grey-green patches | Firmly attached, crumbly when dry | None or faintly earthy | Slow-growing on stone and rough concrete tops |
| Mineral/calcium stain | White, chalky, or rust-colored ring or crust | Hard, gritty, not raised organically | None | Waterline ring, any surface with hard tap water |
The practical test: drag your gloved finger across the growth. Fungal mold feels powdery or fluffy and often comes off in patches. Algae smears like a slick green film. Biofilm is distinctly slimy and may have that pinkish tint that people often call 'pink mold' (it's usually Serratia marcescens, a bacterial species, not a true fungus). Mineral stains resist your finger and require an acid-based approach rather than disinfection. Lichen requires sustained mechanical effort or specialized treatments and is common on old concrete tops left outdoors for years.
What causes mold and other growths to develop on bird bath tops
Mold and biofilm thrive wherever warmth, moisture, and organic material converge. Bird baths provide all three. Droppings, feathers, pollen, and decomposing insects settle on the top surface and become food for microbial growth. A few specific factors accelerate the process significantly.
- Direct shade encourages moisture retention without UV degradation of spores and biofilm
- Still water with no circulation lets nutrients accumulate and mold spores settle undisturbed
- Porous surfaces (unglazed concrete, rough ceramic, natural stone) trap spores and organic debris in micro-pores where scrubbing cannot easily reach
- Infrequent cleaning: going longer than three to four days between water changes in summer gives algae and biofilm enough time to establish
- Leaf litter and tree debris falling into or around the bath introduces tannins and mold spores directly
- High humidity and warm temperatures, especially in summer or in climates with little wind
- Bird feeders positioned directly above the bath, which accelerates fecal and seed contamination of the water
Sun exposure is a double-edged factor. Full sun inhibits mold but accelerates algae and cyanobacteria growth, and it causes rapid evaporation that concentrates organic material on the surface. Partial morning sun with afternoon shade is often the best compromise for mold prevention without triggering algae blooms, but regional climate matters a great deal here.
Bird safety risks and what to do if birds have used a moldy bath
If you've discovered mold or heavy biofilm and birds have been using the bath regularly, there's no need to panic, but it does warrant action. The primary pathogens of concern in a contaminated bird bath are Aspergillus species (which cause aspergillosis, a serious respiratory disease in birds), Salmonella (which causes systemic illness in birds and can transfer to humans and pets through contact with contaminated water or droppings), and environmental gram-negative bacteria like Serratia. Documented human salmonellosis outbreaks have been linked to contact with wild bird feeding stations, so this isn't a theoretical risk.
If you notice sick or lethargic birds near the bath, or find dead birds in the area, remove the bath from service immediately, clean and disinfect it before returning it, and consider notifying your state wildlife agency if you see multiple deaths. For ongoing use: take the bath down, move birds away by removing it for a day, clean and disinfect thoroughly using the recipes below, rinse completely, let it dry, and then refill. Wash your hands thoroughly with soap and water after any contact with the bath, its water, or surrounding soil. If children have been playing near the bath, a quick wipe-down of any surfaces they may have touched is a reasonable precaution.
Safety precautions before you start cleaning
Cleaning a moldy bird bath is a straightforward job, but taking shortcuts on protection can turn a simple chore into a health incident. Follow these precautions every time.
Personal protective equipment (PPE)
- Gloves: nitrile or rubber household gloves rated for chemical use; latex works if you're not allergic
- Eye protection: safety glasses or splash goggles, especially when using bleach solutions overhead or scrubbing vigorously
- Respirator: at minimum an N95 respirator (CDC recommendation) when disturbing dry mold; a simple dust mask is not adequate
- Old clothes or an apron: bleach will ruin clothing on contact
Ventilation and workspace
Always clean bird bath tops outdoors or in a very well-ventilated space. Bleach fumes in enclosed areas can cause respiratory irritation quickly, and disturbing dry mold indoors circulates spores throughout your home. Work downwind if possible, especially on a breezy day.
Chemical warnings and do-not-mix rules
- Never mix bleach with ammonia: this produces toxic chloramine gases
- Never mix bleach with vinegar or other acids: this releases chlorine gas
- Never mix bleach with hydrogen peroxide at high concentrations: the reaction is exothermic and can be hazardous
- Do not use quaternary ammonium (quat) cleaners around birds without verifying the product is safe for wildlife contact surfaces; some formulations are toxic to birds and other animals
- Rinse all surfaces completely after disinfection before allowing birds to return; residual bleach is harmful to birds
- Do not use undiluted bleach on the bath; it is no more effective than a properly diluted solution and is far more corrosive and hazardous
Step-by-step cleaning and disinfection recipes
There are three main disinfectant options that work well for bird bath tops, each with a different risk and residue profile. I'll give you the exact concentrations and contact times for each. Choose based on your materials, your tolerance for chemical handling, and what you have on hand.
Option 1: Bleach solution (sodium hypochlorite), the gold standard
- Empty and rinse the bird bath top completely to remove loose debris and standing water
- Prepare your bleach solution: mix 1 part household bleach (5–6% sodium hypochlorite) with 9 parts water in a bucket. This gives approximately 5,000–6,000 ppm available chlorine from a standard 5.25% stock, which is appropriate for heavy disinfection of environmental surfaces
- Put on your PPE before handling the solution
- Scrub the entire surface first with a stiff-bristled brush (not a wire brush on ceramic or glazed surfaces) and plain water to remove organic debris. Bleach efficacy drops sharply in the presence of heavy organic soiling, so pre-cleaning is not optional
- Apply the bleach solution generously to all surfaces, including undersides and crevices
- Allow a minimum contact time of 10 minutes. CDC and WHO guidance supports this as an effective contact time for most environmental organisms including fungi, bacteria, and many viruses; for lighter cleaning, a 1-minute contact time is the absolute minimum per CDC consumer guidance but 10 minutes is more reliable
- Scrub again if any growth remains, then rinse thoroughly with clean water at least two to three times
- Allow to air-dry completely in sunlight before refilling. Sunlight accelerates chlorine off-gassing
- If you need to neutralize residual chlorine quickly (for example, if you can't wait for full air-drying), a rinse with a dilute sodium thiosulfate solution (commonly available as a dechlorinator at aquarium stores) is a validated method for chlorine neutralization
Option 2: 3% hydrogen peroxide, lower residue, gentler on materials
- Use standard 3% hydrogen peroxide from a pharmacy; no dilution needed for this application
- Pre-clean the surface with a brush and water to remove debris
- Spray or pour the 3% H2O2 solution onto the surface, coating all affected areas
- Allow a contact time of at least 5–10 minutes; hydrogen peroxide degrades to water and oxygen, leaving no chlorine residue, which makes rinsing simpler
- Scrub and rinse thoroughly
- Hydrogen peroxide is gentler on most materials than bleach and does not corrode metal as aggressively, but it is somewhat less reliably effective against all fungal spores and tough organisms compared to the bleach protocol above
Option 3: White vinegar pre-treatment for mineral stains and light algae
Vinegar is not a disinfectant in the clinical sense, but undiluted white vinegar (acetic acid, approximately 5%) is effective at dissolving calcium mineral deposits and loosening light algae and lichen. Apply it directly to the stained area, let it sit for 15–20 minutes, then scrub and rinse. Follow with a bleach or hydrogen peroxide disinfection step if mold or biofilm is also present. Never apply vinegar and bleach sequentially without a thorough water rinse between them.
Cleaning concrete bird bath tops
Concrete is the most common material for bird bath tops, and it's also the most challenging to clean thoroughly because of its porosity. Mold and biofilm anchor into the microscopic pores of the surface where a brush can't reach, which is why contact time with your disinfectant solution matters more for concrete than for any other material.
- Begin with a dry brush-off of any loose debris, lichen flakes, or dried growth, wearing your N95 and gloves
- Soak the surface with water to pre-wet the concrete before applying disinfectant; this opens pores and improves penetration
- Apply the 1: 9 bleach solution (or 3% H2O2 for a lower-chemical option) and scrub using a stiff natural-bristle or nylon brush. Avoid wire brushes, which can damage the surface texture and increase future porosity
- Allow full 10-minute contact time without letting the solution dry out; in hot sun, reapply if it evaporates before time is up
- For stubborn lichen or black mold deeply embedded in pores, a second application followed by scrubbing with a grout brush or old toothbrush on problem areas is more effective than a single heavy application
- Rinse extremely thoroughly: concrete is alkaline and absorbs both the bleach and the rinse water; do at least three complete rinse cycles
- Inspect the concrete for cracks or spalling. Deep cracks harbor mold permanently and are very difficult to disinfect completely; if the damage is significant, replacement of the top may be more practical than repeated cleaning (see the repair vs replace section below)
- Sealing a freshly cleaned and dried concrete top with a bird-safe, non-toxic concrete sealer reduces porosity significantly and is the single most effective long-term prevention step for concrete surfaces
Cleaning ceramic bird bath tops (glazed and unglazed)
Ceramic tops divide cleanly into two categories with very different maintenance needs. Glazed ceramic has a glass-smooth, non-porous surface that is genuinely easy to clean: mold and biofilm sit on the surface rather than penetrating it, and most growth wipes off with minimal effort. Unglazed ceramic behaves more like concrete, with open pores that trap growth the same way. This distinction matters a lot when you're shopping for a replacement bowl or top, which is one reason glazed ceramic bird bath bowls are often the easier-maintenance choice.
Glazed ceramic tops and bowls
- Rinse the surface to remove loose debris
- Apply the 1: 9 bleach solution or 3% hydrogen peroxide directly to the surface
- Allow a 10-minute contact time; for lighter contamination, 5 minutes is often sufficient on non-porous glaze
- Scrub with a soft-bristled brush or non-scratch sponge; glazed ceramic scratches with abrasive pads and scratches create sites where biofilm re-establishes more easily
- Rinse thoroughly two to three times and air-dry
- Check the glaze for crazing (fine surface cracks): crazed glazed ceramic behaves more like unglazed in terms of mold retention and may need more contact time
Unglazed ceramic tops and bowl-only pieces
- Follow the same deep-clean protocol as concrete: pre-wet, apply disinfectant, allow 10 minutes contact time, scrub with a stiff nylon brush, rinse three times
- Unglazed ceramic bird bath bowls and top-only replacement pieces are widely available and are popular as standalone water features (sometimes called 'bird bath top only' replacements); the same cleaning principles apply regardless of whether the bowl is mounted on a pedestal or used as a ground-level dish
- For persistent staining on unglazed ceramic, a vinegar soak (15–20 minutes, undiluted white vinegar) before the bleach step helps loosen mineral deposits and organic staining without damaging the ceramic body
- Avoid high-pressure washing of unglazed ceramic; it can erode the surface and increase future porosity
Cleaning metal and plastic bird bath tops
Metal tops (cast iron, aluminum, copper-effect) require a modified approach because bleach is genuinely corrosive to metals. Sodium hypochlorite attacks iron, aluminum, and many coatings, causing pitting and rust if left in contact. For metal, hydrogen peroxide is the far better disinfectant choice. Use the 3% H2O2 protocol with a 5–10 minute contact time, scrub with a soft-bristled brush, and rinse thoroughly. If you must use bleach on metal, keep contact time to an absolute minimum (under 2 minutes) and rinse immediately and completely. Dry the surface afterward to prevent corrosion.
Plastic and resin tops are the least permeable and easiest to clean. The 1:9 bleach solution is generally safe for short contact times on plastics, though prolonged repeated bleach exposure can degrade some polymers and cause brittleness over time. For routine cleaning, hydrogen peroxide or a 1:10 bleach solution with a 5-minute contact time and thorough rinsing keeps plastic tops sanitary without accelerating degradation. Avoid abrasive scrubbers on plastic, which create micro-scratches that trap biofilm.
Stain removal tips by stain type
| Stain type | Best treatment | Contact time | Notes |
|---|---|---|---|
| Green algae film | 1:9 bleach solution + scrub | 10 minutes | Pre-scrub to remove bulk before applying bleach |
| Black/dark mold | 1:9 bleach solution, reapply if needed | 10 minutes minimum | May need two applications on porous surfaces |
| Pink/orange biofilm (Serratia) | 1:9 bleach or 3% H2O2 | 10 minutes | Reappears quickly if organic residue remains; clean more frequently |
| White mineral/calcium deposits | Undiluted white vinegar | 15–20 minutes | Rinse thoroughly before applying any bleach-based disinfectant |
| Rust stains | Commercial rust remover or oxalic acid solution | Per product label | Rinse completely; follow with disinfection step |
| Lichen (crusty patches) | Vinegar soak + stiff scraping, then bleach | 20+ minutes vinegar | May require multiple treatments over days; slow-growing but firmly attached |
Preventing mold from coming back
Placement and sun exposure
Where you put the bath is one of the biggest factors in how often you'll be fighting mold. Full shade keeps the surface damp and allows mold spores to settle undisturbed, while encouraging bacterial biofilm growth. Full sun dries things out quickly and provides some UV disinfection, but it drives algae and cyanobacteria growth and speeds evaporation. I've found the best placement for most climates is a spot that gets morning sun and afternoon shade, positioned away from overhanging trees that drop debris and drip onto the surface. Keep the bath at least 10–15 feet from dense shrubs or leaf-dropping trees.
Moving water makes a big difference
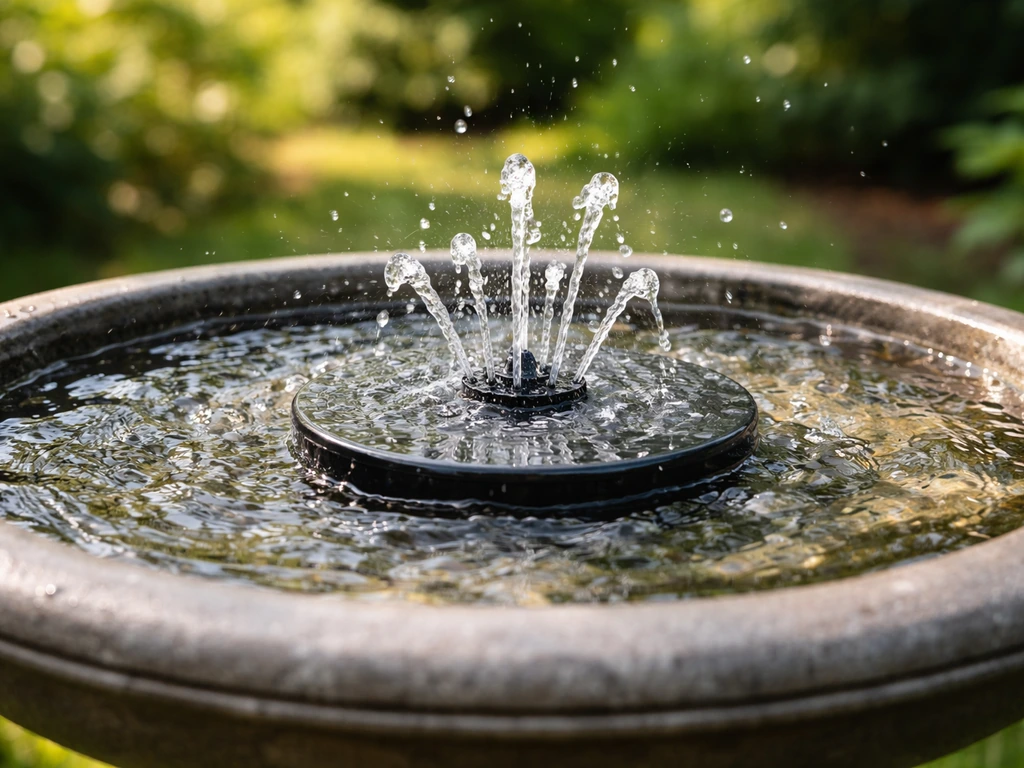
Cornell Lab's guidance emphasizes that moving water both attracts more birds and significantly reduces the stagnant conditions that support mold and mosquito larvae. Adding a small fountain pump or dripper to a static bird bath top is one of the most effective maintenance upgrades you can make. The constant surface agitation disrupts biofilm formation and oxygenates the water, while the sound attracts birds from farther away. Fountain tops with built-in pumps extend this benefit further. The tradeoff is slightly more maintenance (cleaning the pump impeller every few weeks) and a power source, but the payoff in cleaner water and more bird activity is consistently worth it.
An easy maintenance schedule
| Frequency | Task |
|---|---|
| Every 1–2 days (summer) | Empty, rinse, and refill with fresh water |
| Every 3–5 days (summer) / weekly (cool weather) | Scrub basin with a brush and fresh water, no chemicals needed for light maintenance |
| Monthly (or when growth appears) | Full bleach or H2O2 disinfection using the step-by-step protocol above |
| Seasonally (spring and fall) | Deep clean, inspect for cracks, re-seal concrete if needed |
| Annually | Full structural inspection; check mounting hardware, pedestal stability, and surface condition |
Heated and solar options for year-round prevention
In cold climates, a heated bird bath prevents freezing and keeps water available year-round, but it also keeps water temperatures slightly elevated through winter, which can still support biofilm in mild winters. Heated baths need the same cleaning schedule as regular baths. Solar-powered fountain pumps are a practical power-free option for adding circulation, which helps with mold and algae prevention throughout the warm season without running electrical cords across the yard.
Troubleshooting: algae, mosquitoes, and freezing
- Persistent algae despite regular cleaning: increase sun exposure, shorten water-change intervals to daily, consider adding Barley straw extract (widely available, bird-safe algae inhibitor) or a small fountain pump for circulation
- Mosquito larvae in the water: change water every two days without fail (mosquito larvae need at least 7–10 days standing water to develop), or add a solar-powered agitator or fountain pump; Bacillus thuringiensis israelensis (Bti) dunks are bird-safe and effective if you have a persistent problem
- Cyanobacteria (blue-green algae): treat as a serious issue; drain and disinfect immediately, increase water change frequency, reduce nearby fertilizer use, and consider relocating the bath away from fertilizer runoff areas
- Ice and freezing damage to concrete or ceramic tops: avoid using metal tools to break ice, which cracks surfaces; use a heated bath or float a rubber ball in the water to absorb ice expansion; if a concrete top cracks from freeze-thaw cycles, seal the crack immediately with waterproof concrete sealant or consider a replacement
- Pink slime returning quickly after cleaning: this is almost always bacterial biofilm (Serratia); the fix is more thorough organic matter removal before disinfection, not stronger disinfectant. Clean more frequently and ensure all soap or product residues are rinsed away, as they feed the bacteria
When to repair vs replace a bird bath top
Not every moldy top is worth cleaning indefinitely. A concrete top with deep cracks, significant spalling, or surface deterioration that traps mold below the cleanable surface layer is genuinely difficult to maintain safely. If you've run two or three full bleach disinfections and the mold returns within a few days regardless of placement, the surface porosity itself is the problem. In that situation, sealing or replacing the top is more effective than escalating the cleaning schedule.
Repair is practical for: small surface cracks (seal with waterproof concrete sealant, let cure fully before use), minor chips on ceramic glaze (food-safe epoxy or waterproof tile grout works on non-food-contact areas), and surface staining that doesn't affect structural integrity. Replace when: concrete is crumbling or has through-cracks, glazed ceramic has shattered crazing that compromises the surface, or the top no longer fits its pedestal securely.
Buying a replacement bird bath top: sizing, fitting, and where to shop
Replacement tops (sometimes sold as 'bird bath top only' or 'bird bath bowl replacement') are widely available and more affordable than buying a complete new bath. When shopping, try searching for 'bird bath top only' to find replacement bowls that match common pedestal sizes and materials. For recommendations and top picks, see our bird bath best guide. Before ordering, measure your existing pedestal's top opening or mounting point carefully: the key dimensions are the outer diameter of the bowl, the inner basin diameter, and the depth of the bowl (typically 1–3 inches for a functional bird bath). Most standard replacement tops range from 18 to 24 inches in outer diameter. Many concrete and resin pedestal baths use a simple gravity-seating design where the bowl rests in a recessed cradle, making sizing forgiving. If you need a specific size or material, search for bird bath bowl top replacement options to find glazed ceramic and resin choices.
Big-box retailers like Lowe's carry a range of replacement concrete and resin tops, typically in the outdoor garden section seasonally (spring through fall). Online options through Amazon, Wayfair, and specialty bird supply retailers give you a wider selection of materials including glazed ceramic, mosaic, and cast stone. If you're replacing a top specifically to reduce mold issues, glazed ceramic or smooth resin will almost always outperform porous concrete in ongoing maintenance ease, even if the aesthetics differ.
Fountain tops with built-in pump housings require matching the pump specifications to the basin size; most come with their own pump or specify compatible models. If you're upgrading from a static top to a fountain top as part of a mold-prevention strategy, verify that your pedestal base can accommodate the weight and pump cord routing before purchasing.
Static top vs fountain top: which is better for mold prevention?
| Factor | Static bird bath top | Fountain bird bath top |
|---|---|---|
| Mold and biofilm risk | Higher: still water supports biofilm formation | Lower: circulation disrupts biofilm and reduces stagnation |
| Algae growth | Moderate to high in sun | Reduced by surface agitation |
| Mosquito risk | Present with infrequent water changes | Very low: larvae cannot establish in moving water |
| Bird attraction | Good | Excellent: sound and movement attract more species |
| Maintenance | Simpler, no pump to clean | Slightly more: pump impeller needs periodic cleaning |
| Cost | Lower upfront | Higher upfront, small ongoing power cost |
| Best for | Low-maintenance yards, cold climates where pumps freeze | Warmer climates, mold-prone locations, high bird-traffic goals |
For most backyard birders dealing with persistent mold, upgrading to a fountain top is the most impactful single change you can make. Consider upgrading to a bird bath fountain top to add continuous circulation and reduce mold growth. The circulation addresses the root cause (stagnant conditions) rather than just treating the symptom. For a direct comparison of static bowls and fountain tops, see bird bath vs fountain for pros, cons, and maintenance differences (internal link).
DIY bird bath top ideas: tree stumps, repurposed bowls, and creative options
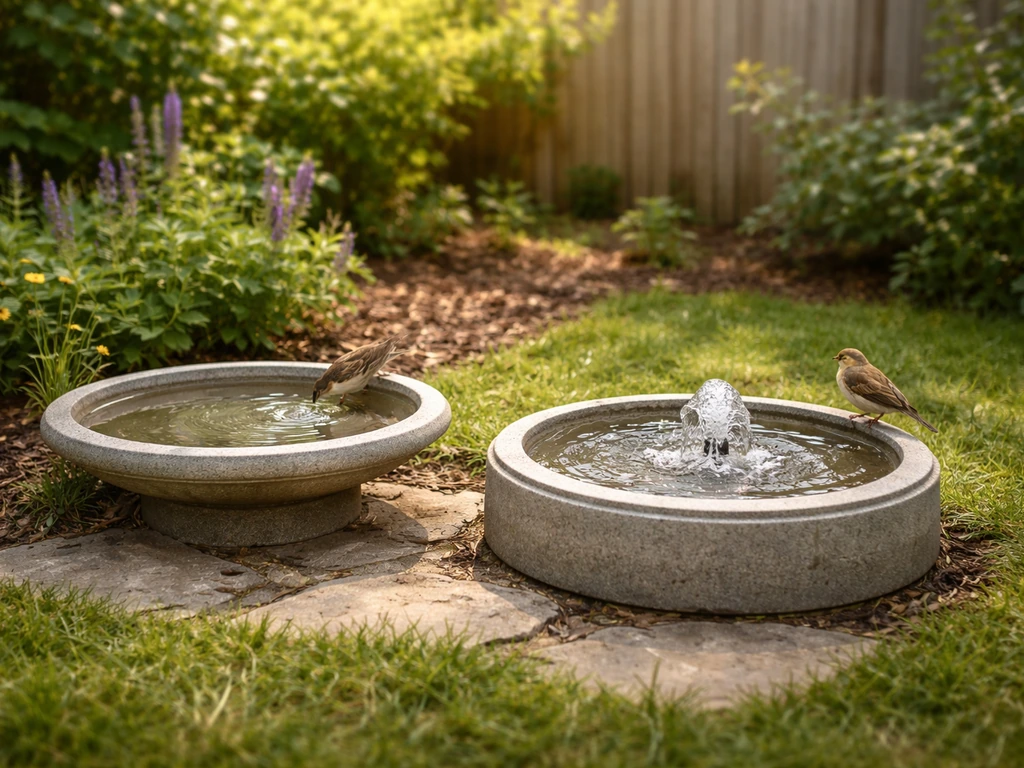
Some of the most functional bird baths I've seen are improvised. A large, shallow ceramic serving bowl set into the top of a cut tree stump makes an effective, naturally styled bird bath that blends into a garden without any hardware. The stump provides height, stability, and an organic look that birds seem comfortable approaching. See our guide on creating a bird bath on top of a tree stump for measurements, sealing tips, and maintenance advice bird bath on top of tree stump. The key maintenance consideration: stumps are porous organic material and will eventually host their own mold, so the bowl sitting in the stump should be removable for cleaning and the stump itself should be sealed or treated periodically.
- Repurposed glazed ceramic bowls or dishes (thrift store finds work perfectly): easy to clean, inexpensive, and available in interesting glazes; verify the glaze is food-safe and contains no lead
- Terracotta saucers (large plant saucers, 16–24 inches): inexpensive and widely available; seal with a waterproof concrete sealant for longer life and easier cleaning
- Concrete mixing trays or shallow garden basins: very functional and cheap; seal before use
- Tree-stump mounts (with a removable bowl set into the top): natural look, excellent stability, allows easy bowl removal for cleaning
- Upcycled stone or slate pieces with a natural depression: zero-cost option if you have suitable stone, though water depth may be shallow; supplement with a small water wiggler for circulation
- Decorative mosaic-topped bird baths: beautiful but grout lines trap debris and mold; use a grout brush during cleaning and seal grout annually
Whatever material you choose for a DIY top, the mold-prevention fundamentals stay the same: smooth non-porous surfaces clean more easily, moving water helps, and frequent water changes are the most effective prevention tool of all. For more bird bath top ideas, see the DIY and replacement options covered earlier in this guide. Creative doesn't have to mean high-maintenance.
Tools and supplies checklist
- Household bleach (5–6% sodium hypochlorite, unscented, no additives)
- 3% hydrogen peroxide (pharmacy grade)
- Undiluted white vinegar
- Two buckets (one for mixing, one for rinsing)
- Stiff nylon-bristle scrub brush (for concrete and unglazed ceramic)
- Soft-bristle or natural-bristle brush (for glazed ceramic and plastic)
- Grout brush or old toothbrush (for crevices and lichen spots)
- Nitrile or rubber gloves (chemical-rated)
- Safety glasses or splash goggles
- N95 respirator or higher
- Garden hose with good water pressure for rinsing
- Sodium thiosulfate dechlorinator (optional, for rapid chlorine neutralization)
- Waterproof concrete sealer (bird-safe, non-toxic when cured)
- Measuring cup or jug for mixing accurate dilutions
FAQ
How can I tell whether the growth on my bird bath top is mold, algae, or a bacterial biofilm?
Look at color, texture, location and smell. Algae: green/greenish film or slimy layer in sunlit water; feels slippery when wet. Cyanobacteria (blue‑green algae): blue‑green scum that can form surface mats and sometimes a musty odor. Bacterial biofilm (often pink/orange/black): slimy, glossy, reappears quickly where organic film remains (household “pink mold” is commonly Serratia). Fungal mold: dry, fuzzy, velvety patches on porous or shaded dry surfaces. Lichens/moss: crusty or leafy, slow‑growing on stone. If growth is slimy and returns within days despite rinsing, think biofilm/bacteria; if it’s fuzzy and on dry crevices, think fungal mold. When in doubt, assume contamination that needs cleaning and disinfection.
What personal safety precautions and PPE should I use when cleaning a moldy bird bath top?
Work outdoors with good ventilation. Wear chemical‑resistant gloves (nitrile or heavy rubber), eye protection (safety glasses), and an N95 respirator if you’ll be disturbing dried growths or have respiratory sensitivities. Avoid splashing—wear old clothes. Keep children and pets away until the bath is rinsed and reinstalled. Wash hands thoroughly after handling and cleaning. Follow product label instructions for any commercial disinfectant.
What exact cleaning and disinfection recipes (concentrations and contact times) are safe and effective for bird bath tops?
Recommended options: 1) Household bleach (sodium hypochlorite, ~5–6% stock): dilute 1:10 (one part bleach + nine parts water) → ≈5,000–6,000 ppm available chlorine. Apply to clean surface, maintain 10 minutes contact time, then rinse thoroughly with potable water and air‑dry. 2) 3% hydrogen peroxide (store pharmacy bottle): apply undiluted, let sit 10 minutes, scrub, then rinse thoroughly. 3) Accelerated Hydrogen Peroxide (AHP) commercial product: follow label dilution and contact time (some products label 1–5 minutes). Important notes: bleach is broad‑spectrum but corrosive to metal and can degrade some plastics—do not soak metal parts in bleach; rinse completely after any disinfectant. If you need to neutralize residual chlorine quickly, use sodium thiosulfate solution per product directions, then rinse.
How should I remove visible grime or thick organic buildup before disinfecting?
Start by emptying the bath. Use a stiff nylon or natural‑fiber brush (not wire on delicate surfaces) and a diluted detergent solution (a few drops of liquid dish soap in warm water) to scrub away loose organic matter, bird droppings and biofilm. Rinse well with potable water, then apply the chosen disinfectant. For heavily soiled/porous surfaces repeat scrub→rinse→disinfect. Always rinse after disinfection.
Are there disinfectants I should avoid around birds?
Avoid uncontrolled use of quaternary ammonium (quat) products unless the product label explicitly permits use around animals and you follow the label. Bleach and hydrogen peroxide are commonly recommended for bird items when used and rinsed properly. Avoid concentrated acids, solvents, or products with added fragrances or surfactants that can leave residues toxic to birds. Always rinse treated surfaces thoroughly before refilling with drinking water.
Material‑specific cleaning steps — concrete bird bath tops
Concrete is porous and holds stains and spores. 1) Remove loose debris, scrub with dish soap and a stiff nylon brush. 2) Rinse. 3) For biological contamination: apply 1:10 bleach solution, work into crevices with brush, maintain 10 minutes contact time. 4) Rinse thoroughly with potable water (several rinses) and let air‑dry fully. For deep stains or persistent growth, a diluted muriatic acid wash (very low concentration) is an advanced option only for experienced users—usually better to repeat bleach treatment or replace top. Seal porous concrete after cleaning with a bird‑safe, breathable masonry sealer once completely dry to reduce recurrence.