If you need a bird bath top only, you're replacing the basin or bowl portion of an existing bird bath setup while keeping the pedestal, stand, or base. That's completely doable, and you don't need to buy a whole new bird bath to get back up and running. The key is measuring your current top correctly, finding a compatible replacement, and making sure it sits stable and level before you fill it. Here's exactly how to do that.
Bird Bath Top Only Replacement: Measure and Install Fast

Marcus Henley
14 Apr 2026
What does 'bird bath top only' actually mean?
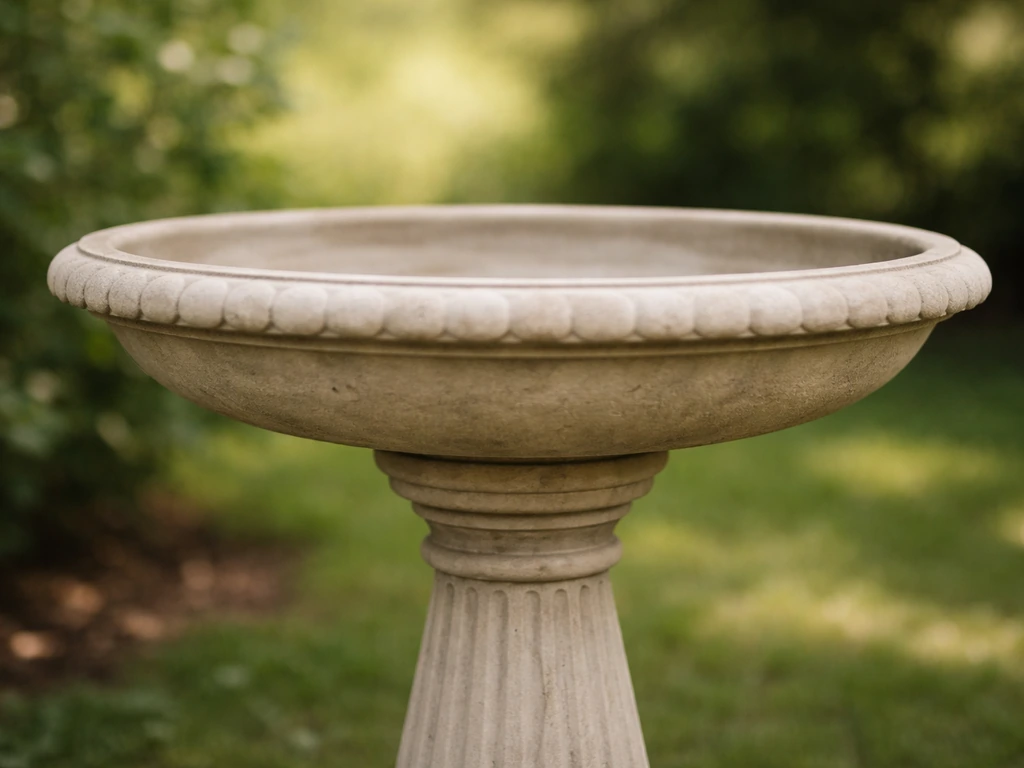
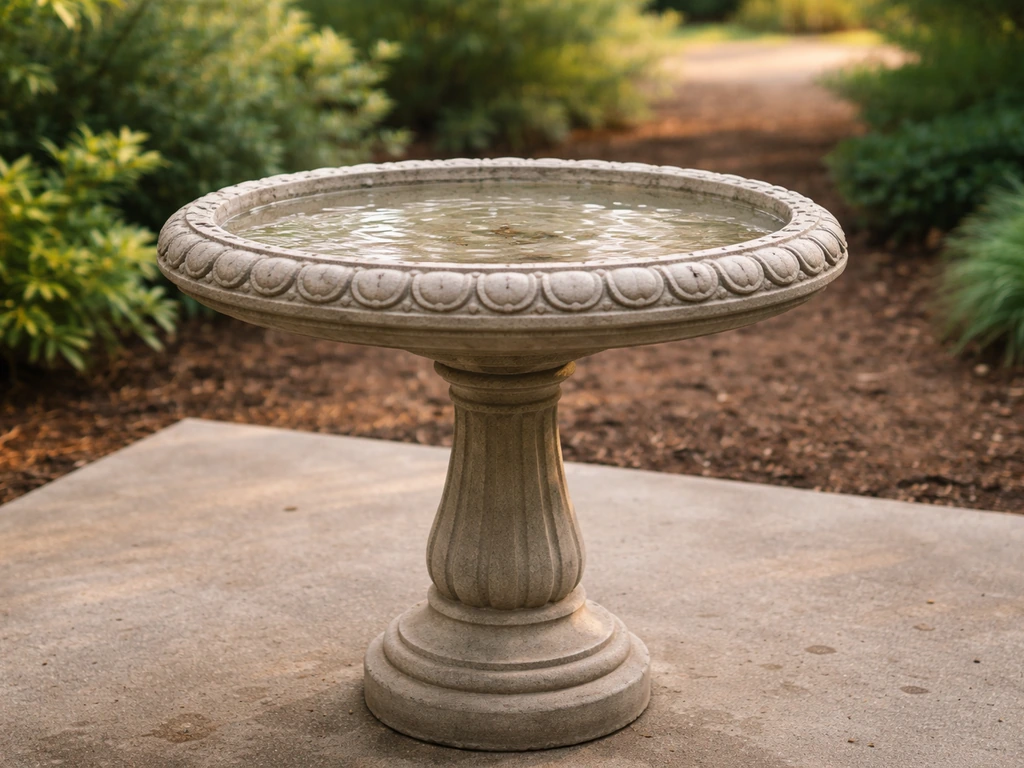
The terminology gets a little inconsistent between brands and retailers, so it helps to clarify this upfront. On the most common pedestal-style bird bath, the 'top' is the basin, bowl, or dish that holds water. It sits on top of the pedestal or stand, which stays in the ground. Some listings call it the 'top only,' others call it the 'replacement dish,' the 'bowl,' the 'basin,' or even the 'saucer.' They all mean the same thing: the water-holding part, sold without the base.
There are a few different construction types worth knowing about. On traditional stone or reconstituted stone baths, the bowl simply rests on the pedestal, often with a copper or steel pin through the base for stability. On some deck-mount or post-mount designs, there's a separate insert bowl that 'pops out' for cleaning, meaning the insert itself is the 'top' you'd replace. On fiber clay, resin, or concrete pedestal baths, the bowl may be a drop-in piece or it may bolt directly to the pedestal using studs, nuts, and washers. Knowing which type you have determines how you measure and what you shop for.
If you want to browse bird bath bowl top options to get a feel for what's available before you measure, that's a great starting point for understanding the range of styles and materials on the market today.
Measure your current top before you buy anything
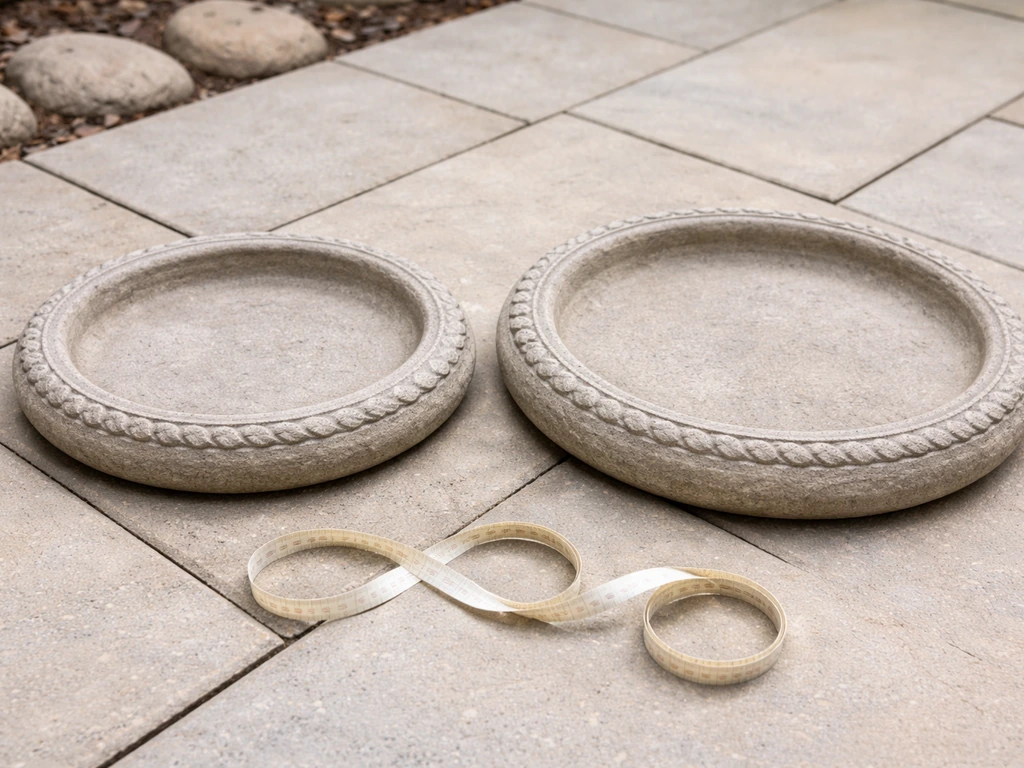
Getting the measurements right before ordering saves you a lot of hassle. A replacement that's even a few centimetres off in diameter can wobble dangerously or simply not sit properly on your pedestal. Grab a tape measure and note down the following:
- Outer diameter: measure across the widest point of the bowl from rim to rim
- Inner basin diameter: measure the flat or usable water-holding area inside the rim
- Depth: measure from the top of the rim down to the floor of the basin
- Mounting method: check whether the bowl has a central hole for a fixing pin, bolt holes, or simply sits flat via friction/gravity
- Lip and rim shape: note whether the rim is flat, angled inward, or has a raised edge, as this affects fit on the pedestal top
- Pedestal top diameter: measure the top surface of your existing pedestal or stand where the bowl rests
As a reference point, a typical replacement stone dish listed as 'top only' is around 38 cm in diameter and 9 cm high, with a water depth of about 4 cm and a 10 mm copper fixing pipe through the base. That's a fairly standard size for a mid-size pedestal bath, but sizes vary quite a bit across brands. If your existing bowl had a specific model number or brand name stamped on it, look that up first. An exact match from the original manufacturer is always the cleanest solution.
Also think about water depth when choosing a replacement. The RSPB recommends a maximum depth of around 10 cm, and ideally the basin should slope gently so birds can stand at various depths. The ideal water depth range for birds to actually bathe is between 2.5 cm and 10 cm. A bowl that's too deep won't be used safely, especially by smaller birds.
Where to find a replacement bird bath top today
UK sources
In the UK, your best bets are garden centres, reclamation yards, and a handful of specialist online retailers. Reconstituted stone tops are widely available from UK garden suppliers, and you can often find them sold specifically as replacements for common pedestal styles. Watling Reclamation, for example, sells a reconstituted stone bird bath top as a standalone item. Ferney Heyes is another UK specialist that lists top-only replacement dishes with clear dimensions. The RSPB shop also stocks bird baths and may carry compatible parts or direct you to their suppliers.
For quick local pickup, check bird bath top options at Lowe's equivalent UK stores like B&Q, Dobbies, or Wyevale. Amazon UK and eBay UK are also worth checking, since sellers like Burgess Home & Garden list replacement stone tops specifically described as 'ONLY for the top to a stone birdbath.' Shipping stone items within the UK is manageable but can add significant cost, so local pickup is worth prioritizing if you can.
US and international sources
In the US, Home Depot, Walmart garden sections, and Amazon are the main channels. JCS Wildlife sells a 16-inch replacement bowl specifically designed as an insert for deck-mount bird baths. For fiber clay or resin bowls, retailers like Garden Your Way sell 19-inch tops without the stand. If you're trying to match a specific branded pedestal bath, search the manufacturer name plus 'replacement bowl' or 'replacement basin.' Many brands sell parts separately. For a broader look at top-rated options across styles and materials, checking out a guide to the best bird baths can help you identify which brands have reliable parts availability.
Compatibility issues: when the new top doesn't fit perfectly
This is where most people run into trouble. Even if you get a bowl that's close to the right diameter, it may not sit stably on your pedestal, or the fixing method may be different. Here's how to handle the most common mismatches:
| Problem | Likely Cause | Fix |
|---|---|---|
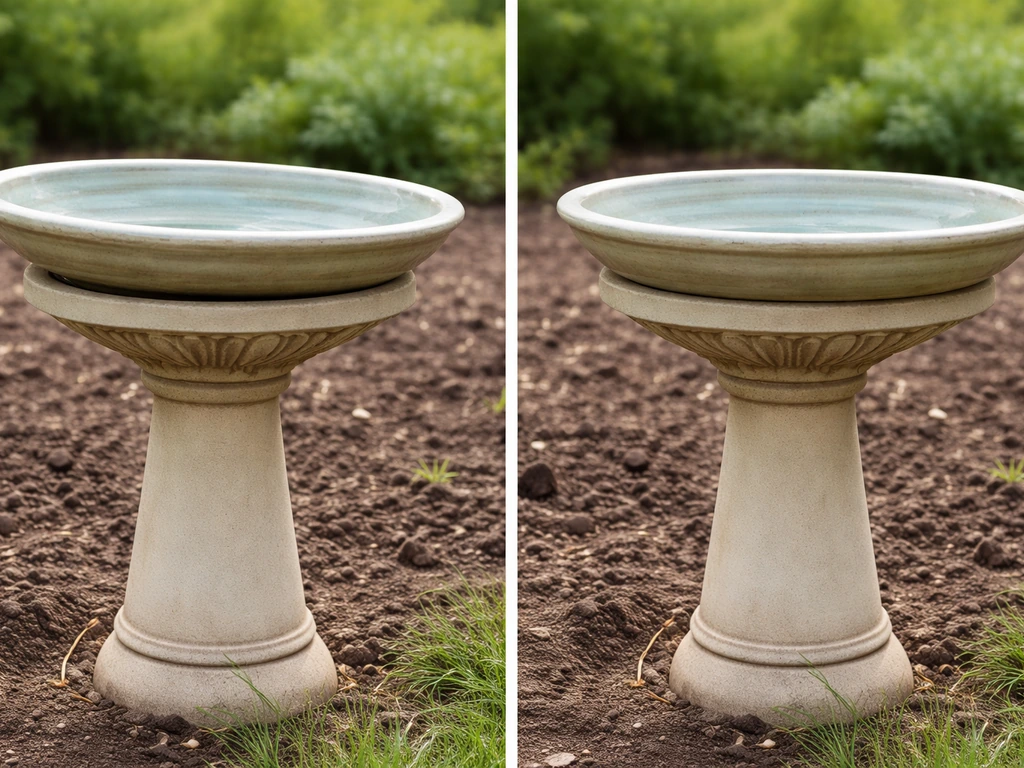
| Bowl wobbles on pedestal | Pedestal top diameter doesn't match bowl base curve | Use non-slip rubber mat, waterproof silicone sealant ring, or sand pedestal top flat |
| Bowl sits too high or low | Rim geometry differs from original | Add a flat stone or concrete ring spacer between pedestal and bowl |
| Fixing pin hole doesn't align | Different pin diameter or placement | Use a rubber grommet to fill gap around pin, or drill new hole carefully if material allows |
| Bolt holes don't match | Different bolt pattern from original | Purchase M6 or equivalent bolts with oversized washers to bridge the gap, or use waterproof adhesive for non-load-bearing stability |
| Bowl diameter too small | Generic replacement undersized | Use a larger bowl with a centering pad of weatherproof foam or mortar to fill the gap on the pedestal |
| Bowl diameter too large | Replacement oversizes pedestal | Acceptable if bowl is stable; add silicone bead around pedestal rim contact point to secure |
If you're in a situation where the new top is a genuinely different style than what you had before, it may be worth rethinking the whole setup. For example, comparing a bird bath to a fountain setup might open up options if your pedestal is no longer practical. Sometimes a replacement top with a built-in fountain feature actually solves stability issues because the pump housing anchors the bowl.
How to install the new top safely
Before you set the bowl on the pedestal, clean both contact surfaces. Any grit, old algae, or debris on the pedestal top will create an uneven resting surface and increase wobble risk. Wipe down the pedestal with a damp cloth and let it dry.
- Set the bowl dry on the pedestal first (no water) and check stability from multiple angles. Press gently on the rim edge to test for rock or tilt.
- If the bowl rocks, identify the high point and place a thin rubber shim or weatherproof felt pad at the low contact points until the bowl sits level.
- Use a small spirit level across the rim or center of the bowl to confirm it's genuinely level, not just visually straight. Water will pool to one side in an unlevel bowl.
- If your design uses a center fixing pin, insert it through the bowl base into the pedestal now. For copper pipe pins, the pin should fit snugly. If it's loose, wrap the pin with a couple of turns of PTFE tape to take up the slack.
- For bolt-on designs (M6 studs and nuts are common on metal-framed baths), thread the bolts by hand first, then tighten evenly in a cross pattern. Don't overtighten on stone or ceramic bowls as these can crack.
- If the bowl is a drop-in friction fit, apply a thin bead of clear waterproof silicone around the pedestal rim contact point before setting the bowl. This won't make it permanent but adds grip and prevents debris from getting under the rim.
- Fill with about 2.5 cm of water first and check for leaks or tipping before filling to your target depth.
If you're working with a tree stump or natural feature as your base rather than a traditional pedestal, the leveling step is even more critical. A full guide on setting up a bird bath on top of a tree stump walks through the extra stabilization steps you'll need for that kind of uneven base.
For bowls going onto an existing stone or concrete pedestal where you want a more permanent fix, a mortar mix works well. Apply a thin bed of ready-mix mortar to the pedestal top, set the bowl in place, check level immediately, and hold or prop until the mortar starts to set. Wipe away any squeeze-out from the rim before it hardens. Allow 24 hours before filling with water.
First use: clean it before the birds arrive
New bird bath tops often have manufacturing residue, dust, or packaging residue on them. Even reconstituted stone can leach lime initially. Before you let birds use the bath, give it a proper clean. Fill the bowl with a solution of white vinegar and water (roughly 1 part vinegar to 9 parts water), let it sit for 10 to 15 minutes, then scrub with a stiff brush or sponge. Rinse thoroughly two or three times until you can't smell vinegar. Let the bowl air dry fully before filling with clean water.
If there's any sealant smell from silicone you applied during installation, let that off-gas for at least 24 hours in open air before putting water in. Silicone that isn't fully cured can release compounds that aren't great for birds.
Keeping the new top clean and bird-friendly
Once the bath is installed and the birds have found it, the maintenance routine is what keeps it genuinely useful. The RSPB recommends rinsing out the bath daily to remove droppings, algae, and debris, then refilling with clean water. The RSPB recommends rinsing out the bath daily to remove droppings, algae, and debris, then refilling with clean water, and it also calls for a thorough disinfection on a weekly basis refilling with clean water daily. That sounds like a lot, but it genuinely only takes about 30 seconds if you have a garden hose nearby. At minimum, aim for every other day in warm weather.
For a deeper clean, scrub the bowl with a sponge and mild soapy water once or twice a week, paying particular attention to any textured areas where algae loves to grab hold. Rinse completely afterward. Algae buildup is both a hygiene issue and a safety hazard since it makes the basin surface slippery. You can find more detail on dealing with bird bath top mold and algae if you're already seeing green buildup after your first few weeks.
Mosquitoes are a real concern in standing water, especially in warm months. The most effective non-toxic solution is a mosquito dunk containing Bacillus thuringiensis israelensis (Bti). blank" rel="noopener noreferrer">Mosquito Dunks® describe their active ingredient as Bti (Bacillus thuringiensis subspecies israelensis) and state it keeps releasing Bti for at least 30 days or more. One dunk treats a small bird bath for around 30 days, killing larvae without harming birds, pets, or beneficial insects. Drop one in after installation and replace monthly during mosquito season. Combined with daily water changes, you'll rarely have a mosquito problem. A fountain-style top can also help significantly since moving water doesn't allow mosquito larvae to develop. If that's an option you're considering, the bird bath fountain top format is worth exploring as your replacement.
Keep the water depth in the sweet spot of 2.5 cm to 10 cm. Most birds prefer the shallower end of that range for bathing, so filling to about 5 cm is a good default. Add a flat stone or two in the center if your replacement bowl is deeper than ideal. This gives smaller birds a safe standing spot and reduces the effective depth without modifying the bowl.
Troubleshooting problems after the new top is installed
Even after a careful install, a few issues can pop up in the first few weeks. Here's what to look for and how to fix it quickly:
- Bowl is tilting after rain or frost: The pedestal may have shifted slightly. Lift the bowl off, check the pedestal for movement, re-level and compact the base, then reset the bowl. In freeze-thaw climates, this is worth checking every spring.
- Birds are ignoring the new bath: Give it a few days. Birds are cautious about anything new. Try placing a few stones in the water for perching, or splash the water surface by hand to create sound and movement that attracts attention.
- Water is draining or disappearing quickly: Check for cracks in the new bowl, especially at the base around any fixing pin hole. A hairline crack can drain a bowl overnight. Fill the dry bowl with water in a bucket first to confirm it holds water before re-installing.
- Algae is returning within days: This usually means the bowl is getting direct midday sun. Consider relocating to a spot with morning sun and afternoon shade, or increase cleaning frequency to every 2 to 3 days.
- Silicone sealant is peeling away: Outdoor silicone degrades over time. Remove the old bead with a plastic scraper, clean the surface with isopropyl alcohol, dry completely, and apply fresh silicone. Use a product rated for outdoor/wet environments.
- Bowl cracked during installation: Stone and ceramic bowls are brittle under uneven pressure. If the crack is small, a waterproof epoxy or cement repair product can seal it. If it's across the basin floor, the bowl should be replaced.
If you find yourself regularly dealing with issues and want to completely rethink the design rather than keep patching, spending some time with bird bath top ideas can give you a fresh direction. Sometimes a different material or style actually solves the chronic issues you're dealing with rather than just patching the same problem over and over.
Getting the right replacement top and installing it well takes maybe an hour of your time, but the payoff is a bird bath that works reliably for years. Measure carefully, don't skip the leveling step, clean it before first use, and stay on top of the weekly maintenance routine. The birds will find it fast.
FAQ
What if the replacement bird bath top is the right diameter but the fixing method is different?
If the bowl is smaller than your old one, birds may still use it, but it can be riskier if the rim sits too high or the bowl rocks. If it is larger, it may overhang the pedestal and wobble unless the fixing points match. The safest option is to match the diameter and the way it connects (pin through base, studs, drop-in lip, or insert). If you cannot match both, choose the same connection type even if the diameter is slightly different.
How can I confirm the bird bath top only will sit level and stable before final installation?
Yes. Dry-fit the bowl first, then check for three things before cleaning and filling: full contact around the rim, no side-to-side wobble when you gently press, and level across two directions. If you have to force the bowl to sit down, stop and investigate the pedestal surface or mounting hardware, because that usually leads to cracking or a loose fit later.
I bought the correct top size but it’s too deep for smaller birds, what are my options?
If the bowl is deeper than ideal, you can reduce usable depth without altering the bowl by placing a flat, smooth stone in the center that sits firmly and does not tip. Avoid rocks with sharp edges or porous surfaces that can hold algae. For safety, keep the water depth in the 2.5 cm to 10 cm band at the standing area, not just at the lowest point.
The bowl wobbles even after I cleaned the contact surfaces, what should I check next?
If your pedestal top has a chipped or uneven finish, the mortar or silicone you use can create a temporary seal but still leave wobble. Instead, scrape off loose bits, then level the pedestal surface with a proper thin mortar bed (for stone/concrete) or reinstall using the original mechanical connection (for pin or stud types). If the pedestal is badly damaged, replacing the pedestal is usually safer than repeatedly adjusting the bowl.
How long should I wait before filling the bird bath after installing a bird bath top only?
Avoid filling right after installation if you used mortar (wait about 24 hours) or silicone (give it at least a full day in open air). Also do a final rinse after vinegar cleaning, then let the bowl air dry before adding clean water, so you do not trap residues that can affect water quality and discourage birds initially.
What’s the fastest maintenance routine that actually prevents algae buildup?
For daily rinsing, use a steady hose flow rather than soaking that splashes debris everywhere. If you’re seeing green buildup fast, remove algae manually with a sponge during weekly cleaning and scrub textured areas where it clings. Replacing water more often in warm weather also helps, because standing water accelerates algae and odor.
Can I prevent mosquitoes without chemicals, and when should I use a Bti dunk?
If mosquitoes are a problem, don’t rely only on dunking. Empty and refill more frequently during peak season, and place the Bti dunk so it stays submerged. Also keep the area around the pedestal clear of leaf litter, since organic debris can feed larvae even when the water looks clean.
Is it OK to use mortar or adhesive on every type of bird bath top only replacement?
You can use the stone sink-in method, but only on bases designed for that contact. Do not mortar a bowl that is supposed to be a drop-in insert if you still need the bowl to lift out for cleaning. For pin or stud setups, prioritize the original mechanical parts, since a bonded joint can complicate future removal.
Why might birds ignore the new bird bath top after I install it?
If birds avoid the bath for a few days after installation, check for slipperiness from algae residue, leftover cleaner smell, or poor drainage. After cleaning, ensure the surface is thoroughly rinsed, and refill with fresh water. Also confirm the bowl is not rocking, because birds quickly stop using unstable perches.
What signs mean the bird bath top only replacement is unsafe and needs adjustment or replacement?
If you can see rust stains or cracks forming around the pedestal contact area, stop using it immediately because movement can widen damage. For metal pins or fittings, ensure they are aligned and not under stress, then replace corroded fasteners rather than tightening harder. If the bowl or pedestal has a crack, patching often fails because water cycles cause the crack to reopen.