
You can make a functional, bird-friendly bath from plastic bottles in under an hour using materials that cost next to nothing. The simplest version involves cutting a large 2-liter or gallon jug into a shallow basin, mounting it on a pedestal or hanging it from a branch, and filling it to about 1-2 inches deep. Birds don't care that it started life as a soda bottle. What they care about is clean, shallow, accessible water, and plastic bottles can absolutely deliver that.
How to Make a Bird Bath Out of Plastic Bottles: DIY Guide

Marcus Henley
17 Jul 2026
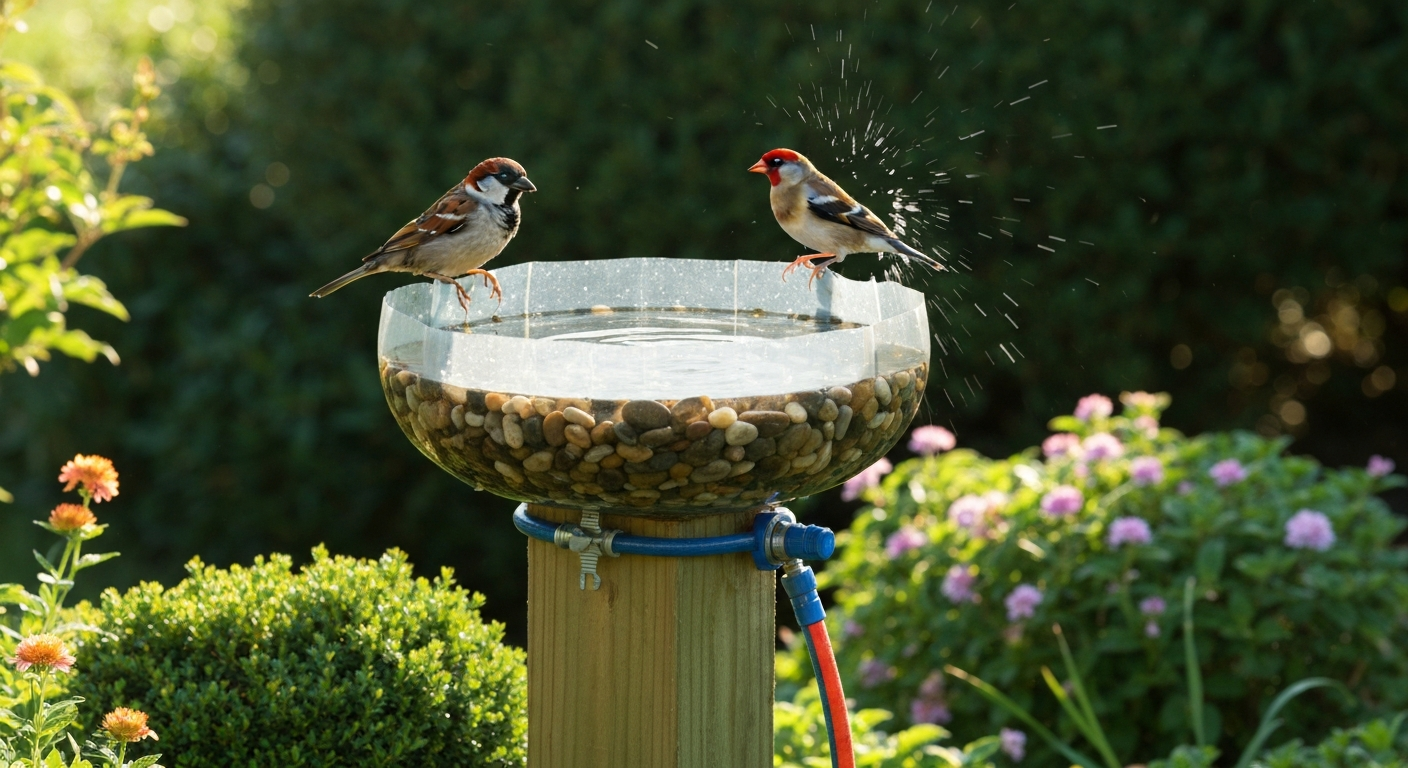
Why a plastic-bottle bird bath is worth your time
The biggest appeal is cost: you're essentially building a functional bird bath for free, or close to it. If you already have bottles at home, your only real spend might be a few dollars on hardware or adhesive. That's a hard argument to beat when concrete baths can run $50 to $200 and even basic ceramic options aren't cheap.
There's also a genuine sustainability angle here. Repurposing a plastic bottle that would otherwise enter the recycling stream (or worse, landfill) extends its useful life and delays its end-of-life impact. It's a small thing, but when you consider that cement production is one of the more CO2-intensive industrial processes on the planet, a zero-concrete bird bath starts to look pretty good from a footprint standpoint.
Practically speaking, plastic baths are lightweight, easy to move, and simple to clean. You can relocate them if a placement isn't working, swap them out seasonally, or retire one without much guilt when it finally degrades from UV exposure. For renters, apartment balconies, or anyone who doesn't want a permanent fixture in their yard, that flexibility matters a lot.
- Zero or near-zero material cost when bottles are repurposed from household waste
- Lightweight and easy to reposition as you learn which placements attract the most birds
- Low thermal conductivity means the water stays cooler than metal baths in direct sun
- Straightforward to clean and disinfect with standard household supplies
- Suitable for renters and small spaces like balconies and patios
- Good entry point for kids or beginner birders getting into DIY habitat projects
- Reduces single-use plastic waste by extending bottle lifespan before recycling
Honest pros and cons, and when plastic bottles make the most sense
I'll be straight with you: a plastic-bottle bird bath is not going to look as polished as a cast-stone pedestal bath or a hand-glazed ceramic bowl. If visual aesthetics are your top priority, you might want to look at builds using glass vases, repurposed dishes, or even old lamps as bases for something more decorative. But if functionality and low cost are your goals, plastic bottles are genuinely hard to beat.
| Factor | Plastic Bottle Bath | Concrete Bath | Ceramic Bath | Metal Bath |
|---|---|---|---|---|
| Cost | Free to ~$5 | $50–$200+ | $30–$150 | $20–$100 |
| Weight | Very light (under 1 lb) | Heavy (20–80+ lbs) | Moderate | Light to moderate |
| Durability | UV degrades over 1–3 seasons | Decades (can crack in freeze-thaw) | Years (chips and cracks) | Years (can rust/corrode) |
| Freeze resistance | Good (flexible, won't crack) | Poor if water freezes inside | Moderate (can crack) | Good |
| Ease of cleaning | Very easy | Moderate (porous surface) | Easy | Easy |
| Aesthetics | Functional, not decorative | Classic, attractive | Attractive | Modern/rustic |
| Bird safety | Good (soft edges if sanded) | Good | Good | Can overheat in sun |
| Environmental impact | Repurposes waste plastic | High CO2 from cement production | Moderate | Moderate |
Plastic bottles make the most sense when you want a low-cost, lightweight, movable bath that you can experiment with before committing to something permanent. They're also ideal as a second or third bath to increase water availability across a larger yard, as seasonal extras you don't mind retiring, or as a quick project to get water out during a heat wave while you wait for a proper bath to arrive.
The main drawbacks are UV degradation (most PET and HDPE bottles become brittle after one to three seasons of direct sun exposure), limited visual appeal, and the need for careful edge-finishing to avoid sharp cut edges that could injure birds. Neither of those problems is insurmountable, but they're worth knowing going in.
Materials and tools you'll need
The materials list varies a bit depending on which build you're doing, but here's everything that might appear across all four designs in this article. You won't need all of it for any single build.
Bottles and basin materials
- 2-liter PET soda bottles (good for shallow saucer cuts and hanging designs)
- 1-gallon HDPE water or milk jugs (wider, more stable basin option)
- 5-gallon HDPE buckets (for large, ground-level baths or as a pedestal base)
- Large-diameter PET bottles (3-liter, if available — wider basin surface)
- Plastic storage container lids or trays (as pre-made basin inserts — no cutting needed)
- Terracotta saucer or ceramic plate (as a basin insert sitting on a bottle pedestal)
Adhesives and sealants
- Food-grade or NSF/ANSI-listed silicone sealant (neutral-cure preferred — avoid acetoxy/acetic-acid cure types near metal hardware)
- Waterproof epoxy rated for plastics (for structural joins)
- Marine-grade or waterproof construction adhesive (for bonding bottle base to wooden pedestal)
- Aquarium-safe silicone (widely available, explicitly non-toxic when cured)
Hardware and mounting
- Stainless steel or galvanized eye bolts (3/8" recommended for hanging baths — stainless 3/8" eye bolts carry working load limits of several hundred pounds, far exceeding the load of a small bath)
- Stainless steel S-hooks and carabiner clips
- Nylon or coated wire rope (minimum 50 lb rated for hanging designs)
- Deck screws or exterior wood screws (for pedestal mounting)
- Cable ties / zip ties (UV-resistant black type for outdoor durability)
- Stainless steel hose clamps (for securing bottle to post or branch)
- Wooden post or garden stake (for ground-mount pedestal, 1" to 2" diameter)
- Tree stump or reclaimed lumber section (for Build Option 4)
Finishes and decorative options
- Exterior water-based acrylic or latex paint (fully cure before use — allow 72+ hours off-gassing outdoors before birds contact the surface)
- Outdoor Mod Podge or similar water-based decoupage medium (for decorative paper or fabric overlays on the outside of the bottle only — never the interior basin)
- Smooth river pebbles, marbles, or glass gems (for traction, perches, and depth gradients inside the basin)
- Natural twigs or wooden dowels (as perch additions for hummingbirds and small species)
- UV-resistant spray clear coat (to slow plastic degradation and extend bath life)
Tools
- Sharp utility knife or box cutter (for scoring and cutting PET bottles)
- Scissors (for finishing HDPE cuts)
- Rotary tool (Dremel-type) with a cutting wheel rated for plastics — use at appropriate speed, never force
- Sandpaper (120-grit and 220-grit for smoothing cut edges)
- Awl or drill with small drill bits (for drainage holes and hardware holes)
- Measuring tape or ruler
- Permanent marker (for marking cut lines)
- Clamp or vise (to secure the bottle while cutting)
- Safety glasses / goggles
- Cut-resistant gloves
- Dust mask or N95 respirator (plastic dust from cutting can be irritating)
- Well-ventilated work area
Cost, time, and skill level at a glance
All four builds in this article are beginner-friendly. You don't need any special skills beyond basic cutting and drilling. The main variable in cost is whether you already have hardware and sealant on hand. If you're starting from scratch, a small tube of aquarium-safe silicone runs about $5-8 and a pack of zip ties and eye bolts costs another $5-10. Bottles are free from your recycling bin.
| Build Option | Estimated Cost | Build Time | Skill Level |
|---|---|---|---|
| Option 1: Simple saucer bath | $0–$8 | 20–30 minutes | Beginner |
| Option 2: Hanging bottle-and-saucer | $3–$12 | 30–45 minutes | Beginner |
| Option 3: Tiered / plinth-mounted | $5–$20 | 45–90 minutes | Beginner-Intermediate |
| Option 4: Bottle-on-stump | $2–$10 | 30–60 minutes | Beginner |
Build option 1: Simple saucer bird bath
This is the fastest, most accessible build in the lineup. You're cutting the bottom off a large plastic bottle to create a shallow bowl, adding some pebbles for perching and traction, and either setting it directly on the ground or propping it on a flat surface. It's a great first project and genuinely effective at attracting birds.
What you need
- 1 large PET bottle (2-liter, 3-liter, or 1-gallon HDPE jug — larger is better for birds)
- Utility knife and scissors
- Sandpaper (120-grit then 220-grit)
- Ruler and permanent marker
- Smooth river pebbles or glass gems
- Safety glasses and cut-resistant gloves
Step-by-step instructions
- Clean the bottle thoroughly with warm soapy water, rinse well, and let it dry completely.
- Stand the bottle upright. Measure up 2.5 inches (about 6 cm) from the base and draw a level line around the entire circumference with your permanent marker. This will be your cut line.
- Put on your safety glasses and gloves. Clamp or hold the bottle securely. Use the utility knife to score along the cut line with several light passes — do not try to cut through in one go. Once scored, scissors can finish the cut cleanly around the circumference.
- Sand all cut edges thoroughly with 120-grit sandpaper until no sharp points remain, then smooth further with 220-grit. Run your fingertip carefully around the entire rim to check for any remaining sharp spots.
- The basin you've created should be approximately 2.5 inches (6 cm) deep. That's slightly over the ideal maximum depth of 2 inches (5 cm) recommended by Cornell Lab, so add a layer of river pebbles inside to bring the effective water depth down to 1 inch at the edges and about 1.5-2 inches in the center. This sloping depth profile suits a wide range of bird species.
- Place the basin on a flat, stable surface — a fence post cap, an upturned flower pot, a flat rock, or directly on the ground. Ground-level placement is accessible to more species and gives birds good predator visibility.
- Fill with fresh water to just below the top of your pebble layer. The water surface should sit at roughly 1-2 inches of depth.
- Position near (but not directly under) a shrub or tree that gives birds a quick escape route if a predator approaches, per RSPB guidance.
Photo guide notes: photograph the bottle before cutting to document your starting dimensions, the scored cut line before cutting through, the sanded rim close-up, the pebble arrangement inside the basin, and the finished bath in its placement location with birds if you get lucky quickly.
| Detail | Value |
|---|---|
| Basin diameter (2-liter bottle base) | ~4.5 inches (11 cm) |
| Basin diameter (1-gallon jug base) | ~5.5 inches (14 cm) |
| Cut height from base | 2.5 inches (6 cm) |
| Target water depth (with pebbles) | 1–2 inches (2.5–5 cm) |
| Estimated build time | 20–30 minutes |
| Estimated cost | $0–$8 (pebbles and sandpaper if needed) |
Build option 2: Hanging bottle-and-saucer bird bath
This design suspends a shallow basin from a tree branch, shepherd's hook, or porch overhang using a bottle as both the water reservoir/support structure and the hanging frame. It's a good choice for yards with cats or other ground predators, and it adds movement (gentle swaying) that some birds actually find attractive. Hummingbirds in particular seem to notice moving water sources more readily.
What you need
- 1 large PET or HDPE bottle (2-liter minimum, larger preferred)
- 1 shallow plastic storage container lid or terracotta saucer, 6–10 inches (15–25 cm) diameter
- Stainless steel eye bolt (3/8", with washer and nut)
- Nylon or coated wire rope, minimum 50 lb rated, cut to desired hanging length
- 2 stainless steel S-hooks or carabiner clips
- Aquarium-safe or NSF-listed silicone sealant
- Drill with 3/8" bit and small pilot bit
- Sandpaper (120 and 220-grit)
- Utility knife and scissors
- River pebbles
- Safety glasses, gloves, dust mask
Step-by-step instructions
- Clean the bottle and saucer thoroughly. Let both dry completely.
- Remove the bottle cap. Using your drill with a 3/8" bit, drill a hole through the center of the bottle cap. Thread the eye bolt through the cap from inside (so the eye faces outward from the top of the capped bottle). Secure with washer and nut on the inside of the cap. Apply a ring of aquarium-safe silicone around the bolt on the inside of the cap to waterproof the penetration. Let cure for 24 hours.
- Cut the bottle about 3 inches (7.5 cm) from the bottom using the utility knife and scissors. Sand all cut edges smooth. This bottom section becomes your basin — set it aside.
- The remaining upper portion of the bottle (with the eye bolt in the cap) becomes your hanging frame. Drill 3 or 4 small drainage holes (1/4", about 6 mm) around the shoulder of the bottle, approximately 2 inches (5 cm) below where the neck meets the body. This prevents any water pooling inside the upper structure.
- Place the plastic saucer or terracotta saucer into the cut opening of the upper bottle frame. It should rest inside the opening at the cut edge. If needed, apply a small bead of silicone around the rim to hold the saucer in place. Do not seal completely — you want to be able to remove the basin for cleaning.
- Alternatively, if using the cut bottle bottom as your basin, simply rest it inside the cut opening of the upper frame. It may nest naturally without adhesive.
- Thread your wire rope through the eye bolt and tie or clip it securely. Hang from a branch or shepherd's hook at a height of about 3-4 feet (90-120 cm) from the ground. Use an S-hook to make it easy to lower for cleaning.
- Add pebbles to the basin. Fill with water to 1-2 inches depth. The basket-style structure should swing gently in a breeze — check that the basin isn't tilting and spilling before leaving it unattended.
Photo guide notes: capture the eye bolt assembly in the bottle cap before reassembly, the saucer resting in the cut frame, the completed hanging assembly before filling, and the finished bath hanging in place. A close-up of the wire rope connection to the eye bolt is useful for readers verifying their hardware setup.
| Detail | Value |
|---|---|
| Basin diameter | 6–10 inches (15–25 cm) depending on saucer size |
| Target water depth | 1–2 inches (2.5–5 cm) |
| Cut height for basin (from base) | 3 inches (7.5 cm) |
| Recommended hanging height | 3–4 feet (90–120 cm) from ground |
| Eye bolt size | 3/8" stainless steel |
| Estimated build time | 30–45 minutes (plus 24-hour sealant cure) |
| Estimated cost | $3–$12 |
Build option 3: Tiered / plinth-mounted plastic-bottle bird bath
This is the most visually striking of the four builds and the one most likely to pass as an intentional garden feature rather than a repurposed soda bottle. You're stacking two or three cut bottle sections to create a tiered bath with multiple water levels, useful for attracting both small species like finches and larger ones like crows, since different birds prefer different depths and heights. Think of it as the multi-family housing of bird baths.
What you need
- 2–3 large PET or HDPE bottles of graduating sizes (e.g., a 1-gallon jug, a 2-liter bottle, and a 1-liter bottle)
- 1 wooden garden stake or 1" diameter post, 24–36 inches (60–90 cm) tall
- Waterproof epoxy or marine-grade construction adhesive
- Stainless steel hose clamps (2–3, sized to fit post and bottle neck)
- Sandpaper (120 and 220-grit)
- Utility knife, scissors
- Drill with small bit for drainage holes
- River pebbles for each tier
- Exterior water-based acrylic paint (optional, for decorating the outside of the bottles)
- Safety glasses, gloves, dust mask
Step-by-step instructions
- Clean all bottles and let dry. If painting, do so now — paint only the exterior of the bottle body, never the interior of any basin. Allow exterior water-based acrylic paint to fully cure for at least 72 hours outdoors before use, so any residual solvents off-gas completely before birds contact the surface.
- For the largest bottle (bottom tier): cut approximately 4 inches (10 cm) from the base to create your widest, deepest saucer. Sand edges smooth.
- For the medium bottle (middle tier): cut approximately 3 inches (7.5 cm) from the base. Sand edges smooth.
- For the smallest bottle (top tier): cut approximately 2.5 inches (6 cm) from the base. Sand edges smooth.
- Drill a small drainage hole (1/4") in the center bottom of each basin tier. This allows tiers to slowly drip into each other and keeps water moving slightly, which attracts more bird species than completely still water.
- Push the garden stake or post into the ground to a depth of at least 8 inches (20 cm) so it stands firm. The post should protrude about 20-28 inches (50-70 cm) above ground.
- Slide the largest basin (bottom tier) down over the top of the post so it rests about 6 inches (15 cm) from the ground. Secure with a hose clamp around the post just beneath the basin base.
- Slide the medium basin over the post so it sits about 8 inches (20 cm) above the bottom tier. Secure with a hose clamp.
- Slide the smallest basin over the post at the top, sitting about 6 inches (15 cm) above the middle tier. Secure with a final hose clamp.
- Add river pebbles to each tier. Fill the top tier first — the drainage hole will allow a slow trickle down to the middle tier, then the bottom tier. This creates natural cascading movement. Top up each tier individually for faster filling.
- Check stability by gently pressing the post from different angles. If it wobbles, reinforce with a second stake alongside the first, connected with cable ties or hose clamps.
Photo guide notes: the three cut bottle basins side by side before assembly, the post in the ground with first clamp in place, each tier added sequentially, and the finished tiered bath from a slight diagonal angle to show all three levels. A bird's-eye view of one tier showing the pebble arrangement and drainage hole is useful.
| Detail | Value |
|---|---|
| Number of tiers | 2–3 (scalable) |
| Bottom tier cut height | 4 inches (10 cm) from base |
| Middle tier cut height | 3 inches (7.5 cm) from base |
| Top tier cut height | 2.5 inches (6 cm) from base |
| Post depth in ground | Minimum 8 inches (20 cm) |
| Tier spacing (vertical) | 6–8 inches (15–20 cm) between each |
| Target water depth per tier | 1–2 inches (2.5–5 cm) |
| Estimated build time | 45–90 minutes (plus 72-hour paint cure if painting) |
| Estimated cost | $5–$20 |
Build option 4: Bottle-on-stump bird bath (natural pedestal)
If you have a tree stump or a thick chunk of reclaimed log in your yard, this build marries the natural look with the recycled-bottle basin. For step-by-step guidance on preparing and mounting a bottle basin on a stump, see a short how-to on how to make a tree stump bird bath. The stump does all the heavy lifting aesthetically, the plastic bottle just provides a clean, easy-to-swap basin on top. I've always liked this design because the stump looks intentional, and you can replace the plastic basin every season without disturbing the whole structure.
What you need
- 1 large PET bottle or 1-gallon HDPE jug (for the basin)
- 1 tree stump or reclaimed log section, ideally 12–24 inches (30–60 cm) tall and at least 6 inches (15 cm) in diameter at the top
- Waterproof construction adhesive or marine-grade epoxy (to secure basin to stump top, optional)
- 2–3 exterior wood screws or stainless steel hose clamp (for mechanical attachment if adhesive alone feels insufficient)
- Drill with small bits
- Utility knife and scissors
- Sandpaper (120 and 220-grit)
- River pebbles
- Safety glasses and gloves
Step-by-step instructions
- Clean the bottle thoroughly. Cut the base off at 2.5–3 inches (6–7.5 cm) from the bottom to create your basin. Sand all cut edges smooth with 120-grit then 220-grit sandpaper.
- Flatten and clean the top of the stump as much as possible. If it's a rough-cut log, a few passes with a hand plane or rasp will create a more stable, level surface for the basin to rest on.
- Check that the cut bottle base sits level on the stump top without rocking. If the stump surface is uneven, use a small amount of waterproof construction adhesive to fill gaps and level the basin. Allow to cure per adhesive instructions.
- For a more permanent attachment: drill two or three small pilot holes through the bottle basin base at the outer edge, then drive short exterior wood screws through the basin base into the stump top. Countersink slightly so screw heads don't protrude into the basin. Apply a small dab of aquarium-safe silicone over each screw head inside the basin.
- Alternatively, use a stainless steel hose clamp around the circumference of the bottle base and the top of the stump to hold the basin in place without drilling through the basin floor.
- Add river pebbles inside the basin to create a sloped depth profile: shallow at the edges (about 1 inch / 2.5 cm) and slightly deeper in the center (up to 2 inches / 5 cm). This suits a wide range of species, from small sparrows to larger crows.
- Position the stump in a spot with clear sightlines, about 3–10 feet from a shrub or low branch where birds can perch and scan for predators before approaching the water. Avoid placing directly under dense tree cover where debris will foul the water quickly.
- Fill with fresh water. The natural stump aesthetic blends into most garden settings, and the stable, low-to-ground height (12–24 inches) makes this accessible to ground-feeding species like robins, thrushes, and towhees.
Photo guide notes: photograph the stump top before and after any leveling work, the basin placement test (before attachment), the screw or clamp attachment close-up, and the finished bath from a 45-degree angle to show both the basin and the stump pedestal. A wide shot showing the stump bath in its garden context is the most compelling final image.
| Detail | Value |
|---|---|
| Basin cut height from base | 2.5–3 inches (6–7.5 cm) |
| Ideal stump height | 12–24 inches (30–60 cm) |
| Ideal stump top diameter | 6 inches minimum (15 cm) |
| Target water depth | 1–2 inches (2.5–5 cm) |
| Attachment method | Construction adhesive, screws, or hose clamp |
| Estimated build time | 30–60 minutes |
| Estimated cost | $2–$10 (stump is free if from your yard) |
Safety first, cutting, sealing, and mounting
Cutting plastic bottles is low-risk if you respect a few basics. PET (the clear plastic used in soda bottles) tends to crack rather than cut cleanly if you force it, so always score with multiple light passes of a utility knife before cutting through. HDPE (the slightly cloudy plastic in milk and water jugs) is softer and cuts more easily with scissors once you've made an initial pierce with the utility knife. Always wear safety glasses and cut-resistant gloves, clamp the bottle so it can't roll, and cut away from your body. If you're using a rotary tool, use bits or wheels rated for plastics, run at moderate speed, and wear a dust mask since plastic cutting dust is an irritant.
For sealants, the key rule is to keep them bird-safe. Choose aquarium-safe silicone or a product with an NSF/ANSI food-contact listing. Avoid solvent-based adhesives or standard construction caulks that aren't rated for incidental food or water contact. Silicone sealant is fully cured and inert once dry, but give it a full 24 hours before filling the bath. If you're painting the exterior of bottles, use exterior water-based acrylic or latex paint only, and allow at least 72 hours of outdoor off-gassing before birds come into contact with any painted surface.
For hanging designs, always use hardware with a stated working load limit (WLL) and choose stainless steel rather than plain steel for outdoor durability. See Machinery Eye Bolt product listing with Working Load Limit information, Grainger for manufacturer-stated WLLs (many 3/8" stainless eye bolts list WLLs in the hundreds of pounds) and follow those WLLs when selecting hardware Machinery Eye Bolt product listing with Working Load Limit information — Grainger. A 3/8" stainless steel eye bolt is rated far in excess of the load you'll put on it, the biggest risk in hanging designs is not the bolt failing but the attachment point (branch, hook, or post) failing, so inspect those regularly too.
Getting the water right for more species
Depth is the single most important factor in whether birds use your bath. Cornell Lab recommends a maximum of about 2 inches (5 cm) at the deepest point, with edges starting at roughly 1 inch (2.5 cm). The RSPB suggests a width of at least 30 cm (about 12 inches) where possible, though smaller baths will still attract small species. A 2-liter bottle base gives you about 4.5 inches (11 cm) of basin width, that works for finches, sparrows, and hummingbirds, but larger birds like robins or crows will prefer wider options. For those species, a 1-gallon jug base, a terracotta saucer, or the tiered design from Build Option 3 works better.
Pebbles inside the basin serve two purposes: they create a sloped depth gradient that suits multiple body sizes, and they give birds traction on the plastic surface, which can be slippery when wet. Audubon specifically notes that slippery bath surfaces are a real deterrent, birds need to grip the bottom to feel secure while bathing. Smooth river pebbles, glass gems, or even a few irregular stones work well. Aim to cover most of the basin floor, leaving some open water gaps between them.
Add a twig or thin wooden perch across the rim for hummingbirds and very small species that want to sip from the edge without landing fully in the water. Crows and larger corvids, on the other hand, prefer a wider, deeper (up to 2 inches) open water surface and are fine without perches. If attracting a broad range of species is your goal, the tiered design in Build Option 3 handles this naturally by offering different depths and heights simultaneously.
Placement and installation tips
- Place baths 3–10 feet from shrubs or low branches — close enough for birds to escape predators, far enough that cats can't use the cover as a launch pad
- Avoid placing directly under bird feeders where seed hulls and droppings will contaminate the water quickly
- Ground-level placement (Build Options 1 and 4) attracts more species overall, including ground-feeding birds
- Elevated and hanging designs (Build Options 2 and 3) are better in yards with roaming cats
- North or east-facing positions in full sun climates keep water cooler in summer
- Position near a dripping hose or misting emitter if possible — the sound and movement of water attracts birds from a distance
Keeping the bath clean and safe
Change the water every one to three days in warm weather. This is not optional, it's the single most effective thing you can do for bird health and mosquito prevention. CDC guidance is clear that emptying and scrubbing small water containers at least once per week breaks the mosquito breeding cycle (mosquito larvae take 7-10 days to develop in standing water). In warm summer weather, I change mine every day or every other day.
For routine cleaning, scrub the basin with hot water and a stiff brush each time you change the water. If algae appear, Cornell Lab recommends dealing with them immediately: scrub with very hot water and a stiff brush, not chemical cleaners inside the basin. For disinfection (which you should do at minimum weekly, or more often during local disease events), use a 10% bleach solution: 1 part household bleach to 9 parts water. Let it sit for about 10 minutes in the basin, then rinse extremely thoroughly and allow to air-dry completely before refilling. This protocol follows Connecticut DEEP and similar state wildlife guidance for bird baths and feeders.
Plastic baths have an advantage here: they're non-porous, so algae and bacteria can't establish as deeply as they can in porous concrete. A quick scrub cleans them more thoroughly than a comparable concrete surface. That said, plastic scratches more easily, and scratched surfaces create more places for biofilm to hide, so use a soft-bristle brush rather than steel wool or abrasive scrubbers.
Dealing with algae, mosquitoes, and leaks
Algae
Green algae in a bird bath is normal but needs to be addressed promptly. The fix is mechanical, not chemical: scrub it out with hot water and a stiff brush. If algae are persistent, reduce how much direct sun the bath gets, change water more frequently, and add a few copper pennies (pre-1982 U.S. pennies are nearly pure copper) to the basin, copper is a natural algae inhibitor and safe for birds at these trace levels. Do not use commercial algaecides unless they are explicitly labeled safe for wildlife water sources.
Mosquitoes
If you're changing your water every 2-3 days, mosquitoes are not a meaningful risk, they need 7-10 days of standing water to complete their larval cycle. If you have a design where the water is harder to change frequently (like a reservoir-fed drip system), use mosquito Bti dunks per the product label. Bti (Bacillus thuringiensis israelensis) is a naturally occurring bacterium that kills mosquito larvae but is harmless to birds, mammals, and other insects. It's the CDC-endorsed option for containers that can't be emptied weekly.
Leaks
Leaks in plastic-bottle baths are almost always at cut edges or drilled holes. A small bead of aquarium-safe silicone around any drilled hole or seam fixes most leaks within 24 hours of curing. If the basin itself has developed a crack from UV degradation or physical stress, it's time to cut a new basin from a fresh bottle. This is the planned obsolescence of this design, and honestly it's a feature, a fresh PET bottle takes five minutes to cut, and you know the new basin is clean and structurally sound.
Seasonal care and winterizing
This is where plastic-bottle baths have a genuine advantage over concrete and ceramic. Plastic is flexible enough to survive a freeze without cracking, the ice can expand and the basin flexes slightly. Concrete baths are notoriously vulnerable to freeze-thaw cracking because they're porous and rigid. That said, repeated freeze-thaw cycles will still stress plastic over time, so I bring my bottle baths indoors from December through February in colder climates. It takes all of 30 seconds.
If you want to keep water available through winter, which is genuinely valuable for birds, since natural water sources freeze over, you have two good options. A low-wattage immersion heater (bird bath de-icer) keeps a small area of water liquid. Always plug these into a GFCI outlet, and never add antifreeze, glycerin, or any chemical to the water to prevent freezing, Audubon explicitly warns against this as both chemicals are harmful to birds. Alternatively, a solar-powered de-icer or heated bath insert works well in milder climates where temperatures don't stay below freezing for extended periods.
In warm climates without freezing, the main seasonal concern is summer heat. Water evaporates faster, algae grows faster, and in direct sun a shallow plastic basin can warm to temperatures that discourage birds. Shade cloth over the bath, or relocating it to a spot that gets afternoon shade, solves this. Increase your water-change frequency to daily during heat waves.
Upgrades worth considering
- Drip emitter or misting head: even a slow drip from an overhead branch adds the sound and movement that attracts birds far more effectively than still water — many garden supply shops sell inexpensive gravity-fed drip systems for under $10
- Solar-powered fountain pump: a small submersible solar pump creates gentle circulation, which reduces algae growth and adds visual and auditory appeal
- Heated bath insert or de-icer: a low-wattage bird bath heater (25-150 watts) keeps water liquid in freezing temperatures — always use a GFCI outlet
- UV-resistant clear coat spray: applied to the exterior of your plastic basin, this extends its outdoor lifespan significantly by slowing UV degradation
- Decorative pebble arrangements: layering different colored stones or glass gems in the basin creates an attractive look visible from a distance, potentially drawing in birds
When to consider other DIY options or materials
Plastic bottles are an excellent starting point, but they're not the only DIY path. If you want something more decorative, building a bird bath from glass vases or repurposed dishes gives you more visual design options while keeping costs low. If you prefer that route, see our concise guide on how to make bird baths from dishes (resource ID 5b2d2577-754f-4aea-8ea5-eb4e91802c8e). If you want step-by-step instructions for repurposing a bird bath into a planter, see our guide on how to make a planter out of a bird bath. If you have a broken concrete bath, the bowl or pedestal may still be salvageable, there are good ways to repurpose broken bird bath components rather than discarding them. Wood baths offer a natural aesthetic that blends well in woodland-style gardens, though they require more maintenance to prevent rot. If you want detailed, step-by-step instructions on how to make a bird bath from wood, look for a dedicated guide that covers cutting and sealing timber, choosing rot-resistant species, and finishing techniques to keep the bath bird-safe. And if you have a lamp base gathering dust in the garage, it makes a surprisingly elegant bird bath pedestal. If you have a lamp base gathering dust, check a short guide on how to make a bird bath from an old lamp for step-by-step instructions on turning it into an elegant pedestal. Each material has its own trade-offs in durability, aesthetics, and maintenance load, and the right choice depends on your yard and how much ongoing upkeep you want to take on.
The plastic-bottle option is best viewed as what it is: a fast, free, functional solution that gets water out for birds immediately. If you love it and want something more permanent, the knowledge you gain about placement, depth, and bird behavior from your bottle bath will serve you well when you upgrade to a more durable design. For ideas on giving an old or damaged basin a new life, see how to repurpose a bird bath. Start cheap, learn fast, then invest in what works.
FAQ
What key measurements and bath profile details should the article specify for plastic‑bottle bird baths to attract the broadest range of species?
Give a shallow, gently sloping profile: edge depth ≈1 in (2.5 cm), maximum depth ≈2 in (5 cm) in the middle for general use; width as wide as practical (ideally >12 in/30 cm) to suit more species; include exact bottle/saucer diameters and cut lines for each build option so readers can reproduce dimensions.
Which plastic types are acceptable for bird baths and what safety guidance should be included about reusing bottles?
Recommend food‑contact plastics: PET (PETE) and HDPE—these are commonly used for beverages and food, and are FDA‑approved for contact. Advise avoiding PVC and unknown plastics with phthalates. Instruct readers to use bottles originally designed for food/water, inspect for cracking or UV degradation, and rinse well before use.
What materials and tools lists must be provided for each build option?
Provide separate, itemized materials and tools lists per design (simple saucer, hanging bottle‑saucer, tiered/plinth, bottle‑on‑stump, recycled‑dish hybrid). Materials: bottle types (size/neck ID), shallow basins/saucers, food‑grade/NSF‑listed silicone or adhesives, stainless hardware (eye bolts, washers), rocks/perches, optional deicer/heater/solar de‑icer, Bti dunks. Tools: utility knife, scoring blade, rotary tool with plastic bits, drill with bits for plastics, clamps, PPE (eye protection, cut‑resistant gloves, dust mask), measuring tape, marker.
What sealing and adhesive guidance should the article give to ensure water‑tight, bird‑safe joins?
Specify using NSF/ANSI‑listed or explicitly food‑contact‑safe silicones/adhesives (neutral‑cure silicone preferred). Provide application tips (clean, dry surfaces; roughen HDPE slightly with sandpaper if needed; allow full cure time per manufacturer). Warn against using generic construction adhesives, solvent glues, or adhesives that lack food‑contact certification.
What step‑by‑step safety protocols for cutting and assembly are required?
Require PPE: safety glasses, cut‑resistant gloves, and a dust mask for rotary work. Clamp bottles securely, cut away from the body, score thin PET repeatedly before final cut, use rotary bits/wheels rated for plastics at appropriate speed, work in ventilated area to avoid inhaling plastic dust, and keep first‑aid supplies available. Reference OSHA tool safety and manufacturer instructions for rotary tools.
How should the article present step‑by‑step build procedures so readers can replicate them accurately?
For each design include: a short materials/tools list, numbered steps with exact measurements (bottle sizes, cut depths/diameters, hole positions, fastener sizes and thread engagement), estimated time and skill level, clear tips (clamping, scoring, test‑fit), and photos/diagrams for each critical step (cutting, sealing, mounting). Provide optional variants for different bottle sizes.
Next Articles
How to Make a Tree Stump Bird Bath Step by Step
Step-by-step DIY to turn a tree stump into a safe, durable bird bath with proper basin, drainage, sealing, and upkeep.
How to Make a Bird Bath From Wood: DIY Guide
Build a wooden bird bath step by step using reclaimed wood, with sealing, placement, algae control, and repair tips.
How to Make a Bird Bath From an Old Lamp Step by Step
Turn an old lamp into a stable, bird-safe bath with sealed basin, safe wiring, drainage, placement, and easy maintenance