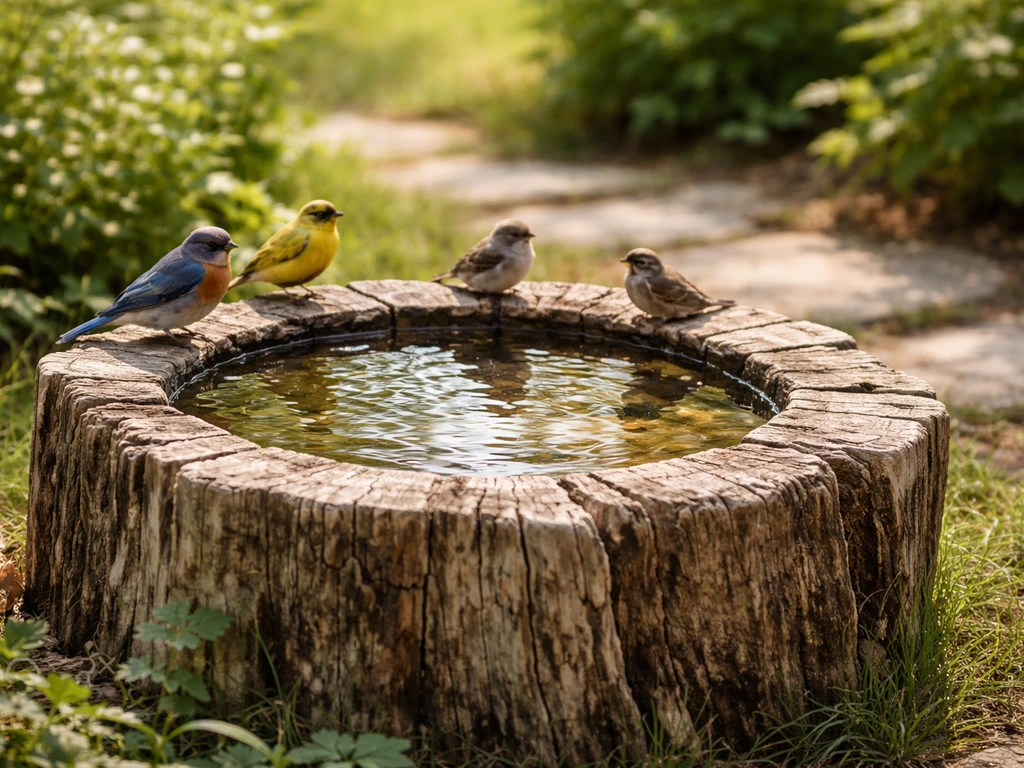
You can turn a tree stump into a functional bird bath by hollowing a shallow basin into the top, sealing it with a bird-safe waterproof coating, and setting it level in a spot with partial shade and good sightlines. If you want to go beyond a stump, you can also repurpose other items into a bird bath using the same carving, waterproofing, and safe-placement steps repurpose a bird bath. Done right, it looks completely natural, lasts for years, and birds seem to genuinely prefer the rustic surface over slick ceramic. Here's exactly how to do it from start to finish.
How to Make a Tree Stump Bird Bath Step by Step
Marcus Henley
8 Jul 2026
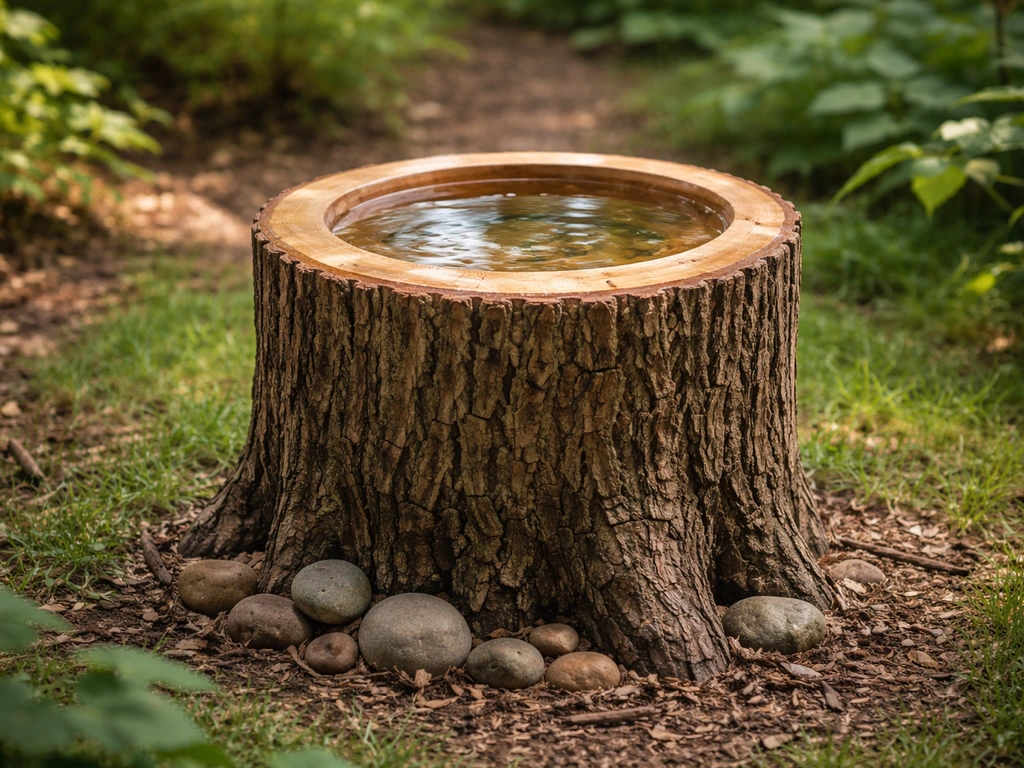
Pick the right tree stump for a bird bath
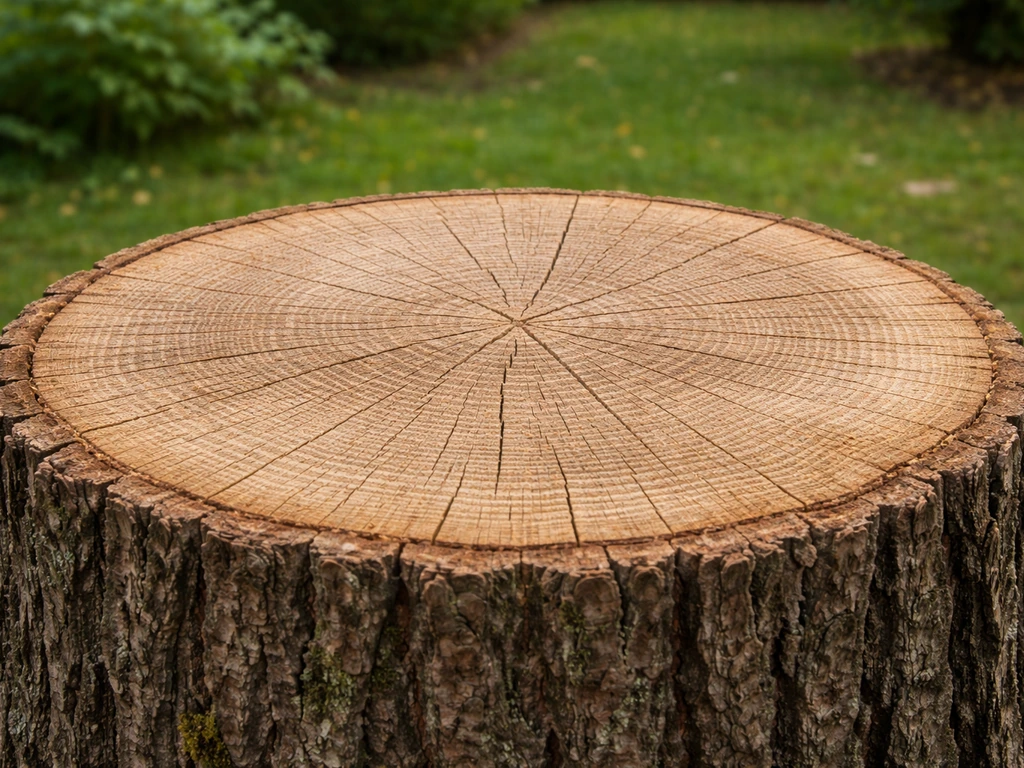
Not every stump is worth the effort. The single most important thing to check is rot. Internal decay can be sneaky, the outside of a stump can look solid while the core is soft and punky. Press a screwdriver or knife blade firmly into the wood at several spots around the top and sides.
If it sinks in easily or the wood feels spongy, that stump has decay you can't work around. Bark peeling off on its own is another red flag. Wood decay fungi enter through wounds and can colonize a stump for years before it becomes obvious, so don't assume a stump is fine just because it looks okay from a distance.
The USDA Forest Service publication on urban tree risk management notes that wood decay can colonize stumps and reduce stability before it becomes obvious [don't assume a stump is fine just because it looks okay from a distance](https://www. fs. usda. gov/nrs/pubs/na/NA-TP-03-03.
pdf). Wood-decay fungi enter through wounds such as winter injury and insect feeding, and colonization can persist for years before the decay becomes obvious Wood decay fungi enter through wounds.
What you want is a stump that's firm, dense, and at least 10 to 12 inches in diameter at the top, that gives you enough surface to carve a basin and still have a decent landing rim around it. You can borrow many of the same placement and maintenance tips when you explore broken bird bath ideas stump that's firm, dense. A flat or slightly domed top is much easier to work with than a heavily angled cut.
Height-wise, stumps between 18 and 30 inches work best. Too short and cats can reach the bath easily. Too tall and smaller birds avoid it. Hardwoods like oak, maple, and black cherry hold up far longer than softer woods like pine or poplar, which break down quickly once you start cutting into them.
If you're working with a stump that's still in the ground, great, that's ideal for stability. If you're using a cut stump or a section of log, make sure it's thick enough that the base won't split when you move or anchor it. Freshly cut stumps need several weeks to dry before you seal them. If the stump is already well-seasoned (dry, no green wood visible), you can move faster.
Tools and materials you'll need
- Angle grinder with a carving disc or flap disc (a wood gouge and mallet work too, just slower)
- Chainsaw or hand saw (for leveling the top if it's uneven)
- Screwdriver or pocket knife (for the rot test)
- Wire brush and stiff-bristle scrub brush
- Sandpaper, 60-grit and 120-grit
- Level (a small torpedo level is fine)
- Pond liner, pre-formed plastic basin liner, or large ceramic/terracotta saucer (optional but helpful)
- Bird-safe waterproof sealant (non-toxic polyurethane, epoxy pond coating, or natural linseed oil)
- Gravel or small smooth stones (1/2 to 1 inch diameter)
- Exterior wood preservative (non-toxic, for treating the exterior of the stump)
- Masonry anchoring stakes or landscape spikes (for freestanding stumps)
- Outdoor silicone caulk (bird-safe, for sealing any cracks)
- Optional: small solar fountain pump, dripper attachment
The angle grinder with a carving disc is honestly the tool that makes this project manageable. A wood gouge and mallet are traditional and give you more control, but carving a basin by hand in a dense hardwood stump takes real time and effort. Either approach works. For sealant, the most reliable options I've used are either an epoxy-based pond liner paint or a pure tung oil finish (not the blended products that contain petroleum solvents). If you're repurposing an old lamp into a bird bath, the sealant you use on the lamp parts matters just as much for keeping the water surface bird-safe. Both are bird-safe once fully cured.
Prep and stabilize the stump
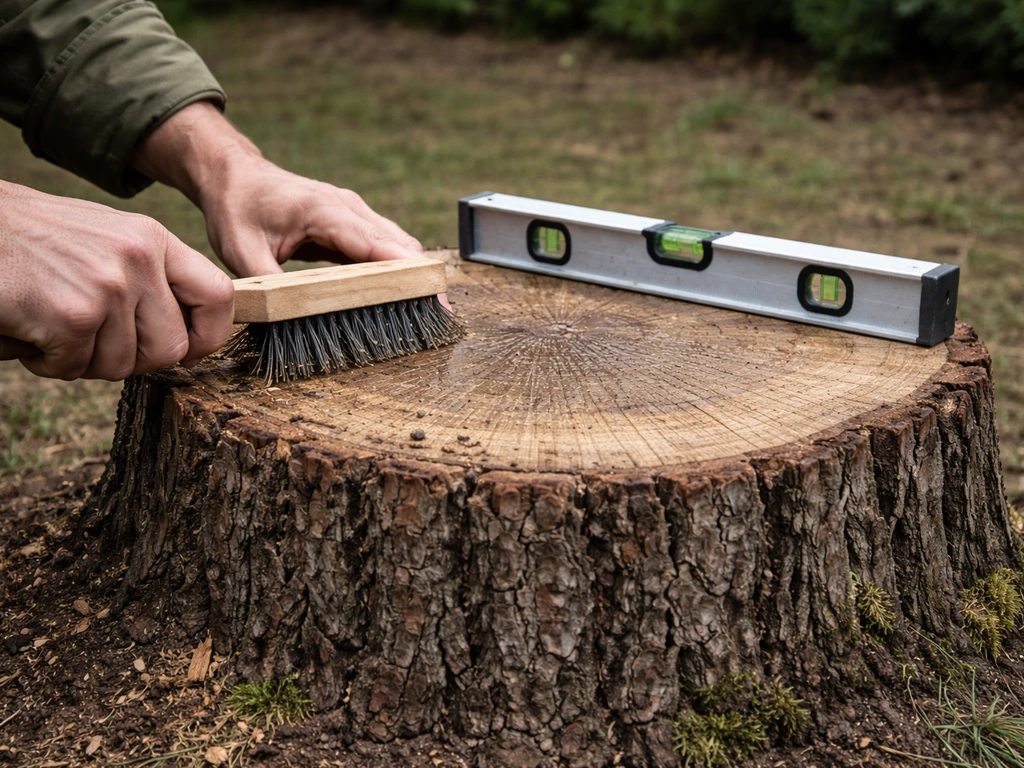
Before you carve anything, get the stump clean and stable. Brush off all loose bark, dirt, moss, and debris with a stiff wire brush. If there's lichen or mold on the surface, scrub it with a diluted white vinegar solution (1 part vinegar to 3 parts water) and let it dry completely. This matters for adhesion later, sealant won't bond well to a dirty or damp surface.
Check the top surface with your level. If it's significantly off-level, you'll need to correct it before carving, because a tilted basin will just spill water out one side. For an in-ground stump, excavate a little soil from the high side and pack it down on the low side, checking as you go. For a freestanding stump, you can either shim the base with flat stones or trim the base flat with a saw. Getting within about 5 degrees of level is close enough, you can fine-tune the basin angle slightly during carving.
Freestanding stumps need anchoring. A bird bath gets bumped by animals, knocked by wind, and generally abused outdoors. Drive two or three landscape spikes or rebar stakes into the ground around the base and use heavy-gauge wire or metal strapping to secure the stump to them. Alternatively, drill two or three holes into the bottom of the stump and drive long galvanized deck screws at angles into the ground through them. For stumps set in soil, packing the base tightly with compacted gravel and soil often provides enough friction that additional anchoring isn't strictly necessary, but I'd still recommend it.
Carve the basin and create a safe, usable water surface
The basin is the heart of the project and it needs to meet a few specific requirements to actually work for birds. It should be 2 to 3 inches deep at the center, with sides that slope gradually from the rim inward, not steep walls that drop straight down. Birds aren't strong swimmers, and a bath with steep sides is one they'll avoid or can drown in. The basin should be at least 12 to 18 inches across. Smaller than that and you'll get one bird at a time at best. A gently curved, saucer-like profile is what you're after.
Mark the basin outline on the stump top with chalk or a pencil, leaving at least 2 inches of solid wood rim all around. Start removing material from the center, working outward in passes rather than trying to dig straight down. With an angle grinder and carving disc, use slow, controlled sweeping strokes. Check depth frequently, it's easy to go too deep in one spot. With a gouge, work with the grain when possible and take thin shavings rather than chunks.
Once the rough shape is done, switch to a flap disc on the grinder or 60-grit sandpaper to smooth the basin surface. Then go over it again with 120-grit. You want a surface that's smooth enough to clean easily but still has some texture, a completely polished surface actually makes it harder for birds to grip. Run your hand across the finished basin. If it feels like rough concrete rather than a splinter hazard, you're in good shape. Finally, carve or drill a small drainage notch at the edge of the basin, about 1/4 inch wide and deep. This lets water overflow gradually rather than pooling indefinitely if you overfill or it rains.
Seal, waterproof, and ensure bird-safe water retention
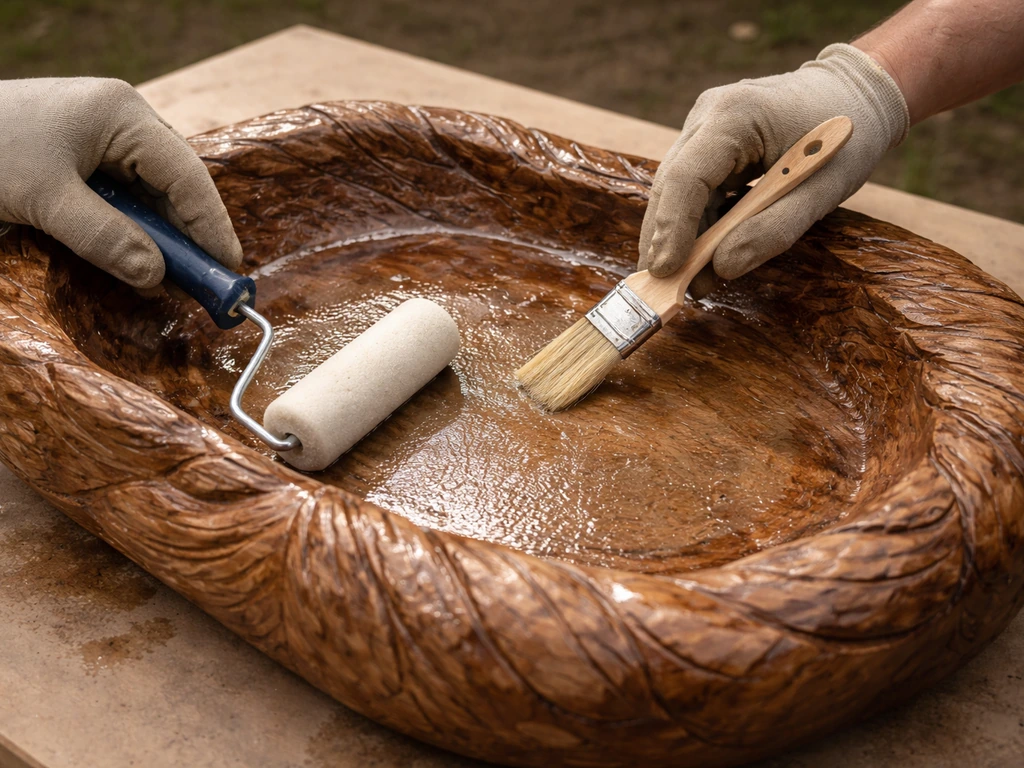
Sealing is what separates a bird bath that lasts two seasons from one that lasts a decade. Unsealed wood will absorb water, swell, crack, and start rotting from the inside of the basin outward. The sealer you choose must be non-toxic once cured, since birds will drink directly from this water.
The best options are epoxy-based pond coatings (the kind used on koi ponds and water features, brands marketed specifically as safe for fish and wildlife), pure tung oil, or a pre-mixed non-toxic waterproofing sealer. Avoid anything containing zinc naphthenate, creosote, or pentachlorophenol, which are common in wood preservatives but toxic to birds. Standard deck sealants and many polyurethane products are safe once fully cured, but check the product label to confirm it doesn't list heavy metals or biocides.
Apply the sealant in thin coats, not one thick coat. Two to three thin coats with full drying time between each will penetrate the wood better and last longer than a single thick application. Pay extra attention to the grain end-cuts, which absorb liquid fastest and are most vulnerable to moisture intrusion. Let each coat dry fully according to the manufacturer's instructions before applying the next.
Curing time matters. Most sealants are touch-dry in a few hours but don't fully cure for 24 to 72 hours. Pond epoxy coatings can take up to 7 days to fully cure and off-gas completely. Don't fill the basin with water until the sealant has fully cured, birds shouldn't be drinking water sitting on fresh sealant. Once cured, fill the basin, let it sit for a few hours, then dump and refill. If you detect any solvent smell in the water after curing, repeat the rinse.
If you'd rather not deal with repeated sealing every year or two, dropping a pre-formed plastic or ceramic basin liner into the carved hollow is a smart alternative. Shape the hollow so the liner sits snugly with its rim just below the wood surface. This gives you a watertight basin you can simply lift out to clean, and it dramatically extends the life of the stump itself. A large unglazed terracotta saucer (the kind sold as plant drip trays) works perfectly and is already a proven bird bath material. If you want an even cheaper option, you can also make a bird bath out of plastic bottles and avoid dealing with carving and sealing bird bath material.
Install and place it for best bird activity
Placement has a massive effect on whether birds actually use a bath. The most important factors are cover, visibility, sun exposure, and predator safety, and they're somewhat in tension with each other, so you're making trade-offs.
Aim for a spot with dappled or partial shade for most of the day. Direct sun all day heats the water fast, encourages algae, and makes birds reluctant to use it during hot afternoons. Full shade keeps the water cool and slows algae but can make birds feel exposed in dense cover where predators hide. A spot that gets morning sun and afternoon shade hits the sweet spot in most climates.
Keep the bath within about 10 feet of shrubs or trees, birds like to have a quick escape route and a perch to survey from before coming down. At the same time, don't put it directly under a dense tree canopy where cats can crouch and wait. Place it where you can see it from a window, which keeps monitoring easy and reminds you to top off the water.
If the stump isn't already in the ground, set it level on its chosen spot and do a final stability check, push it from different angles to make sure it doesn't rock. Add any gravel you want in the basin (a thin layer of small smooth pebbles at the basin floor makes it easier for birds to stand and adds visual appeal), then fill with fresh water to about 1.5 to 2 inches depth. That's the target depth for operation.
Moving water attracts birds far more effectively than still water. If you want a simple build, follow the full steps to make a bird bath from wood, from choosing a stump to carving and sealing the basin. A simple solar-powered dripper or fountain pump that runs on a small submersible head can be placed in the basin with the cable routed discreetly along the stump. The sound of dripping water is audible from a surprising distance and consistently pulls in birds that might otherwise walk past a still bath. This is especially effective for warblers and other species that are more responsive to water sounds than visual cues.
Maintenance and troubleshooting
Regular cleaning routine
Plan on dumping and refilling the basin every 2 to 3 days in warm weather, and scrubbing it weekly. For the weekly scrub, empty the basin completely, scrub the surface with a stiff brush and a diluted white vinegar solution (1:9 vinegar to water ratio), rinse thoroughly, and refill. Avoid soap, even small residue amounts from dish soap affect water surface tension in ways that are uncomfortable for birds and can coat feathers. You can also make bird baths from old dishes by creating a stable basin and using bird-safe materials so the water surface stays safe dish soap.
Dealing with algae
Algae buildup is the most common ongoing issue with any bird bath, and a stump bath is no different. The vinegar scrub handles early-stage algae well. For heavier buildup, a diluted hydrogen peroxide solution (a few tablespoons of 3% pharmacy-grade hydrogen peroxide in a gallon of water) works effectively without leaving harmful residue. Let it sit for a few minutes, scrub, and rinse well. Moving water via a fountain or dripper significantly slows algae growth, as does the partial shade placement discussed above. Copper is a natural algaecide, placing a small piece of copper pipe or a few copper pennies (pre-1982, which are mostly copper) in the basin slows algae without harming birds.
Preventing mosquitoes
Mosquitoes need standing water for about 7 to 10 days to complete their larval cycle. If you're dumping and refilling every 2 to 3 days, you'll break that cycle reliably. The moving water option (dripper or pump) is even more effective since mosquitoes prefer completely still water to lay eggs. If you're going away for a week or more and can't maintain the bath, dump it before you leave. Bacillus thuringiensis israelensis (BTi) dunks, sold as Mosquito Dunks at garden centers, are safe for birds and wildlife and can be broken into small pieces to drop in the basin as a belt-and-suspenders measure.
Handling winter and freezing
Water expanding as it freezes inside a carved wood basin is the main winter threat to your stump bath. The pressure can crack even a well-sealed basin over multiple freeze-thaw cycles. The simplest solution is to let the water freeze and thaw naturally without a liner in place, the drainage notch you carved earlier gives expanding ice a little room to push outward. If you're using a removable liner, take it out before hard freezes or keep it filled with water (which paradoxically protects the liner itself from cracking since water inside the liner expands with the liner rather than against it).
A submersible birdbath heater or a heated base placed under the stump keeps water liquid in freezing temps and is worth it if you're in a cold climate and want to provide year-round water. These are the same heated elements used in conventional bird baths. If you go this route, make sure the electrical cord is protected and keep the heater thermostat-controlled so it only runs when temps drop below freezing.
Ongoing stump maintenance and resealing
Inspect the basin sealant once a year, ideally in early spring. If you are learning how to make a planter out of a bird bath, you'll want to plan for how the water feature will be converted and sealed so it stays safe for soil and plants. Look for peeling, crazing, or soft spots in the wood.
Any area where the sealant has lifted needs to be scraped clean, dried thoroughly, and recoated before the bath goes back into service. The exterior of the stump will naturally weather and develop surface cracks, that's fine and even improves the look, but if you see cracks extending into the basin area, fill them with outdoor silicone caulk and reapply sealant over the top once the caulk cures.
With solid wood, proper sealing, and annual maintenance, a well-chosen hardwood stump bath can realistically last 8 to 15 years or longer. If you eventually find the wood has degraded past the point of repair, the project isn't wasted, the skills and approach transfer directly to making bird baths from other natural and reclaimed materials, including wood slabs, glass vessels, old dishes, and other found objects.
Quick troubleshooting reference
| Problem | Likely cause | Fix |
|---|---|---|
| Birds avoid the bath | Too deep, too much sun, no escape cover nearby | Add gravel to raise water level, relocate to partial shade, plant nearby shrubs or add a perch |
| Water drains too fast | Sealant worn, crack in basin | Dry basin completely, inspect, recaulk cracks, reapply sealant |
| Green algae coating surface | Too much sun, infrequent cleaning | Add shade, scrub with vinegar weekly, add copper element or BTi |
| Mosquito larvae visible | Water sitting more than 3 days | Dump and refill more frequently, add dripper or fountain, use BTi dunk |
| Basin cracking in winter | Freeze-thaw expansion | Switch to removable liner, add heater, or empty bath before hard freeze |
| Stump wobbling | Soil settled, anchor loosened | Re-pack base with compacted gravel, re-anchor with stakes |
| Sealant peeling | Applied too thick, surface was damp when applied | Strip peeling areas, let wood dry fully, reapply in thin coats |
FAQ
How can I tell when the stump bird bath sealer is fully cured and safe for birds?
If you seal too soon, birds may drink off-gassing solvents and you risk early seal failure. Wait until the sealer is fully cured (not just touch-dry), then do a short “test fill” with plain water, let it sit for a few hours, and dump it. If there is any lingering solvent or strong chemical smell in the water, keep rinsing and wait longer before filling for use.
What basin shape mistakes make birds avoid a tree stump bird bath?
Avoid shallow “scoop” basins that look bowl-shaped but have near-vertical walls, birds cannot stabilize their footing and may slip into the water. Use the 2 to 3 inch center depth and a gradual slope, and leave at least a 2 inch solid rim all around so the outer edge stays sturdy and provides a comfortable landing lip.
Can I use dish soap or household cleaners to scrub the bird bath?
Weatherproofing is important, but water chemistry and cleanliness matter too. Skip dish soap, even if the surface looks clean afterward, soap residue changes surface tension and can affect how birds drink and how water wets feathers. For weekly cleaning, use the vinegar rinse method, then refill with fresh water.
Is it okay to make a tree stump bird bath from a freshly cut stump if I seal it quickly?
Yes, but only if the wood is already dry and stable, and you still need to treat rot concerns. You generally should not seal green, freshly cut wood, because moisture trapped inside can push the sealant off and accelerate internal decay. If you are in a hurry, let the stump dry longer, then do the screwdriver test before investing in carving and sealing.
What are the key installation tips if I use a pre-formed liner or terracotta saucer in the hollow?
A removable liner works, but the liner rim needs to sit just below the wood surface so water does not creep underneath and wet the stump. Also, plan for liner handling in cold weather, remove it before hard freezes or keep it managed so it does not crack from freeze-thaw stress.
My stump bird bath gets algae fast. What should I adjust first?
If algae returns quickly, reassess sun exposure first, then improve circulation. Moving water and partial shade slow algae far more than repeated scrubbing alone. Also check that you are rinsing well after vinegar treatments, and avoid leaving a film that can seed algae.
How do I increase the odds that birds will actually use the bath in my yard?
A few species prefer perching and safety cues more than the water itself. Place the bath near shrubs or a tree so birds have a nearby lookout, but not under an area where cats can crouch. If you cannot use the shrub proximity, add a low natural perch nearby (for example, a smooth branch) without blocking escape routes.
What should I do if I see cracking in the basin after a cold winter?
If the basin cracks, the most likely cause is freeze-thaw pressure or an incompletely cured seal. Make sure you included that small drainage notch, and in winter either leave it without a liner or manage the liner so ice can expand without splitting the wood. In spring, scrape off lifted sealant, let it dry fully, and recoat over the repaired areas.
Can I use a submersible or heated base to keep water from freezing, and what safety checks matter?
You can, but ensure the heater setup is designed for outdoor wet locations and keep the cord protected along the stump so it does not get exposed or chewed. Use a thermostat-controlled heater so it only runs when temps are below freezing, and avoid any heater that requires bypassing safety controls.
If I cannot refill often, how can I prevent mosquitoes without harming birds?
Yes. If your yard allows it, drop a BTi mosquito dunk piece into the basin before you leave, and still dump and refill when you return. BTi is a helpful backup, but regular dumping every 2 to 3 days (or moving water) is the main method because larvae need standing water time to develop.
Next Article
How to Make a Bird Bath From Wood: DIY Guide
Build a wooden bird bath step by step using reclaimed wood, with sealing, placement, algae control, and repair tips.