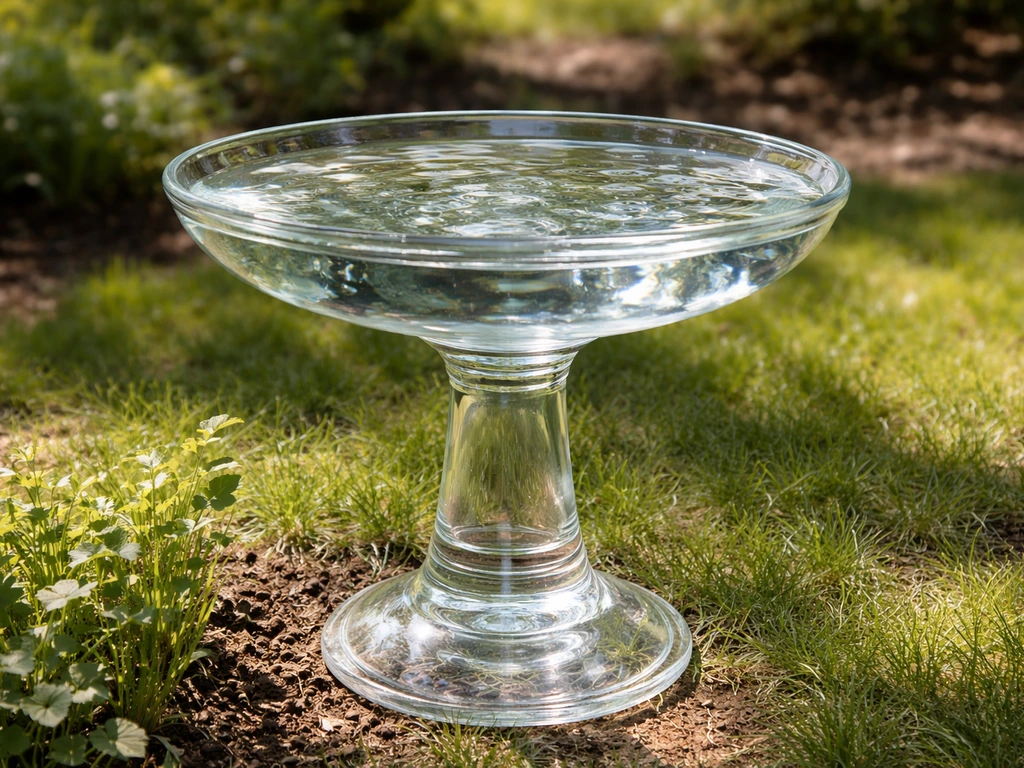
You can turn one or more glass vases into a genuinely attractive, functional bird bath in an afternoon. Stack a tall vase upside down as the pedestal, bond a wide shallow vase or glass dish to the top with 100% silicone aquarium sealant, let it cure for 48 hours, and you have a bird-safe water feature that costs a fraction of a store-bought bath. The tricky parts are choosing glass that won't shatter when drilled or freeze-cracked, sealing joints so they're waterproof and non-toxic for birds, and stabilizing the whole thing so a gust of wind doesn't topple it.
How to Make a Bird Bath From Glass Vases

Marcus Henley
24 May 2026
Materials and tools you'll need
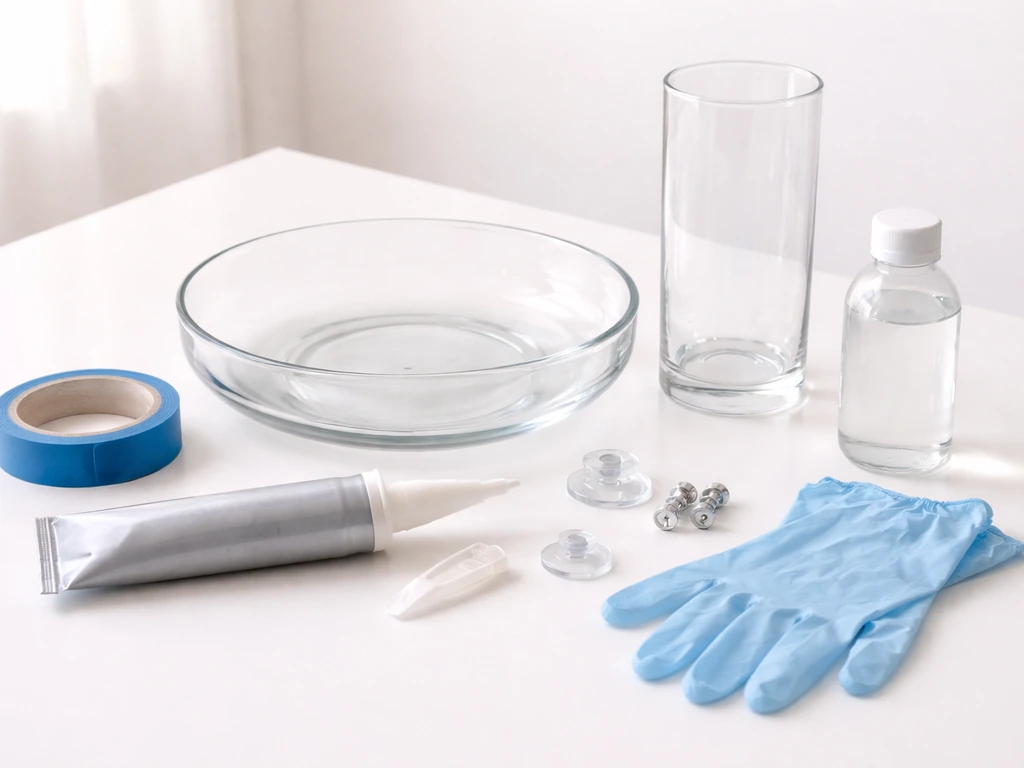
Keep your shopping list tight. You don't need much, but what you do need matters for safety and durability.
- One or two glass vases: one wide, shallow vase or glass dish for the basin (at least 10–12 inches across), and optionally one tall, sturdy vase to serve as the pedestal
- 100% silicone aquarium sealant (Aqueon, DAP aquarium-grade, or Stanley aquarium silicone): non-toxic, waterproof, and rated for permanent contact with water
- Variable-speed power drill with a diamond-tipped or carbide spear-point drill bit (only needed if you want a drainage hole)
- Diamond-coated hole saw for larger holes, plus a squeeze bottle or small cup for water as a coolant
- Painter's tape or masking tape to act as a drilling guide and prevent bit slip
- Waterproof construction adhesive or additional silicone for bonding vase to pedestal
- A flat, stable base: a large paving stone, heavy ceramic tile, or concrete stepping stone
- Rubbing alcohol and clean rags for surface prep before sealing
- Outdoor-rated epoxy putty (optional, for filling chips or minor cracks before assembly)
- Gravel or flat river stones to add to the basin for perching and adjusting depth
If you plan to skip drilling (which is often the easiest call), you just need the vases, sealant, a flat base, and some river stones. Drilling is only worth doing if you want water to drain slowly between refills rather than stagnating.
Picking the right vase and glass type
Not all glass is suitable for outdoor use, and this is probably the most important decision you'll make on this project. You want annealed glass, not tempered or safety glass. Tempered glass is designed to shatter into small cubes when it breaks, which means if you try to drill it or if it freezes and cracks, you get a pile of tiny glass shards around your bird bath. Annealed glass (regular glass) breaks in larger pieces and can actually be drilled safely with the right bit.
For the basin, look for a wide, shallow vase or a glass serving bowl with a diameter of at least 10–12 inches. Depth is critical: Cornell Lab of Ornithology recommends water no deeper than 1 inch at the edges, sloping to a maximum of 2 inches in the center. A vessel that's already shallow and gently sloped is ideal. If your vase is too deep, you'll need to fill the bottom with river stones or gravel to bring the water level into that safe 1–2 inch range.
For the pedestal, a tall cylindrical vase works beautifully when flipped upside down. Look for something heavy-walled, at least 10–12 inches tall, with a flat base (which becomes the top) that's wide enough to support your basin. Thick-walled glass is more wind-resistant and less prone to stress cracks. Avoid very thin decorative vases, especially for the pedestal.
| Glass type | Can you drill it? | Freeze-thaw risk | Best use |
|---|---|---|---|
| Annealed (regular) glass | Yes, with diamond bit | Moderate — bring in below freezing | Basin and pedestal |
| Tempered / safety glass | No — will shatter | High — shatters unpredictably | Avoid for this project |
| Borosilicate glass | Yes, with care | Lower than standard glass | Basin if you can find it |
| Recycled bottle glass | Yes, with care | Moderate | Pedestal accent only |
Thrift stores and estate sales are gold mines for this project. Look for wide glass bowls, large brandy snifters, hurricane vases, and heavy cylindrical flower vases. A brandy snifter with a wide mouth flipped right-side up makes an almost perfect shallow basin straight out of the thrift store.
Step-by-step build: putting it all together
This process works whether you're making a simple single-vase basin on a store-bought stand or building a full pedestal-style bath from stacked vases. I'll walk through the full pedestal version since it's the most satisfying build.
- Clean all glass surfaces thoroughly with rubbing alcohol and let them dry completely. Any oil, dust, or residue will prevent the silicone from bonding properly.
- Set your flat paving stone or concrete base in its final location before you assemble anything. Moving the finished bath risks tipping it.
- Flip your pedestal vase upside down so the base faces up. If the base is slightly rounded, use a small ring of silicone or a rubber furniture pad on the stone below to stabilize it.
- Apply a generous bead of 100% silicone aquarium sealant around the top rim of the pedestal vase (the upside-down base). This is the joint that will hold the basin.
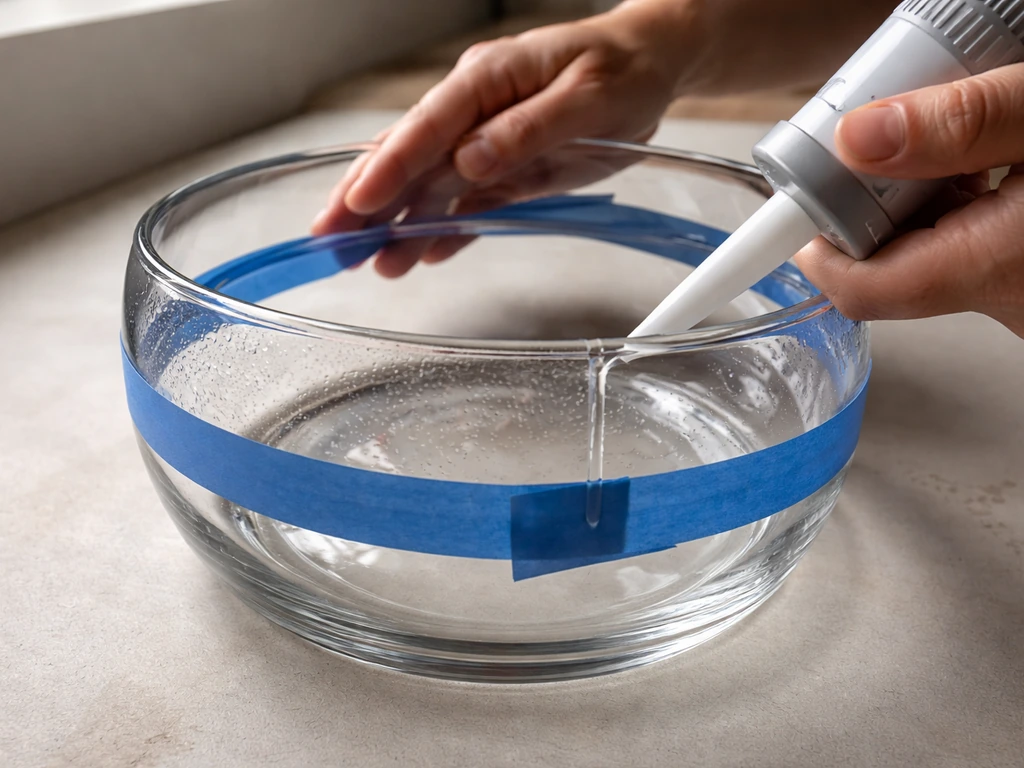
- Press your basin vase firmly down onto the sealant bead. Wipe away any squeeze-out with a damp cloth before it cures. Use painter's tape to hold the joint aligned while the sealant sets.
- Apply a second bead of silicone around the outside of the joint where basin meets pedestal for extra strength and a clean seal.
- Apply sealant around the bottom of the pedestal where it contacts the paving stone. This anchors the bath and prevents it from sliding.
- Let the sealant cure fully — at least 48 hours at room temperature before adding water. Some aquarium silicones need 72 hours in cooler weather.
- Once cured, add a layer of flat river stones or gravel to the basin bottom. This serves two purposes: it brings deep basins up to the safe 1–2 inch water depth, and it gives birds a textured surface to grip while bathing.
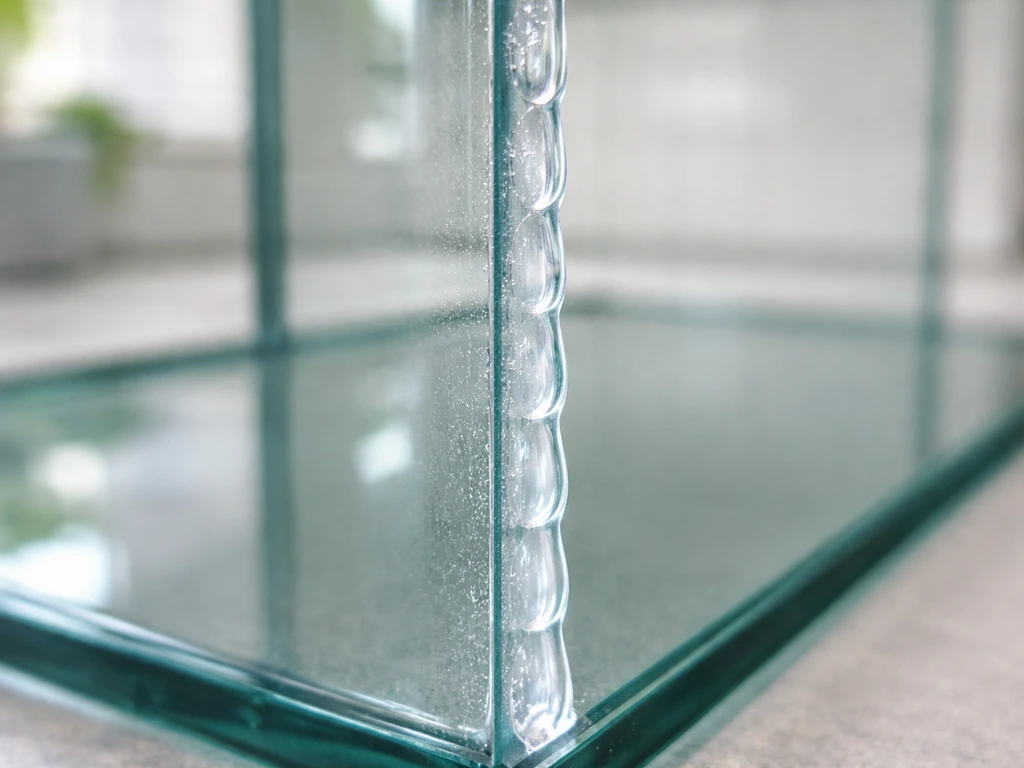
- Fill with fresh water to about 1–2 inches depth and check for any leaks at the joints. If you see seeping, dry the area, apply a small additional bead of silicone, and let it cure again before use.
Drilling a drainage hole (optional but useful)
A small drainage hole in the basin bottom lets you rinse and drain the bath without lifting it. To drill one, apply a strip of painter's tape over your mark (it prevents the bit from skating across the glass), use a diamond-tipped drill bit in a variable-speed drill set to low speed, and keep the bit constantly wet. Have a squeeze bottle of water handy and add water every few seconds. Use a slow, steady up-and-down pecking motion rather than constant pressure. If you see steam or smell burning, pause and add more water. Never attempt this on tempered glass.
Waterproofing, sealing, and keeping water safe for birds
The sealant you choose matters a lot here because birds will be drinking this water. The safest option is 100% silicone aquarium sealant, specifically the kind rated for aquarium manufacture and repair. Products like Aqueon Aquarium Sealant, DAP aquarium-grade silicone, and Stanley aquarium silicone are non-toxic, solvent-free, and designed for long-term contact with water that fish (and birds) will be in. Standard construction silicones and caulks often contain antifungal additives or other compounds you don't want birds ingesting.
Once the silicone is fully cured (and 100% silicone releases acetic acid as it cures, which is why it smells like vinegar), it becomes inert and safe. The key word is fully cured. Don't rush this. Fill the basin with water after 48–72 hours, let it sit for a few hours, then dump that first fill and refill fresh. That first rinse clears any residual cure byproducts.
Don't use spray paint, polyurethane varnish, or oil-based sealants on any surface that contacts water in the basin. Glass itself is naturally waterproof, so the only sealing you actually need is at the joints between pieces. The glass surfaces themselves need no coating at all.
Stand, placement, and keeping it from tipping
Stability is the biggest structural challenge with a glass vase bird bath. Glass is heavy but top-heavy, and an inverted-vase pedestal can tip in wind or when a larger bird lands awkwardly. A few things that genuinely help: place the bath on a level, solid surface (a concrete paving stone is ideal), silicone the base to the stone as described above, and choose a sheltered spot that doesn't get the worst of the wind.
Placement for birds is its own consideration. About 10 feet from dense shrubs or cover is a good target: close enough that birds feel safe and can dart to cover quickly, far enough that cats can't ambush them from the brush. Full sun is fine for visibility but speeds up algae growth. Partial shade is a good compromise. If you have a deck or patio, a corner position with a wall or railing on two sides dramatically reduces wind exposure and tipping risk.
If you're not using the pedestal vase approach, other stable stand options include setting the basin vase directly into a shallow sandbox-style container filled with sand (which grips and levels the vase base), using a wrought-iron plant stand with a ring top sized to cradle the vase, or placing the basin on top of a stack of flat paving stones mortared together. The mortared-stone pedestal is actually my favorite alternative because it's indestructible and gives the bath a naturalistic look. Similar DIY logic applies to lamp-base and stump pedestals, which are other creative routes if you have those materials on hand. Similar DIY logic applies to lamp-base and stump pedestals, and for ideas like a stump bird bath, you can also see how to make a tree stump bird bath for a related approach. You can also turn your completed bird bath into a planter by swapping in soil and choosing plants that handle wet and sunny conditions how to make a planter out of a bird bath.
Keeping it clean, algae-free, and mosquito-free through the seasons
Regular cleaning routine
Glass is actually one of the easier materials to clean because algae and biofilm don't penetrate it the way they do concrete or unglazed ceramic. A stiff-bristled brush (not metal), a splash of white vinegar, and a good scrub every 3–5 days in warm weather is all you need. Rinse thoroughly before refilling. Avoid soap, residue can harm birds. If algae is persistent, a diluted bleach solution (one part bleach to nine parts water) works well as a periodic deep clean, but rinse extremely thoroughly afterward and let the basin air for a few hours before refilling.
Controlling mosquitoes
Mosquitoes need still, standing water to breed, and they can complete their larval cycle in as little as 7–10 days. The simplest prevention is changing the water every 2–3 days, which breaks the breeding cycle before larvae can develop. If you want extra protection, Bti (Bacillus thuringiensis israelensis) mosquito dunks or bits are your best friend. The EPA has approved Bti for use in residential water features including bird baths, and it's specifically toxic to mosquito larvae while being completely safe for birds, other wildlife, and humans. Break a small piece of a dunk and drop it in the basin. You can also add a small solar-powered water wiggler or dripper, since moving water both deters mosquitoes and attracts more birds.
Handling freezing temperatures
This is where glass vase bird baths need the most attention. Glass, concrete, and stone are all more susceptible to freeze-thaw cracking than plastic or metal. Water expands as it freezes, and if it's sitting in your glass basin overnight in a hard freeze, it can crack the glass from the inside. The fix is simple but requires discipline: bring the basin inside when overnight temperatures are going to drop below freezing, or at minimum empty it completely so there's no water to expand. Don't leave even a thin layer of water in it during a freeze.
If you're in a climate with mild winters and only occasional frost, floating a rubber ball in the basin can help: it absorbs some of the expansion pressure and keeps a small area of water from fully freezing. A fitted insulating cover reduces heat loss and can buy you a few extra degrees. But in genuinely cold climates (Zone 6 and colder), the honest advice is to bring the glass bath indoors from November through March and set out a heated plastic or metal bath for winter birds instead. The glass bath is a three-season feature in those regions, and there's no shame in that. Treating it as seasonal is far better than watching a beautiful vase split in a January freeze.
Quick seasonal maintenance checklist
| Season | Key task | Notes |
|---|---|---|
| Spring | Deep clean and inspect sealant joints | Re-seal any cracked silicone before filling for the season |
| Summer | Clean every 3–5 days, refill every 2–3 days | Use Bti dunks if mosquitoes are a problem; add a dripper to attract more birds |
| Fall | Inspect glass for stress cracks before temperatures drop | Small chips can become full cracks in a freeze — repair or retire cracked pieces |
| Winter | Empty and store the glass basin in mild freezes; bring indoors in hard freeze climates | Consider a heated metal or plastic bath as a winter substitute |
A few final tips before you start
If this is your first DIY bird bath, the glass vase approach is genuinely one of the most satisfying builds because the results look intentional and elegant, not like a craft project. If you want the full DIY, learn how to make a bird bath from wood and other natural materials with safe, bird-friendly finishing steps. If you want a simpler project, you can also repurpose an existing bird bath by adjusting the basin for safe depth and refreshing the sealant where needed glass vase approach. The version made from stacked dishes follows similar logic and is worth exploring if you have a collection of mismatched plates and bowls. The lamp-base approach is another close cousin if you find a heavy lamp base at a thrift store and want an even sturdier pedestal than a vase provides.
Start simple: one wide basin vase on a sturdy iron plant stand, siliconed in place on a flat stone. Get comfortable with the cleaning routine and see how the birds respond before you invest time in a more complex stacked build. Once you've got birds coming regularly, you'll know exactly what's working and what to improve next season.
FAQ
Can I use tempered glass vases or glass bowls if I only glue them, not drill them?
It’s still not recommended. Tempered glass can fail unexpectedly, and if it ever cracks (including from freeze-thaw stress), it breaks into small, unsafe shards. If you’re unsure what type of glass you have, look for maker markings, and when in doubt, choose annealed glass so any failure stays in larger pieces.
How do I tell what glass type I have before I start drilling or sealing?
Annealed glass is generally drillable and breaks in larger fragments. Tempered glass often has “TEMPERED” or similar markings on the bottom, or it may show heat-treatment patterns. A safer approach is to avoid drilling until you confirm, and to test only a discreet area if markings are unclear (preferably on a non-essential piece first).
What silicone should I use if I cannot find “aquarium-grade” 100% silicone?
Look for 100% silicone that is explicitly solvent-free and labeled safe for prolonged contact with water (and ideally food contact or aquarium use). Avoid all labeled “mold resistant,” “anti-fungal,” or mixed-gas caulks. If the product mentions additives for curing odors or biocides, skip it for bird-bathing surfaces.
Do I need to seal the entire glass surface, or only the joints?
Only the joints between pieces need sealing. Coatings on the basin surface can peel, create residue in the water, or trap grime, which is harder to clean and can affect bird safety. Keep the glass contact area uncoated and let the joint bead be continuous and fully cured.
How can I confirm the silicone is fully cured and safe before putting birds near it?
Do a staged test: after your main cure window, fill with plain water and let it sit for a few hours, then dump and refill fresh. If there is still a strong vinegar smell or any tackiness after that, wait longer. Silicone is safe only when it’s fully cured, not just “mostly set.”
Will the first birds drink it if the cure is done but it smells slightly?
It’s better to wait. A lingering vinegar odor typically means curing is not complete. The safest rule is to complete the 48–72 hour cure, then do the first fill and dump rinse cycle before allowing birds to use the bath.
What should I do if my bird bath keeps wobbling or tipping after I mount it?
Re-check the base for level and weight distribution, then add anchoring where possible. Siliconing the pedestal base to a flat, solid surface helps, but use a wider base area if the pedestal sits on a small footprint. Also choose a sheltered placement (corner near a wall or railing) to reduce wind and landing torque.
Can I make a drain hole even if I don’t want water to fully soak and stagnate?
Yes, but only if you’re drilling annealed glass. Use low-speed drilling with a diamond bit and keep the area constantly wet, then fully deburr and test drainage using a bucket before introducing birds. If you do not drain, you’ll need a tighter water-change routine to reduce algae and mosquito risk.
How often should I change the water, and what if I’m away on vacation?
For active mosquito prevention, change water every 2–3 days, and replace sooner during warm, still weather. If you’ll be gone longer, consider adding Bti mosquito bits (larvae control) and switch to a slightly more shaded spot to slow algae. A small dripper or water wiggler also helps keep water moving.
Is vinegar safe for cleaning, and can I use more than a quick scrub?
Vinegar is safe for routine algae-buildup cleaning when used as a light solution and followed by thorough rinsing. For heavy buildup, use vinegar first, then move to a bleach deep clean only occasionally. After any bleach treatment, rinse extremely well and let the basin air out before refilling.
Can I use soap to get rid of stubborn residue on the glass?
Avoid soap. Residue can remain even after rinsing and may irritate or harm birds. Use only brush scrubbing, vinegar, or a diluted bleach deep clean, then rinse until there’s no slick film and refill only after the basin has dried briefly.
Will a glass bird bath freeze in winter, and will it always crack?
It doesn’t always crack, but freeze-thaw stress is common in glass, concrete, and stone. If overnight temperatures are below freezing, either bring the bath inside or empty it completely, no leftover thin film. In milder climates, a floating rubber ball and insulating cover can reduce stress, but they are not a substitute for emptying in hard freezes.
Can I leave it outside year-round if I’m in a mild winter area?
You may be able to, but you still need a plan for cold snaps. If you get occasional freezes, empty it before those nights and consider a cover or a rubber ball to buffer expansion. In consistently cold regions, treat it as a seasonal feature and switch to a heated plastic or metal bath during winter.
How shallow should the water be if I’m using a deeper vase that I can’t replace?
Target the water depth guideline at the edges, around 1 inch or less, rising to about 2 inches at the center. If your basin is naturally deeper, use river stones or gravel to displace volume so the final water level stays in range. Re-check after birds add splashing water and after you rinse.
What’s the safest way to position the bath near shrubs for bird safety without attracting cats?
Aim for about 10 feet from dense cover so birds can escape quickly, but make sure there isn’t an easy cat line of travel. In practice, corners near a wall or railing reduce wind and also limit approach angles. If you see predation attempts, shift the location further from open walkways and closer to dense cover.
Can I use this glass vase design as a planter, and will it be safe for birds afterward?
Yes, but only if you fully clean and discontinue bird use during the planter phase, since soil changes the biofilm and can introduce fertilizers or pesticides. Before switching back to a bird bath, remove all soil, rinse thoroughly, and inspect silicone seams for integrity. Do not use any plant products that could wash into water when birds return.