You can build a solid, bird-safe wooden bird bath in a weekend using basic tools, untreated lumber or reclaimed wood, and an epoxy or pond-coating sealer. The key is keeping the basin shallow (1 to 1.5 inches deep for most birds), sealing every surface with a non-toxic waterproof coating, and mounting it at the right height so birds feel safe using it. Here's exactly how to do it from start to finish. If you want an easier upgrade, you can also reuse an old lamp to create a unique bird bath style for your yard old lamp bird bath.
How to Make a Bird Bath From Wood: DIY Guide

Marcus Henley
2 Jul 2026

Choosing the right wood and recycled materials
Wood choice is the single most important decision you'll make, and one rule applies without exception: never use pressure-treated or chemically preserved lumber near a bird bath. Older pressure-treated wood contains chromium and arsenic compounds, and creosote-treated railroad ties can leach creosote and arsenic into the water and surrounding soil. The US EPA regulates wood-preserving area sources for pollutants associated with preservative-treated wood processes, including chromium and arsenic pressure-treated wood contains chromium and arsenic compounds. Both are toxic to birds and wildlife with prolonged contact. Avoid anything that was treated, painted, stained, or has an unknown history.
For a new build, your best options are naturally rot-resistant woods that don't need chemical treatment. Cedar and redwood are the top picks because they resist moisture and decay without any additives. Black locust and teak also hold up well outdoors. If you're on a budget, construction-grade pine or Douglas fir will work fine once properly sealed, though they need more thorough coating to last multiple seasons.
Reclaimed and recycled wood is a great option as long as you know what you're working with. Old fence boards, barn siding, pallet wood from food-grade pallets (look for the HT stamp, meaning heat-treated, not chemically treated), and salvaged hardwood flooring all make excellent material. The rustic look is a bonus. If you find a thick slice from a fallen tree, that's even better. A hollowed log or carved stump is a classic approach, similar in spirit to making a tree stump bird bath. Just sand cut edges smooth and inspect for old paint or finishes before committing.
Tools and materials checklist
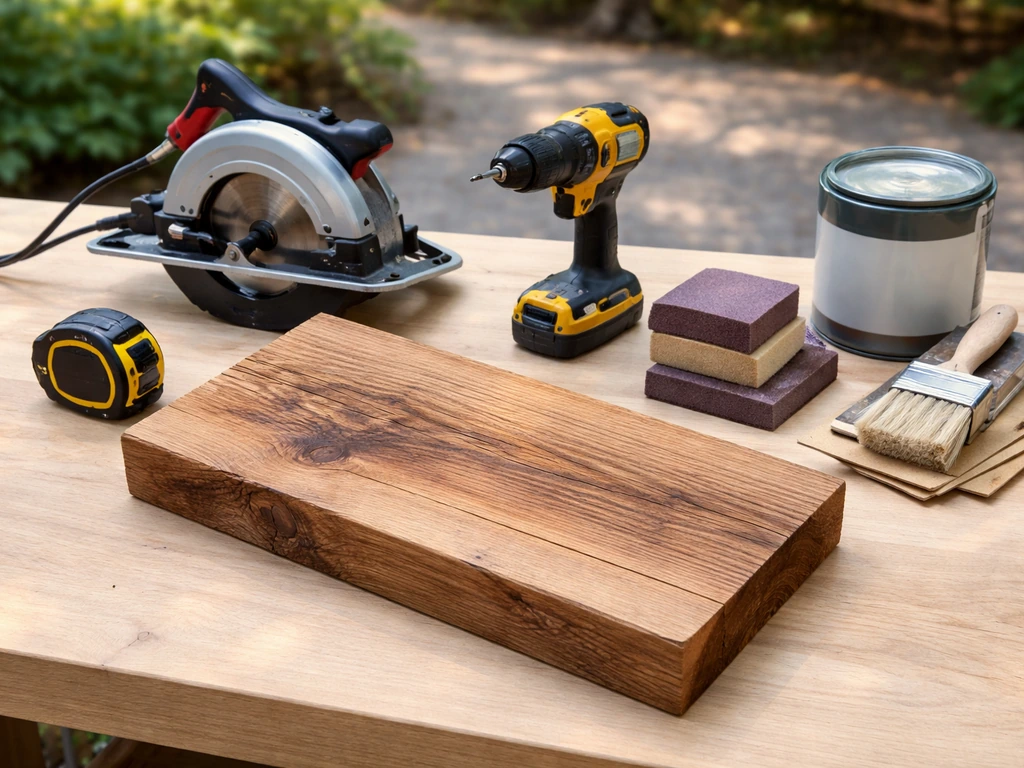
You don't need a fully equipped workshop. If you want a cheaper, faster DIY option, you can also learn how to make a bird bath out of plastic bottles. Most of this can be done with a circular saw, a drill, and basic hand tools. Here's what to gather before you start:
- Untreated cedar, redwood, or reclaimed HT-stamped wood (boards or a thick slab)
- Tape measure, pencil, and straightedge
- Circular saw or jigsaw (or a handsaw for thin stock)
- Drill with bits and countersink bit
- Exterior-rated wood screws (stainless steel or galvanized, 1.5 to 2.5 inches)
- Sandpaper (80 and 120 grit)
- Waterproof wood glue (exterior PVA or polyurethane)
- Two-part epoxy pond coating (Pond Shield or similar) or an AQUA PROOF-type water feature coating
- Paintbrush or foam roller for applying sealer
- Post (4x4 cedar or pressure-treated post is fine for the support, since it won't contact water) and post anchor or concrete mix for setting it
- Level and safety glasses
- Optional: router for chamfering basin edges, or coarse rasp for shaping
For a wall-mounted or hanging version, swap the post for a sturdy bracket and hardware rated for outdoor use. If you're going stump-style, a chisel and mallet replace a lot of the sawing work.
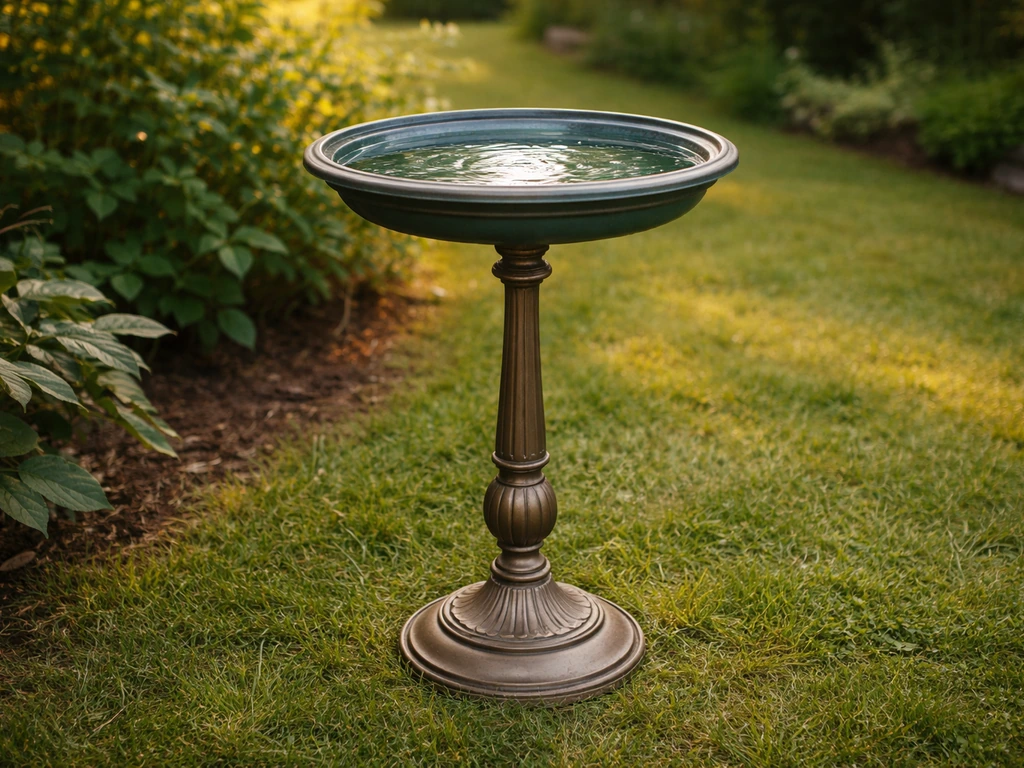
Design options and safe dimensions for birds
The three most practical designs for a DIY wood bird bath are a pedestal-mounted basin, a deck-mounted shallow tray, and a carved log or stump bowl. All three work well. Your choice mostly depends on what materials you have and where you plan to place it.
Whatever design you choose, the dimensions have to be right or birds won't use it. The basin needs to be wide, shallow, and gently sloped. If you want a more budget-friendly build, you can also learn how to make bird baths from dishes using everyday items and the right sealing methods. Audubon recommends keeping water depth between 1 and 1.5 inches for most songbirds, and the RSPB advises a maximum depth of around 4 inches only at the very center with sloping sides that birds can wade into gradually. Think beach, not swimming pool. A basin that's at least 12 inches across works, but going wider (18 to 24 inches or more) attracts more birds at once. If your basin turns out deeper than 2 inches, add a flat stone or two to the bottom to bring the water level up and give birds a foothold. Ohio DNR/Ohio Division of Wildlife guidance also recommends keeping backyard bird bath water depth around 1.5 to 2 inches and using flat rocks to raise the water level if the container is deeper.
| Design | Best for | Difficulty | Material needed |
|---|---|---|---|
| Pedestal basin (built box on post) | Most backyards, all bird sizes | Moderate | 2–3 boards, post, screws, sealer |
| Deck-mounted tray | Small spaces, balconies | Easy | 1 wide board or plywood, mounting hardware, sealer |
| Carved log or stump bowl | Rustic look, natural setting | Moderate to hard | Log or stump, chisel or router, sealer |
| Hanging wooden tray | Areas without ground space | Easy | 1 board, rope or chain, eye hooks, sealer |
Step-by-step build: making the wooden basin and support
These steps cover the most versatile option: a flat-bottomed square or rectangular basin on a post. If you want a stump version, you can carve and seal the top to form a shallow basin, then waterproof it with wildlife-safe pond epoxy before adding water how to make a tree stump bird bath. Adjust as needed for your chosen design.
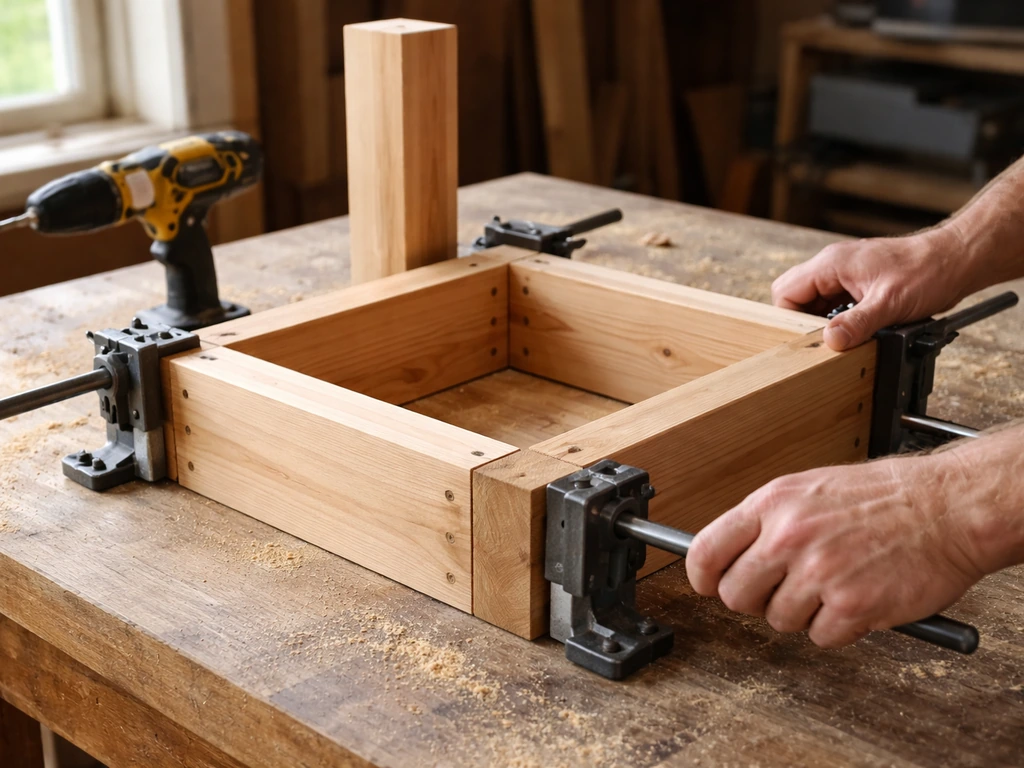
- Cut your basin bottom: Cut one piece of 1.5-inch-thick cedar (1x8 or 2x8 stock) to roughly 16 by 16 inches. Sand both faces smooth, starting with 80 grit and finishing with 120 grit. Round or chamfer the top edges slightly so they're comfortable for birds to perch on.
- Cut and attach the sides: Rip four side pieces about 2 inches tall. Angle the inside face of each piece at 10 to 15 degrees outward so the basin interior slopes gently (this helps birds wade in gradually). Glue and screw the sides to the basin bottom from underneath using countersunk screws so no screw heads are exposed inside the water zone.
- Check depth and slope: Fill the assembled basin with water temporarily to confirm depth. At the center it should be no more than 1.5 to 2 inches. Add a router chamfer or hand-sand the interior walls smooth. If you want a deeper center for larger birds, keep it under 4 inches and plan on placing a flat stone inside.
- Build or prepare the support: A 4x4 cedar post cut to your target height works well. Drill a centered hole or cut a notch in the top of the post to seat the basin bottom so it can't shift. Alternatively, cut a crosspiece from two 2x4s in an X shape and screw it to the post top, then fasten the basin bottom to that.
- Attach the basin to the post: Predrill and drive two or three stainless steel screws up through the post top or crosspiece into the basin bottom. Don't overtighten. Add a drop of exterior wood glue at the joint for extra stability.
- For a stump or log style: Use a chisel, mallet, and router (or angle grinder with a carving disc) to hollow out a bowl shape in the top of the log. Work slowly and check depth as you go. Keep the walls at least 1.5 inches thick so they don't crack after sealing.
- Sand everything: Give the whole assembled unit a final sand with 120 grit, paying extra attention to the interior of the basin. Any rough spots or splinters will hold algae and make waterproofing less effective.
Sealing, waterproofing, and finishing for bird safety
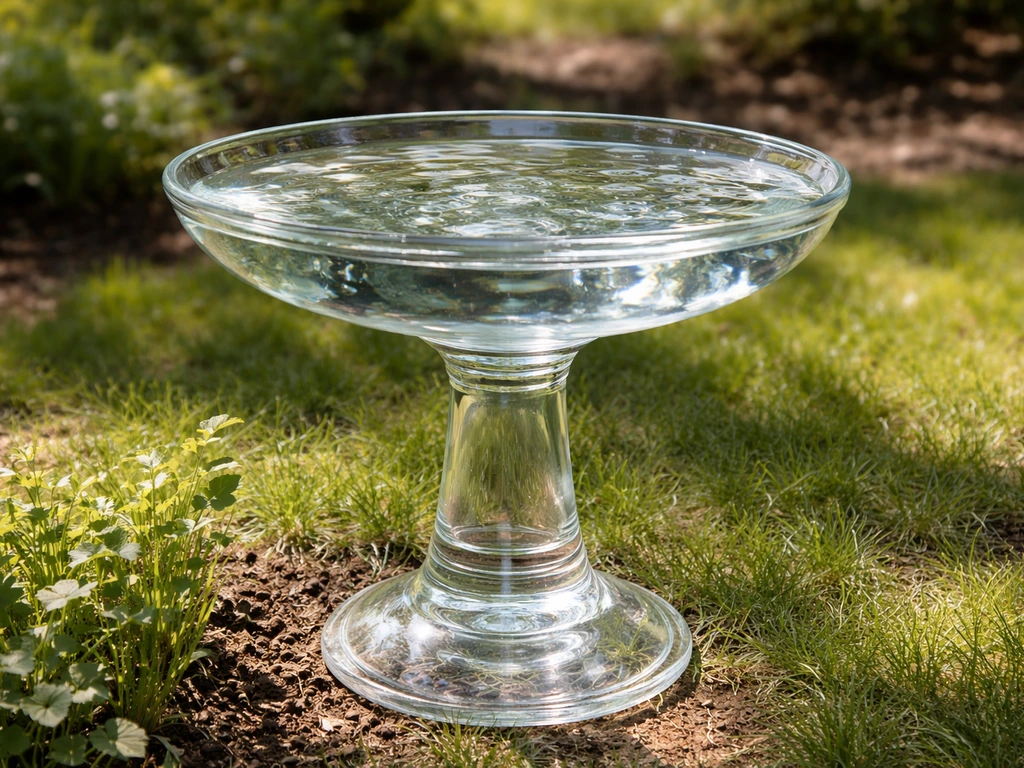
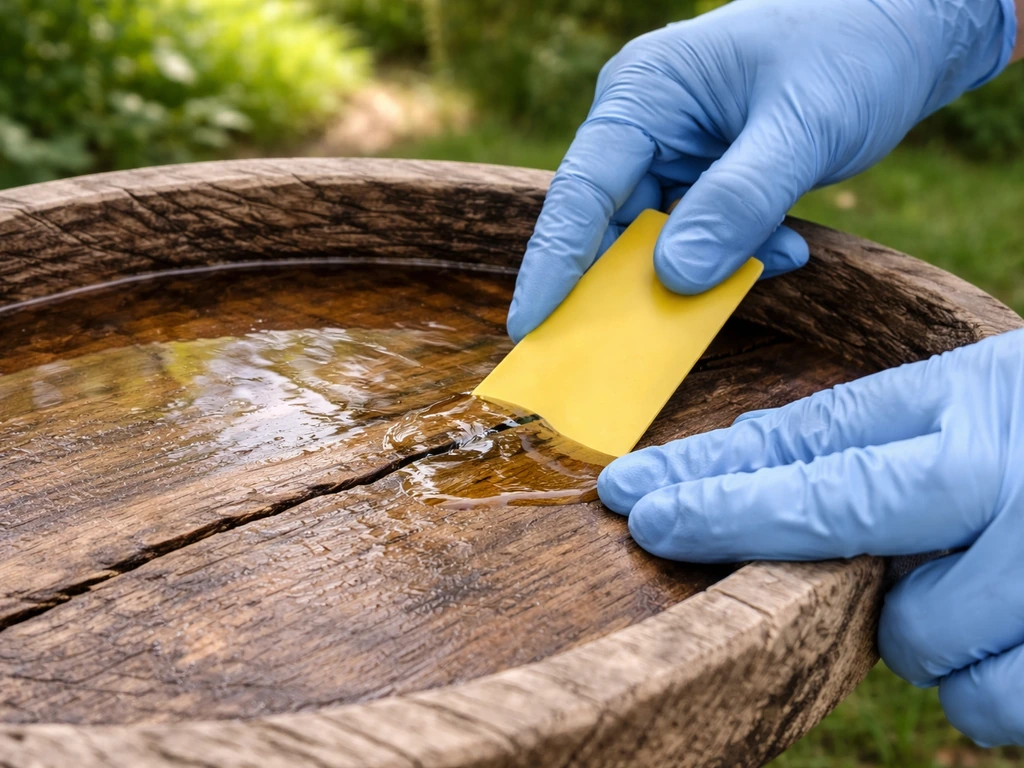
Sealing is where a lot of DIY bird baths fail. Wood and water don't coexist without a barrier, and that barrier has to be completely non-toxic once cured. If you're thinking of a different material, like how to make a bird bath from glass vases, you still need a non-toxic waterproof barrier wherever birds will drink or splash wood and water don't coexist without a barrier. Your two best options are a two-part epoxy pond coating (like Pond Shield) or an AQUA PROOF-type water feature coating. Both are marketed for ponds and water features, bond directly to wood, and are safe for wildlife once fully cured. Marine epoxy (like Loctite Marine Epoxy) also works and is especially good for filling cracks or sealing carved stump edges before the main coat goes on.
Here's how to seal properly: Start by making sure the wood is completely dry. Apply a thin first coat of your chosen epoxy or pond coating to the entire interior basin surface and at least 2 inches down the outside walls. Let it cure fully according to the manufacturer's instructions, which usually means 24 to 48 hours at room temperature. Then apply a second coat. Two coats are the minimum. Three is better for soft woods like pine. Pay special attention to corners, joints, and any spots where two pieces of wood meet, as those are where water finds its way in first.
A few things to avoid: polyurethane varnish and standard exterior wood stains are not safe for standing water that birds drink from. Oil-based deck sealers are also off the list. Linseed oil will go rancid in standing water. Stick to products specifically designed for ponds or water features, and always let the coating cure completely before filling the basin. If there's any solvent smell remaining, give it another 24 hours before use.
Once the sealant is cured, you can add a layer of fine gravel or a flat stone to the basin bottom. This gives birds better footing, looks more natural, and helps break up algae growth. Rinse any gravel thoroughly before placing it.
Placement, installation, and height for different birds
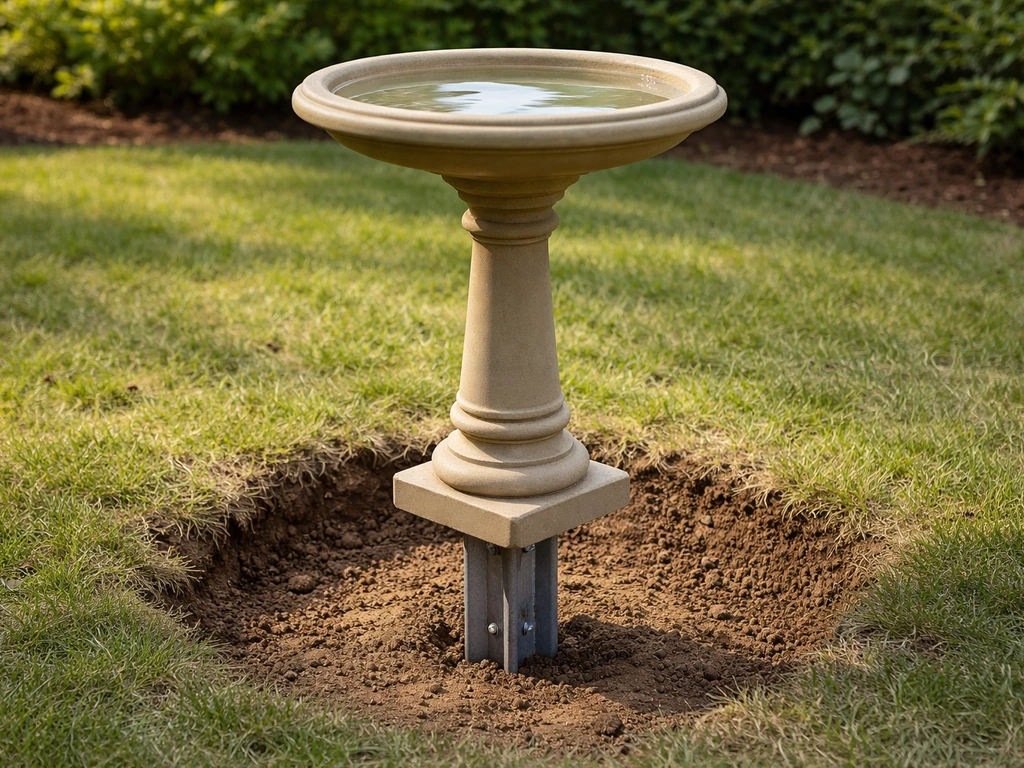
Height and location matter as much as the build itself. The standard recommendation is to place a pedestal bird bath so the water surface sits 24 to 36 inches off the ground. That's comfortable for most songbirds and puts the bath low enough that birds can approach from nearby shrubs while still high enough to give them a view of approaching predators. Ground-level baths work well for robins and thrushes that naturally drink from puddles, but they need extra open space around them so cats can't sneak up undetected.
For the post installation, either set the post in a post anchor driven into the ground (easy to reposition later) or dig a hole 18 to 24 inches deep, set the post, and pack it with concrete. The concrete option is more stable but makes seasonal removal harder if you live somewhere that freezes hard in winter.
Choose a spot that gets morning sun and afternoon shade if you can manage it. Full sun all day encourages rapid algae growth and warms the water quickly, which birds find less appealing in summer. Full shade keeps the water cooler but makes the bath harder for birds to spot. Aim for a balance. Avoid placing the bath directly under dense shrubs or low-hanging branches where cats or other predators can crouch and ambush bathing birds. A distance of about 10 feet from shrubby cover is a good buffer, with a clear perching branch a few feet away so birds can preen after bathing.
If you're building a deck-mounted or hanging version, apply the same logic: full morning light, afternoon shade where possible, and a clear sightline from the water surface to nearby escape routes. A nearby fence post or small tree gives birds a landing and preening spot they'll use every time.
Maintenance and troubleshooting
Regular cleaning routine
Plan on cleaning the basin every week during warm months, more often in hot weather. Empty the water, scrub the interior with a stiff brush to loosen algae and debris, rinse well, and refill with fresh water. For a deeper sanitizing clean every few weeks, use a diluted bleach solution (roughly 1 part bleach to 9 parts water), scrub, and then rinse the basin extremely thoroughly before refilling. Bleach residue is harmful to birds, so multiple rinses are not optional. Let the basin dry and air out for a few minutes after the final rinse if you can.
Dealing with algae and green slime
Algae in a wooden bath is mostly a placement and frequency-of-cleaning problem. Moving the bath to a shadier spot and cleaning more often handles most cases. Adding a small solar-powered water wiggler or dripper keeps the water moving, which discourages algae dramatically. Copper accessories (like a small copper penny or a purpose-made copper coil) release trace copper ions that slow algae growth without harming birds at low concentrations. Avoid algaecide products unless they're specifically labeled safe for wildlife water features.
Preventing mosquitoes
Mosquitoes need still water to breed, and they can complete a larval cycle in as little as a week. The simplest fix is to change the water every two to three days during summer so larvae never mature. A small solar dripper or fountain attachment does the same job passively by keeping water moving. If you have a larger basin that you can't change as often, Bti dunks (Bacillus thuringiensis israelensis) are a biological larvicide that kills mosquito larvae and is completely safe for birds, mammals, and other wildlife.
Handling freezing temperatures
Freeze-thaw cycles are hard on wooden bird baths, even sealed ones. Water expands when it freezes, and if it's trapped in any micro-cracks in the sealant, it will open those cracks wider each winter. The best approach is to either bring the basin indoors during hard freezes or add a small submersible birdbath heater to keep water just above freezing (these draw very little power and are purpose-made for this). If you leave the bath outside without a heater, empty it before temperatures drop below freezing to protect the sealant. Inspect the coating each spring before refilling and touch up any spots where it has lifted or cracked.
Repairing a wooden bird bath
Cracks in the wood or sealant are a normal part of ownership after a few seasons. For small cracks, dry the surface completely, apply marine epoxy or pond coating into the crack, smooth it, and let it cure fully before refilling. For a cracked or delaminating basin bottom, you may need to empty and dry the bath, sand the interior back to bare wood, and reapply a full two-coat treatment of your pond epoxy. This takes a weekend but will add years to the life of the bath. If a joint between the side boards and basin bottom has opened up, inject waterproof wood glue, clamp it, and seal over the joint once the glue cures.
A well-built and properly sealed wooden bird bath can last five to ten years or more with basic annual maintenance. The sealing and cleaning steps are what separate a bath that holds up from one that rots after a single season. Get those right and you'll have a feature birds return to year after year. If you are wondering what to do with an aging or cracked bath, broken bird bath ideas like rebuilding the basin or replacing only the damaged section can keep your setup bird-safe.
FAQ
Can I use reclaimed wood if I cannot identify the old finish?
If you use reclaimed wood, test it first for any lingering finishes or treatments. Sand a small, hidden area down to bare wood, wipe with a damp cloth, and check for sticky residue or strong odor. If the surface gums up or still smells chemical, do not use that board, because sealing will not reliably block contaminants that are still present in the pores.
What sealant should I avoid even if it says it is exterior-rated?
No. Sealants that are only water-resistant, like outdoor varnish, stain, or many deck products, can soften or break down where birds splash and drink. Even if they are “weatherproof,” choose a product designed for pond or water-feature use, and verify it is explicitly safe for wildlife after it cures.
How do I add a fountain or water wiggler without scaring birds?
Plenty of birds prefer moving water, but you should not make it so fast that they cannot wade. A dripper or wiggler should create ripples and slow flow, not a stream. Start with the lowest setting and watch for birds that hesitate or avoid the bath, then adjust until they regularly approach and dip.
My sealed wooden bath has a cloudy film, what does that mean and what should I do?
If you are seeing white residue, dull film, or a slick layer, it is often incomplete curing, trapped moisture, or minerals from your water. Empty, let the basin dry fully, then scrub and rinse repeatedly until the surface feels clean and non-slippery, before refilling. For future builds, apply the full number of coats and confirm there is no lingering odor before adding water.
When is the safest time to add water and gravel after sealing?
Let the bath air out until fully cured, then fill and run your first rinse cycle (fill, splash, empty) at least once if you used epoxy recently. Avoid immediately placing gravel on the bottom if the seal is not fully cured, because you might trap uncured material under the stones where it cannot dry.
Will a bird bath heater prevent all freeze-thaw cracking?
A heater can help, but you still must manage the basin geometry. If the basin is very shallow with a nearly flat bottom, ice can still lift or crack the seal at the edges. Keep the seal thickness generous in corners, and inspect the seam lines in spring, because those are the first spots to show freeze-thaw stress.
Can I repair a small leak without redoing the whole basin?
If only a small area has opened up, you can spot-repair, but only after thorough drying and cleaning. Sand back to sound, bare wood at the damaged spot, then apply pond epoxy into the crack and feather the edges. If water keeps creeping from the same joint, it usually means the surrounding coating bond failed and you may need to recoat that entire interior surface.
How deep should the bath be in real life if my basin shape is uneven?
Use the minimum water depth that still stays comfortable for birds to stand and sip. Overfilling can also create deeper water pockets where birds cannot reach the bottom with their feet, which can reduce use. If your water level commonly exceeds your target depth, reduce the basin fill level or adjust by adding flat stones to raise the bottom.
Are deck-mounted wooden bird baths safe for the deck, and what extra issues should I watch for?
Yes, but only under the same wildlife-safety rules and with stable drainage. If you mount wood on a deck, keep the underside protected from standing water and ensure the mount does not trap runoff against the structure. Also, never place the bath where wind-blown debris collects, because more debris means more scrubbing and quicker biofilm buildup on the surface.
What should I change if algae keeps coming back even after weekly cleaning?
If you get persistent algae despite shade and weekly cleaning, consider reducing how much nutrient material enters the basin. Rinse surrounding gravel, keep leaves and pollen from falling in (a simple placement away from overhanging plants helps), and avoid overusing bleach since it can leave residue that supports regrowth. A small dripper or wiggler plus a slightly more shaded location usually outperforms chemical products.