
The fastest way to make a bubbling bird bath is to drop a small submersible pump (30–160 GPH, 5–15 watts) into any shallow basin, run the cord to a GFCI-protected outdoor outlet, and let the gentle surface movement do the work. That single upgrade can double the number of species visiting your yard because birds detect moving water by sight and sound from a surprising distance. If you want something more hands-off, a solar panel and battery kit can keep the water moving all day without any wiring. Below I walk through every practical option, from a ten-minute plug-in bubbler to a full recirculating solar setup, with real parts, real measurements, and the safety notes that actually matter.
How to Make a Bubbling Bird Bath: DIY Pumps, Placement, Care

Marcus Henley
22 Jul 2026
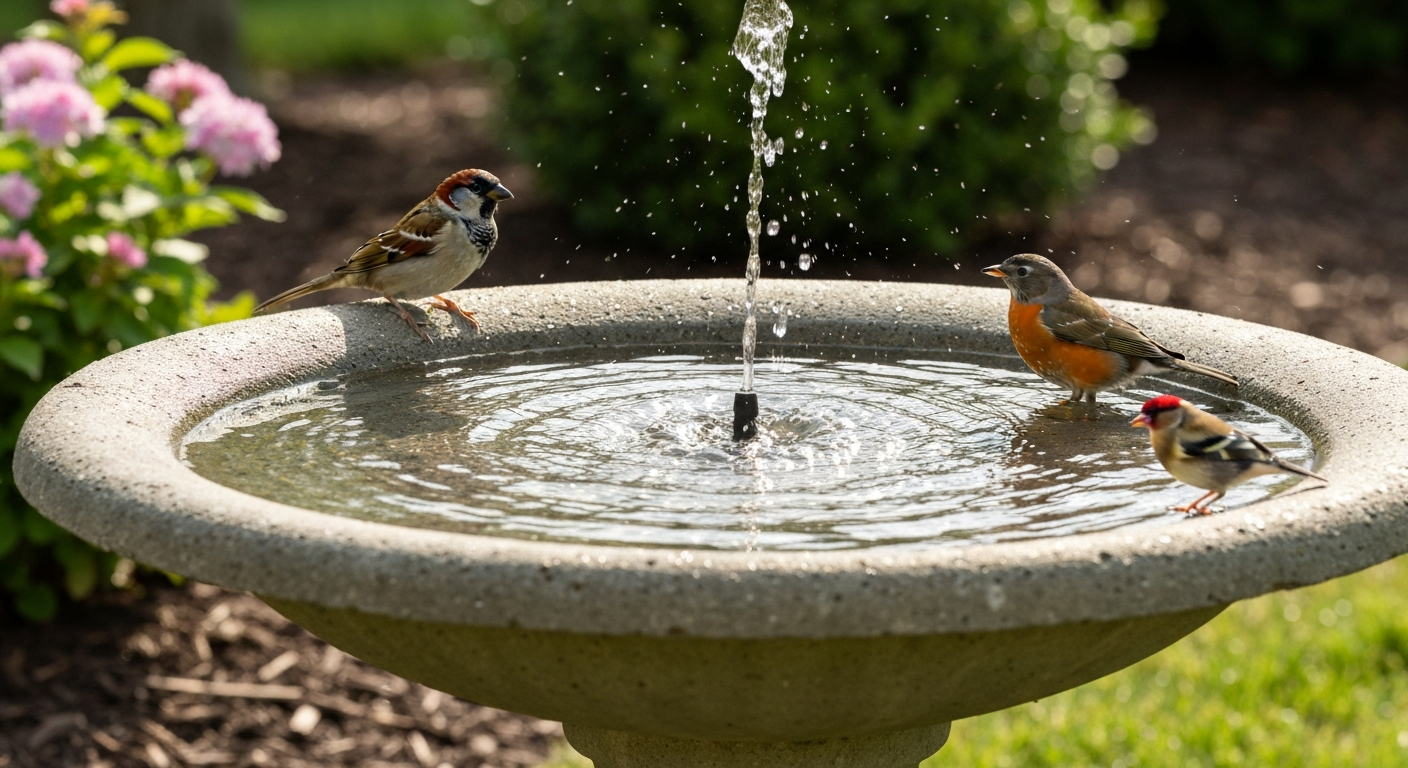
Why bubbling water pulls in more birds (and keeps them safe)
Birds rely on hearing and sight to locate water, and a still surface gives them almost nothing to work with. A gentle ripple or drip creates a glint of reflected light and an audible trickle that carries well across a backyard. Hummingbirds in particular strongly prefer moving water: a dripper or mister triggers their bathing instinct far more reliably than a flat pool. Larger birds like crows and jays also investigate splashing sounds, and sparrows and warblers that might otherwise skip a standard bath will land confidently when water is in motion.
There is a safety dimension here too. Moving water resists mosquito breeding far more effectively than still water. Mosquito larvae need roughly 7–10 days of undisturbed surface to complete their early life cycle, and a pump disrupts that cycle continuously. If your pump ever sits idle for a day or two, an EPA-registered Bti product (sold as mosquito dunks or bits) is safe to use in a bird bath at label rates: it targets only mosquito and certain fly larvae and has no toxicity to birds, mammals, or beneficial insects. Standing water in a dirty bath is also a disease vector. Contaminated baths can spread avian pathogens including Mycoplasma conjunctivitis and salmonellosis, so routine cleaning is as important as the water movement itself.
Choosing the right bird bath for a bubbling setup
Depth and shape come first
The Cornell Lab of Ornithology recommends edges about 1 inch (2.5 cm) deep sloping gradually to a maximum of 2 inches (5 cm) in the center. Recommended birdbath depths and shape: shallow with a gentle slope, edges about 1 inch (2.5 cm) deep, sloping to a maximum of about 2 inches (5 cm) in the middle; ground-level placement and gentle surface movement increase use by diverse songbirds and hummingbirds (Attract Birds With Birdbaths, All About Birds (Cornell Lab of Ornithology)) Attract Birds With Birdbaths — All About Birds (Cornell Lab of Ornithology). Most birds will not enter deeper water and will abandon a bath that feels unsafe. A gentle interior slope lets small birds stand at the rim and larger birds wade toward the middle. If you already own a deeper container, add a flat rock or submerged ceramic plate to create a shallow wading shelf.
Material options and what to watch for
Concrete and unglazed stone are my go-to choices. They are heavy enough to stay put with a pump running, their rough texture gives birds grip, and when properly sealed with a cured, low-VOC concrete sealer they are inert to water. Ceramic and glazed pottery are attractive but carry a real risk: studies and FDA regulatory reviews have documented lead and cadmium leaching from some decorative glazes, particularly older or uncertified pieces. If you are using a glazed bath you are not certain about, switch to a concrete or resin model. Avoid any basin with metal trim unless you can verify it is stainless steel or powder-coated aluminum, because zinc and lead toxicoses in birds are well documented in veterinary literature.
| Material | Pros | Cons | Best for |
|---|---|---|---|
| Concrete / stone | Durable, textured grip, inert when sealed | Heavy, can crack in freeze-thaw | Permanent ground-level or pedestal setups |
| Unglazed ceramic / terracotta | Natural look, porous texture | Fragile in frost, heavier than resin | Mild-climate patios and gardens |
| Resin / plastic | Lightweight, inexpensive, easy to clean | Can crack in UV over time, slippery surface | Budget DIY builds and seasonal setups |
| Stainless steel / powder-coated metal | Very durable, easy to clean | Heats up in direct sun, can be slippery | Contemporary setups, heated bath bases |
| Glazed decorative pottery | Attractive colors | Lead/cadmium leach risk from unknown glazes | Avoid unless certified food-safe glaze |
Heated and solar bath bases
If you live somewhere that freezes hard in winter, a thermostatically controlled submersible deicer (typically 50–150 watts for a standard birdbath) is worth adding. Units from K&H Pet Products and similar brands switch on automatically near freezing and off when the water warms, which keeps electricity use low. Always choose a deicer that is UL Listed or ETL Listed for outdoor and submersible use, and always run it on a GFCI-protected circuit. UL Listed and ETL Listed are equivalent North American safety marks issued by accredited testing labs. You can verify a product's listing by searching the UL Solutions or Intertek ETL online directories before you buy.
Pumps and power options: what actually works outdoors
Plug-in submersible pumps
A small adjustable-flow submersible pump is the most reliable bubbling option. For a standard bird bath basin (2–5 gallons of water), look for a pump rated 30–160 GPH with a maximum head of at least 1.5–2 feet. Little Giant's PE-1 series, for example, delivers around 205 GPH at a 1-foot head, which is more than enough and needs to be throttled down with its flow adjuster. Running the pump at its lowest setting for a bird bath produces a gentle upwelling rather than a splashy fountain jet. Power draw is typically 5–15 watts for these mini submersibles, which amounts to pennies per day.
Solar pumps: direct-drive vs. battery-backed
A direct-drive solar pump (panel wired straight to pump, no battery) runs only when the sun is shining, which is fine for a summer bubbler you just want active during peak bird hours. The problem is clouds: a thin overcast can cut output enough to stall the pump completely. A solar kit with a battery and an MPPT (Maximum Power Point Tracking) controller is significantly more reliable. MPPT controllers dynamically match the panel's operating point to maximize harvested power, typically delivering 15–30% more energy than simple PWM or direct-drive units in variable or partial-shade conditions. For a small bird bath (under 100 gallons, pump pulling 40–80 GPH), a modest 10–20-watt panel with a 5–10 Ah battery is sufficient for most summer days. Match your kit to the manufacturer's GPH and head charts and your local average peak sun hours.
Electrical safety: GFCI is non-negotiable
Any pump, deicer, or lighting connected to mains power near a bird bath must be on a GFCI-protected circuit. OSHA and the National Electrical Code (NEC/NFPA) both require GFCI protection at outdoor and wet-location receptacles. A standard GFCI outlet or a portable GFCI adapter plugged into an existing outdoor outlet both satisfy this requirement for DIY setups. For any permanent wiring, such as burying conduit to a dedicated outdoor circuit, hire a licensed electrician. Do not simply extend an indoor extension cord outside and assume it is protected.
For submersible components, check the IP (Ingress Protection) rating on the product label. Submersible pumps should be rated IP67 or IP68, which means they are tested for continuous immersion. Splash-resistant surface-mount components (junction boxes, timers) should be at least IP44. Do not trust marketing copy alone: look for the specific IEC/EN rating on the product's data sheet.
Tools and parts checklist before you start
These are the materials and tools that show up across every build described below. Gather them before you start and the actual assembly goes quickly.
- Shallow basin or bird bath bowl (edges ~1 inch deep, center max ~2 inches deep)
- Small submersible pump, 30–160 GPH adjustable flow, IP67/IP68 rated, UL or ETL Listed
- Flexible PVC or vinyl tubing to match the pump's outlet diameter (typically 3/8 inch or 1/2 inch ID)
- Fountain head nozzle or bubbler cap (included with many pump kits; dribble or bell-spray head preferred over tall jet)
- Flat rock, brick half, or suction-cup pump riser to position pump at the correct height
- GFCI-protected outdoor outlet or portable GFCI adapter
- Outdoor-rated extension cord (14-gauge minimum for longer runs) or low-voltage cable for solar kits
- Stainless steel hose clamp or zip ties for securing tubing
- Mesh or foam pre-filter sponge for pump intake (reduces debris clogs)
- Bucket and stiff-bristle brush for cleaning
- 9: 1 water-to-white-vinegar solution in a spray bottle for routine cleaning
- Silicone sealant (aquarium-safe, neutral cure) for any drilled holes
- Drill with masonry or ceramic bits if converting a solid basin
- Level (small torpedo level) for checking basin stability
Build 1: the simple plug-in bubbler (beginner-friendly, 20 minutes)
Parts list
- Shallow ceramic, concrete, or resin bird bath basin
- Mini submersible pump, 30–80 GPH adjustable, IP67 rated, UL Listed (e.g., 5–8 W models sold as 'pond or fountain pump')
- Bell-spray or dribble fountain head nozzle (often included with pump)
- Small flat rock or paver to raise the pump off the basin floor
- GFCI outlet or GFCI adapter
- Outdoor extension cord if needed
Step-by-step build
- Set your basin on a level surface. Use a torpedo level on the rim and shim it with flat stones if needed. An unlevel bath will spill water from one side when the pump runs.
- Place the flat rock or paver on the basin floor. This raises the pump so the intake is not pressed against sediment and gives you a stable base.
- Attach the bell-spray or dribble nozzle to the pump outlet. Most mini pumps use a push-fit barbed nozzle. Set the flow adjuster to its lowest setting before filling.
- Set the pump on the rock, making sure the intake screen faces outward and is not blocked.
- Fill the basin with clean water to about 1.5 inches at the deepest point. The pump must be fully submerged before powering on.
- Route the cord over the rim to the GFCI-protected outlet. Avoid pinching the cord under the basin edge. If running across a path, use a cord cover or bury in conduit.
- Plug into the GFCI outlet and observe the water movement. Adjust the flow dial until the water bubbles or drips gently at the surface without splashing over the rim.
- Add a flat wading stone in the shallow end if you want a landing shelf for smaller birds.
Maintenance for the plug-in bubbler
Refill the basin every 1–2 days in warm weather, since evaporation and bird activity drop the water level quickly and a running pump exposed to air can overheat. Clean the basin weekly during summer using a 9:1 water-to-white-vinegar solution and a stiff brush: scrub, rinse thoroughly, and refill. Audubon advises routine birdbath cleaning by scrubbing and rinsing with nine parts water to one part white vinegar, refilling every 1–2 days in warm weather, and reserving a dilute bleach solution (one part bleach to nine parts water, ≈10% v/v) for deep disinfection during disease events or heavy contamination Audubon recommends cleaning with 9:1 water-to-vinegar, refilling every 1–2 days, and using 1:9 bleach for deep disinfection. For heavy algae or contamination during a disease event in your area, a 1:9 bleach-to-water solution (approximately 10% bleach) is appropriate for deep disinfection. Rinse extremely well and let air-dry before refilling. Remove and rinse the pump's intake sponge every two weeks to prevent flow restriction.
Build 2: air-stone bubbler with aquarium pump (ultra-quiet option)
An air-stone setup uses a small aquarium air pump sitting outside the bath, connected by airline tubing to a ceramic or stone air diffuser submerged in the water. The air pump pushes air through the stone, creating a column of tiny bubbles at the surface. It does not circulate the water the way a submersible pump does, but the constant surface agitation is enough to attract birds and disrupt mosquito larvae. This approach is very quiet, inexpensive, and leaves no motor submerged in the water, which makes cleaning easier.
Materials
- Small single-outlet aquarium air pump, 1–2 watts (e.g., Tetra Whisper 10 or equivalent), rated for outdoor or protected-location use
- 3–4 feet of 3/16-inch ID flexible airline tubing
- Medium ceramic or stone air diffuser (air stone), 1–2 inches long
- Airline check valve (prevents back-siphon from flooding the pump if power fails)
- Small suction cup or clip to hold the air stone in position
- Waterproof housing or weatherproof junction box for the air pump if it will be exposed to rain
- GFCI outlet
Assembly steps
- Install the check valve in the airline tubing about 6 inches from the air pump outlet. Arrow on the valve must point away from the pump (toward the air stone). This prevents water from siphoning back into the pump if power is cut.
- Connect the tubing to the air pump outlet and run the line over the basin rim to the air stone. Keep the air pump above the water level when possible, or rely on the check valve as backup.
- Clip or suction-cup the air stone to the basin floor near the center. Position it so bubbles rise through the shallowest zone birds will use.
- Place the air pump in a weatherproof enclosure or under a protective overhang. Standard aquarium air pumps are not IP-rated for rain exposure.
- Plug into a GFCI outlet, let the bubbles establish, and watch the surface movement. Adjust depth of the air stone to change bubble intensity.
- Fill basin to standard depth (1–1.5 inches at the rim, 2 inches maximum at center).
Placement tips and troubleshooting
Keep the air pump no more than 3–4 feet of tubing away from the air stone: longer runs increase back-pressure and reduce bubble output. If bubbling stops, check the air stone first by submerging it in a glass of water and blowing through the tube manually. A clogged stone will show no bubbles or uneven bursts. Air stones clog with mineral deposits and algae over time; replace them every 4–8 weeks or soak in a 1:10 vinegar solution overnight to extend their life. If the pump hums but produces no bubbles, the check valve may be installed backwards.
Build 3: converting a decorative fountain or basin into a bird bath
A lot of garden fountains are designed for drama: tall jets, deep reservoirs, and fast flow. Birds will not use most of them as-is. The conversion goal is to redirect the water so it emerges as a gentle dribble or wide bell spray into a shallow wading zone no deeper than 2 inches, while keeping the existing plumbing intact underneath.
Parts you will need
- Existing fountain or decorative basin with a submersible pump already installed
- Adjustable bell-spray or dribble nozzle to replace the existing jet head
- Barbed reducing adapter if the new nozzle has a smaller outlet than the existing tubing
- Flat river stones or ceramic tiles to build up a shallow wading shelf inside the basin
- Aquarium-safe silicone if any new holes are drilled
- Small mesh screen or foam filter wrap for the pump intake
Step-by-step conversion guide
- Unplug the fountain and drain the reservoir. Remove the existing jet nozzle from the pump outlet.
- Reduce the pump's flow using its built-in adjuster dial or by adding a ball valve inline. Set flow to the lowest setting that still lifts water to the surface.
- Attach the dribble or bell-spray nozzle to the pump outlet using the appropriate barbed adapter. Dribble heads are the most bird-friendly: they produce a low, wide sheet of falling water rather than a concentrated jet.
- Stack flat river stones inside the basin to create a raised shallow platform. The water surface over this platform should sit at 1–1.5 inches depth. Test by filling to the intended level before securing stones.
- Wrap the pump intake in a fine mesh foam filter sleeve to prevent gravel and debris from entering the impeller.
- Refill the reservoir and plug in (GFCI outlet). Observe: the water should dribble or sheet gently onto the stone platform. Adjust the flow dial until no water splashes outside the basin.
- If the basin is too deep overall, place a wider, shallower insert bowl (terracotta saucer, resin tray) on top of the stone stack so birds interact with a shallow surface while the reservoir beneath holds the volume the pump needs.
This conversion approach works especially well if you already have a larger fountain you want to repurpose. The reservoir below the insert provides a generous water volume, which means less frequent topping-up and a more stable temperature. It also gives you room to add a thermostatically controlled deicer in winter without having to modify the bird-accessible surface. If you are interested in taking a full fountain base and turning it into a dedicated bird water feature, the full fountain-to-bird-bath conversion process involves a few additional plumbing considerations worth exploring on their own.
Build 4: recirculating setups for larger or deeper baths
If you want a larger feature, a multi-tier setup, or a solar-powered bath that runs all day without a cord stretching across the yard, a properly sized recirculating system is the way to go. The principles are the same as the simple plug-in bubbler, but pump sizing, tubing, and the power source need more attention.
Pump selection for larger baths
Use the pump manufacturer's flow-versus-head curve to select your pump, not just the maximum GPH on the box. A pump rated at 400 GPH might only deliver 80 GPH at a 3-foot head. For a bird bath you want gentle movement, so the target working flow at your actual lift height is 30–150 GPH. The Little Giant 1-Series is a common reference point: it delivers roughly 205 GPH at 1 foot of head, which needs to be throttled well down for a bird bath application. For a multi-tier or slightly elevated setup where the lift is 2–3 feet, step up to a pump with a 3-foot shut-off head minimum, still set to low flow.
Plumbing layout
- Use flexible vinyl or PVC tubing matched to the pump's outlet barb diameter (typically 1/2 inch or 5/8 inch ID for small-to-medium pumps)
- Keep tubing runs as short and straight as possible; each 90-degree bend reduces effective head
- Fit a foam or mesh pre-filter on the pump intake to reduce clogging from algae and debris
- Use a stainless steel hose clamp at each barbed connection to prevent the pump vibration from working tubing loose
- Include an inline ball valve between the pump outlet and the nozzle so you can tune flow precisely without opening the basin
Reservoir sizing
A recirculating system with a hidden below-grade reservoir gives you much more water volume than a standard birdbath bowl, which helps stabilize water temperature, reduces topping-up frequency, and gives you enough depth below the pump intake to prevent air entrainment. A 5–10 gallon plastic storage bin buried to the rim works well as a hidden reservoir. Cover it with galvanized mesh or a custom grate topped with pea gravel to keep debris out and give birds a safe surface. The pump sits in the reservoir and pushes water up to the bird-accessible surface above.
Solar options for recirculating setups
For a reliable solar recirculating setup, use a kit that includes an MPPT controller and a battery rather than a bare direct-drive panel. MPPT controllers extract 15–30% more energy than simple direct-drive connections in variable or partial-shade conditions. For a system circulating 40–80 GPH from a 5-gallon reservoir, a 10-watt panel with a 7–10 Ah sealed lead-acid or LiFePO4 battery will run the pump through most summer days and maintain water movement for a few hours after sunset. Match your final component selection to the manufacturer's kit sizing chart and your location's average daily sun hours. In climates with long cloudy stretches, size up one tier on both panel and battery rather than running on the edge of the system's capacity. Recirculating setups like this, especially when built as a standalone water feature, overlap with the broader world of DIY recirculating bird baths, which is a useful area to explore if you want to scale up further.
Winter operation and freezing
Moving water freezes more slowly than still water, but it will still freeze in sustained below-freezing temperatures. If you want year-round operation, pair the recirculating pump with a thermostatically controlled submersible deicer (50–150 watts for a standard-volume reservoir). The deicer kicks in near 32°F and maintains a small ice-free patch without running continuously. Use separate GFCI protection for the deicer and the pump. Solar power is not practical for winter operation in most North American climates due to reduced daylight and lower panel output: switch to a mains-powered pump October through March if you want reliable cold-weather performance.
Placement strategies that actually bring birds in
Ground-level placement attracts a wider range of species than pedestal placement. Many sparrows, thrushes, and warblers are cautious about elevated surfaces, while ground-feeding birds like doves and robins strongly prefer bathing at ground level. That said, ground baths are easier targets for cats, so place them in open ground with clear sightlines in at least three directions: birds need to spot predators approaching. A bath 10–15 feet from a shrub gives birds a quick escape route without positioning them inside ambush range.
Keep the bath in partial shade during the hottest part of the day, especially in summer. Full sun heats shallow water to temperatures birds may avoid and accelerates algae growth and evaporation. Morning sun and afternoon shade is the practical ideal. Place the bath within earshot of where you spend time outdoors: the sound of bubbling water is one of its genuine pleasures.
For hummingbirds, a dripper or mister positioned over a very shallow bath (half an inch of water is enough) is far more effective than a standard bubbler. Hummingbirds bathe by flying through mist or rubbing against wet leaves rather than standing in a pool. A dripper creates moving surface water that other songbirds appreciate and provides hummingbirds with the spray they prefer. A dedicated hummingbird water feature has a few additional tricks worth knowing about if you are specifically targeting those species.
Routine maintenance and troubleshooting
Cleaning schedule
| Frequency | Task | Solution/Method |
|---|---|---|
| Every 1–2 days (summer) | Top up water, check pump is submerged | Fresh tap water |
| Weekly | Scrub basin, rinse pump pre-filter | 9:1 water-to-white-vinegar spray, stiff brush, full rinse |
| Every 2–4 weeks | Remove and soak pump intake sponge | Rinse in clean water; soak in 1:10 vinegar solution for heavy buildup, then rinse again |
| As needed (disease event or heavy contamination) | Deep disinfection of basin and components | 1:9 bleach-to-water solution (~10% bleach); thorough rinse and full air-dry before refilling |
| Seasonally (spring/fall) | Inspect pump impeller, tubing connections, cord integrity | Replace worn tubing or pre-filter; check GFCI trips correctly |
Algae control
Algae thrive on sunlight and nutrients, and no bubbler eliminates them entirely in a warm bath. The most practical controls are: keeping the bath in partial shade, cleaning weekly, and not overfilling with water that sits for days before being replaced. A moving water surface does slow algae adhesion compared to still water, but it is not a substitute for cleaning. Avoid copper-based algaecides in bird baths: copper is toxic to many aquatic invertebrates and the safety margin for birds in a small volume is uncertain.
Mosquito prevention
A pump running continuously is your primary defense. If the pump sits idle for more than two days during warm weather, add an EPA-registered Bti dunk or bits at the label rate for the basin volume. Bti (Bacillus thuringiensis israelensis) is the active ingredient in commercial mosquito dunks and is listed by the CDC as an effective, wildlife-compatible larvicide. It has no known toxicity to birds, mammals, or beneficial insects at label rates.
Common problems and fixes
- Pump running but no water movement: intake clogged with debris or algae; remove and clean the pre-filter sponge and impeller housing
- Water level drops fast: check for a leak at tubing connections (re-clamp or re-seal with aquarium silicone); also check for splash-out caused by flow set too high
- GFCI trips repeatedly: water has entered the cord or plug; unplug immediately, dry all connections, and inspect the cord for damage before reuse
- Algae coating the basin within days: bath is in too much direct sun; move or add shade; increase cleaning frequency to twice weekly during peak summer
- Birds not using the bath: flow may be too strong and splashing; reduce flow to a gentle upwelling or dribble; also check that water depth at the rim is truly at or below 1 inch
- Air-stone produces no bubbles: check the check valve direction; soak the air stone in vinegar overnight; verify the air pump itself is running by touching it for vibration
A note on rhubarb leaf baths and material safety
A popular DIY project uses large rhubarb or gunnera leaves pressed into concrete or mortar to create a textured, leaf-shaped basin. The resulting form is genuinely attractive and the concrete surface is safe once fully cured. The concern is the leaf itself: rhubarb leaves contain high concentrations of oxalic acid, which can be an irritant during the concrete-casting process (wear gloves and avoid skin contact with the leaf pulp and wet concrete mixture). Once the concrete has fully cured and the leaf material has decomposed or been removed, the cast surface presents no ongoing chemical risk to birds, provided the concrete is sealed with a cured, low-VOC, aquarium-safe sealer. Do not use paint or unknown decorative glazes on the interior water surface. The leaf-cast concrete bath is a beautiful project, but treat it as a concrete project with standard concrete safety precautions, not as a natural or untreated wood or ceramic option.
Comparing the four builds at a glance
| Build | Skill level | Approximate cost | Power source | Best for |
|---|---|---|---|---|
| Plug-in submersible bubbler | Beginner | $20–$50 | Mains (GFCI outlet) | Most backyards; quickest setup |
| Air-stone with aquarium pump | Beginner | $15–$30 | Mains (GFCI outlet) | Ultra-quiet; easy to clean; small baths |
| Converted decorative fountain | Intermediate | $0–$40 (retrofit) | Mains (GFCI outlet) | Repurposing existing features |
| Recirculating solar/mains system | Intermediate–Advanced | $60–$200+ | Solar (MPPT + battery) or mains | Larger features; cord-free setups; year-round use |
My honest recommendation for most backyard birders: start with the plug-in submersible bubbler. It takes twenty minutes, costs under fifty dollars, and you will see birds responding within a day or two of installation. Once you have watched the difference moving water makes, you will understand exactly what you want from a more elaborate setup, whether that is solar independence, a dripper for hummingbirds, or a larger recirculating feature. Start simple, observe your birds, then scale up to what they actually respond to in your specific yard.
FAQ
What authoritative sources and facts should I cite when writing about bubbling bird baths?
Cite wildlife authorities for birdbath depth and behavior (Cornell Lab All About Birds), sanitation and cleaning guidance (Audubon), disease/biosecurity alerts (Cornell/Project FeederWatch, state wildlife agencies), mosquito‑control guidance (CDC on Bti), electrical and outdoor safety (OSHA, NEC/NFPA guidance for GFCI), IP rating interpretation (IEC), materials/toxicity (Merck Vet Manual, peer‑reviewed studies on lead leaching). For pump specs and solar details, cite manufacturer spec sheets and trusted retailers to support sizing/flow/head numbers.
What bath depths, shapes, and placements are safest and most attractive to birds?
Use a shallow bowl with a gentle slope: edges about 1 inch (2.5 cm) deep sloping to a maximum of ~2 inches (5 cm) in the middle. Place baths at ground level or on stable stands with nearby low cover (shrubs) for perching and escape routes. Gentle surface movement (drips, misters or low flow) encourages use; avoid deep, steep-sided containers for small songbirds.
How should I select a pump (flow and head) for a bubbling bird bath?
Determine bowl volume and desired effect (gentle ripple, dripper, small fountain). Target low flows: roughly 30–160 GPH for small baths. Use manufacturer flow‑vs‑head curves to pick a pump that delivers the needed GPH at the actual lift (vertical distance from pump to outlet). Choose adjustable‑flow pumps (or add a valve) to tune movement and avoid splashing out of the bowl.
What's the difference between air‑stone bubblers and recirculating submersible pumps, and when to use each?
Air‑pump + air stone systems aerate and create gentle surface movement without large currents—good for shallow bowls and oxygenation. Submersible recirculating pumps move water for drips, jets or fountains and are required for visible fountain effects or recirculation through a stately fountainhead. Match equipment specs (LPM/CFM for air pumps; GPH and head for submersibles) to the vessel size and desired effect.
What electrical and IP/plug safety rules apply for outdoor bird bath pumps and heaters?
Use equipment listed for outdoor/wet use and rated appropriately: submersible pumps often have IP67/IP68 (immersion) ratings; splash‑resistant lights/fittings should be IP44 or higher. Always connect outdoor equipment to GFCI‑protected circuits per OSHA/NEC guidance. Check UL/ETL listings and verify via the lab directory. For permanent or hardwired installations consult a licensed electrician.
How do I size and configure a solar pump system (panel, MPPT, battery)?
Select a solar pump kit sized for the pond/bowl based on the pump's GPH and maximum lift. Direct‑drive (panel to pump) works in full sun but is unreliable in shade; use an MPPT charge controller and a battery if you need reliable daytime or night operation and to smooth output in variable light. Follow the manufacturer’s kit charts for panel wattage, battery amp‑hour, and pump load.