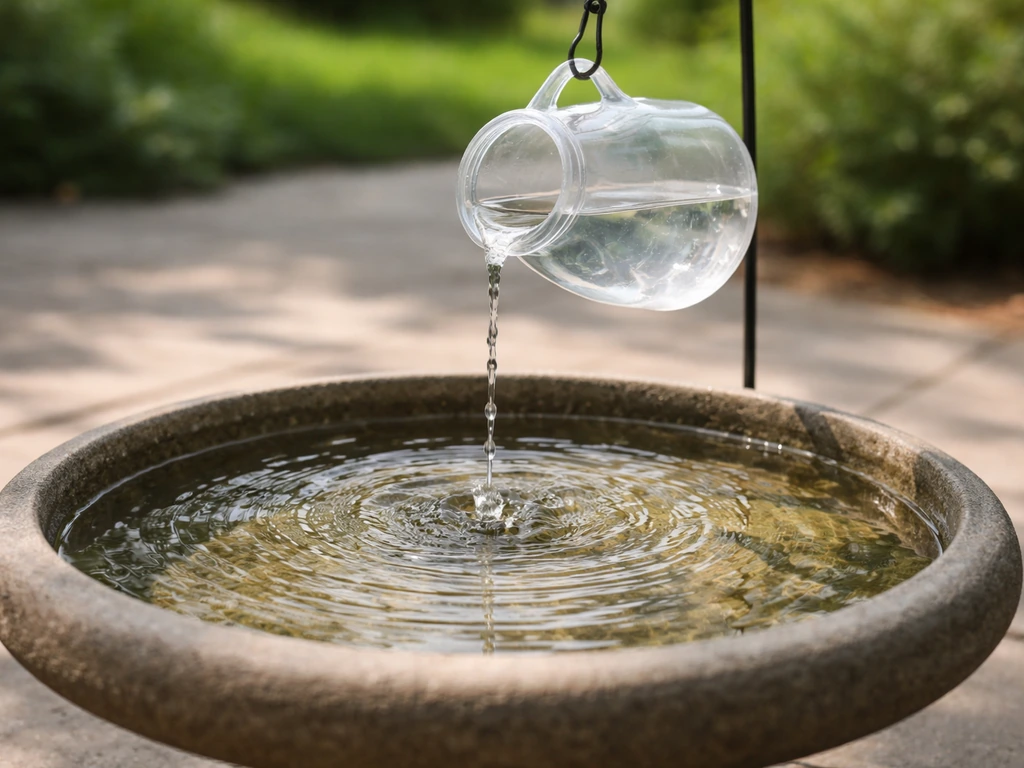
You can make a perfectly functional bird bath dripper in about 20 minutes using a clean recycled plastic jug, a pushpin or small drill bit, and a piece of wire or string to hang it above your bath. You can also make a bird bath dripper from rhubarb leaves for a creative, plant-based option how to make a bird bath from rhubarb leaves. Poke a small hole near the bottom of the jug, fill it with water, hang it so the drip lands in the center of the basin, and you're done. The goal is roughly one drip per second, which works out to about one pint of water per hour. That pace keeps the water surface moving, attracts birds with the sound, and slows algae and mosquito breeding without draining your bath or flooding the ground below it.
How to Make a Bird Bath Dripper Step-by-Step DIY

Marcus Henley
19 Jun 2026
Why a dripper makes your bird bath so much better

Still water is fine, but moving water is magnetic for birds. The NWF points out that splashing sounds and surface reflections draw birds in much faster than a silent, flat basin. There's also a practical health angle: moving water makes it harder for algae to take hold and makes it nearly impossible for mosquitoes to lay viable eggs. Standing water that sits undisturbed for even a few days is where mosquito larvae develop, so even a slow, steady drip breaks that cycle. Birds also seem to trust moving water more because it reads as a fresh source to them, the same way a trickle from a stream would in the wild.
If you're interested in going beyond a basic dripper, the same principles apply to fountains, bubblers, and misters. A mister throwing a fine spray above the bath is especially effective for hummingbirds, who prefer to fly through mist rather than wade. But for most songbirds, a simple dripper is the most effective and lowest-maintenance option you can build or buy.
Pick a dripper design that fits your setup
There are two main homemade approaches, and which one you choose depends mostly on how hands-on you want to get and whether you have a hose nearby.
Option 1: The hanging jug dripper (no hose needed)
This is the easiest build and the one most beginners start with. A clean gallon milk jug, a clean syrup bottle, or any similar plastic container works well. You poke or drill a small hole near the base of the jug, hang it above the bath, and gravity does the rest. It holds enough water to drip for several hours before you need to refill it. The downside is that it's a passive system, so you'll need to top it off every day or two depending on your flow rate. But it costs nothing to build and is easy to adjust.
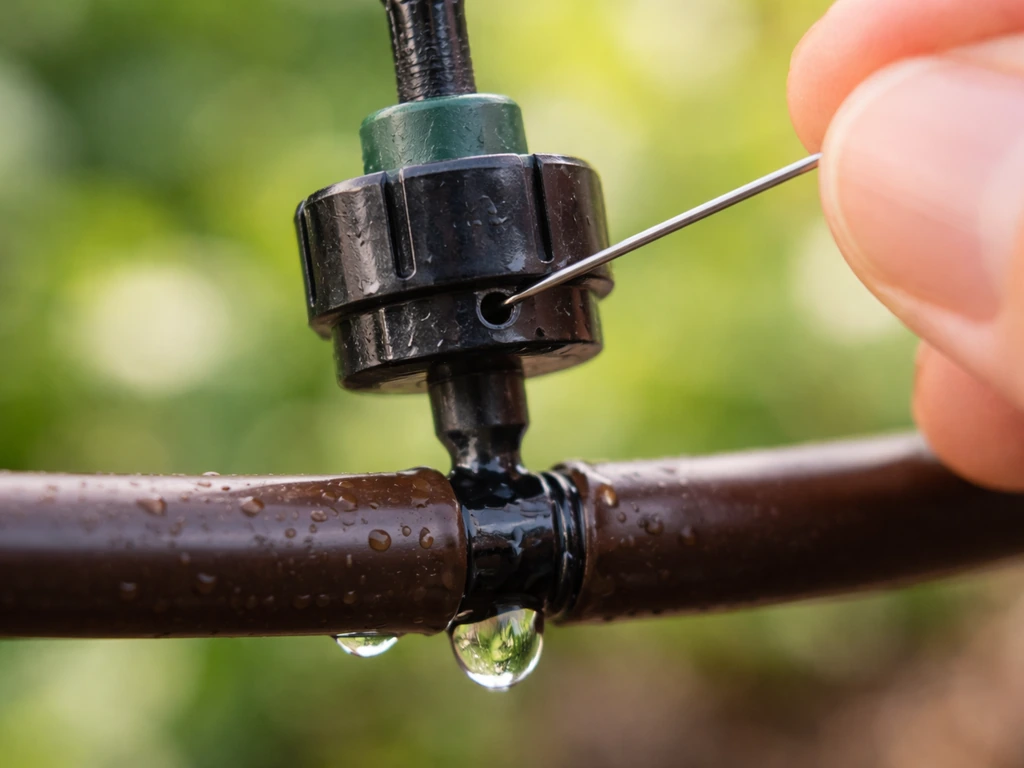
Option 2: The hose-connected dripper
If you have an outdoor spigot within reach, you can connect a narrow-diameter soaker hose or a dedicated drip emitter to a garden hose and run it to your bath. A simple inline valve lets you dial the flow down to a drip. This gives you a continuous, hands-free supply of fresh water, but it does require a bit more setup and you need to keep an eye on the flow so you're not overflowing the basin. Commercial drip emitters designed for bird baths, like the Avian Dripper, are built to target that one-drip-per-second flow rate and connect directly to a standard hose.
For this guide, the step-by-step build focuses on the hanging jug method since it works for anyone regardless of yard setup, requires zero plumbing, and costs nothing beyond a jug you were about to recycle.
What you need before you start
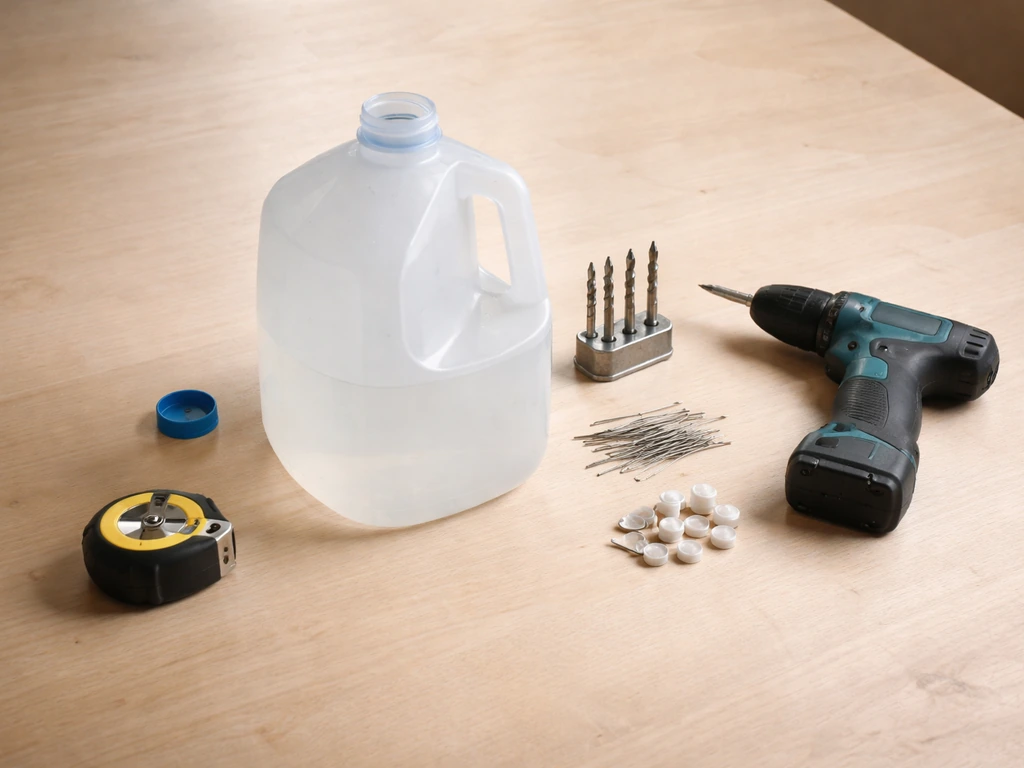
Gather everything listed below before you start so you're not hunting for tools mid-build. None of these items are specialized and most people already have them at home.
| Item | What it's for | Notes |
|---|---|---|
| Clean gallon milk jug or large plastic bottle | The water reservoir | Rinse thoroughly, no soap residue |
| Pushpin, thumbtack, or 1/16" drill bit | Making the drip hole | Start small, you can always enlarge it |
| Awl or larger drill bit | Vent hole at top | Needed so air can enter and water drips steadily |
| Wire, strong twine, or zip ties | Hanging the jug above the bath | Sturdy enough to hold a full gallon (about 8 lbs) |
| Branch, shepherd's hook, or stake | Mounting point above the bath | Needs to position jug 6–12 inches above water |
| Waterproof marker or tape | Marking hole placement | Optional but helpful |
| Pliers | Bending wire for a secure hang | Optional |
| Safety glasses | Eye protection when drilling | Skip if using a pushpin only |
One safety note: if you're drilling rather than using a pushpin, wear eye protection and drill slowly. Plastic jugs can crack if you force a large bit through them. Always start with the smallest hole possible and widen from there.
How to build your homemade jug dripper
- Rinse your jug completely. Any soap residue or old liquid can harm birds, so rinse it several times with plain water and let it air dry for a few minutes.
- Poke the drip hole near the bottom of the jug, about half an inch from the base. Use your pushpin or smallest drill bit. This is where the water will exit, so position it on the side that will face downward over the bath.
- Add a vent hole near the top of the jug. This is the step most first-timers skip, and it's why their dripper stops after a few minutes. Without a vent, air pressure builds up inside and stops the flow. A pushpin hole near the cap or on the upper shoulder of the jug is enough.
- Test the drip rate before you hang anything. Fill the jug over a sink and hold it upside down (or tilted so the drip hole is at the lowest point). Count the drips. You're aiming for roughly one drip per second. If it streams instead of drips, the hole is too big and you'll need a new jug. If it barely drips, widen the hole slightly with a larger pin or drill bit.
- Attach your hanging wire or twine. Thread it through the jug handle or around the neck of the bottle and make sure the knot or loop is secure enough to hold the weight of a full jug. A gallon of water weighs about 8 pounds.
- Hang the jug from your mounting point (a shepherd's hook, a sturdy branch, or a stake driven into the ground beside the bath). Position it so the drip hole sits 6 to 12 inches above the surface of the water.
- Fill the jug, cap it loosely (don't overtighten or you'll block airflow from the vent), and watch for a steady drip. Adjust the hang angle slightly if the stream is missing the basin.
Installing it on your bird bath and getting the placement right
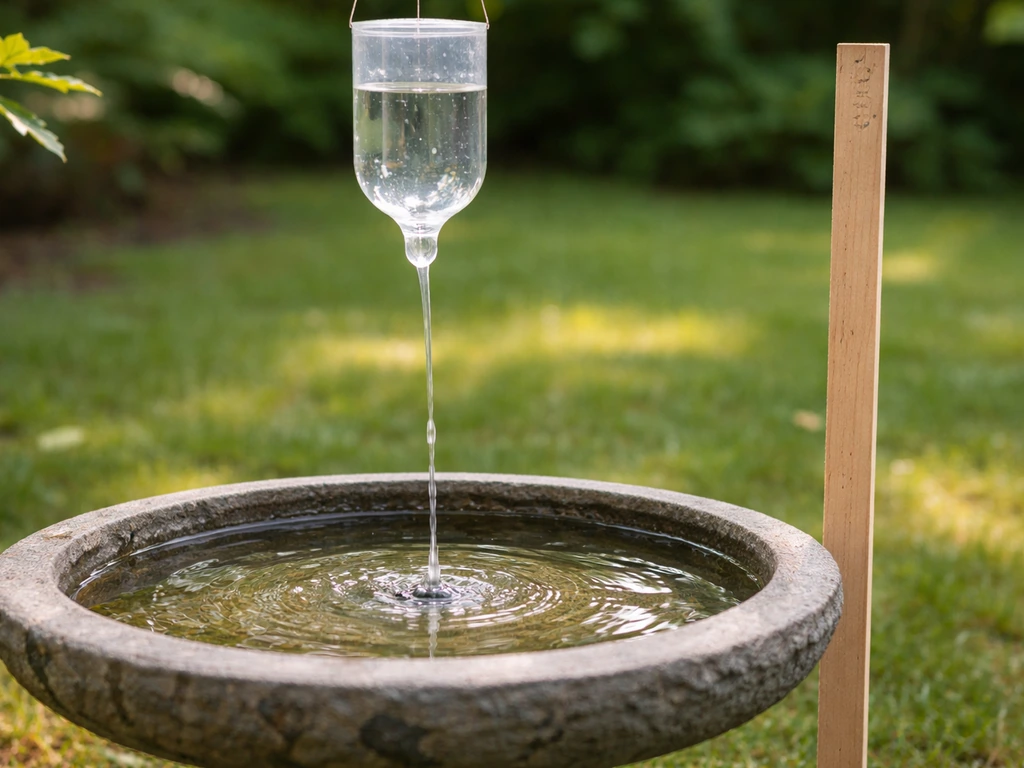
The drip height matters more than most people expect. Too high (more than about 12 inches) and the drip creates too much splash, which empties your bath fast and can stress small birds. Too low (under 3 or 4 inches) and the audible ripple sound is weak, which reduces how well it attracts birds from a distance. Six to ten inches above the water surface is a reliable sweet spot for most baths.
Aim the drip toward the center of the basin rather than the edge. Birds tend to congregate toward the center where the water is shallowest and the splash is most visible. If your bath is concrete, ceramic, or metal, the mounting approach is slightly different but the drip target stays the same.
| Bath Type | Best Mounting Method | Watch Out For |
|---|---|---|
| Concrete pedestal | Shepherd's hook placed behind the bath; lean jug wire over the basin | Hook needs to be long enough to reach center of basin |
| Ceramic or decorative | Overhead branch or dedicated dripper stake; avoid clamping to the rim | Ceramic rims chip easily; never hang directly from the bowl edge |
| Metal (copper, galvanized) | Stake or hook beside the bath; wire tied to a cross-bar above if available | Metal baths heat up fast in sun; drip helps cool the water |
| Ground-level bath | Simple stake or low branch; jug sits close to the ground | Keep jug just off the ground to reduce contamination from soil splash |
Place the whole setup in partial shade if possible. This slows evaporation, keeps the water cooler (birds prefer it), and extends how long your jug will drip before it runs dry. Direct afternoon sun on a hot summer day can empty a gallon jug faster than you'd expect between the dripping and evaporation combined.
Tuning the drip for birds that will actually use it
Once everything is in place, spend a few minutes watching and adjusting. If you want the water to bubble reliably, focus on getting the drip height, hole size, and flow rate tuned so it stays lively without overflowing how to make a bubbling bird bath. The ideal drip creates a small ripple ring in the center of the basin and produces a quiet, steady ticking sound. If you hear a loud splashing or see water spraying over the rim, the hole is too large or the jug is hanging too high. If the bath looks completely still and silent, the flow is too slow to attract attention.
The one-drip-per-second benchmark is a good starting point, but different birds respond differently. Ranger Rick also recommends adjusting the drip rate by enlarging the hole if the homemade dripper drips too slowly blank" rel="noopener noreferrer">adjusting drip frequency by enlarging the hole if it drips too slowly. Smaller songbirds like chickadees and finches prefer a gentle drip with minimal splash. Robins and other thrushes are more tolerant of a slightly faster flow. If you're trying to attract hummingbirds, a dripper alone isn't quite enough. Hummingbirds strongly prefer a fine mist they can fly through, so a mister attachment works better for them. For most other backyard birds, the drip is perfect.
Check the water depth while you're tuning. Birds are safest in water no deeper than 1.5 to 2 inches. If your basin is deeper than that, add a flat stone or two to raise the floor level near the drip target. This gives birds a comfortable footing and prevents smaller birds from avoiding the bath entirely.
Keeping your dripper working all season long
Clogs
The drip hole is tiny, so it can get partially blocked by mineral deposits from hard water or by debris. If your drip rate slows noticeably, poke the hole clear with a clean pin. If you're dealing with persistent hard water buildup, fill the jug with a 50/50 mix of white vinegar and water once a week, let it sit for 30 minutes, then rinse and refill with fresh water. This dissolves calcium deposits before they become a real problem.
Leaks at the hang point
If water is dripping from anywhere other than the drip hole, check the cap first. A loose cap with a vent hole should be snug but not airtight. If the jug itself has developed a crack from UV exposure or being knocked around, it's time to swap in a fresh jug. Plastic milk jugs aren't built to last forever outdoors, so keep a spare on hand. In full summer sun, a jug may start to degrade in as little as a few weeks.
Algae in the jug or bath
Even with moving water, algae can build up inside the jug and in the basin, especially in warm weather. Change the water in both the jug and the bath every two to three days in summer. Clean the basin with a stiff brush weekly, and rinse the jug when you refill it. Avoid using soap inside the jug since residue can harm birds even after rinsing. A quick scrub with a bottle brush and plain hot water does the job well enough.
Mosquito control
The movement from the dripper disrupts the still surface that mosquitoes need to lay eggs, but the bath water itself still needs to be changed regularly. If you want a more advanced setup that keeps water moving without constant refilling, consider learning how to make a recirculating bird bath. blank" rel="noopener noreferrer">Swap out the water at least every three to four days to interrupt any breeding cycle. If mosquitoes are a persistent problem in your area, a Bti (Bacillus thuringiensis israelensis) dunk or tablet in the basin is safe for birds and lethal to mosquito larvae.
Freezing weather
This is where the basic jug dripper has a real limitation. Once temperatures drop below freezing, water in the jug will freeze and the whole system stops working. In colder climates, you have a few options. You can bring the jug indoors overnight and put it back out each morning. You can switch to a heated bird bath with a built-in element that keeps the water above freezing. Or you can use a hose-connected drip system paired with a heated bath so water keeps moving through even on cold nights. If you do nothing and leave a water-filled jug outside overnight in a freeze, expect a cracked jug in the morning.
A dripper works beautifully from spring through fall in most climates. Think of the jug dripper as your warm-season workhorse and plan for a different solution when the temperature drops consistently below 32°F. Whatever setup you land on, the payoff of having consistent moving water in your yard is real. If you want a safe, simple way to customize your bath using natural ingredients, follow rhubarb leaf bird bath instructions. Birds will find it faster, use it more reliably, and return to it day after day once they know it's there.
FAQ
Can I use a smaller container (like a yogurt bottle or water bottle) instead of a gallon jug?
Yes, but tune it with the hole size so the drip does not become a stream. If the jug is too full, water may run out around the hole or overflow from splashing. Leave a little headspace and confirm the drip still hits the center after hanging.
How high should the dripper be above the bird bath for the best splash and sound?
Target roughly 1 to 2 inches of drip tubing or hanging clearance from the underside of the container down to the hole area so gravity provides a consistent drop. If the drip lands too far from the center, move the hanging point and re-test the ripple pattern after 10 minutes.
What should I do if the dripper splashes too much and birds stay away?
If you see birds avoiding it, reduce splash by lowering the hang height (within the recommended range) or shrinking the hole slightly. For hesitant songbirds, aim for a quiet ripple rather than visible spray beyond the rim.
My dripper stopped or slowed down, what are the first checks?
It is usually a clogged hole or a venting problem. Clear the hole with a pin, then check that the cap is vented (snug but not airtight). If the hole is clear and flow is still weak, hard water scaling is likely building up.
Can I clean the jug with dish soap to keep the water fresh?
Use plain hot water and a stiff bottle brush to scrub the jug and rinse thoroughly. Avoid soap or detergents inside the jug because residue can be harmful even if you rinse.
How often should I change the water to prevent algae and mosquito larvae?
Warm climates: change water every 2 to 3 days and scrub the basin weekly. Cooler climates can stretch it a bit, but if you notice any green film or odor, switch to more frequent changes regardless of temperature.
Will a jug dripper attract hummingbirds the way it attracts other birds?
For hummingbirds, a simple dripper often is not enough because they prefer airborne mist. Add a mister-style spray source or a fine-spray attachment that creates a small mist zone above the bath rather than just a falling drip.
What if my bird bath is too deep for small birds to stand comfortably?
If your bath is deeper than about 1.5 to 2 inches, add a flat stone so birds can stand safely near the center where the drip lands. This reduces the chance smaller birds skip the bath entirely.
Can I turn the dripper on and off with a timer to save water?
A timer is not ideal for mosquito control with drippers because you still need the water movement to prevent egg laying. Instead of cycling off, focus on maintaining a consistent drip and renewing water on schedule.
What is the best way to keep a bird bath dripper working during freezing weather?
In freezing temperatures, a cold-soaked jug will freeze and stop. The most reliable fixes are bringing it indoors overnight, using a heated bird bath, or using a hose-connected system with a heated solution so flow continues through the night.
How do I handle mineral buildup from hard water so the drip stays consistent?
Yes. If your area has frequent hard-water deposits, descale on a regular schedule, not just when flow drops, using a vinegar and water soak then rinse. In between, keep the hole clear so mineral buildup does not fully block it.
Why is water leaking from places other than the drip hole?
If water drips from the cap or other seams, tighten or replace the cap and confirm it has a vent hole if it uses one. If the jug develops cracks from UV exposure or knocks, patching is unreliable, replace the jug.
Can I set up more than one dripper on the same bird bath?
Yes, especially if you want to add a second sound and a more inviting water surface. Place multiple drippers so their streams do not directly collide, and verify that the combined flow does not overflow or create large splashes beyond the rim.