
For most bird bath projects, QUIKRETE 5000 High Early Strength Concrete Mix is the best all-around choice. It hits 5,000 psi at 28 days, handles freeze-thaw cycles well when air-entrained, and is widely available at hardware stores. For casting thin decorative bowls, a glass-fiber-reinforced concrete (GFRC) mix or a fiber-modified Portland cement blend gives you a lighter, crack-resistant result. For repairs, SAKRETE Pro-Mix All-Purpose Cement Mix works well for small patches, and QUIKRETE Concrete Bonding Adhesive is the go-to primer when bonding new concrete to old. Whatever you use, always seal the finished basin with an NSF/ANSI 61-certified coating before birds start drinking from it.
Best Cement for Bird Baths: Top Mixes, Brands & How‑To Guide

Marcus Henley
20 Jul 2026
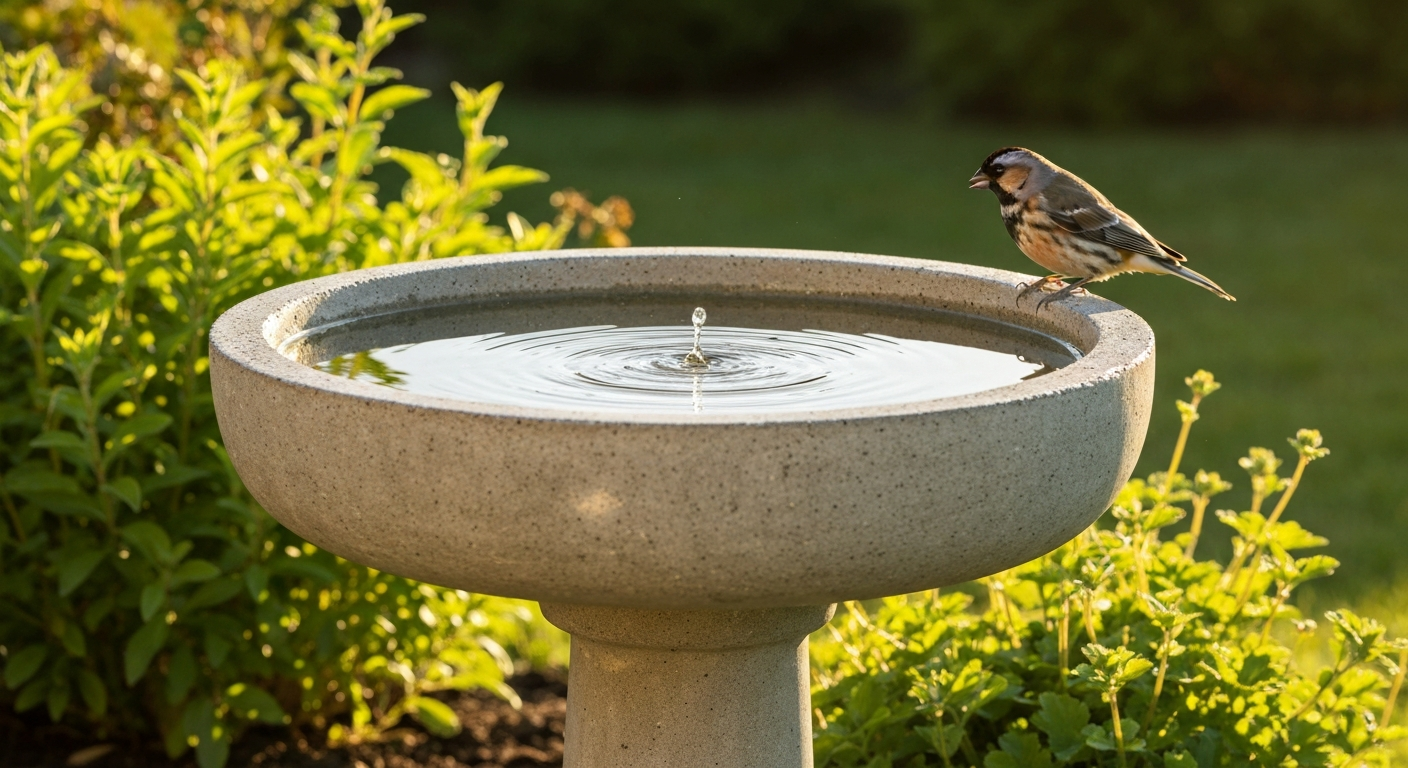
Who this guide is for and what you'll get
I wrote this for three groups: backyard birders who want to cast a simple concrete bath from scratch, DIYers tackling a cracked or crumbling existing bath, and landscapers or garden designers who want reliable product names and mix specs they can actually order and use. You'll get specific brand recommendations with the scenarios where each one makes sense, exact mix ratios for bowls, pedestals and repairs, additive options (fibers, polymer modifiers, air-entraining agents, wire mesh), a comparison table covering concrete vs. mortar vs. hydraulic cement vs. pre-mixed kits, and a tools-and-safety checklist before you pour your first batch. I also cover sealing, painting and gluing options, topics that come up constantly once the concrete is cured, along with a troubleshooting section for the problems I see most often: red iron staining, cracking, algae and mosquitoes.
Why your cement choice actually matters for birds
Cement choice affects three things that directly touch bird health and bath longevity: pH, porosity and structural durability. Fresh Portland cement concrete is highly alkaline (pH 12-13) and leaches lime into the water for weeks after casting. Birds drinking from an uncured, unsealed basin are exposed to that alkalinity, which can irritate mucous membranes. A proper cure followed by an NSF/ANSI 61-certified sealer neutralizes the surface and prevents leaching. Porosity is the second issue. A high-porosity mix soaks up water, which means freeze-thaw cycling shatters it from the inside. Porous concrete also harbors algae and bacteria in a way that dense, well-cured concrete does not. Finally, structural durability matters because a crumbling bath sends sharp concrete chips into the water that can harm small birds. Getting the mix ratio, curing and sealing right is not optional, it is the whole job.
Surface texture also feeds back into bird safety. Rough aggregate finishes give birds traction at the bowl's edge, which is important for smaller species. Overly smooth trowel finishes can be slippery. You can intentionally expose fine aggregate by brushing the surface before final set, which is easy to do with a stiff brush and a bit of planning at the casting stage.
Top recommended products and when to use them
I've tested or worked with all of the options below, and each one earns its place for a specific scenario. There's no single product that wins every category, so matching the product to the job is half the battle.
| Product | Best For | Compressive Strength | Notes |
|---|---|---|---|
| QUIKRETE 5000 High Early Strength | Full cast bowls, pedestals, new builds | 5,000 psi @ 28 days; 1,500 psi @ 1 day | Best freeze-thaw durability with AEA added; widely available |
| SAKRETE Pro-Mix All-Purpose Cement | Small repairs, patches, fill cracks | Moderate (per TDS) | Do not add extra admixtures per manufacturer TDS; mix 4 parts powder to 1 part water for small batches |
| QUIKRETE Concrete Bonding Adhesive | Bonding new concrete to old surfaces | N/A (bonding agent) | Meets ASTM C1059; apply before overlay or patch work |
| Portland Cement Type I/II (plain) | Custom GFRC or hypertufa blends | Depends on mix design | Combine with perlite, peat or alkali-resistant glass fiber for lightweight bowls |
| QUIKRETE Sand Topping Mix | Thin repairs and surface resurfacing | Moderate | Good for smoothing pitted surfaces before sealing |
| Hydraulic Cement (e.g., QUIKRETE Hydraulic Water-Stop) | Active water leaks, crack sealing | High early strength | Sets in minutes; useful for repair, not casting |
QUIKRETE 5000 is my default recommendation for anyone casting a full bird bath from scratch. The high early strength means you can demold in 24 hours (it reaches 1,500 psi by day one), and its 28-day target of 5,000 psi puts it well above what a small decorative casting needs to handle outdoor stress. SAKRETE Pro-Mix is solid for repairs but pay attention to the manufacturer's restriction: the TDS explicitly says not to add accelerators, retarders, plasticizers or other additives to that specific product. If you need admixtures, use a plain Portland cement mix instead and add them yourself.
Concrete mix recipes and exact ratios
Standard bird bath bowl (cast in a mold)
This is the mix I use for a simple round basin mold with 1.5-2 inch wall thickness. It gives a strong, workable pour that holds fine detail at the surface.
- 1 part Portland cement Type I/II
- 2 parts clean coarse sand (washed, no fines)
- 2 parts pea gravel or fine aggregate (3/8 inch max)
- Water: approximately 0.45-0.50 water-to-cement ratio (w/c) by weight; for QUIKRETE 5000 as a bag mix, add about 6 pints per 80 lb bag and adjust to reach a 2-3 inch slump
- Optional: 1 lb polypropylene micro-fiber per cubic yard for shrinkage control
Keep the water-to-cement ratio as low as you can while still getting a workable mix. Adding too much water is the single most common mistake I see, it weakens the concrete and increases porosity. If the mix feels stiff, use a small dose of superplasticizer (see additives section below) rather than adding more water.
Lightweight hypertufa bowl (for a softer, rustic look)
Hypertufa is a classic blend for garden ornaments. It is lighter than standard concrete and has a natural, porous texture birds seem to grip well. The tradeoff is lower compressive strength and more susceptibility to hard freeze-thaw if unsealed.
- 1 part Portland cement Type I/II
- 1.5 parts perlite
- 1.5 parts peat moss (sifted, no large chunks)
- Water: add gradually to reach a cottage-cheese consistency — roughly 0.6 w/c by weight
- Optional: 1 handful of polypropylene fibers per small batch for crack resistance
Hypertufa benefits enormously from sealing after cure because its high porosity will otherwise allow algae to colonize the surface rapidly. I treat hypertufa bowls as a two-step project: cast and cure, then seal before putting them in service.
Pedestal mix
A pedestal takes compressive load and needs to resist ground moisture and frost heave. I use a slightly richer mix here with smaller aggregate.
- 1 part Portland cement Type I/II
- 2 parts coarse sand
- 3 parts gravel (3/4 inch max)
- Water: 0.45 w/c target; 6 pints per 80 lb bag of QUIKRETE 5000 as a starting point
- Air-entraining admixture dosed to achieve 4-6% air content for freeze-thaw climates (see additives section)
Repair mortar for cracks and chips
- 1 part Portland cement
- 2.5 parts clean fine sand
- Water: add to a thick, stiff paste consistency
- QUIKRETE Concrete Bonding Adhesive applied to the substrate and allowed to become tacky before pressing in mortar
- For SAKRETE Pro-Mix small-batch repairs: 4 parts powder to 1 part water; do not exceed 4.0 qt water per 50 lb bag
Additives and reinforcement options
Polypropylene fibers
Synthetic fibers are the easiest reinforcement upgrade for small bird bath castings. Micro-polypropylene fibers (such as those from Forta) reduce plastic-shrinkage cracking during the first 24 hours of cure, which is when most surface cracks form in thin sections. Macro-synthetic fibers add post-crack toughness. Typical dosage for micro-fibers runs 0.5-1.5 lb per cubic yard for shrinkage control; macro-fiber dosages typically fall in the 3-12 lb per cubic yard range depending on the product and required toughness (FORTA-FERRO and similar products publish ICC-ES reports with their specific dosage tables). Add fibers with the aggregates during mixing so they disperse without balling.
Air-entraining admixtures for freeze-thaw climates
If you live somewhere that gets hard freezes, air entrainment is not optional, it is the main tool for protecting exterior concrete from freeze-thaw damage. The industry standard target for exterior concrete exposed to freezing is 4-7% entrained air, with ACI guidance commonly pointing to 4-6% for moderate exposures and up to 6-7% for severe exposure conditions (finer aggregates and harsh climates push the number up). ACI / industry guidance summarized in ACI documents and mixture‑proportion guides (see ACI 211 & related guidance, summarized in industry literature). Sika and similar manufacturers publish dosage guidance for their air-entraining agents; the exact dosage per bag of cement has to be dialed in by testing because it varies with cement alkali content, mixing time and temperature. ASTM C666 is the standard freeze-thaw test protocol referenced by product manufacturers. Add the air-entraining agent with the mixing water or as the last admixture addition per manufacturer TDS.
Superplasticizers
If you need a workable mix but want to keep the water-to-cement ratio low (which is what gives you density and strength), a polycarboxylate-ether superplasticizer like MasterGlenium 3030 is the answer. It meets ASTM C494 and lets you get a fluid, castable mix without adding water. Dosage is expressed as a percentage of cementitious content and needs to be trialed in a small test batch first, the manufacturer TDS gives recommended ranges. I use superplasticizers mainly for thin-wall GFRC pieces where workability matters but structural integrity cannot be sacrificed.
Wire mesh reinforcement
Welded wire fabric (WWF) adds structural crack control in larger castings like pedestal shafts or wide flat bowls. The most common light gauge option is 6x6-W1.4xW1.4 (ASTM A1064). For a bird bath bowl with walls thicker than 2 inches, a layer of light mesh centered in the wall thickness makes a real difference in long-term crack resistance. The important caveat for water-contact applications is corrosion: bare steel mesh will rust in a wet environment, causing the dreaded brown/orange staining (iron bloom) and eventually spalling the concrete. Hot-dip galvanized mesh delays but does not eliminate this. For a basin that holds water permanently, I recommend either stainless-steel welded mesh or switching to polypropylene fibers as the primary reinforcement and skipping steel mesh altogether. The red staining problem that so many bird bath owners report is almost always traced back to iron corrosion from embedded steel or from iron-rich aggregate, something worth keeping in mind.
Glass-fiber-reinforced concrete (GFRC)
GFRC uses alkali-resistant (AR) glass fiber instead of aggregate to create thin-shell castings that are surprisingly light and strong. A typical GFRC face coat mixes Portland cement with fine sand at a 1:1 ratio, alkali-resistant glass fibers at around 5% by weight of cementitious material, a polymer (usually an acrylic or SBR emulsion) and a small amount of water. GFRC is the best option for large decorative bowls where weight is a concern or for very thin artistic forms. The tradeoff is complexity, it usually requires spray or premix application techniques and a bit of practice to get consistent fiber distribution.
Concrete vs. mortar vs. hydraulic cement vs. pre-mixed kits
These four categories get mixed up constantly, and choosing the wrong one wastes time and money. Here's how they compare for bird bath applications.
| Material | Composition | Best Bird Bath Use | Key Limitation | Recommendation |
|---|---|---|---|---|
| Concrete (e.g., QUIKRETE 5000) | Cement + sand + coarse aggregate + water | Full castings: bowls, pedestals, bases | Heavier; needs molds and reinforcement planning | Best overall for new builds |
| Mortar (cement + sand, no coarse aggregate) | Cement + fine sand + water | Thin repairs, surface coats, setting stones | Lower tensile strength than concrete; not for structural castings | Good for patch work and resurfacing |
| Hydraulic cement (e.g., QUIKRETE Hydraulic Water-Stop) | Fast-setting expansive cement | Sealing active leaks and cracks with running water | Sets in 3-5 minutes — too fast for casting; not for large pours | Repair only, not casting |
| Pre-mixed kits (bag mixes like SAKRETE Pro-Mix) | Proprietary blend; add water only | Small repairs, quick fills | Cannot add admixtures per manufacturer TDS; limited control over mix design | Convenient for repairs; follow TDS strictly |
The practical takeaway: use concrete (coarse aggregate included) when you are casting something structural or thick-walled. Use mortar when you are patching, applying a surface coat or working in thin sections. Reach for hydraulic cement only when you have an active leak you need to stop fast. Pre-mixed kits are convenient for small repairs but resist the temptation to customize them with admixtures, the SAKRETE Pro-Mix TDS is explicit about this restriction.
Tools, materials and safety checklist before you start
What you'll need
- Mixing container or drum mixer (5-gallon bucket works for small batches under 0.25 cu ft)
- Measuring cups or a kitchen scale for water (accuracy matters at small batch sizes)
- Margin trowel and steel trowel for finishing
- Stiff-bristle brush for aggregate exposure texture
- Molds: plastic bowls, foam forms or wooden formwork (spray with mold release or cooking oil before pouring)
- Welded wire mesh or polypropylene fibers (your choice of reinforcement)
- Plastic sheeting or damp burlap for moist curing
- Bonding adhesive (QUIKRETE Concrete Bonding Adhesive) if doing repairs
- NSF/ANSI 61-certified sealer or coating for the finished basin (applied after cure)
- Measuring tape, level
Safety items, none of these are optional
- N95 or P100 respirator: dry cement is a silica dust hazard; always wear one when opening bags or dry-mixing
- Chemical-resistant gloves (nitrile or rubber): wet concrete is caustic and will cause alkali burns on prolonged skin contact
- Safety glasses or goggles: splash protection during mixing and pouring
- Long sleeves and closed-toe boots
- Clean potable water for mixing: do not use contaminated or salt-containing water (it affects set and strength)
- Wash station nearby: rinse any skin contact with cement paste immediately with clean water
Quantities to buy for a typical single-basin project
A standard round bird bath basin roughly 18 inches in diameter and 2 inches thick has a volume of about 0.03 cubic yards (approximately 0.8 cubic feet). One 80 lb bag of QUIKRETE 5000 yields roughly 0.60 cubic feet of mixed concrete. So one bag typically covers a single bowl with a little left over for the pedestal top or small test pieces. For a full bath with pedestal, budget two 80 lb bags. If you are using QUIKRETE 5000, remember: add approximately 6 pints (2.8 L) of water per 80 lb bag as a starting point and adjust to hit a 2-3 inch slump, do not dump in extra water to make mixing easier.
Curing timeline to follow before sealing or using
- Day 0 (pour day): cast, consolidate and finish the surface; cover immediately with plastic sheeting or damp burlap
- Day 1: QUIKRETE 5000 reaches roughly 1,500 psi — can demold carefully if needed, but keep moist curing in place
- Day 3: approximately 2,500 psi — structure is handling-safe; continue moist curing
- Day 5-7: complete primary moist curing (5 days in warm weather, 7 days in cool weather per QUIKRETE TDS); remove burlap
- Day 14-28: wait until concrete reaches approximately 80% of design strength before applying a penetrating silane/siloxane sealer (per Ghostshield Siloxa-Tek 8500 guidance and similar products)
- Day 28 and beyond: full design strength reached; basin is ready for birds after sealer has fully cured per the sealer manufacturer's instructions
Sealing, painting and gluing after the pour
Sealing is where a lot of DIY bird baths fall short. The concrete may look finished but without a proper sealer, you are putting birds in contact with a porous, high-pH surface that leaches lime and soaks up algae. There are two sealer categories worth knowing: penetrating sealers and surface-coating sealers. For product comparisons and NSF 61–certified recommendations, see our guide on the best sealant for concrete bird bath. For step-by-step instructions, see how to seal a concrete bird bath.
Penetrating silane/siloxane sealers (Ghostshield Siloxa-Tek 8500 is a well-documented example) soak into the concrete matrix and create hydrophobic zones that repel water without forming a film. They dramatically improve freeze-thaw durability and chloride resistance. They do not significantly change the surface appearance, which is a plus if you want the natural concrete look. Apply after the concrete reaches about 80% design strength, typically 14-28 days after the pour.
Surface-coating sealers and epoxy liners offer a more complete moisture barrier but must be NSF/ANSI Standard 61 certified if birds will be drinking the water (which they will). NSF/ANSI 61 is the standard for materials in direct contact with potable water, and it is the bar you should hold any basin coating to. Two-component, 100%-solids epoxy coatings with NSF 61 certification are used in potable water tanks and are appropriate for bird bath basins where you want a fully sealed, non-porous surface. The EPA / State‑of‑Technology review for water distribution rehabilitation references NSF/ANSI 61 listings for epoxy/polymeric potable‑water linings used in tanks and pipe rehabilitation, confirming that NSF 61‑certified, two‑component 100%‑solids epoxies are specified for potable water contact EPA / State‑of‑Technology review for water distribution rehabilitation — references to NSF/ANSI 61 epoxy linings for potable water. Always check that the specific product you buy carries the NSF 61 listing, a general-purpose epoxy floor coating does not qualify.
For painting decorative elements on the outside of the basin (not the water contact surface), standard exterior masonry paint works fine. If you want to paint the interior, again: NSF 61 certification is the non-negotiable requirement. For recommendations on compatible coatings and the best paint for concrete bird bath interiors that meet NSF/ANSI 61, see our buying guide. For repairs involving broken sections, QUIKRETE Concrete Bonding Adhesive provides the mechanical connection between old and new concrete, and for larger structural breaks, a two-part construction epoxy adhesive rated for wet conditions works well on clean, dry fracture faces. For choosing an adhesive specifically suited to wet, outdoor concrete basins, see guidance on the best glue for concrete bird bath.
Troubleshooting: red staining, cracking, algae and mosquitoes
Red or orange staining (iron bloom)
This is one of the most common complaints from concrete bird bath owners and the cause is almost always iron. It comes from one of two places: corroding steel reinforcement or wire mesh inside the concrete, or iron-rich sand or aggregate in the mix. If the staining is spreading outward from a crack or seems to track along a hidden internal line, embedded steel is likely the culprit. The long-term fix is to remove the corroding reinforcement if accessible, clean and dry the surface, and seal properly. Switching to polypropylene fiber reinforcement eliminates the problem at the source. If the staining is more diffuse and covers the whole basin, check your aggregate source. Iron oxide staining can be cleaned with a dilute oxalic acid solution, but if the iron source is still present in the concrete, the staining will return.
Cracking
Hairline surface cracks in the first 24 hours are almost always plastic-shrinkage cracks caused by the surface drying too fast. Prevent them by covering the pour immediately with plastic sheeting. Structural cracks that open up over the first season are usually caused by insufficient curing, too-high water-to-cement ratio or lack of reinforcement. For minor cracks, clean the crack, apply bonding adhesive, press in a stiff repair mortar and re-seal. In freeze-thaw climates, any unsealed crack becomes an entry point for water that then expands on freezing, seal the whole basin proactively rather than waiting for damage.
Algae and bacteria
A porous, unsealed concrete surface is an algae hotel. The best prevention is dense, well-cured concrete plus a quality sealer. For ongoing maintenance, Audubon recommends scrubbing the basin with a 9:1 water-to-vinegar solution, avoid synthetic soaps because residue can strip the oils from bird feathers. Refill the water every other day in warm weather, or more often in summer heat. Adding a small submersible bubbler or dripper keeps the water moving, which discourages both algae growth and mosquito breeding. Mosquitoes need still water to lay eggs, so even a slow drip makes a real difference.
Freeze damage and winter care
Concrete expands when it freezes and so does water sitting in the basin. A fully sealed, air-entrained concrete bath handles freeze-thaw cycles far better than a porous, unsealed one. In climates with extended hard freezes, the safest approach is either to bring the bath inside or to add a submersible bird bath heater, which keeps the water just above freezing and eliminates the freeze-thaw stress on the basin. If you leave the bath outside unsealed through a winter, expect surface scaling and possible cracking by spring.
Putting it all together: a practical starting point
If you are casting a new bird bath from scratch, start with QUIKRETE 5000, keep your water ratio around 6 pints per 80 lb bag, add polypropylene micro-fibers for shrinkage control, moist-cure under plastic for at least 5-7 days, then wait 14-28 days before applying a penetrating silane/siloxane sealer or an NSF 61-certified surface coating. For a side-by-side comparison and vendor links, see best concrete mix for bird bath. If you are in a freeze-thaw climate, ask your local concrete supplier about adding an air-entraining admixture to target 4-6% air content, it is the single biggest durability upgrade you can make for outdoor applications. For repairs, use QUIKRETE Concrete Bonding Adhesive as your primer and SAKRETE Pro-Mix or a site-mixed mortar as the patch. Seal everything before the birds move in.
The concrete work is really just the beginning. Once the basin is cast, cured and sealed, you'll be thinking about the right sealer chemistry, whether to paint the exterior, how to fix a broken section if it takes a fall, and why the water is turning rust-colored after a few months. Each of those questions has a clear answer rooted in the same principle: use the right material, follow the product TDS, and do not skip the seal.
FAQ
What is the single best concrete product to use when casting a new outdoor bird bath basin for durability and early strength?
For a durable, high‑strength cast suited to outdoor bird baths, a general recommendation is a Portland‑cement concrete mix with good early strength and controlled water content. QUIKRETE 5000 (High Early Strength Concrete Mix) is a widely available option: for an 80 lb (36.3 kg) bag the manufacturer recommends approximately 6–10 pints (2.8–4.7 L) of clean water per bag (typical target ≈6 pints to reach ~2–3 in slump). Expected compressive strengths: ~1,500 psi @1 day, ~3,500 psi @7 days and ~5,000 psi @28 days. Use moist curing for at least 5–7 days and full strength develops by 28 days.
If I’m making small batches or a hand‑poured ornamental bird bath, what packaged mixes are best and what exact mix ratios should I use?
For small batches, use a premixed bag intended for small pours: SAKRETE Pro‑Mix All‑Purpose Cement Mix is suitable. Manufacturer guidance for hand batches: 'add 4 parts powder to 1 part water' for small quantities and do not exceed 4.0 qt (3.8 L) water per 50 lb bag. For a slightly stronger, less porous basin, reduce water to the lower end of the range to achieve a stiff, workable mix (no slump). Always mix with clean potable water and follow the product TDS; do not re‑temper with extra water later.
How should I change a mix for freeze‑thaw durability in climates that freeze?
Add an air‑entraining admixture to target entrained air in the hardened concrete of roughly 4–7% (typical industry/ACI guidance; use ~4–6% for many exposures). Use a reputable AEA (Sika or similar) and dose per the product TDS, making trial batches to dial in the exact dosage for your mix and aggregate. Also: keep water/cement ratio low (use high‑range water reducer / superplasticizer like a PCE — MasterGlenium type — to maintain workability without adding water), ensure proper curing (moist cure 5–7 days minimum), and consider non‑corroding reinforcement (synthetic fibers or stainless mesh) to avoid internal corrosion from continuous wetting.
What reinforcement should I use to reduce cracking without creating corrosion risk in a constantly wet bird bath?
For small basins, prefer synthetic micro/macro fibers (polypropylene or proprietary blends) to control plastic/shrinkage cracking and add post‑crack toughness. Typical fiber dosages range from 3–12 lb/yd3 (1.7–7 kg/m3) depending on product — follow the fiber manufacturer’s TDS and add fibers per instructions to avoid balling. If mesh is needed, use stainless‑steel welded wire (light gauge) with proper cover, or very light galvanized mesh only if you accept limited life — stainless is preferred for long wet exposure to avoid rust staining and corrosion. Avoid bare carbon steel rebar in continuously wet basins.
Which additives are safe and recommended (plasticizers, accelerators, AEAs, superplasticizers) and how should they be dosed?
Recommended admixtures and general dosing guidance: - Air‑entraining admixture (AEA): target 4–7% entrained air for freeze‑thaw; follow manufacturer dosing (Sika TDS) and confirm with trial mixes. - High‑range water reducer / superplasticizer (PCE, e.g., MasterGlenium): use per manufacturer's recommended dosage (expressed per cementitious weight) to lower w/c and keep workability — always run trial batches. - Do not add incompatible additives to proprietary small‑bag mixes that forbid them (many Sakrete/Quikrete TDS sheets warn against adding accelerators/retarders/plasticizers to certain products). Always follow the product TDS/SDS and test batches.
How do I bond new concrete to an old bird bath or repair a crack so the patch lasts?
Best practice for repairs: 1) Clean surface to sound concrete — remove loose, delaminated material, rust, dirt, vegetation. 2) For substrate preparation, roughen and dampen (SSD) the old concrete but avoid standing water. 3) Apply a cement bonding agent (e.g., QUIKRETE Concrete Bonding Adhesive, which meets ASTM C1059) to the prepared surface per product directions. 4) Use a compatible repair mortar or mix (small‑batch cementitious patch or a polymer‑modified repair mortar). 5) Trowel the patch and finish as needed; keep moist curing per product guidance (usually 3–7 days). For hairline cracks consider epoxy injection or NSF‑certified two‑part epoxy adhesives for structural repair, but for basins where water will contact birds use only adhesives/coatings certified for potable/wildlife contact (see sealing/lining FAQ).
Next Articles
Best Concrete Mix for Bird Bath: DIY Ratios and Steps
Choose the best concrete mix for a bird bath with DIY ratios, mixing steps, leak-proof curing, and bird-safe finishes.
Best Glue for Concrete Bird Bath Repairs That Last
Choose the right adhesive, prep, and repair steps for concrete or ceramic bird baths that cure in wet weather.
Best Sealant for Concrete Bird Bath: Bird-Safe Guide
Choose the best bird-safe, non-toxic sealant for concrete bird baths, with prep, coats, curing, and maintenance steps.