You can make a DIY bird bath top in an afternoon using a shallow terracotta saucer, a concrete mixing tray, or a repurposed glazed dish, the key is keeping water depth between 1 and 1.5 inches, adding texture so birds don't slip, and securing it so it stays level on whatever base you're using. That's really the whole project. Everything else is just details that make the difference between a bath birds actually use and one they ignore.
DIY Bird Bath Top: Step by Step Build and Install

Marcus Henley
22 Jun 2026
What a bird bath top actually is (and why it matters)
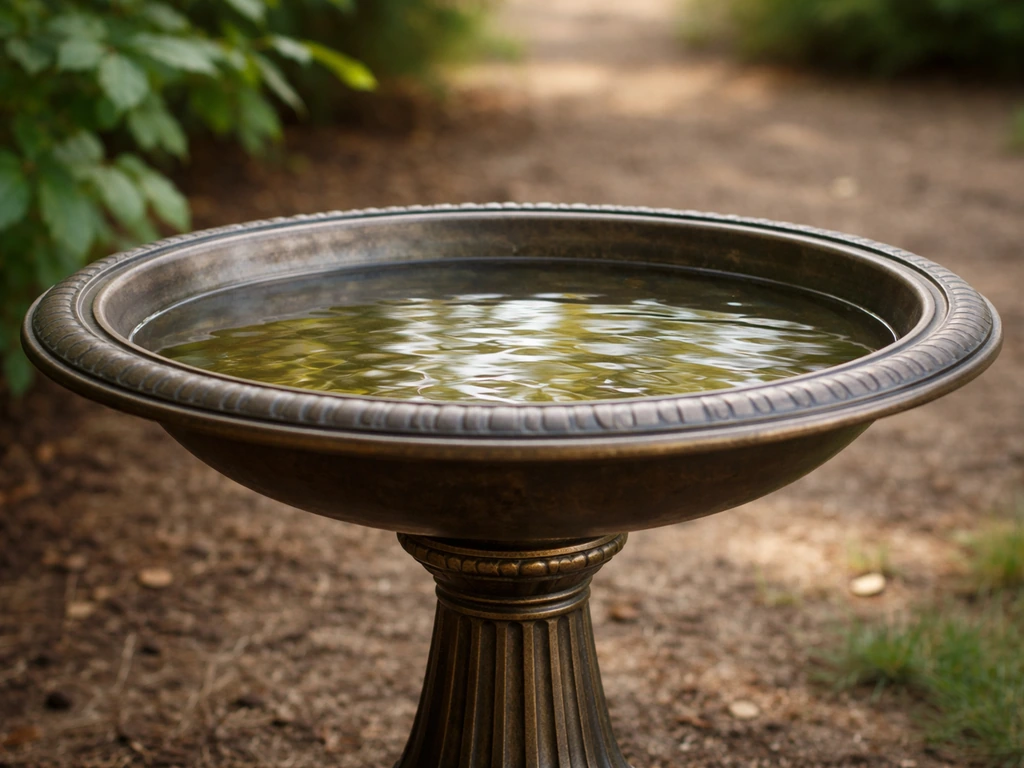
A bird bath top is the basin part, the shallow bowl or insert that holds the water. It sits on top of a pedestal, a stump, a stack of bricks, or any stable base you've already got. When people talk about making a DIY bird bath top, they usually mean one of two things: either building a replacement basin for an existing stand whose original bowl cracked or went missing, or creating a completely new shallow insert that improves on a plain container they've been using.
The reason the top is such a critical piece is depth. Most decorative containers and pots are just too deep, birds want 1 to 1.5 inches of water, with a gradual slope up to a blank" rel="noopener noreferrer">dry edge at the rim where they can perch and assess their surroundings before hopping in. Ornithology.org recommends keeping birdbath water shallow, ideally no more than 1, 2 inches deep, to support safe wading blank" rel="noopener noreferrer">ideally no more than 1–2 inches deep. A plain terra cotta pot saucer already gets this right in terms of shape. A repurposed salad bowl usually doesn't. A well-designed top solves both the depth problem and the traction problem in one step.
Materials and tools you'll need
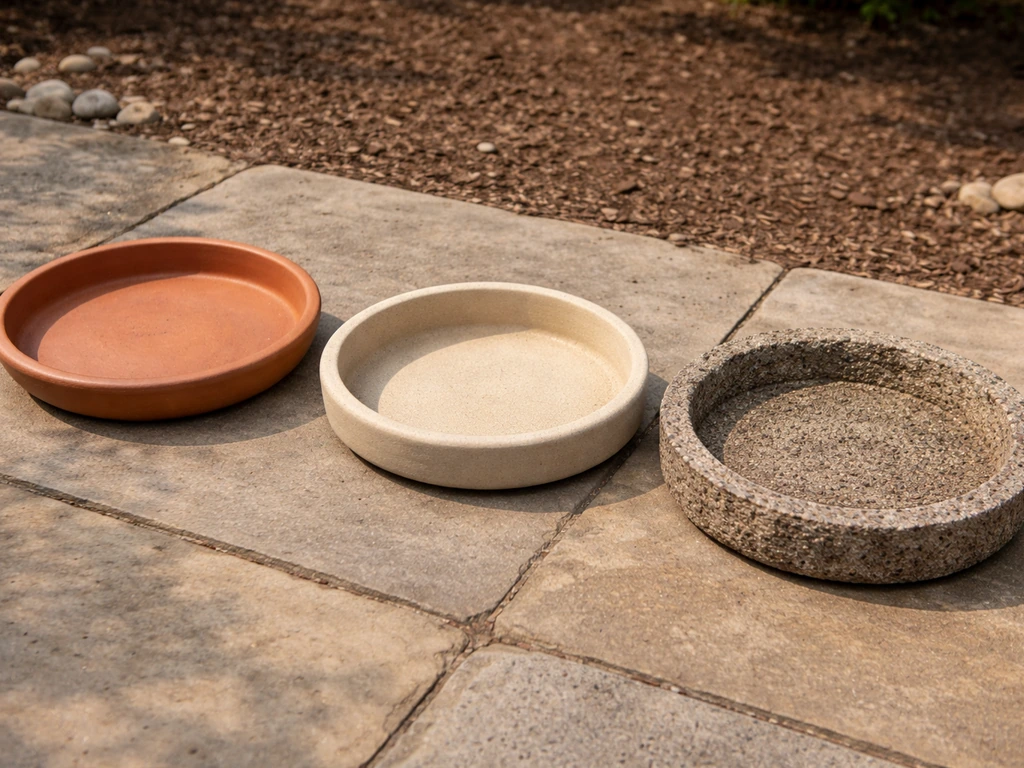
You have a few solid material options depending on your budget, your climate, and how long you want this to last. Here's a quick comparison to help you pick:
| Material | Cost | Durability | Best For | Freeze Risk |
|---|---|---|---|---|
| Terracotta saucer (14–18 in.) | Under $15 | 3–5 years | Beginners, quick builds | Cracks in hard freezes if not brought in |
| Hypertufa (DIY concrete mix) | Under $25 for supplies | 10+ years | Custom shapes, permanent installs | Very low if mixed correctly |
| Glazed ceramic dish | Under $20 | 5–8 years | Aesthetics, easy cleaning | Moderate — glaze can crack |
| Concrete mixing tray (repurposed) | Under $10 | 5–7 years | Budget builds, large basins | Low — flexible plastic absorbs some freeze expansion |
| Fiberglass or resin tray | Under $30 | 10+ years | Cold climates, lightweight | Very low |
For most beginners, I'd start with a terracotta saucer in the 16–18 inch range or go straight for a hypertufa build if you want something that lasts. The hypertufa route takes one weekend but produces a genuinely durable, natural-looking basin that birds seem to love, the rough surface provides grip without any extra work.
Tool list
- Tape measure and marker
- Sandpaper or a concrete rubbing stone (for smoothing sharp edges)
- Waterproof exterior sealant or concrete sealer (if using unglazed terracotta or hypertufa)
- Non-slip pebbles, coarse sand, or small flat stones for traction (optional but recommended)
- Waterproof adhesive or silicone caulk (for attaching the top to a pedestal)
- Bucket and mixing paddle (for hypertufa builds)
- Rubber gloves and safety glasses
- Level (a small bubble level saves a lot of frustration)
How to make your bird bath top, step by step
These instructions cover both the terracotta saucer route (fast, minimal tools) and the hypertufa route (slower, more rewarding). Pick whichever suits your timeline.
Option 1: The terracotta saucer build (same day)
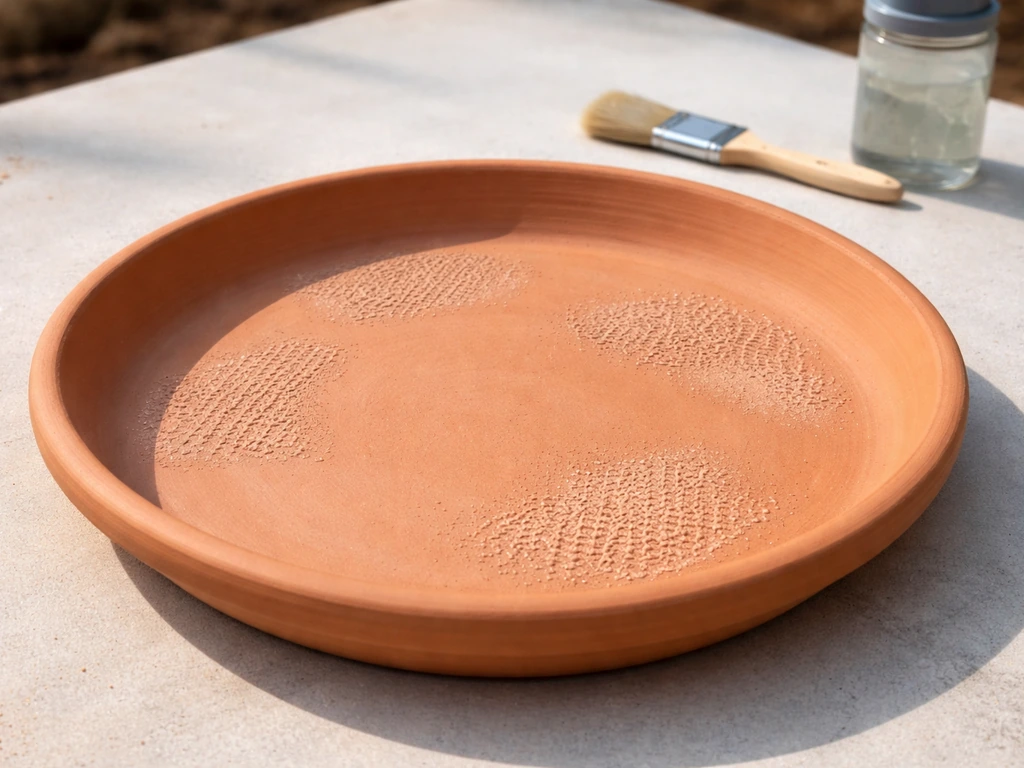
- Choose a glazed or unglazed terracotta saucer between 14 and 18 inches in diameter. Unglazed is naturally rough, which is good for grip. Glazed looks nicer but you'll need to add texture.
- Check the depth. The center of the saucer should be no deeper than 2 inches. If you have an unglazed saucer, test it with a ruler — most standard 16-inch saucers hit right around 1.5 inches at the deepest point, which is perfect.
- If the surface is glazed and slippery, rough it up with coarse sandpaper or glue a handful of small flat pebbles to the bottom using waterproof adhesive. Let it cure for 24 hours before adding water.
- Seal unglazed terracotta with two coats of exterior-grade concrete sealer or a food-safe waterproof sealant. Unsealed terracotta is porous and will slowly seep water. Let it dry fully — 48 hours in warm weather.
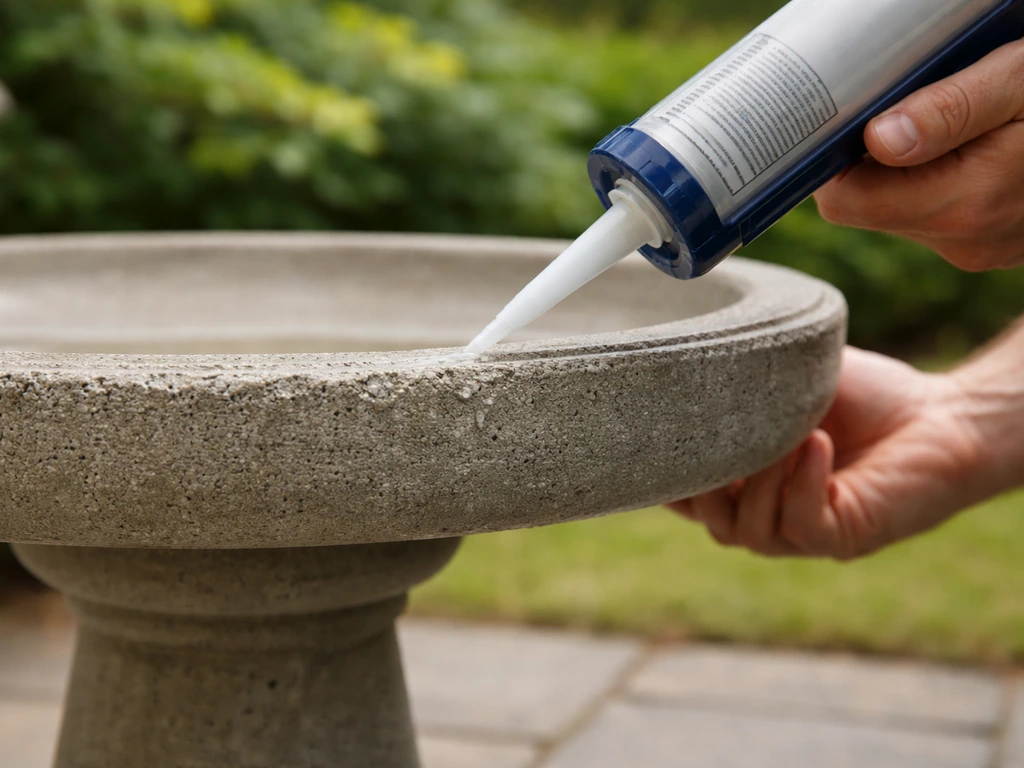
- Place the saucer on your base and check it with a level. Even a slight tilt will cause the water to pool on one side and dry out the other. Use waterproof silicone caulk between the saucer and the base to prevent shifting.
Option 2: The hypertufa DIY basin (weekend project)
- Mix your hypertufa: combine 1 part Portland cement, 1.5 parts peat moss, and 1.5 parts perlite by volume. Add water slowly until the mix holds together like thick peanut butter. Wear gloves — cement is caustic.
- Choose a mold. A flexible plastic mixing tray or a large plastic bowl works well. Lightly coat the inside with petroleum jelly so the hypertufa won't bond to it.
- Press a 1.5 to 2 inch layer of the mix into the mold, working from the center out. Aim for a gentle slope — thicker at the rim, slightly shallower toward the center. The natural shape of a bowl mold handles most of this automatically.
- Cover the mold loosely with plastic sheeting and let it cure for 24–48 hours. Don't let it dry too fast in hot sun — slow curing makes stronger hypertufa.
- Unmold carefully, then let it cure for another week outdoors. Scrub the surface with a stiff brush and water to remove loose material and soften any sharp edges.
- Before use, soak the basin in water for 3–4 days, changing the water daily. Fresh Portland cement leaches lime, which raises pH. Soaking and rinsing neutralizes it so it won't harm birds.
- Seal with a concrete sealer if you want easier cleaning, or leave it unsealed for a more natural look. The rough texture is already bird-friendly as-is.
Fitting, sealing, and keeping it stable
A wobbly bird bath top is a problem on two levels: birds won't trust an unstable surface, and a tipped basin attracts mosquitoes in stagnant puddles nearby. Getting this right is worth the extra ten minutes.
If your top is resting on a pedestal or a flat surface, run a bead of clear waterproof silicone caulk around the contact point before setting the basin down. Press it into position, check with your level, adjust immediately (you have a few minutes before the caulk starts to grab), then leave it undisturbed for 24 hours. This creates a flexible, weatherproof bond that still allows seasonal expansion and contraction.
For tops sitting on uneven surfaces like stumps or stacked stones, pack non-hardening weatherstrip foam tape or small flat shims into any gaps before caulking. The goal is full contact with no rocking. Once caulked and cured, test it by pressing firmly on opposite edges, there should be zero movement.
If you ever want to remove the top for winter storage or replacement (and terracotta owners definitely should consider this in freezing climates), skip the caulk and use a rubberized anti-slip mat cut to fit between the basin and the base instead. If you need to swap to a heritage-style bird bath replacement top, make sure you match the same water depth and rim shape for stable perching heritage bird bath replacement top. It cushions, grips, and lets you lift the basin free without chipping anything. This is actually my preferred approach for any removable top.
On the leak front: a properly sealed terracotta or hypertufa basin won't leak through the material itself, but hairline cracks can develop over time, especially after a hard freeze. Check your basin at the start of each season by filling it and watching the water level over 24 hours. If it drops more than what evaporation would explain, re-seal with a waterproof concrete patch compound or replace the basin. Glazed ceramic and resin tops almost never develop this issue, which is one reason they're worth considering if you're in a cold region.
Placement and height: getting birds to actually show up
Where you put the bath matters as much as what it's made from. I've moved the same bath three times in my yard before landing on a spot where it gets consistent visits, and the differences were immediate each time.
Height is the most important variable. Most backyard birds prefer a bath positioned 24 to 36 inches off the ground, roughly waist to chest height. This keeps them visible to predators so they feel safe enough to linger. Ground-level baths do get used, especially by robins and mourning doves, but they require more open space around them (at least 6 feet of clear sightlines) so birds can see a cat or hawk approaching.
Place the bath within 10 to 15 feet of a shrub or small tree, but not directly under heavy cover. Birds want a quick escape route, a nearby branch to perch on while they survey the bath, and somewhere to retreat to while they preen afterward. Directly under a tree looks natural but creates a mess from droppings and debris that accelerates algae growth.
Morning sun is a plus because it warms the water slightly and makes the bath visible from a distance. Afternoon shade helps in hot climates, keeping the water cooler and slowing evaporation. In most North American climates, a spot with morning sun and partial afternoon shade is the sweet spot.
One more thing: adding a dripping water source or a small solar-powered fountain pump to your DIY top makes a huge difference in traffic. Adding a dripping water source can also improve how well your cardinal bird bath top draws birds in. Moving water catches light and creates sound that birds detect from a surprising distance. Even a simple dripper made from a punctured plastic jug hung above the basin works well.
Keeping it clean: algae, mosquitoes, and seasonal care
A bird bath top needs regular maintenance to stay healthy for birds. The good news is that once you're in a routine, it takes maybe five minutes every few days.
Routine cleaning
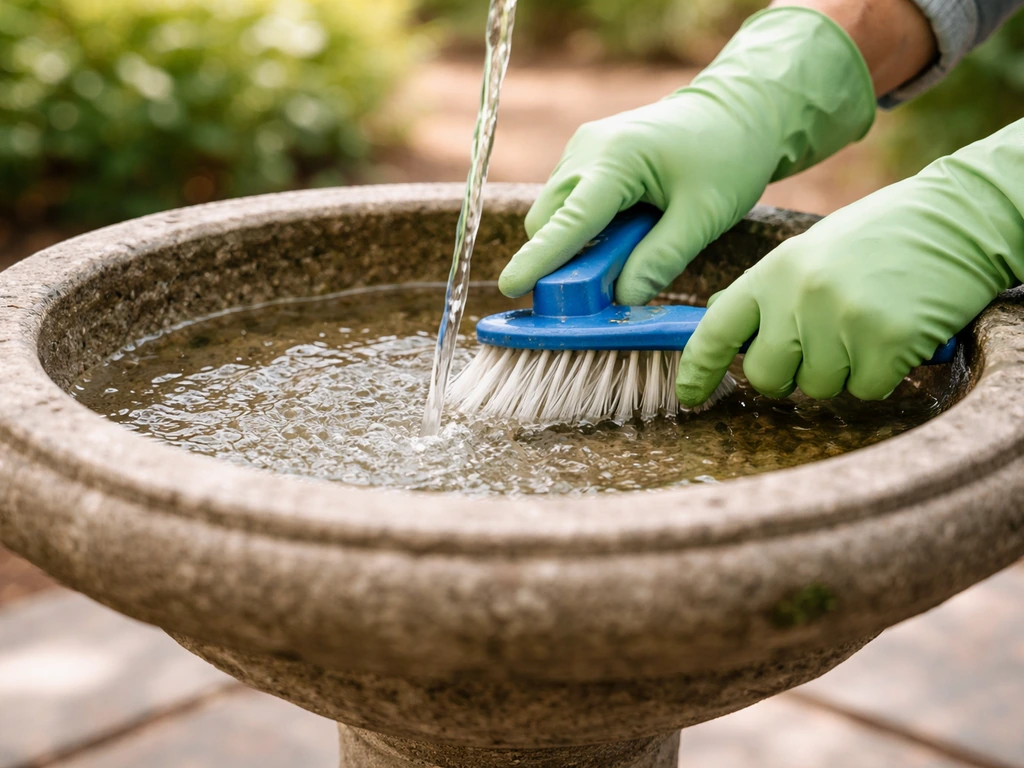
Empty and scrub the basin every 2 to 3 days in warm weather, daily if temperatures are above 90°F or if you're seeing a lot of bird traffic. A stiff-bristled brush (not metal) and plain water handle most buildup. For stubborn algae or mineral deposits, use a 1:9 white vinegar to water solution, scrub, then rinse thoroughly before refilling. Never use dish soap or bleach directly in the basin, soap residue strips birds' feathers of natural oils, and bleach residue is toxic. If you need to disinfect, a solution of 1 part bleach to 10 parts water is acceptable, but rinse with multiple changes of fresh water and let it air dry before refilling.
Algae prevention
Algae grows fast in warm, sunlit, still water. The single best prevention strategy is changing the water frequently, algae can't establish a foothold in water that gets refreshed every 48 hours. A rough-textured basin surface (like unglazed terracotta or hypertufa) is slightly more prone to algae than a smooth glazed surface, so if algae is a recurring problem, consider sealing the interior with a smooth concrete sealer. Barley straw extract (available at garden centers) added in tiny amounts is a natural algae inhibitor that's safe for birds. A few drops of plain apple cider vinegar per gallon of water also helps without harming wildlife.
Mosquito control
Mosquitoes need standing water for 7 to 10 days to complete their breeding cycle. If you're changing water every 2 to 3 days, you've already broken that cycle. Adding a small solar fountain pump takes care of any remaining risk because mosquitoes won't lay eggs in moving water. If you want a belt-and-suspenders approach, mosquito dunks (Bacillus thuringiensis israelensis, or BTi) are 100% safe for birds and lethal to mosquito larvae.
Winter and freezing weather
Terracotta and unglazed ceramic tops should come inside before the first hard freeze, water expands when it freezes and will crack an unglazed porous basin in one season. Hypertufa, fiberglass, and thick resin tops generally handle freezing better, especially if you let them drain completely before a hard freeze rather than leaving standing water in them. If you want to keep a bath running through winter to support birds in cold months (which is genuinely worthwhile since natural water sources freeze over), add a dedicated submersible bird bath de-icer rated for your basin size. They're thermostatically controlled and only run when the temperature drops close to freezing, so they're inexpensive to operate.
If you're comparing DIY options to ready-made solutions, it's worth knowing that metal bird bath tops and clay bird bath tops each have their own maintenance profiles, metal can corrode without proper coating, while clay behaves similarly to the terracotta approach described here. A replacement bird bath bowl top from a garden center is always an option if your DIY build doesn't turn out how you hoped, and there's no shame in mixing a homemade pedestal with a commercial basin or vice versa.
FAQ
Can I use a deeper pot saucer for a DIY bird bath top if I add a little less water?
If the basin is naturally deeper, birds may still try to hop in and then get submerged or struggle to find the gradual slope up to a dry rim. The safer approach is to keep the water depth in the 1 to 1.5 inch zone with a rim-perching shape, not just reduced fill height.
What should I do if my basin sits on a pedestal but the wobble only happens after it fills?
Check for uneven support points, not level of the rim alone. Dry-test by pressing opposite edges for movement, then re-check after filling. Use non-hardening shims or weatherstrip foam tape under the specific low spots before applying caulk.
How do I choose between silicone caulk and a rubber anti-slip mat if I want the top to be removable?
Use a rubberized anti-slip mat when you anticipate seasonal removal, like in freezing climates. Silicone caulk creates a flexible weatherproof bond that is harder to undo cleanly, even if it still allows some movement.
Is it safe to seal an unglazed terracotta or hypertufa interior to prevent algae?
Yes, sealing can help, especially if algae keeps returning, but only use a smooth concrete sealer made for potable or wildlife-safe water contact and apply it to the inside surface after the basin cures fully. Keep traction in mind, if birds slip after sealing, lightly texture the transfer points near the waterline.
What’s the best way to patch hairline cracks on a DIY bird bath top?
First confirm the crack is the source of water loss (fill and observe over 24 hours). Then re-seal using a waterproof concrete patch compound, and let it cure fully before refilling. If water loss continues, replace the basin rather than stacking multiple patch layers.
Can I place the bird bath under a thick shrub or near dense foliage for protection?
Avoid heavy overhang directly above the basin because it blocks escape routes and increases debris and droppings falling into the water. Instead, aim for nearby cover that is “off to the side” with at least an open sightline for predators to be detected.
Do I need to worry about birds splashing water outside the bath?
Yes, water pooling around the base can create mosquito habitat. Keep the installation stable and consider a slightly sloped base surface or quick drainage area so excess splash water doesn’t collect into puddles.
Will a small dripper or pump change how often I need to clean?
You’ll still need routine cleaning. Moving water reduces stagnant conditions, but mineral buildup and biofilm still form, especially in sunlit areas. Stick with the same scrub schedule, then adjust frequency based on how fast the water clouds.
Can I use soap, even if it’s mild, to remove grime?
Avoid dish soap in the basin. Soap residue can strip natural oils and affect feather health. For stubborn grime, use the vinegar-to-water method and rinse thoroughly, and only use bleach if you follow it with multiple freshwater changes and full air drying.
How do I prevent a DIY bird bath top from freezing and cracking in winter?
Bring terracotta or unglazed porous tops inside before hard freeze. For materials that tolerate freezing, drain completely so no standing water remains. If you want year-round operation, use a bird bath de-icer sized for your basin and run it only when temperatures drop near freezing.
What size de-icer or de-icer rating should I buy for a DIY bird bath top?
Match the de-icer’s capacity to the basin’s approximate water volume and surface area. A unit rated too small may run continuously or fail to keep a usable pocket of water, while an oversized unit is often unnecessary and can increase operating cost.
Can I combine a commercial bird bath bowl with a homemade pedestal?
Yes. Mixing a DIY pedestal with a store-bought replacement bowl is a practical solution if you want reliable depth and rim shape. The key is still the same target depth and perching geometry, and a stable top-to-base contact so the basin stays level.
Next Article
Metal Bird Bath Top Guide: Pick, Fit, Install, Maintain
Choose, replace, and install a metal bird bath top with right fit, water depth, maintenance, and winterproofing tips.