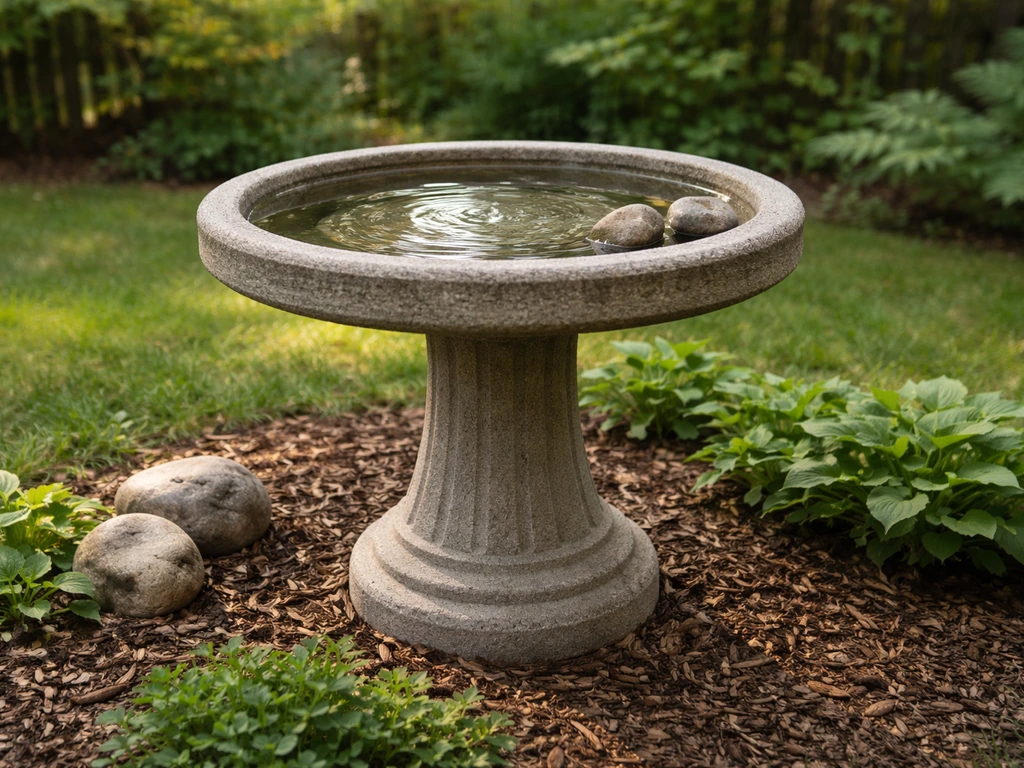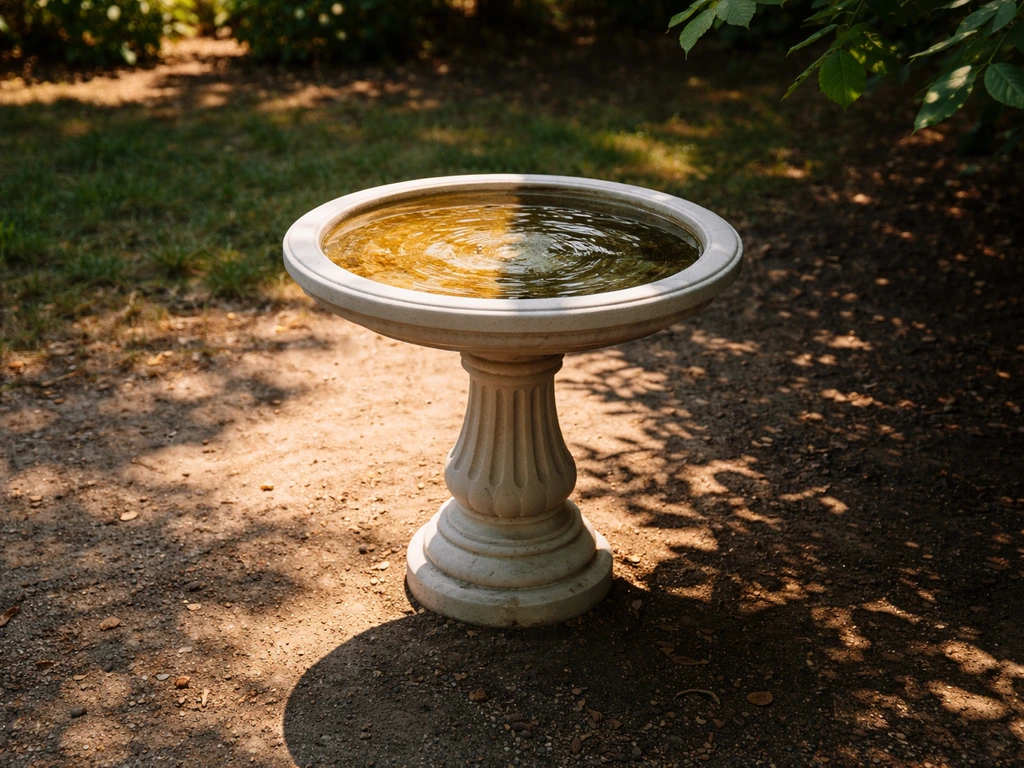
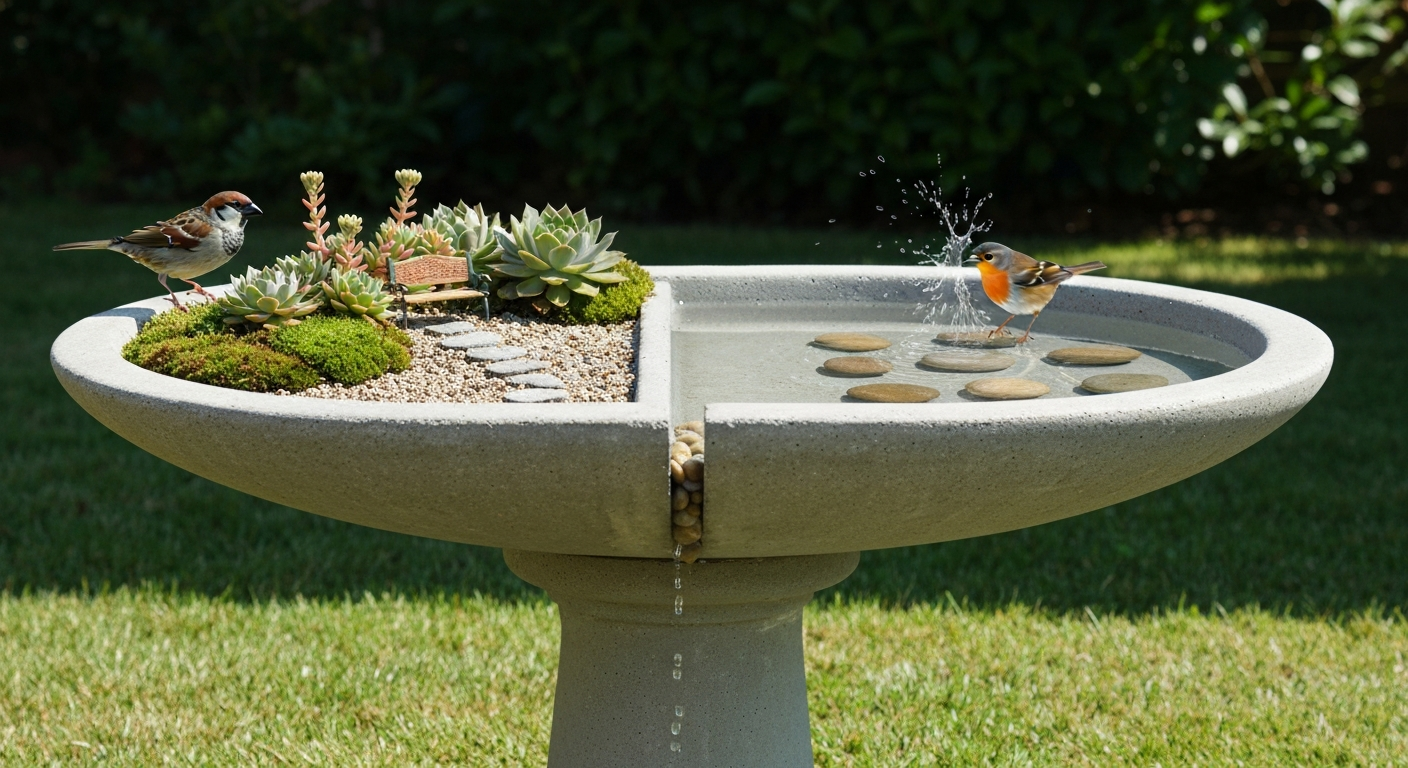
You can absolutely make a fairy garden in a bird bath, and it works beautifully as long as you keep bird safety at the center of every decision. The key is to use a wide, shallow basin with gently sloping sides, drill a drainage hole, fill it with a free-draining soilless substrate, choose non-toxic low-growing plants like sedums and mosses, and keep a section of open water shallow enough (no deeper than 2 inches in the center) for birds to actually use. Do all that, and you get a charming miniature garden that doubles as a genuine wildlife water feature.
How to Make a Fairy Garden in a Bird Bath: Safe Build & Care

Marcus Henley
15 Jul 2026
Why a fairy garden bird bath is worth building
Most fairy gardens live in pots or trays where birds have no reason to visit. A bird bath flips that around: birds are already drawn to it for water, so the planting and miniature accessories become a backdrop to real wildlife activity rather than just a tabletop display. I've had house sparrows, goldfinches, and robins using a planted bath in my backyard while completely ignoring the unplanted one two feet away. The texture and color variations seem to give smaller birds more confidence to approach.
That said, this project carries a responsibility that a regular fairy garden doesn't. Birds drink from and bathe in the water, which means every material you use, every plant, every glue and paint, has to be non-toxic and bird-safe. A pretty scene that poisons a songbird or traps it in deep water is worse than no garden at all. The sections below address safety at every step, not just as a footnote.
Choosing the right bird bath and base
The basin itself does most of the heavy lifting for this project, so picking the right one upfront saves you a lot of retrofitting work later.
Size and shape
Go wide and shallow. The RSPB recommends a surface area of at least 30 cm (about 12 inches) across, and I'd suggest 40 to 60 cm (16 to 24 inches) as a practical sweet spot for a fairy garden because you need room for both a planting zone and an open water zone. Depth matters enormously for bird safety: edges should be no deeper than about 1/2 to 1 inch (1.3 to 2.5 cm), sloping gradually to a maximum of 2 inches (5 cm) in the center. If you can't keep the deepest point under 2 inches, place smooth pebbles or flat stones inside to create a shallow wading shelf.
Material comparison
| Material | Drilling ease | Weight/stability | Durability | Best for |
|---|---|---|---|---|
| Concrete/hypertufa | Moderate (masonry bit) | Heavy, very stable | Excellent outdoors | Permanent garden installs |
| Ceramic/glazed | Harder (diamond bit needed) | Moderate | Good, can chip or crack | Decorative focal points |
| Terracotta | Easy (masonry bit) | Moderate | Can crack in hard frost | Mild-climate gardens |
| Resin/plastic | Very easy (standard bit) | Light, may need anchoring | UV degrades over years | Budget builds, easy to move |
| Cast iron/metal | Difficult, not recommended | Very heavy, very stable | Rust risk without sealing | Use liner pot instead of drilling |
For most people starting out, a wide shallow concrete or resin basin on a pedestal or set directly on a patio is the easiest base to work with. Concrete handles outdoor conditions well and is easy to drill with a masonry bit. If you already own a ceramic bath you love, it can absolutely work, but you'll need to drill with a diamond hole saw using the wet drilling method described later.
Stability
A tipping bird bath is dangerous to birds and ruins the planting. If you're using a pedestal-style bath, check that the basin locks or sits securely on the column. For ground-level baths, set the basin on a flat, level surface and pack soil around the base if needed. Once you add substrate, pebbles, and accessories, even a lightweight resin basin becomes heavy enough to stay put on a calm day, but secure it with a ground stake or adhesive pads if you're in a windy spot.
Making the bath safe for birds before you plant anything
Bird safety isn't a single checkbox; it's a set of design decisions you make before the first shovel of soil goes in.
Water depth and access
The open water section of your fairy garden bath should slope gently from about 1/2 inch at the rim to no more than 2 inches at its deepest point. Songbirds, particularly smaller species like warblers and wrens, are comfortable at around 1 inch. Place a few smooth, flat stones or river pebbles in the water zone to create textured footing and variable wading depths. Avoid any stone with sharp edges, and never use artificial turf mats that could tangle toes or trap a wet bird.
Perches and landing zones
Birds like to assess a water source before committing to it. A few pebbles or a small flat stone placed just at the water's edge give them a place to stand and survey. The planted section of the bath itself functions as a landing pad, but keep the plant foliage low enough (under about 3 to 4 inches tall) so it doesn't obstruct the bird's sight lines while bathing.
Non-toxic finishes and sealants
If your basin has a factory glaze, it's generally safe once cured. If you're sealing bare concrete or terracotta, use a water-based, non-toxic pond or water feature sealant and allow a full cure time (usually 72 hours minimum, check the product label). Avoid any solvent-based sealant, epoxy, or paint not rated for water features or aquatic contact. Do not use standard deck paint, rust paint, or spray paint on any surface that will contact the water.
Drainage and substrate: getting the foundation right
This is the step most DIY fairy garden tutorials skip, and it's why so many planted bird baths turn into a soggy, algae-covered mess within a month. Good drainage is non-negotiable.
Drilling a drainage hole
The cleanest long-term solution is to drill at least one drainage hole at the lowest point of the planting zone. For a small to medium basin, a single hole of 1/4 to 1/2 inch diameter is usually sufficient. For concrete or masonry, use a masonry bit or core bit with water to reduce dust and heat. For ceramic or glazed basins, use a diamond hole saw with wet drilling: keep water dripping onto the bit continuously, start slowly, and let the bit do the work without forcing it. Always clamp or stabilize the basin firmly, wear eye protection and a dust mask, and work slowly to avoid cracking the rim or glaze. If you absolutely cannot drill (a very expensive antique basin, for example), you can use a nested plastic liner pot with its own drainage hole set inside the basin on a raised platform of gravel, but a direct drainage hole is always preferable.
Layering the substrate
Don't rely on gravel alone at the bottom as a drainage layer; that's a myth that leads to a perched water table in the growing medium. Instead, layer as follows: start with a small layer of 1/4 to 3/4 inch pebbles or coarse gravel directly over the drainage hole, then place a piece of landscape fabric or fine mesh over the gravel to stop the soil from washing through. Over that, add no more than 1 inch of a free-draining soilless potting mix, ideally a cactus and succulent mix or a gritty mix cut 50/50 with coarse horticultural grit. Keep the total media depth very shallow, typically 1 to 1.5 inches, because you're working with a basin that has almost no vertical depth. Top with decorative pebbles, small stones, or patches of sphagnum moss.
Route the drainage hole away from the open water section of the bath. If the bath sits on a pedestal, the drainage simply drips off. If it sits on the ground, position a small pebble tray or channel underneath to carry water away from the base without creating a puddle that could become a mosquito breeding spot.
Plants that work well and how to plant them
You're working with a shallow, potentially sunny, exposed microenvironment, so the plant palette is specific. Plants that need deep root runs, frequent watering, or lush humid conditions will fail quickly. The following categories consistently perform well.
Low-growing sedums and sempervivums
Creeping sedum cultivars (stonecrops) are ideal for this use. They tolerate shallow, gritty soil, handle drought and sun exposure, stay naturally low, and spread to cover pebbles attractively. Good options include Sedum acre, Sedum album, and low mat-forming cultivars like 'Dragon's Blood' or 'Coral Carpet.' Sempervivums (houseleeks) form tight rosettes and are extremely drought tolerant, surviving in as little as an inch of gritty medium. Both genera are non-toxic to birds. Check the USDA hardiness zone for any specific cultivar you're considering, because cold tolerance varies considerably.
Alpine and rock garden plants
Dwarf alpine saxifrages, low thyme cultivars (like Thymus serpyllum), and small-leaved oregano varieties are well adapted to shallow rocky conditions. The Royal Horticultural Society lists sedums, sempervivums, and alpine saxifrages as ideal for crevice and shallow rock garden containers, which is essentially what a bird bath planting zone is. Thyme and oregano are non-toxic and have the added benefit of being fragrant, though there's no evidence that scent alone attracts birds.
Mosses
Mosses are perfect for shaded or semi-shaded sections of the bath and create a classic fairy garden look. They work best in the damper zones near the water edge and in spots that don't get full afternoon sun. Cushion mosses and sheet mosses transplant well from garden stones or can be purchased from terrarium suppliers. Keep moss patches moist with a light misting rather than heavy watering, and avoid letting them sit in standing water, which encourages rot rather than healthy growth. Mosses don't need soil depth at all; they anchor on top of the pebble surface.
Planting technique
- Drill your drainage hole and allow any sealant to fully cure before planting.
- Lay the gravel base layer (1/4 to 3/4 inch pebbles), then cut landscape fabric to fit and press it over the gravel.
- Add the soilless gritty mix over the fabric, keeping it to about 1 inch depth in the planting zone.
- Plan your layout dry before planting: water zone on one side, planting zone on the other, with a gradual transition using flat stones.
- Plant sedums and sempervivums by pressing the root ball gently into the thin media layer; they don't need much depth.
- Position mosses at the water's edge by pressing patches onto damp pebbles or a thin sphagnum layer.
- Fill gaps with small decorative pebbles, gravel, or fine-grained sand to complete the ground surface.
- Water the planted section lightly to settle the media, then add the water to the open water zone.
Plant and material safety: what's safe and what to avoid
This is the section to read carefully, especially if you're planning to let birds drink from and bathe in the water. The list of toxic plants that could leach into a small water volume is not trivial.
Safe plant choices
- Sedum (stonecrop) species and cultivars: non-toxic to birds
- Sempervivum (houseleek): non-toxic
- Thymus (thyme): non-toxic, commonly used in herb gardens
- Origanum (oregano): non-toxic
- Native mosses and sphagnum: non-toxic
- Saxifraga (saxifrage) alpine species: generally non-toxic, but verify any specific cultivar if unsure
Plants to avoid near a bird bath
- Foxglove (Digitalis): highly toxic
- Lily of the valley (Convallaria): toxic
- Yew (Taxus): extremely toxic
- Daffodil bulbs (Narcissus): toxic
- Lantana: toxic to birds
- Euphorbia species: milky sap is toxic and irritating
- Any plant treated with systemic pesticides or neonicotinoids
Soils, adhesives, and paints
Use a peat-free or peat-light cactus/succulent potting mix or a homemade gritty mix of horticultural grit and loam-free compost. Avoid any potting mix with added slow-release fertilizer granules, because fertilizer runoff into the water encourages algae growth and could affect water chemistry. For gluing accessories in place, use aquarium-safe silicone sealant only (it specifies aquatic/potable water safety on the label). Never use hot glue, superglue, or construction adhesive anywhere near the water zone. For painting terracotta accessories or stones, use a water-based acrylic labeled non-toxic when dry, and allow 48 to 72 hours cure time before placing near water.
Miniature accessories and keeping them in scale
The accessories are where the fairy garden personality comes from, but in a bird bath they need to serve the birds as much as the design. For ideas on arranging ornaments and plantings, see how to decorate a bird bath. Every piece needs to pass a basic test: could it trap, injure, or poison a bird? If the answer is maybe, leave it out.
Scale and placement
Work in the 1:12 dollhouse scale (1 inch equals 1 foot) for a natural fairy garden feel, or simply use pieces no taller than 3 to 4 inches and no wider than about 2 inches for a medium-sized basin. Larger pieces visually crowd a small basin and physically block birds from accessing the water. Place accessories only in the planted zone, never in the open water area. Anchor pieces with aquarium-safe silicone so they can't shift, fall into the water, or create a trap.
Safe accessory materials
- Unglazed terracotta miniature pots and urns: safe, weather well
- Natural stone or slate pieces: safe, add visual weight
- Small pieces of driftwood or weathered bark: safe if thoroughly dried
- Resin fairy figurines sealed with non-toxic water-safe finish: safe when fully cured
- Glass pebbles or flat glass gems: safe as long as they have no sharp edges
- Miniature wooden fences or bridges made with untreated timber: safe if sealed with non-toxic water-based sealant
What to avoid in accessories
- Anything with very small loose parts that could be ingested
- Metallic paint or metal foil finishes that can flake into water
- Wire structures that could snag a bird's foot or wing
- Netting or mesh of any kind
- Hollow accessories that collect and hold water inside them (mosquito habitat)
- Anything with lead-based paint (some vintage metal figurines)
For seasonal variations, the same principles apply. A Christmas or winter-themed bird bath fairy garden (think miniature evergreen sprigs, natural pine cones, and white quartz pebbles standing in for snow) works beautifully with fully natural, non-toxic materials. Avoid metallic spray-painted cones, plastic tinsel, or any decorative element that could shed microplastics or paint flakes into the water.
Step-by-step build guide
- Choose and prepare your basin: select a wide (ideally 40+ cm / 16+ inches), shallow basin with gently sloping sides. Clean it thoroughly with a 1:10 bleach-to-water solution, rinse completely, and allow to fully air dry.
- Seal if needed: if the basin is bare concrete or unglazed terracotta, apply a non-toxic water feature sealant to the interior. Let it cure for at least 72 hours before continuing.
- Mark your zones: using a piece of chalk or removable tape, divide the basin into a planting zone (roughly 40 to 50 percent of the surface) and an open water zone (the remainder). The water zone should include the deepest point of the basin.
- Drill the drainage hole: at the lowest point of the planting zone, drill a 1/4 to 1/2 inch hole using the appropriate bit for your material (masonry bit for concrete/terracotta, diamond hole saw with water for ceramic). Wear eye protection and a dust mask.
- Lay the drainage layers: place a 1/4 inch layer of fine gravel over the drainage hole, then cut and press landscape fabric over it to cover the entire planting zone floor.
- Add growing medium: fill the planting zone to about 1 inch depth with a cactus/succulent potting mix or a 50/50 gritty mix. Firm gently.
- Position your hardscape: place flat stones, small slate pieces, or pebble paths to define the planting layout and create a natural transition between the planted and water zones.
- Plant: set sedums, sempervivums, or low alpines into the growing medium. Press moss patches onto damp pebbles or sphagnum at the water's edge. Work from the back of the basin toward the front.
- Add accessories: anchor any fairy garden figurines or miniature features in the planted zone using aquarium-safe silicone. Let the silicone cure for 24 hours before adding water.
- Fill the water zone: add clean fresh water to the open water zone, filling to no more than 2 inches depth at the center. Place one or two smooth flat wading stones in the water zone.
- Position the bath: choose your placement (see placement notes below) and ensure the basin is completely level so water doesn't drain toward the planted zone.
- Monitor and adjust: check the water level and clarity daily for the first week. Change the water every 1 to 3 days, and watch that the drainage hole is working and the substrate isn't becoming waterlogged.
Placement: sun, shade, and everything in between
Placement is a balancing act with a planted bird bath. Birds generally prefer bird baths that are visible and close to cover, while your plants may have different light needs. Most sedums and sempervivums want at least four to six hours of direct sun, while mosses prefer dappled or indirect light. For tips on reducing sun exposure and protecting shallow water from overheating, see guidance on how to shade a bird bath. A spot with morning sun and afternoon shade tends to satisfy both plant and bird needs: the sun keeps the water fresh and deters heavy algae, and the shade prevents the shallow water zone from evaporating too rapidly in high summer. If you're wondering whether a bird bath should be in the sun or shade, aim for a location with morning sun and afternoon shade in most climates should a bird bath be in the sun or shade. Full afternoon sun in hot climates (USDA zones 8 and above) can raise the small water volume to temperatures that stress or deter birds. If full shade is unavoidable, lean heavily toward mosses and ferns rather than sedums, and accept that you'll need to clean the water more frequently as algae thrives in still shaded water.
Avoid placing the bath under trees or large shrubs that drop heavy leaf litter, seeds, or sap directly into the water zone. A small amount of dappled light through leaves is fine; a bath that fills with decomposing organic matter every day is not. Proximity to natural perching spots, such as a shrub border 5 to 10 feet away, gives birds a place to preen after bathing and makes them more likely to return regularly.
Ongoing care and cleaning
Water change routine
Change the water in the open water zone every one to three days, and more frequently in warm weather when algae and bacteria multiply faster. In practice, I top up daily and do a full drain-and-refill every two days during summer. When you change the water, use the opportunity to rinse the wading stones and check that the drainage hole isn't blocked.
Cleaning the basin
When algae appears (and it will), scrub the water zone immediately with a stiff-bristled brush. For a deeper disinfection, use a 1:10 dilution of household bleach to water: apply, leave for a few minutes, scrub, then rinse extremely thoroughly multiple times and allow to air dry completely before refilling. This dilution (1 part bleach, 9 parts water) is the standard recommendation from wildlife organizations for bird bath disinfection. Be careful not to let bleach solution contact your plants; keep the cleaning process focused on the open water zone.
Mosquito prevention
Standing water in the planting substrate and in the water zone can become a mosquito breeding site in warm weather. The most effective prevention is simple: change the water every one to three days, because mosquitoes need at least four to seven days of standing water to complete their larval cycle. If you're in a region where mosquito pressure is high and you can't change the water that frequently, use a Bti (Bacillus thuringiensis israelensis) product such as Mosquito Dunks in the water zone, following the product label for dosing in small containers. To reduce mosquito breeding, change standing water every 1–3 days and/or use EPA‑registered Bti (Bacillus thuringiensis israelensis) products (e.g., Mosquito Dunks) applied according to the label; Bti targets mosquito larvae and is widely recommended for small containers when used per label instructions To reduce mosquito breeding, change standing water every 1–3 days and/or use EPA‑registered Bti (Bacillus thuringiensis israelensis) products (e.g., Mosquito Dunks) applied according to the label; Bti targets mosquito larvae and is widely recommended for small containers when used per label instructions.. Bti is a biological larvicide that targets mosquito larvae specifically and is widely used in wildlife-friendly water features. It won't harm birds, fish, or beneficial insects when used per label instructions.
Plant maintenance
Sedums and sempervivums in a well-draining shallow substrate are remarkably low maintenance. Trim back any growth that's encroaching on the water zone, remove dead rosettes after they flower (sempervivums die after flowering but produce offsets), and top up the gritty mix if erosion from rain or bird activity has depleted it. Mosses just need periodic misting in dry spells and removal of any dead patches.
Seasonal care and winterizing
Autumn prep
As temperatures drop toward freezing, move any non-hardy accessories indoors. Sempervivums and most sedums are cold-hardy (many to USDA zone 4 or lower) and can stay in the bath through winter, but check your specific cultivars. Remove any moss patches that aren't fully established before the first hard frost; they can be stored in a cool, damp spot and replanted in spring.
Freezing water and heated baths
Water in a shallow basin freezes faster than in a deeper vessel, which is actually good for the plants (less freeze-thaw action in the substrate) but can leave birds without a water source. If you want to maintain a winter water supply, a thermostatically controlled heated bird bath insert placed in the open water zone is a practical solution. Cornell Lab of Ornithology specifically notes not to use antifreeze or glycerin in bird bath water, as both are harmful: antifreeze is acutely toxic and glycerin, even in small amounts, can mat feathers and impair waterproofing. A proper heating element is the only safe approach. Crucially, ceramic and some glazed basins can crack from repeated freeze-thaw cycles; if you're in a cold climate (zones 5 and below), either bring a ceramic basin indoors for winter or accept the risk of cracking. Concrete and resin handle cold better, though even concrete can crack if water freezes in a drainage hole.
Spring refresh
In early spring, do a full clean and inspection: check the drainage hole is clear, replace any substrate that has compacted, replant or replace any plants that didn't survive winter, and reposition accessories. This is also a good time to reassess the water zone depth and add or rearrange wading stones.
Troubleshooting common problems
| Problem | Likely cause | Solution |
|---|---|---|
| Waterlogged substrate | Blocked drainage hole or insufficient drainage | Clear the hole, check landscape fabric isn't fully blocking flow, switch to a grittier mix |
| Rapid algae growth | Standing water + warmth + light | Change water every 1 to 2 days; scrub with brush; move to partial shade |
| Birds not using the bath | Water too deep, or accessories blocking access | Add flat wading stones; remove large accessories from near water edge |
| Plants dying back quickly | Too much water contact or no drainage | Improve drainage; ensure planted zone is elevated slightly above water zone |
| Mosquito larvae visible | Water standing more than 3 to 4 days | Change water immediately; use Bti product per label for persistent areas |
| Moss turning brown and crispy | Too much direct sun or drying out | Move moss to shaded zone; mist more frequently; check substrate moisture |
| Basin cracking in winter | Freeze-thaw in ceramic or thin concrete | Drain basin before hard frosts; move ceramic indoors; use resin or hypertufa in cold climates |
| Accessories tipping into water | Not secured; bird activity dislodging them | Re-anchor with aquarium silicone; choose lower-profile pieces |
Complete parts, materials, and tools checklist
Here's everything you need to gather before you start. I've split it into the core build, optional extras, and ongoing maintenance supplies.
Core build materials
- Wide shallow bird bath basin, minimum 16 inches (40 cm) across with gently sloping sides, max 2 inch center depth
- Non-toxic water feature sealant (water-based, rated for aquatic contact) if basin is unsealed concrete or terracotta
- Fine gravel or pebbles, 1/4 to 3/4 inch size, approximately 1 to 2 cups
- Landscape fabric or fine mesh, cut to fit the planting zone floor
- Cactus and succulent potting mix or a gritty mix (50/50 succulent mix and coarse horticultural grit), approximately 1 to 2 quarts
- Low-growing sedum cultivars (3 to 5 small plants for a 16-inch basin)
- Sempervivum rosettes (2 to 4)
- Sheet or cushion moss patches (optional, for shaded zones)
- Flat wading stones or smooth river pebbles for the water zone
- Miniature accessories of your choice (terracotta, resin, natural stone, untreated wood)
- Aquarium-safe silicone sealant for anchoring accessories
Tools
- Drill with masonry bit (1/4 to 1/2 inch) for concrete or terracotta, or diamond hole saw for ceramic/glazed basins
- Water source for wet drilling (a squeeze bottle or small hose will do)
- Safety glasses and dust mask for drilling
- Stiff-bristled scrub brush (dedicated to the bird bath, not used for anything else)
- Sharp scissors or craft knife for cutting landscape fabric
- Small trowel or spoon for placing substrate
- Spray bottle for misting moss
Ongoing maintenance supplies
- Household bleach (for dilute 1: 10 cleaning solution)
- Bti larvicide product such as Mosquito Dunks (for warm-season mosquito prevention if needed)
- Thermostatically controlled bird bath heater or deicer (for climates with freezing winters, zones 5 and below)
- Extra gritty potting mix for spring top-ups
- Replacement sedum or sempervivum plants for annual refresh
FAQ
What is a bird‑safe depth and shape for a fairy garden inside a bird bath?
Use a wide, shallow basin with gently sloping sides. Edge depth should be about 1/2"–1" (≈1.3–2.5 cm) and no more than about 2"–4" (≈5–10 cm) in the deepest center. Provide stones or pebbles so birds can perch or wade without submerging.
Can I convert an existing bird bath into a planted fairy garden without harming birds?
Yes, if you keep a shallow water area or intermittent water, ensure drainage, and use only bird‑safe, non‑toxic materials. Drill a drainage hole (or provide overflow to ground) so media cannot trap standing water. Maintain a separate shallow water source nearby if you remove most open water from the basin.
How should I handle drainage and substrate to avoid standing water and mosquito breeding?
Drill at least one drain hole (≈1/4"–1/2") or provide a clear overflow path. Layer: coarse gravel for weight, landscape/filter fabric, then a thin (≈1" or less) free‑draining mix such as cactus/succulent or gritty mix. Keep media shallow so it doesn’t hold excess water; change standing water every 1–3 days and follow mosquito control guidance (see Bti below) if needed.
Are there approved mosquito prevention options safe for bird baths?
Primary prevention is eliminating standing water or changing it every 1–3 days. If standing water cannot be avoided, use EPA‑registered Bti products (e.g., Mosquito Dunks) exactly per label; Bti targets mosquito larvae and is widely recommended for small containers when applied according to instructions.
Which plants are best for a shallow bird‑bath fairy garden?
Choose very shallow, low‑growing plants: creeping/low sedums, sempervivums (small rosettes), dwarf alpine saxifrages, small thymes or dwarf oregano cultivars, and patches of moss in shaded spots. Match species to your USDA hardiness zone and pick cultivars with small mature spreads to fit the basin.
What planting techniques keep the garden light, stable, and bird‑safe?
Use a shallow soil layer (≤1") of free‑draining mix over filter fabric and gravel. Plant small clumps rather than deep pockets, press roots gently into the media, and top with small decorative pebbles or sphagnum patches to reduce splash. Avoid potting mixes with wetting agents or slow‑release fertilizers that could leach into water.