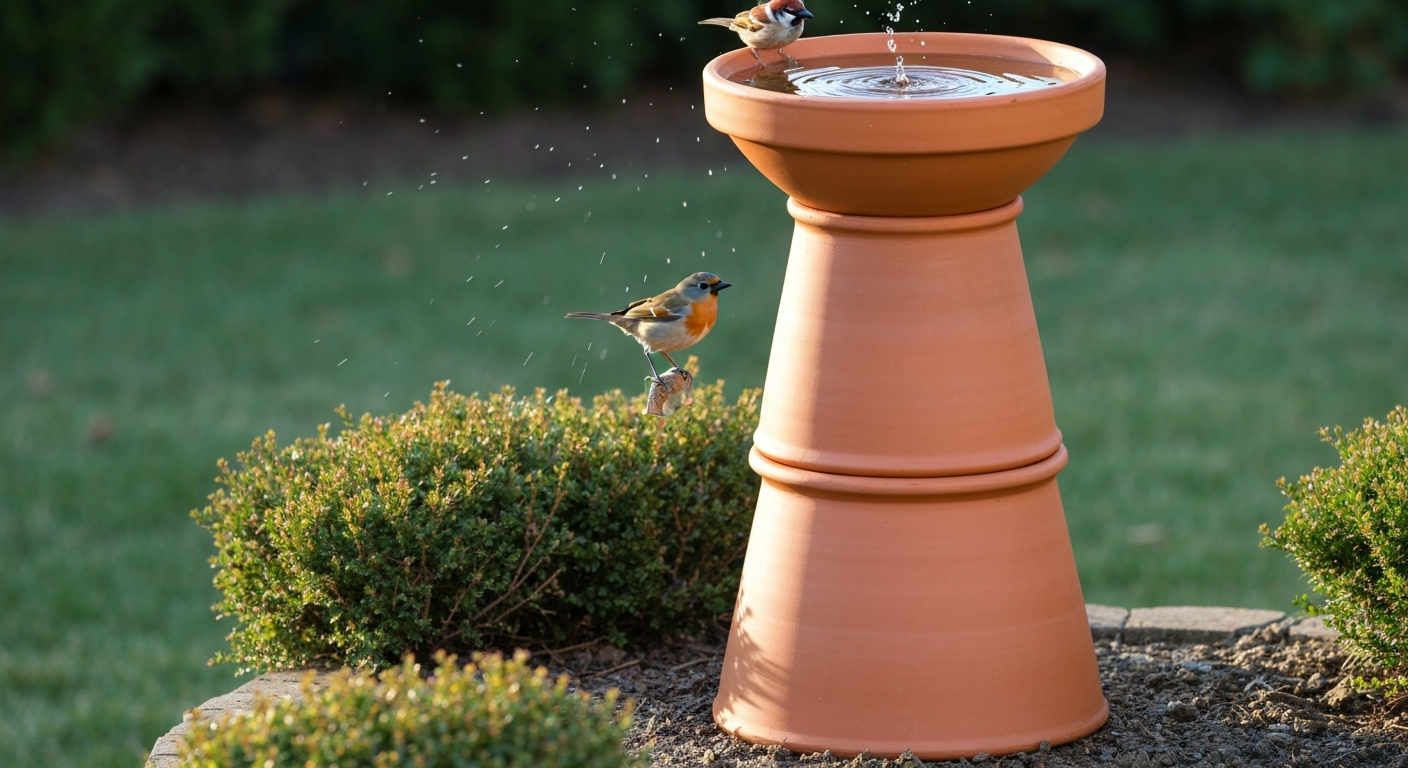
You can make a hypertufa bird bath in a single afternoon using Portland cement, perlite, and peat moss (or coir) mixed in roughly equal parts by volume. Pack the mix into an overturned plastic bowl or a bucket mold, let it firm up for 24 to 48 hours, then cure it damp for two to four weeks. The result is a lightweight, stone-look basin that birds love, costs under $30 in materials, and lasts for decades if you cure it properly and neutralize the initial alkalinity.
How to Make a Hypertufa Bird Bath: Durable DIY Guide

Marcus Henley
12 Aug 2026
Who this guide is for and what you'll walk away with
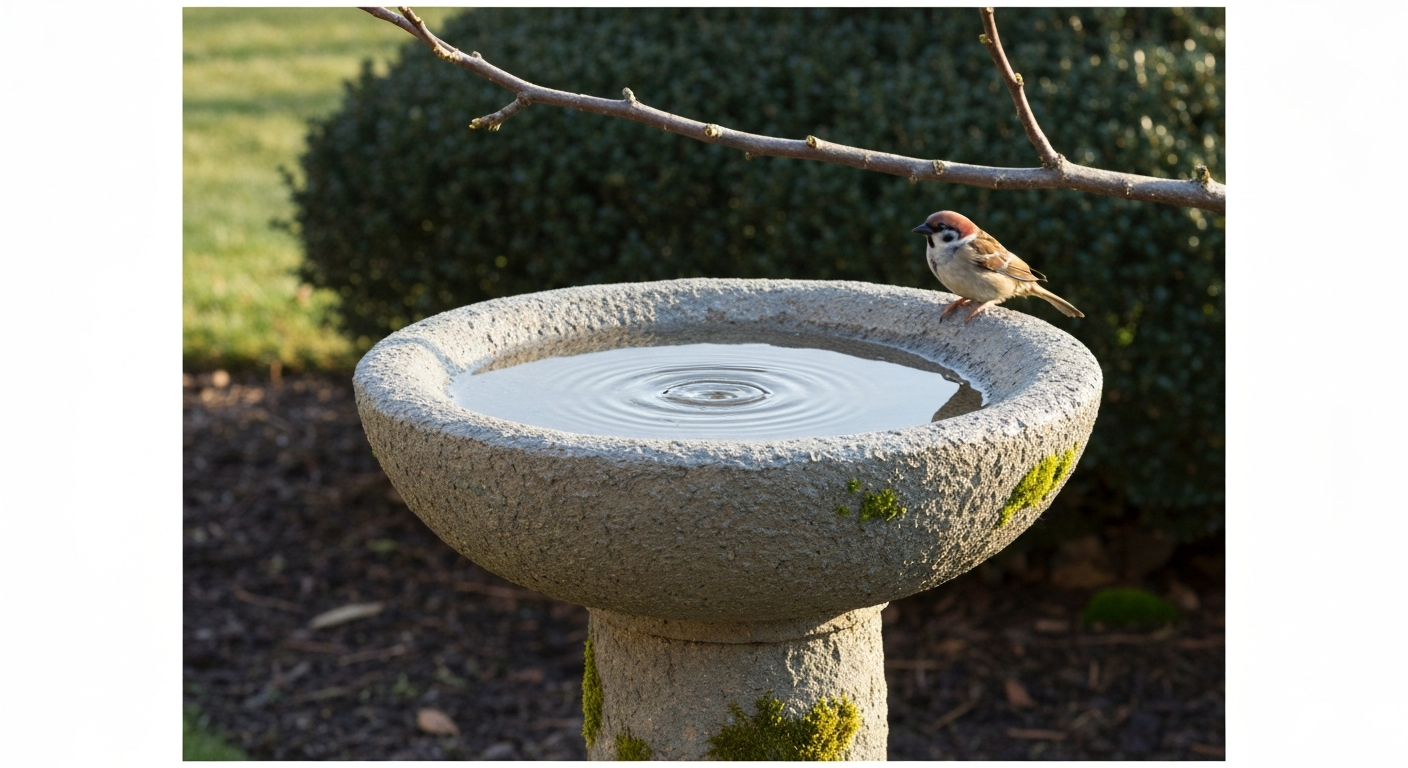
This guide is written for backyard birders and DIYers who want a genuinely durable, natural-looking water feature without spending $80 to $150 on a cast concrete pedestal bath. It's also for people who've tried hypertufa once, had it crack or stay too alkaline, and want to know what went wrong. I've made about a dozen of these over the years, using everything from plastic salad bowls to a two-bucket nested mold setup, and I'll share the recipe variations, thickness rules, and curing schedule that have consistently produced crack-free results. By the end you'll know exactly how to mix, mold, cure, seal, install, maintain, and troubleshoot a hypertufa bird bath, plus how it stacks up against mosaic, clay-pot, ceramic, and brick alternatives if you're still deciding which path to take.
Materials and tools, what to buy and how much
The quantities below are calibrated for a medium bird bath basin (roughly 14 to 16 inches across, 2 to 3 inches deep). I'll give batch-size scaling in the recipe section. Buy Portland cement in the smallest available bag (47 lb), it goes stale once opened, so seal the remainder in a zip-lock bag with the air pressed out.
- Portland cement (Type I/II): 1 part by volume — roughly 2 dry quarts for a medium batch
- Perlite (coarse horticultural grade, not fine): 1.5 parts by volume — roughly 3 dry quarts for a medium batch
- Sphagnum peat moss (or coir fiber): 1.5 parts by volume — roughly 3 dry quarts for a medium batch
- Synthetic concrete reinforcing fibers (polypropylene): one small handful per batch (approximately 1 oz / 30 g)
- Water: start with roughly 0.5 parts by volume and add slowly — actual amount varies by peat moisture content
- Plastic or silicone bowl mold (12 to 18 inches diameter) OR two nested buckets (5-gallon outer, 2-gallon inner)
- Cooking spray or petroleum jelly (release agent)
- Plastic sheeting or a drop cloth to protect your work surface
- Heavy-duty rubber or nitrile gloves (knee-length gauntlet style preferred)
- Safety glasses or goggles
- N95 respirator (minimum) for dry ingredient handling — see safety section
- Old 5-gallon bucket for mixing
- Margin trowel or sturdy gloved hands for packing
- Plastic wrap or plastic bags for moist curing
- Wire brush or stiff-bristle brush for texturing (optional)
- Concrete sealant rated for potable water contact (e.g., a penetrating silane/siloxane type), for post-cure sealing
The hypertufa recipe and batch-size examples
There's no single official hypertufa recipe, which confuses a lot of beginners. What you're doing is replacing the aggregate in concrete with lightweight organic material (peat or coir) and perlite. The more organic material you use, the lighter and more porous the final piece; the more cement, the heavier and more watertight. For a bird bath you want something in the middle: porous enough to look like stone and stay cool, but dense enough to hold water without cracking. The FineGardening recipe (1 part cement : 1.5 parts peat : 1.5 parts perlite) and the OSU Extension variant (2 parts cement : 3 parts coir : 3 parts perlite) both hit that sweet spot. I've used both and prefer the 1:1.5:1.5 ratio for bowls because it packs more easily into curved molds.
| Batch size | Portland cement | Peat moss or coir | Perlite | Approx. water | Typical yield (packed) |
|---|---|---|---|---|---|
| Small (dish accent, 8–10 in.) | 1 dry qt | 1.5 dry qt | 1.5 dry qt | 0.5–0.75 dry qt | ~1 shallow basin |
| Medium (standard bath, 14–16 in.) | 2 dry qt | 3 dry qt | 3 dry qt | 1–1.5 dry qt | ~1 basin + pedestal cap |
| Large (wide basin, 18–22 in.) | 4 dry qt | 6 dry qt | 6 dry qt | 2–2.5 dry qt | ~1 large basin + thick base |
Mix all dry ingredients first, cement, peat, and perlite, until the color is uniform. Add polypropylene reinforcing fibers and fold them in before adding any water. Then add water slowly, a little at a time. The WSU Extension squeeze test is your quality check: grab a fistful of mix and squeeze firmly. The mix should hold its shape when you open your hand, and only two or three drops of water should appear. If water streams out, the mix is too wet and will shrink-crack; if it crumbles, add a splash more water. Wetter mixes are easier to work but produce weaker, more crack-prone results.
On ingredient swaps: perlite produces a lighter, more porous mix and is my first choice for bird baths because it keeps the basin cooler in summer heat. The Perlite Institute's guide 'Everything You Need to Know About Perlite for Horticulture' notes that perlite creates lighter, more porous mixes with superior drainage compared with vermiculite or sand Everything You Need to Know About Perlite for Horticulture — Perlite Institute. Vermiculite absorbs and holds more water within the mix itself, which slightly extends working time but can make the final piece heavier and more freeze-prone in cold climates. Sand increases weight and makes the mix denser and more watertight, useful if you're casting a thin pedestal column, but it makes the basin heavier to move and looks less like natural tufa stone. Coir is a fine peat substitute and is more sustainable; it behaves slightly differently because it decomposes more slowly, but the texture and workability are similar.
Safety first: cement dust is a real hazard
I want to be direct about this because most DIY tutorials skim it: Portland cement contains crystalline silica (a known respiratory hazard regulated by OSHA's crystalline silica standard) and is strongly alkaline (pH ~12 to 13), which means it causes chemical burns on skin and serious eye injury. Both OSHA and NIOSH have published clear guidance on controlling silica dust exposure, and those controls are practical for a home project. NIOSH/CDC guidance (Silica and Worker Health, NIOSH/CDC) recommends a hierarchy of controls to minimize dust (wet mixing, outdoor work, local exhaust) and advises N95 or better respirators for lower exposures, with full‑face/P100 or supplied‑air options at higher airborne silica concentrations Silica and Worker Health — NIOSH/CDC.
- Respirator: wear a minimum N95 particulate respirator when measuring and mixing dry ingredients outdoors; if you're working in any enclosed space, upgrade to a full-face respirator with P100 filters (NIOSH rates P100 at an assigned protection factor of ~50 vs ~10 for an N95)
- Gloves: heavy-duty nitrile or rubber gloves, preferably gauntlet-length — cement paste will cause dermatitis and chemical burns after prolonged skin contact even through small glove gaps
- Eye protection: safety glasses at minimum; goggles are better, especially when mixing dry ingredients that can throw dust
- Ventilation: always mix outdoors or in a very well-ventilated space with cross-airflow; never mix in a closed garage
- Wet mixing control: adding water to dry ingredients before aggressive stirring dramatically cuts airborne dust — pour the water in early and fold gently rather than stirring vigorously while dry
- First aid for cement contact: flush skin with plenty of water immediately; for eye contact flush for 15+ minutes and seek medical attention; do not let cement dry on skin
- Dispose of rinse water responsibly: cement slurry is caustic and should not be poured directly into storm drains — let solids settle in a bucket, decant the water carefully
Setting up your workspace and molds
Hypertufa sticks aggressively to porous surfaces and moderately to smooth ones, so workspace prep matters. I work on a folding table covered with a double layer of plastic sheeting secured with painter's tape at the edges. The sheeting protects the table, makes cleanup easier, and keeps the hypertufa from picking up grit from the table surface.
Workspace checklist before you mix
- Lay out plastic sheeting or a drop cloth over your entire work surface
- Set out all measured dry ingredients in separate containers so you're not scooping into open bags once gloves are on
- Coat all mold surfaces that will contact hypertufa with a generous layer of cooking spray, petroleum jelly, or a dedicated form-release agent — get into every curve and corner
- If using a bowl mold right-side up (basin inside bowl): coat the inside of the bowl
- If using a bowl mold upside-down (basin draped over bowl exterior): coat the outside of the bowl
- Have plastic wrap or a large plastic bag ready for the curing wrap before you start pouring
- Keep a bucket of clean water and a rag nearby for wiping gloves and tools while working
- Position your work within easy reach of a water source for first aid if needed
For release agents: cooking spray (nonstick) works fine for smooth plastic or ceramic bowls. For more detailed forms or wooden molds, petroleum jelly gives better coverage and sticks to the mold surface more reliably. This Old House recommends paraffin wax melted onto wooden forms for clean release. Whatever you use, apply it generously, a patchy release agent is the number one cause of stuck molds and damaged basins during demolding.
Step-by-step: the bucket mold method
The two-bucket nested method is my go-to for a freestanding basin with an organic, irregular shape. It's forgiving for beginners and doesn't require any special mold shapes. You pack the mix between an outer 5-gallon bucket and a weighted inner 2-gallon bucket to form a thick-walled bowl.
- Coat the inside walls and bottom of the 5-gallon bucket thoroughly with cooking spray or petroleum jelly
- Coat the outside of the 2-gallon bucket the same way
- Mix your hypertufa batch and pass the squeeze test (see recipe section above)
- Pack a 2.5 to 3-inch layer of mix into the bottom of the 5-gallon bucket; tamp it firmly with your fist or a small piece of wood to eliminate air pockets
- Set the 2-gallon bucket centered on top of the bottom layer and press it down gently — it should sit roughly level
- Pack mix into the gap between the two bucket walls; aim for walls at least 1.5 to 2 inches thick (WSU Extension recommends 2 to 3 inches at the bottom and 1 to 2 inches on sides for durability)
- Tamp the walls as you layer up to eliminate voids — air pockets become cracks later
- Fill a zip-lock bag with water or sand and place it inside the inner bucket to hold it in position while the mix stiffens
- Smooth the exposed top rim with a gloved finger dipped in water if you want a clean edge, or leave it rough for a natural stone look
- Wrap the entire assembly loosely in plastic sheeting and keep it out of direct sun, wind, and temperatures below 50°F (10°C)
- After 24 to 48 hours, check firmness — the surface should feel like firm soap and not dent under light finger pressure; at this point the piece is firm enough to demold
- To demold: remove the inner bucket first (it usually lifts straight out once the weight bag is removed), then invert the 5-gallon bucket and peel it away; if it resists, flex the bucket walls gently rather than forcing it
- If desired, use a wire brush or stiff-bristle brush while the surface is still slightly green (not fully hardened) to scratch a rough stone texture into the exterior
- Wrap the finished basin in plastic immediately after demolding and keep it damp for the full curing cycle
Step-by-step: the plastic or ceramic bowl mold method
Bowl molds produce a smooth, symmetrical basin with a more finished appearance. You can use this method right-side up (packing mix inside the bowl to form the interior surface) or upside down (draping mix over the outside of the bowl to create a shallower, flared basin). For step-by-step instructions on creating and lining common molds, see a short guide on how to make a bird bath mold that covers bowl, bucket, and nested-mold techniques. For a bird bath, the upside-down method is excellent because it naturally creates the gentle sloped sides that birds prefer for wading. Shallow basins are also safer for small songbirds, aim for a maximum depth of 1.5 to 2 inches at the deepest point.
Upside-down bowl method (recommended for bird baths)
- Choose a plastic or ceramic bowl 14 to 18 inches in diameter with gently sloped sides — avoid bowls with steep straight walls
- Turn the bowl upside down on your prepared work surface and coat the entire exterior with a generous layer of cooking spray or petroleum jelly
- Drape a sheet of plastic wrap over the bowl before applying mix if you want an extra-easy release (optional but helpful for smooth bowls)
- Mix your hypertufa batch and pass the squeeze test
- Press handfuls of mix onto the upturned bowl, starting at the center (which will become the basin floor) and working outward toward the rim
- Build to a consistent thickness of at least 2 to 2.5 inches across the base and 1.5 inches along the walls — thicker is more durable; do not go thinner than 1.5 inches anywhere
- Smooth the edges at the bowl rim to create a rounded lip (a gloved finger dipped in water works well for this); avoid sharp edges that can crack under freeze-thaw stress
- Press any drainage hole now if you want one: push a pencil or wooden dowel through the lowest point of the inverted bowl center before the mix sets
- Cover loosely with plastic wrap and let it rest undisturbed for 24 to 48 hours at room temperature or in a sheltered outdoor spot
- Test firmness at 24 hours — the surface should resist light fingernail scratching; if it still dents easily, give it another 12 hours
- To demold: grip the bowl edges and gently lift; the bowl should separate cleanly if the release agent was thorough; if it resists, do not force it — wait another few hours
- Flip the basin right-side up; the interior surface (which was against the bowl) will be smooth, and the exterior will be rougher — run a stiff brush over any surfaces you want to texture further while still green
- Wrap in plastic immediately after demolding and cure damp for 2 to 4 weeks; mist daily or re-wet the plastic wrap to maintain moisture
Timing notes and what to expect with smooth molds
Smooth plastic bowls release more cleanly than ceramic or porous molds, but the interior surface can end up almost glassy-smooth, which birds actually dislike because they can't grip it. Once demolded and still green (semi-cured), scratch the interior surface lightly with a stiff wire brush or even the rough edge of a piece of perlite. That slight texture gives birds better footing. If your basin has cured fully (past 48 hours) and you forgot to texture it, a diamond-tip grinding bit in a rotary tool will score the surface. It takes a few extra minutes but makes a real difference in how much bird activity you'll see.
Reinforcement and crack prevention
Hypertufa without reinforcement can develop hairline cracks during curing or after the first winter freeze. Two practical fixes work well together. First, add a small handful of polypropylene synthetic concrete fibers (about 1 oz per medium batch) to your dry mix before adding water, FineGardening specifically recommends this step, and in my experience it makes a noticeable difference in crack resistance. The fibers look like fine hair and distribute through the mix; they don't change workability much. Second, maintain consistent wall thickness throughout the piece. Thin spots (under 1.5 inches) are almost always where cracks start. If you feel a thin area while packing, add more mix and tamp firmly.
If you already have a crack in a cured piece, a hydraulic cement or a polyurethane concrete crack filler (available at any hardware store in a tube) will fill and seal it. Press it well into the crack, let it cure, then re-seal the entire basin. Small hairline cracks that don't penetrate the full wall thickness often self-seal over time through continued hydration of unreacted cement particles, this is a real phenomenon, not wishful thinking, and it's why a properly cured basin sometimes looks better at year two than at year one.
Curing schedule: the step most people rush
Curing is where patience pays off. Portland cement continues to gain strength through hydration chemistry for 28 days, and strength development is directly tied to keeping the mix moist. A piece that dries out in the first week will be brittle compared to one that was kept damp for three to four weeks. The Portland Cement Association confirms that maintaining moisture and temperature through the curing period is the primary factor controlling final strength.
| Day range | What to do | What to expect |
|---|---|---|
| 0–24 hrs | Leave undisturbed in mold, loosely covered with plastic | Mix stiffens; surface firms up |
| 24–48 hrs | Check firmness; demold when surface resists fingernail scratch | Piece is firm but still 'green' (curing) |
| Days 3–7 | Wrap in plastic or wet burlap; mist daily; keep out of direct sun | Continued hardening; color lightens |
| Days 7–14 | Soak basin in a tub of water for 24 hrs, then re-wrap; repeat once | Leaches excess alkalinity (important for birds) |
| Days 14–28 | Keep damp-wrapped or in a shaded spot; mist every 1–2 days | Approaches near-full strength |
| After 28 days | Test pH with pool test strips; seal if pH is below 8; install | Ready for birds once pH is neutral |
The soaking cycles in weeks one and two serve double duty: they keep the cement hydrating AND they leach out calcium hydroxide (the alkaline byproduct of cement hydration). Fresh, unsealed hypertufa can have a surface pH above 12, which is toxic to birds and aquatic organisms. After two to three water-change soak cycles, surface pH typically drops to a safe level. Test with a basic pH strip before putting the bath into service, you want a reading of 7 to 8. If it's still above 8.5, do another 24-hour soak and test again.
Sealing and finishing options
You don't have to seal hypertufa, plenty of people don't and their baths last for years. But sealing reduces water absorption, which directly reduces freeze-thaw damage in cold climates, and it slows the buildup of algae and mineral deposits. If you choose to seal, use a penetrating concrete sealant (silane or siloxane-based) that's rated safe for contact with water that birds or wildlife will drink. Avoid film-forming acrylic sealants on the interior basin surface, they can peel and birds can ingest flakes. A penetrating sealer soaks into the concrete matrix and doesn't create a surface film, so there's nothing to peel. Apply after full 28-day cure, let it dry per the product instructions (usually 24 to 48 hours), then do a final pH check before filling with water.
Building a pedestal or base
A hypertufa basin sitting directly on the ground is fine for ground-feeding species, but most small songbirds prefer water elevated 2 to 3 feet off the ground where they can see predators approaching. You have a few practical base options.
- Hypertufa pedestal column: cast a second hypertufa piece in a large cylindrical form (a cardboard tube from a concrete form or a large PVC pipe works well) with a flat top sized to support your basin; the pieces don't need to be permanently joined — weight and gravity hold the basin in place
- Stacked brick or stone: stack mortared or dry-stacked bricks to the desired height and seat the basin on top; this is the simplest stable base, and brick pairs well with the stone-look of hypertufa
- Repurposed stand: a cast-iron plant stand, a vintage sewing machine base, or a thick tree stump all work and add character; just make sure the basin diameter is larger than the top of the stand so water doesn't splash onto the support
- In-ground installation: set the basin directly in the ground at grade level for a ground bird bath; add a ring of gravel around it for drainage and to give birds a landing zone
Placement: where to put it so birds actually use it
Location matters more than most people expect. A bird bath that never gets visited is almost always a placement problem, not a bath problem. The general rule is 10 to 15 feet from shrub or tree cover, close enough for birds to retreat quickly, far enough that a cat can't launch from cover directly onto the bath. In my yard I found that moving the bath about 8 feet closer to a dense shrub increased daily visits noticeably within a week. Keep it out of deep shade (algae accelerates significantly) but also out of full afternoon sun if you're in a hot climate (water evaporates fast and can approach dangerously warm temperatures).
- Basin depth: 1 to 2 inches for small songbirds (warblers, finches, chickadees); no more than 3 inches maximum; add a flat stone in the center if your basin is deeper than 2 inches — birds will use it as a stepping stone
- Height: 2 to 3 feet above ground is the most visited range for most yard birds; ground-level baths attract robins, thrushes, and sparrows but require more vigilance about cats
- Nearby perches: a branch or stake 2 to 3 feet above the bath gives birds a place to preen and watch before descending
- Moving water: a solar-powered dripper or mister attached to the rim dramatically increases the number and variety of species; the sound of moving water is the single most effective bird attractant I've used
- Avoid: directly under a feeder (seed hulls foul the water fast), directly under a tree canopy (leaf debris and bird droppings from above), and isolated spots with no sight lines to cover
Routine maintenance: keeping it clean and safe
Hypertufa is porous, which means it can harbor algae and bacterial biofilm more readily than glazed ceramic or smooth metal. That's manageable with a consistent cleaning routine. I clean mine every two to three days in summer, once a week in cool weather. Empty the water, scrub the basin with a stiff brush (no soap, residue harms birds), rinse thoroughly, and refill. If algae has established itself (green coating on the basin walls), a diluted white vinegar solution (1 part vinegar to 9 parts water) scrubbed in and rinsed off completely will clear it without leaving toxic residue.
- Algae control: partial shade, more frequent water changes, and a copper mesh coil placed in the water (copper ions inhibit algae without harming birds at low concentrations) all reduce algae growth; avoid bleach unless you rinse extremely thoroughly
- Mosquito prevention: mosquitoes need 7 to 10 days of standing water to complete a larva cycle — changing water every 2 to 3 days is the single most effective prevention; a dripper or wiggler adds movement that prevents egg-laying
- Mineral deposits: white crusty calcium deposits are common in hard-water areas; soak with diluted white vinegar and scrub; for thick deposits a plastic scraper works without scratching the surface
- Debris: position the bath away from heavy leaf or flower drop; a small fine-mesh net draped over the bath at night can reduce overnight debris accumulation in autumn
Winter care for your hypertufa bath
Properly cured hypertufa handles freeze-thaw cycles better than most concrete because the perlite and peat give it some flexibility, but it's not impervious. The main failure mode is water trapped in the porous matrix that expands when it freezes. If you're in a climate with hard freezes (below 28°F / -2°C regularly), take these steps each autumn.
- Empty the basin completely before first freeze — don't leave standing water
- Tip the basin face-down or elevate one edge with a block to ensure any residual moisture drains; standing water trapped in a sealed basin is the most common cause of freeze-spalling
- For a pedestal bath you want to keep operational in winter, a submersible basin de-icer (a simple thermostat-controlled heater disk rated for birdbaths) will keep a circle of water open in temperatures as low as -20°F; solar-powered options exist but are less reliable in overcast winter conditions
- Wrap the exterior of the basin and pedestal in burlap or horticultural fleece in very cold climates — this reduces temperature cycling speed more than absolute cold protection, and it's that cycling that causes cracking
- Inspect for new cracks each spring before refilling; fill any cracks with hydraulic cement or polyurethane caulk, allow to cure, and re-seal if needed before putting back into service
Troubleshooting: cracks, leaching, and staining
| Problem | Likely cause | Fix |
|---|---|---|
| Cracks appear during first week | Mix too wet, dried too fast, or walls too thin | Repair with hydraulic cement; cure more slowly next time; increase wall thickness to 2+ inches |
| Basin still very alkaline after 4 weeks | Insufficient curing soak cycles | Repeat 24-hr water soak and change; test pH with strips; may take 4–6 soak cycles in porous mixes |
| White efflorescence on exterior | Calcium hydroxide migrating to surface — normal in new concrete | Scrub with diluted vinegar; fades naturally over months; does not affect structural integrity |
| Green-black staining on interior | Algae or biofilm buildup | Scrub with stiff brush + diluted vinegar; increase cleaning frequency; consider partial shade reduction |
| Basin leaks through base | Cracks or pinholes in bottom layer | Let dry fully, apply waterproof concrete patching compound from inside; re-seal; pack thicker base next time (3 in. minimum) |
| Mold stuck during demolding | Insufficient release agent application | Flex mold gently; do not force; for plastic bowls, place in warm water to soften slightly before pulling |
How hypertufa compares to other DIY bird bath options
Hypertufa is my personal first choice for a DIY bird bath because the material cost is low, the weight is manageable (a medium hypertufa basin weighs roughly 8 to 15 lbs depending on recipe, compared to 30+ lbs for solid cast concrete), and the finished look ages beautifully, it develops moss and patina over a season or two. But it's not always the right choice. Here's how it stacks up against the other DIY approaches you might be considering.
| Method | Difficulty | Cost (materials) | Weight | Durability | Best for |
|---|---|---|---|---|---|
| Hypertufa (this guide) | Moderate | $20–$35 | Light–medium | High if well-cured | Natural stone look, lightweight, customizable shape |
| Mosaic bird bath | Moderate–High | $30–$80 | Depends on base | Medium (grout can crack) | Color, artistic personalization, upcycling existing bases |
| Clay pot stacked bath | Easy | $15–$40 | Medium | Low–medium (frost risk) | Budget beginner projects, seasonal use |
| Ceramic (kiln-fired) | High (requires kiln) | $50–$150+ | Heavy | High | Long-lasting, glazed interior, easiest to clean |
| Brick bird bath | Moderate | $20–$50 | Very heavy | High | Permanent installation, formal garden style |
If you're drawn to a mosaic design, you can actually combine approaches: cast a plain hypertufa basin using this guide, cure it fully, then apply mosaic tile to the exterior using tile adhesive and grout rated for outdoor use. You get the lightweight custom shape of hypertufa plus the visual interest of mosaic. Clay pot stacked baths are the easiest entry point if this is your first DIY project, but they're vulnerable to hard frosts and the joints can work loose. Ceramic requires a kiln, which puts it out of reach for most home DIYers unless you have access to a community studio. For step-by-step instructions on how to make a ceramic bird bath, see our guide on how to make a ceramic bird bath (resource ID 6869b859-575a-4eee-b18d-49e4b5f84261). Brick gives you the most permanent and structurally stable installation, which is worth considering if you're planning a large in-ground feature or a formal garden focal point. For step-by-step instructions on building a durable brick bird bath, see how to make a brick bird bath.
A few final tips from experience
Don't skip the pH testing before you put birds on the bath, it's a five-second step with a pool test strip and it protects the birds you're trying to attract. Plan for a textured interior surface from the start, either by brushing it while green or pressing a piece of coarse burlap against the wet mix before demolding. And give the curing the full time it needs: the two or three weeks of patience before the bath goes outside are what determine whether it lasts one winter or twenty. Once it's installed, filled, and the first bird uses it, you'll see immediately why it's worth the effort.
FAQ
What authoritative recipes and mix ratios should I cite for hypertufa bird baths?
Cite university extension guides and vetted how‑tos that publish tested ratios and discuss tradeoffs: WSU Extension (multiple recipes and squeeze test; 1:1:1 and variants) https://s3.wp.wsu.edu/uploads/sites/2079/2014/02/Hypertufa2008.pdf; OSU Extension (coir/cement/perlite example and practical timing) https://extension.oregonstate.edu/news/craft-stone-look-planters-hypertufa; FineGardening (1:1.5:1.5 variant plus fiber reinforcement) https://www.finegardening.com/project-guides/container-gardening/make-your-own-hypertufa-container. Use these to present 2–4 recipe options, measured-volume proportions, and the standard squeeze/consistency test.
Which sources explain ingredient tradeoffs (peat vs coir, perlite vs vermiculite vs sand)?
Reference WSU/OSU Extension notes on material behavior and the Perlite Institute for perlite characteristics: WSU hypertufa PDF (materials discussion) https://s3.wp.wsu.edu/uploads/sites/2079/2014/02/Hypertufa2008.pdf; OSU Extension https://extension.oregonstate.edu/news/craft-stone-look-planters-hypertufa; Perlite Institute overview for particle properties and water retention https://www.perlite.org/everything-you-need-to-know-about-perlite-for-horticulture/.
What sources should I use for mold construction, wall thickness, and demolding guidance?
Use professional how‑tos and extensions that document mold types, release agents and recommended thicknesses: This Old House (mold construction, tamping, ≈2¼" trough minimum) https://www.thisoldhouse.com/gardening/how-to-make-a-hypertufa-garden-trough; GardenGuides for common mold/release options https://www.gardenguides.com/13425453-how-to-make-a-hypertufa-bird-bath/; WSU for thickness recommendations (bottom 2–3", sides 1–2") https://s3.wp.wsu.edu/uploads/sites/2079/2014/02/Hypertufa2008.pdf.
Where can I find authoritative curing and strength/chemistry information?
Cite cement/concrete authorities for hydration and curing timelines and extension guides for practical curing schedules: Portland Cement Association / PCA materials on curing and hydration (applications of cement) https://www.cement.org/cement-concrete/applications-of-cement/; OSU and WSU extension pages for demold (24–72 hr) and moist curing recommendations (keep damp 2–4 weeks; soak cycles to leach alkalinity) https://extension.oregonstate.edu/news/craft-stone-look-planters-hypertufa https://s3.wp.wsu.edu/uploads/sites/2079/2014/02/Hypertufa2008.pdf.
What safety and PPE sources must I cite (silica, cement hazards, respirators)?
Use primary regulatory and manufacturer guidance: OSHA crystalline silica standard and controls https://www.osha.gov/silica-crystalline; NIOSH silica guidance and respirator selection logic (N95 vs P100) https://www.cdc.gov/niosh/silica/about/index.html and https://www.cdc.gov/niosh/docs/2008-140/; Manufacturer SDS for ordinary Portland cement (example Cemex Lafarge SDS) for skin/eye hazards and first aid — use current SDS from the cement supplier you reference (example) https://www.cemex.es/documents/d/cemex-es/cement-safety-data-sheet-april-2026.
Which sources back reinforcement and anti‑cracking advice (fibers, wire, thickness)?
FineGardening recommends synthetic concrete fibers and practical reinforcement methods (handful of fibers, wire mesh where needed) https://www.finegardening.com/project-guides/container-gardening/make-your-own-hypertufa-container; extension guides (WSU/OSU) discuss thickness, reinforcement and curing to reduce cracking https://s3.wp.wsu.edu/uploads/sites/2079/2014/02/Hypertufa2008.pdf https://extension.oregonstate.edu/news/craft-stone-look-planters-hypertufa.
Next Article
Clay Pot Bird Bath Instructions: DIY Step-by-Step Guide
Clay pot bird bath instructions: step-by-step DIY build, sealing, placement, winter care and troubleshooting