
You can make a ceramic bird bath at home using one of three practical methods: hand-building a pottery bowl from raw clay (fired in a kiln), stacking glazed clay pots and saucers without any firing, or casting a molded bowl and covering it in a mosaic tile overlay. Each approach gives you a durable, bird-safe water feature for a fraction of the cost of a commercial piece, but the right method depends on whether you have kiln access, your comfort with clay, and how much time you want to invest. I've built all three, and this guide walks through every step, from choosing the right clay to sealing the finished basin so it holds water safely through winter.
How to Make a Ceramic Bird Bath: 3 DIY Methods & Care
Marcus Henley
28 Jul 2026
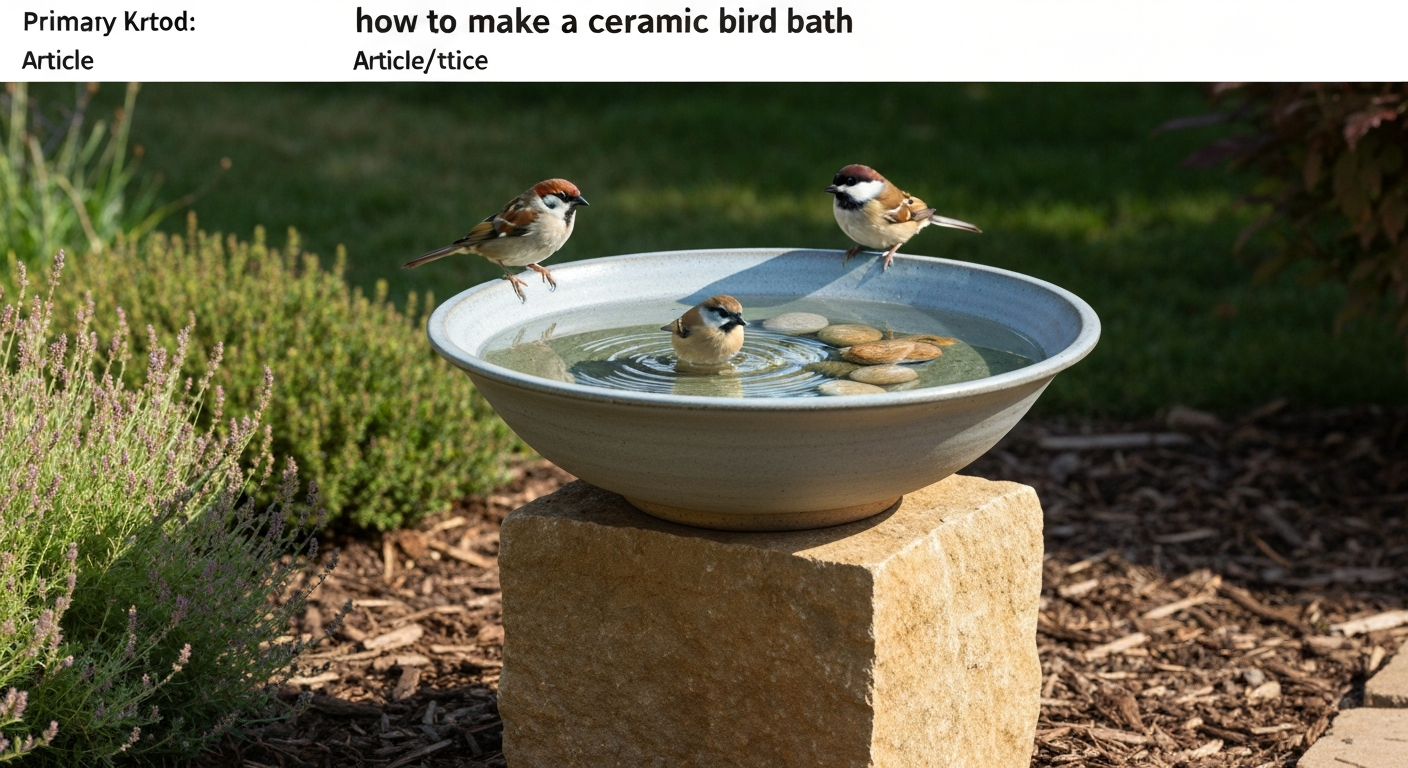
Why build a ceramic bird bath?
Ceramic and terra cotta bird baths offer a warmth and texture that plastic or resin pieces rarely match. The slightly rough, porous surface of unglazed or matte-glazed clay gives birds solid footing, something birds genuinely prefer over slippery, high-gloss basins. You also have complete control over depth (birds do best in 1 to 2 inches of water), diameter, and color. A hand-built stoneware bath can last decades if properly fired and sealed; even the simpler clay-pot version holds up well across multiple seasons when you choose the right materials and treat them before winter.
That said, ceramic has some real constraints. Raw, unglazed earthenware and terra cotta are porous, they absorb water and crack in freeze-thaw cycles unless you glaze or seal them properly. Kiln access is a genuine barrier for the hand-built route. And any glaze that contacts drinking water needs to be verifiably lead-free and fired at the correct temperature. This article addresses all of those issues directly, so you end up with something that's genuinely safe for birds, not just pretty.
Ceramic vs. other DIY and pre-made options
Before you commit to ceramic, it's worth comparing it honestly against the other popular DIY materials and pre-made alternatives. Here's how the main options stack up across the factors that matter most for a backyard bird bath.
| Material | Durability / Freeze Resistance | DIY Difficulty | Weight | Cost (DIY) | Bird Footing |
|---|---|---|---|---|---|
| Glazed stoneware / porcelain (fired) | Excellent — vitrified body (<0.5–3% absorption) resists freeze-thaw | High — requires kiln access and clay skills | Moderate | $$–$$$ | Good with matte/textured glaze; add pebbles for glossy |
| Terra cotta / earthenware (fired + sealed) | Fair — porous unless glazed and sealed; frost risk if unsealed | Medium — kiln needed; forgiving to hand-build | Moderate–Heavy | $–$$ | Excellent — natural texture |
| Stacked clay pots (no kiln) | Fair — frost-proof if you choose glazed/frost-rated pots; disassemble for winter | Low — accessible for all skill levels | Moderate | $–$$ | Good |
| Mosaic over pre-made mold/bowl | Good — depends on base material; grout and sealer needed | Medium — tile work is time-intensive | Moderate–Heavy | $$ | Good with sanded grout |
| Concrete / hypertufa (DIY) | Very good — low porosity when cured and sealed; pH needs neutralizing | Medium — messy but no kiln needed | Heavy | $–$$ | Excellent — rough texture |
| Brick (DIY) | Good — mortar joints need sealing; heavy | Medium | Very heavy | $ | Excellent |
| Pre-made ceramic / resin (purchased) | Varies — check frost rating; resin chips easily | None | Light–Moderate | $$$ | Variable |
If you don't have kiln access and want a quick weekend project, the stacked clay-pot method or the mosaic overlay are your best starting points. If you're already comfortable with ceramics or have access to a community studio, the hand-built pottery route is the most rewarding and produces the most durable result. For readers interested in concrete-based DIY alternatives, hypertufa and brick builds are excellent no-kiln options worth exploring separately.
Full materials and tools checklist
The three builds share some core materials, but each has specific requirements. Below is a complete combined list so you can plan your shopping trip before you start.
Shared basics
- Large glazed or frost-rated terra cotta saucer (at least 14–18 inches diameter, 2–3 inch depth) — for the basin in all three builds
- Measuring tape and pencil
- Wire brush or stiff scrubbing brush for cleaning
- Exterior-grade waterproofing sealer (see Waterproofing section for options)
- Food-grade silicone caulk (neutral-cure, platinum-cured, NSF/FDA-compliant) for sealing seams
- Rubber gloves and safety glasses
- Bird bath pedestal, flat stump, or stacked pot base
Build A: hand-built pottery (kiln required)
- Stoneware or mid-fire earthenware clay body (Cone 5–6 stoneware recommended for outdoor durability; 5–10 lb for a standard bowl)
- Wire clay cutter and wooden batt or canvas work surface
- Pottery rib tools (metal and rubber)
- Sponge and water bowl
- Needle tool
- Kiln (electric studio kiln or community pottery studio access)
- Pyrometric witness cones (matching your clay body's target Cone, e.g., Cone 5–6)
- Lead-free, food/dinnerware-safe liquid glaze (e.g., AMACO Celadon or Spectrum lead-free series) rated for your target cone
- Glaze brushes or dipping tongs
- Kiln wash / kiln shelf
- Optional: wax resist for glaze application
Build B: stacked clay-pot assembly (no kiln)
- Three to four glazed, frost-rated terra cotta or ceramic pots in graduated sizes (e.g., 4-inch, 6-inch, 8-inch)
- One large glazed frost-rated saucer (14–18 inch diameter) for the basin
- Exterior construction adhesive or waterproof tile adhesive (Liquid Nails Exterior, Gorilla Glue Waterproof)
- Threaded steel rod (3/8-inch diameter, cut to total stack height) and washers/nuts — for anchoring
- Exterior-grade mortar or waterproof grout (optional, for joint sealing)
- Masonry drill bit if anchoring to a hard surface
- Gravel or sand fill for ballast inside bottom pots
Build C: molded bowl with mosaic overlay
- Pre-made concrete, plastic, or glazed ceramic bowl/mold (12–18 inch diameter)
- Glass mosaic tiles (3/4-inch vitreous glass tiles are ideal; 1/4-inch glass pebbles or broken ceramic pieces also work)
- Exterior-grade, waterproof tile adhesive (polymer-modified thin-set or epoxy tile mortar)
- Unsanded or fine-sanded outdoor-rated grout (use unsanded grout for joints under 1/8 inch)
- Grout sealer rated for outdoor and water-contact use
- Tile nippers and safety goggles
- Notched trowel (1/4-inch V-notch)
- Grout float and damp sponge
- Optional: grout colorant (charcoal or blue-gray reads well outdoors)
Safety and bird health, read this before you start
This section matters more than most DIY guides let on. Birds drink from and bathe in whatever water you provide, so every material that contacts the basin surface needs to be safe once fully cured and in contact with water.
Glaze toxicity and lead safety
The FDA has documented that improperly fired glazes, including some labeled 'lead-free', can still leach lead if fired at the wrong temperature or in a contaminated kiln. For any water-contact surface, use a glaze that is explicitly formulated and documented as lead-free and food/dinnerware-safe (AMACO and Spectrum both publish this on their product data sheets), and follow the manufacturer's recommended firing schedule exactly. Using pyrometric witness cones inside the kiln (not just relying on the digital controller) confirms that correct heatwork was achieved. If you're unsure about a glaze result, don't use that piece as a bird bath. The ISO 6486 and FDA acetic acid leach tests (4% acetic acid, 24 hours) are the accepted standard for verifying glaze safety, commercial testing labs can run these tests for a modest fee if you want to verify a finished piece.
Kiln safety and ventilation
- Never fire a kiln in an enclosed space without proper ventilation — kilns release carbon monoxide, sulfur compounds, and glaze vapors during firing
- Use a kiln ventilation system (downdraft vent) or fire with garage doors and windows fully open
- Keep combustible materials at least 3 feet from all kiln sides
- Allow the kiln to cool to below 200°F (93°C) before opening the lid — thermal shock to ware and burns are both genuine risks
- Wear heat-resistant gloves when loading and unloading
- If using a community studio kiln, notify the studio about your project so they can schedule your piece appropriately
Sealants and adhesives: what's safe for birds
Once fully cured, food-grade neutral-cure silicone (meeting FDA 21 CFR 177.2600 or NSF certification) is the safest choice for sealing joints and seams that birds will contact. Epoxy coatings and masonry sealers need to be fully cured (usually 72 hours minimum, often 7 days for full hardness) and specifically rated for food or potable water contact before birds should have access. Avoid solvent-based varnishes, oil-based paints, or any coating not rated for water contact on the basin interior. When in doubt, apply sealant to exterior and base surfaces only, and use a glazed or already-inert interior surface for the basin itself.
Bird footing and bath depth
Birds are safer and more likely to use a bath with a textured, non-slip surface. Extremely glossy glazes are beautiful but can discourage bathing. If you've fired a glassy high-gloss interior, add a handful of pea gravel or flat river stones to the basin bottom, this solves the footing problem immediately and adds visual appeal. Keep water depth between 1 and 2 inches for most songbirds; deeper baths work for crows and larger species but will deter smaller birds.
Build option A: hand-built pottery bird bath
This is the most involved of the three builds, but it produces a genuinely custom, heirloom-quality bird bath. Expect to invest 3 to 5 hours of hands-on clay work spread across multiple sessions (clay needs drying time between stages), plus kiln time. Difficulty: intermediate. You do not need a potter's wheel, this is hand-built using slabs or a coil-and-pinch technique, which is accessible to beginners willing to work slowly.
For outdoor durability, I strongly recommend stoneware over earthenware for this build. Properly fired stoneware at Cone 5–6 (approximately 2160–2230°F / 1180–1220°C) achieves significant vitrification and water absorption below 3%, which means it holds water without sealing and survives freeze-thaw cycles far better than earthenware. If you use earthenware (Cone 06–1, approximately 1830–2150°F), you must apply a thoroughly matured glaze to the interior and still consider it higher-risk in freezing climates.
Hand-built step-by-step
Step 1: wedging the clay
Start with 5 to 8 pounds of stoneware clay body. Wedge the clay by pressing and folding it rhythmically on a canvas or plaster work surface for 5 to 10 minutes, using a ram's head or spiral technique. Wedging removes air pockets that would expand and crack the piece during firing. The clay is ready when the surface is smooth and consistent with no air bubbles visible when you cut through it with a wire tool. If you're new to wedging, many community studios have instructors who can demonstrate in person, it's one of those things that's much easier to see than to read.
Step 2: forming the bowl
For a slab-built basin, roll the wedged clay to an even slab about 3/4 inch thick using rolling guides (two wooden dowels of equal thickness on either side of the clay). Cut a circle 16 to 18 inches in diameter for the basin using a needle tool and a traced template. Drape this slab over a pre-made hump mold (a convex form, even a large overturned bowl wrapped in plastic wrap works) or press it into a concave mold. Smooth the surface with a rubber rib. Add a coiled rim by rolling a coil of clay about 3/4 inch thick and attaching it around the edge with slip (clay mixed to the consistency of thick cream), smoothing the join on both sides. The finished basin should be at least 14 inches in interior diameter and no more than 2 inches deep at the center.
Step 3: trimming and refining
Once the clay has stiffened to leather-hard (it holds its shape but is still slightly cool and darkish in color, usually 12 to 24 hours depending on studio humidity), remove the piece from the mold and refine the rim and base with a metal rib and needle tool. Trim any uneven edges. If you want the interior surface to be textured for bird grip, lightly press a coarse sponge or piece of rough fabric into the interior surface while still leather-hard. Smooth the exterior and base. Make sure the base is flat so it will sit stable on a pedestal.
Step 4: drying slowly and completely
This is the step most beginners rush, and it causes most cracks. Cover the piece loosely with plastic sheeting and allow it to dry slowly and evenly, at least 3 to 7 days in normal studio conditions, longer in humid climates. Uneven drying causes stress cracks. Once the piece is bone-dry (uniformly light in color, room temperature to the touch, no cold spots), it is ready for bisque firing. Do not fire clay that is even slightly damp, steam expansion will crack or explode the piece in the kiln.
Firing and finish choices
Bisque firing
Bisque firing hardens the clay into a permanent ceramic state before glaze is applied. For stoneware, bisque typically fires to Cone 010–04 (approximately 1650–1940°F / 900–1060°C), hot enough to drive out chemically bound water and harden the piece, but leaving enough porosity to absorb glaze. Use witness cones on the kiln shelf next to your piece to confirm correct heatwork. Bisque fire slowly through the 200–400°F (93–204°C) range to avoid steam-related cracking.
Glaze firing for outdoor water use
After bisque, apply two to three even coats of a lead-free, food/dinnerware-safe glaze rated for your clay body's target cone (Cone 5–6 for mid-fire stoneware). Brush, dip, or pour glaze over the interior, leaving the bottom 1/4 inch unglazed to prevent sticking to the kiln shelf. Apply kiln wash to the shelf before loading. Fire to the glaze maturation temperature recommended by the manufacturer, confirmed with witness cones. A mature glaze on stoneware gives you a vitrified, water-holding surface that needs no additional sealer. For outdoor durability, matte and satin glazes are preferable to ultra-high-gloss finishes, they're safer for bird footing and less likely to show algae staining.
Low-fire earthenware glazing
If you're working with earthenware, the same rules apply for lead-free glazes, but the resulting body will retain higher porosity than stoneware even when glazed. This means you should apply an interior sealer over the glaze for extra protection (see the Waterproofing section), and you should seriously consider disassembling or storing the bath indoors through winter if you're in a freeze-thaw climate.
No-fire alternatives for hand-built forms
If you've made a clay form but lack kiln access, you can air-dry the piece and finish with multiple coats of a pond-safe, exterior-grade masonry sealer instead of firing. Air-dried (unfired) clay is fragile, however, it will rehydrate and crack if the sealer is not completely sealed over every surface. This is a last resort, not a preferred method. A far more practical no-kiln alternative is to skip the clay-building step entirely and use Build B or C below.
A note on raku firing
Raku produces beautiful surfaces but is a genuinely poor choice for outdoor bird baths. The rapid-cool process leaves the clay body highly porous and thermally stressed, making it vulnerable to water absorption and freeze-thaw cracking. Raku is a low-temperature, rapid-cooling firing process (glaze-fires typically under ≈980°C / ≈1800°F) that produces porous, thermally-shocked surfaces blank" rel="noopener noreferrer">Raku is a low-temperature, rapid-cooling firing process (glaze-fires typically under ≈980°C / ≈1800°F) that produces porous, thermally-shocked surfaces.. Use raku pieces decoratively, not as functional water holders.
Build option B: stacked clay-pot and saucer bird bath
This is the most accessible build and a genuine weekend project. For step-by-step clay pot bird bath instructions, see the dedicated how-to guide for assembling and sealing a stable stacked-pot bird bath. Difficulty: beginner. Time: 1 to 2 hours of active work, plus adhesive cure time (usually 24–48 hours). The result looks polished, uses commercially available frost-rated pots, and is easy to disassemble and store for winter. The key is choosing the right pots upfront.
Materials and sizing
Use glazed, frost-rated ceramic or terracotta pots, look for the words 'frost-resistant' or 'frost-proof' on the product label. Unglazed, unfired terracotta saucers will absorb water and crack through the first winter without proper sealing. A typical three-pot pedestal stack uses a 10-inch base pot (inverted), a 6-inch middle pot (inverted), and a 4-inch top pot (inverted as the cap), topped by a 16-inch glazed saucer as the basin. The saucer should be at least 2 inches deep.
Step-by-step assembly
- Clean all pots and the saucer with warm water and a stiff brush. Allow to dry completely.
- Fill the base pot with gravel or sand through the drainage hole before inverting — this adds ballast and stability. Plug the drainage hole with a cork or weatherproof silicone.
- Invert the largest pot on your chosen surface and apply a ring of exterior construction adhesive around the rim (bottom of the inverted pot).
- Stack the medium pot (inverted) on top, centering it. Press firmly and allow to tack (5–10 minutes).
- Repeat with the smallest pot on top of the medium one.
- Apply a ring of adhesive to the top (base) of the smallest inverted pot and set the saucer basin on top. Center it and press.
- For a threaded-rod anchor (strongly recommended for windy sites): drill a hole through the centers of all pots and the saucer base before assembly, thread a 3/8-inch galvanized or stainless steel rod through the entire stack from bottom to top, and secure with washers and a nut at both ends. Tighten snugly but not so hard you crack the ceramic.
- Allow adhesive to cure fully (minimum 24 hours, 48 hours recommended before filling with water).
- Seal the interior of the saucer if it is unglazed terracotta (see Waterproofing section). If it is already glazed, rinse thoroughly and fill.
Variants and stabilization for the clay-pot method
The biggest practical issue with stacked pot builds is wind knock-over. The threaded rod anchor above solves this for freestanding baths. If you're placing the bath on a hard surface like a patio, drill a masonry anchor into the patio surface and bolt the bottom of the rod to it. On soft ground, the rod can be extended into the soil like a stake, 6 to 8 inches of rod below grade provides good resistance.
For additional sealing and aesthetics, fill the gaps between stacked pot rims with exterior-grade, flexible grout or tile adhesive. This closes the joint against water infiltration and makes the stack look like a single sculpted piece. Use a dark charcoal or earth-tone grout to complement the pot glaze.
Frost-proofing: even with frost-rated pots, disassembling and storing the bath indoors (or in a shed) during hard freezes is the safest approach if you live somewhere with sustained sub-freezing temperatures. If the design is permanent or the bath is too heavy to move, drain it completely before the first hard freeze, fill the basin with sand or foam insulation to prevent water pooling, and cover it with a breathable frost cover cloth.
Build option C: molded bowl with mosaic overlay
This method combines a solid, pre-made base with a hand-crafted mosaic surface. Difficulty: beginner to intermediate. Time: 3 to 5 hours active work across 2 days (adhesive must cure before grouting). The result is colorful and highly customizable, great for birders who want a garden focal point as much as a functional bath.
Choosing and preparing the base
You can use a pre-made concrete mixing bowl, a wide ceramic planter base, a plastic basin, or a purpose-made bird bath mold. Concrete and ceramic are preferable to plastic because they're heavier (more stable) and bond better with tile adhesive. Concrete bases need to have their pH neutralized before use (rinse and scrub with a diluted white vinegar solution, then rinse thoroughly) to prevent excess alkalinity from affecting adhesive bond and eventually the water chemistry. If you're building your own mold first, the process is detailed in a companion project that covers casting and mold-making specifically. For step-by-step instructions on making a stable casting mold, see the companion guide 'how to make a bird bath mold'.
Mosaic technique: tiles, adhesive, and grout
Vitreous glass mosaic tiles (3/4 inch, approximately 3mm thick) are the best choice for outdoor water-contact surfaces. They are non-porous, frost-resistant, and color-stable outdoors. Broken ceramic pieces (smashed dinner plates, tiles) also work and give a more spontaneous, handmade aesthetic, a method often explored in detail in mosaic bird bath projects. For a full walkthrough on how to make a mosaic bird bath, see the companion project 'how to make a mosaic bird bath' (project b19904ab-b1ea-413c-9318-cbcaf8f9445d). Avoid mirror tiles in the water basin itself: they can crack with temperature swings and the reflective surface may confuse or deter birds.
- Sketch your design on the bowl surface with a pencil or chalk. Start with a simple pattern — concentric rings, a starburst, or a loose floral — rather than a complex pictorial image on your first attempt.
- Use tile nippers to cut tiles to fit curves and fill gaps. Always wear safety goggles when nipping — glass shards travel.
- Apply a small amount of waterproof polymer-modified thin-set or epoxy tile mortar to the back of each tile using a butter technique (back-buttering), and press tiles firmly onto the surface. Work in small sections so the adhesive does not skin over before you set tiles.
- Leave consistent gaps between tiles for grout lines — approximately 1/16 to 1/8 inch.
- Allow adhesive to cure for minimum 24 hours (follow manufacturer instructions — epoxy adhesives may require longer).
- Mix outdoor-rated grout (unsanded for fine joints) to a smooth peanut-butter consistency. Press grout firmly into all joints with a rubber grout float, working in multiple directions.
- Wipe excess grout off tile surfaces with a damp sponge before it fully hardens (usually 15–20 minutes after application). Rinse sponge frequently.
- Allow grout to cure 24–72 hours, then apply two coats of outdoor-rated grout sealer to the entire surface. Allow full cure per manufacturer instructions before filling with water.
Edging and finishing the rim
The rim is the most visible part of the finished bath. Use a consistent tile size or a contrasting accent color around the outer edge for a clean, finished look. Quarter-round ceramic bullnose tiles also work well as a rim cap. Seal the underside edge and any exposed base material with two coats of masonry sealer before setting the bath outdoors.
Waterproofing and sealant options
Waterproofing is where a lot of DIY bird baths fail, either because the wrong product is used or because it isn't reapplied on schedule. Here's an honest comparison of the main options.
| Sealant Type | Best For | Application | Bird Safety (when cured) | Freeze-Thaw Performance | Reapplication Interval |
|---|---|---|---|---|---|
| Penetrating silane/siloxane impregnator (e.g., Miracle Sealants 511) | Unglazed terra cotta, natural stone bases | Brush or spray onto dry surface; 2 coats | Good — breathable, no surface film to peel | Good — doesn't bridge cracks but reduces absorption | Every 1–3 years depending on exposure |
| Pond-safe epoxy coating (e.g., Pond Armor, Rust-Oleum Pond Coat) | Concrete and unglazed ceramic basins | Brush or roll; 2 coats; full cure 7 days | Good once fully cured (verify potable-water rating) | Moderate — can crack if not rated flexible; choose exterior grade | Every 3–5 years; inspect for chips |
| Food-grade neutral-cure silicone (platinum-cured, FDA CFR 21 177.2600) | Sealing joints, seams, and cracks | Apply by bead, tool smooth; cure 24–72 h | Excellent — specifically certified food/water safe | Excellent — flexible material moves with freeze-thaw | As needed when seal is damaged |
| Outdoor/masonry penetrating sealer (e.g., Thompson's WaterSeal) | Exterior surfaces and bases, not water-contact interior | Spray or brush | Moderate — not specifically food-contact rated | Good on exterior surfaces | Annually |
| Glazed ceramic surface (properly fired) | Basin interior of fired pottery builds | Applied and fired — permanent | Excellent when lead-free and correctly fired | Excellent (stoneware/porcelain); fair (earthenware) | No reapplication needed; inspect for cracks |
For most DIY ceramic and terra cotta builds, my go-to combination is: a penetrating silane/siloxane impregnator on the exterior and base (preserves the natural look and reduces water uptake), plus food-grade silicone for any seams or joints, plus a pond-safe epoxy on the interior of any unglazed concrete or low-fired earthenware basin. Reapply the penetrating sealer every 1 to 2 years, or any time water no longer beads on the surface.
Placement and installation
Where you put your bird bath matters as much as how you build it. Place it in partial shade, 2 to 4 hours of direct morning sun, with afternoon shade, to slow evaporation and algae growth. A position 5 to 10 feet from dense shrubs strikes the right balance: birds like nearby cover to escape to but will avoid a bath that's enclosed on all sides (they need a clear sightline to watch for predators). Keep it at least 10 feet from bird feeders to avoid seed hulls and feces contaminating the water.
Set the bath on a stable, level surface. For ground-level baths, lay a paver base first. For pedestal baths, stake or anchor the base as described in the clay-pot section. Hummingbirds prefer shallow, moving water, if you're trying to attract them, add a small dripper or mister fitting. Crows and larger birds will use deep-sided baths but strongly prefer flat, open designs with a large water surface area.
Routine cleaning and seasonal care
Empty and scrub the basin every 2 to 3 days in summer to control bacteria and mosquito breeding. A stiff brush and plain water handles most buildup. For algae, scrub with a diluted white vinegar solution (1 part vinegar to 9 parts water), rinse thoroughly, and refill. Avoid bleach on glazed ceramic surfaces, it can degrade some glazes and traces are toxic to birds. Enzymatic bird bath cleaners (available at wild bird supply stores) are safe and effective for persistent organic staining.
Mosquito and algae control
Mosquitoes need 7 to 10 days of still water to complete their larval cycle. Changing water every 2 to 3 days breaks this cycle without any additives. A small solar-powered dripper or fountain keeps water moving and dramatically reduces both mosquito breeding and algae formation, the moving water also makes the bath more attractive to birds, who can hear and locate it from a distance. Bacillus thuringiensis israelensis (Bti) dunks (sold as Mosquito Dunks) are bird-safe and effective if you want to go longer between water changes.
Winter care
In climates with sustained freezing temperatures, the single most important thing you can do is drain and store any unglazed or earthenware components indoors before the first hard freeze. Even frost-rated glazed pots can crack if water pools in the drainage hole and freezes repeatedly. For birds, keeping liquid water available through winter is genuinely valuable, a heated bird bath insert (a simple submersible de-icer rated for ceramic bowls) is an easy addition to any of these builds for winter use. If you leave the bath outdoors, never pour boiling water onto frozen ceramic to thaw it, thermal shock will crack even well-fired stoneware.
Troubleshooting: cracks, leaks, and instability
Hairline cracks and leaks
Small hairline cracks in a fired basin are common and often structurally harmless but will leak. Clean and dry the crack thoroughly, then fill with food-grade neutral-cure silicone applied by syringe or squeeze tube. Smooth with a wetted finger and allow to cure fully. For larger cracks (wider than 1/16 inch), the piece may not be structurally sound for water use, retire it as a decorative planter and start a new basin.
Unstable pedestal or tipping
If the bath wobbles or tips in wind, the quickest fix is adding weight to the base (fill hollow bottom pots with gravel, sand, or water) and using the threaded rod anchor described in Build B. Ground stakes driven alongside a pedestal base and connected with wire ties also work for temporary stabilization.
Persistent green algae
If algae returns within days of cleaning, your bath is getting too much direct sun. Move it to a more shaded position, or add a solar fountain to keep water circulating. Avoid copper sulfate additives, while they kill algae, copper accumulates in the water and is potentially harmful to birds at higher concentrations.
Water not beading on terra cotta exterior
If water soaks straight into the exterior surface rather than beading, your penetrating sealer has worn off. Clean the surface, let it dry completely (at least 48 hours in dry weather), and reapply two coats of penetrating silane/siloxane sealer. This is especially important before winter in cold climates.
When to choose a different material or buy pre-made
Ceramic and terra cotta are genuinely excellent bird bath materials when the right method is used, but they aren't the best choice for every situation. If you're in a climate with severe freeze-thaw cycles and can't bring the bath indoors for winter, a concrete or hypertufa build may be more durable long-term. Brick is extremely robust and heavy enough to resist wind without any anchoring, which makes it ideal for open, exposed garden positions. For step-by-step instructions and materials for a durable, no-kiln option, see how to make a brick bird bath. If you want something instantly functional with no building time, a commercial glazed ceramic bath from a reputable manufacturer is a perfectly reasonable choice, look for frost-resistant ratings and a matte interior surface.
The builds in this guide are most rewarding when you enjoy the making process, want something that reflects your own aesthetic, or want a specific size or depth that isn't available commercially. Any of the three methods can produce a bird bath that lasts years and genuinely improves the bird activity in your backyard, especially once the birds find it and word gets around the neighborhood flock.
FAQ
What are the basic materials and tools needed to make a ceramic bird bath?
Materials: clay body (earthenware/terracotta, stoneware, or porcelain), appropriate glaze or waterproof sealer (food‑safe if water contact), optional underglaze/mosaic tiles, bisque and glaze (or single) firing supplies, sand or grit for texture, pedestal/stand (concrete, metal, rebar anchor), food‑grade silicone (neutral cure) for seams, optional pond liner or pre‑fired shallow basin insert. Tools: pottery wheel or hand‑building tools (rolling pin, ribs, knives, fettling tools), slab roller or templates (for saucer method), sponge, banding wheel, kiln or access to one, respirator for silica dust, brushes, mortar for mosaic, tile nippers, tile adhesive and grout (exterior rated), calipers/tape measure, level and basic hand tools for installation.
Which clay should I choose: earthenware/terracotta, stoneware, or porcelain?
Earthenware/terracotta: easy to work, traditional look, low‑fire but porous—requires a waterproof glaze or sealer for outdoor water use and is vulnerable to freeze–thaw if unsealed. Stoneware: mid‑fire, tougher and less porous when properly fired—better outdoor durability; glaze/insertion may still be needed for long‑term water holding. Porcelain: high‑fire and can be very vitrified (low absorption) and frost‑resistant when fired correctly—best for holding water without heavy sealing. Choose based on your firing capability and desired look; if using earthenware, plan for reliable waterproofing or an insert.
What are three practical build options for different skill levels?
1) Hand‑built pottery basin (beginner to advanced): throw or slab‑build a shallow bowl with slight slope and textured bottom for grip; bisque, then glaze with a food‑safe, low‑leach glaze and glaze‑fire to the manufacturer's schedule. 2) Stacked clay‑pot saucer method (beginner, no kiln required if using pre‑fired purchases): use a large pre‑fired saucer or glazed planter tray as the basin (choose frost‑resistant labeled product), mount on inverted pots or pedestals stacked and secured with adhesive or rebar through center; seal seams with food‑grade silicone. 3) Mold + mosaic overlay (intermediate): cast a basin in a plaster/silicone mold with clay or concrete, or use a pre‑fired shallow bowl and apply exterior mosaic tiles or glass on rim/outer face; grout and seal with exterior, potable-rated grout and sealant. Each option includes waterproofing choices described below.
How do I make a hand‑built ceramic bird bath step‑by‑step?
1) Design: shallow basin 1–2 in (2.5–5 cm) deep in center, gentle slope to edges, textured bottom for footing; diameter 12–18 in (30–45 cm) typical. 2) Form: throw on wheel or build a slab and form into a shallow bowl; compress and center the foot ring. 3) Dry/bisque: allow even drying; bisque fire per clay body (follow cone recommendations). 4) Glaze: apply a food‑safe, low‑leach glaze to interior - use matte or textured finish or add grit before glazing for traction. 5) Glaze fire to the recommended cone for the glaze/body. 6) Install: mount on a stable pedestal or stand, level carefully, and seal any attachments with food‑grade silicone. 7) Test: fill, observe for leaks; if leaks occur, consider interior sealer or replacement glaze.
How can I build a bird bath using stacked pots and saucers (no kiln)?
1) Source: buy a pre‑fired glazed/frost‑resistant saucer or wide shallow planter labeled for outdoor use. 2) Base: choose a stable base (wide pot, concrete block, or pedestal). 3) Stack: invert pots or use column pieces; center with rebar through drainage holes anchored into ground or a heavy base to prevent tipping. 4) Attach: use exterior, food‑grade silicone to bond saucer to top of stack or secure with rust‑proof hardware. 5) Finish: add textured stones in basin for bird footing. 6) Seal: if the saucer is unglazed terracotta, apply a food‑safe sealer or use a plastic/ceramic glazed insert.
How do I add a mosaic finish or use molds for a decorative bird bath?
Mold route: press clay into or pour a casting material to a silicone/plaster mold, refine edges, bisque, and glaze/fire as appropriate. Mosaic overlay: choose a pre‑fired, structurally-sound basin; adhere vitreous glass tiles or porcelain tile to rim or outer face with exterior adhesive rated for wet conditions; grout with epoxy or cement grout rated for outdoor/pond use and seal grout if required. Use rounded, slip‑resistant interstitial areas in the basin interior (or keep interior tiled only with large flat stones) so birds have grip. Ensure mosaic pieces and grout used in areas where birds drink are rated non‑toxic or fully cured and sealed.
Next Articles
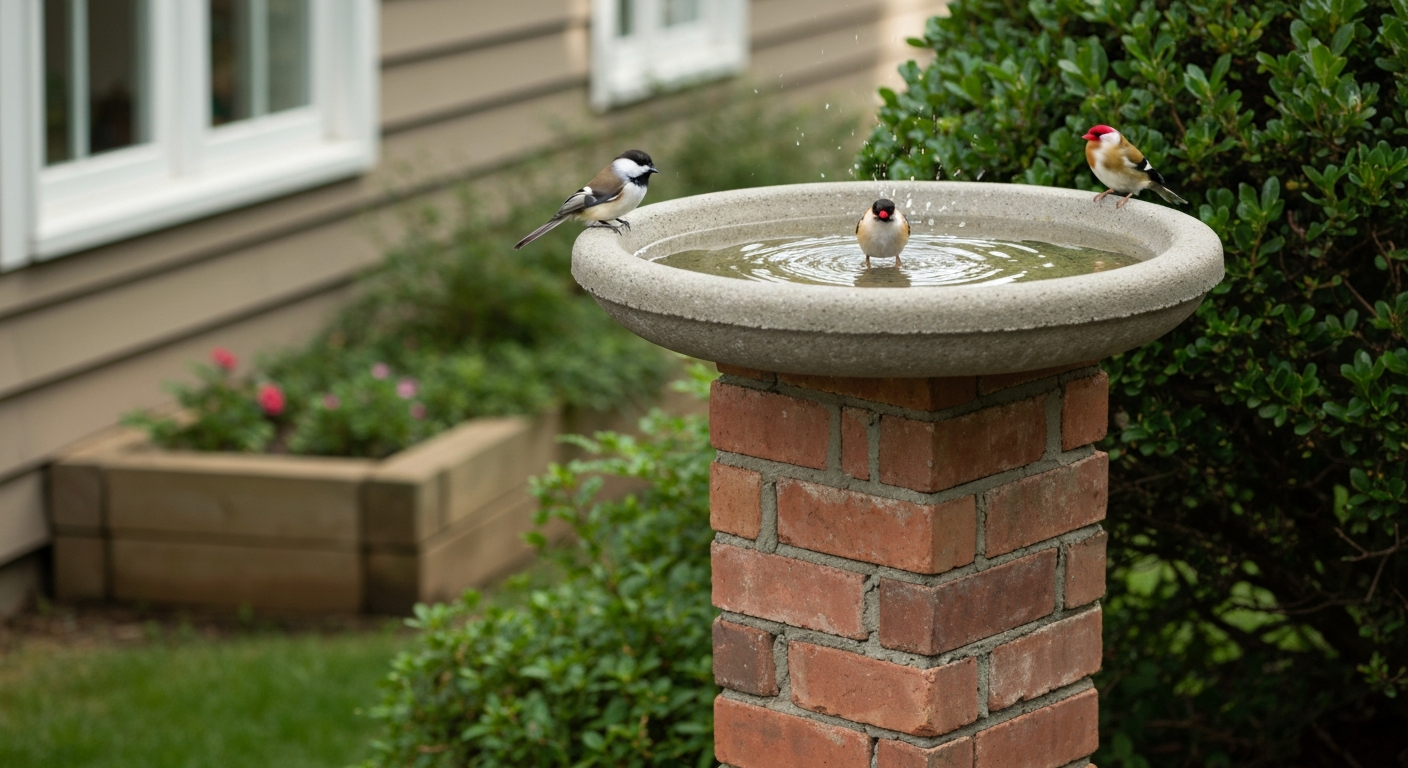
How to Make a Brick Bird Bath: Step-by-Step Plans, Materials & Care
DIY brick bird bath: step-by-step build, materials, basin options, maintenance & winter care.
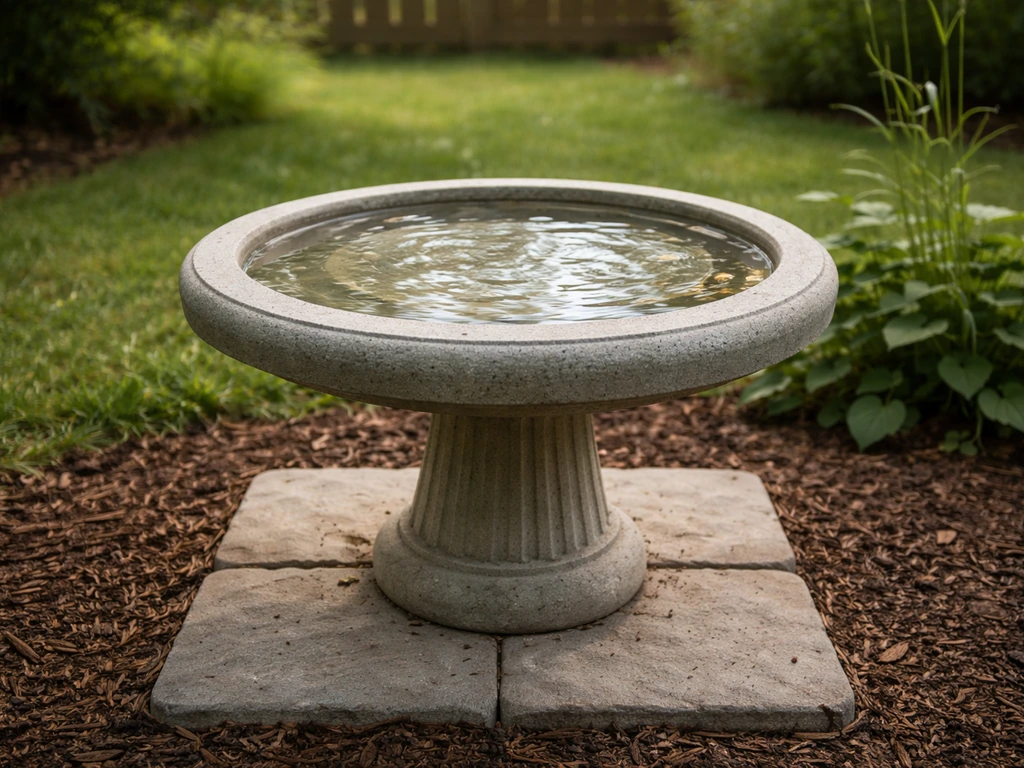
How to Make a Bird Bath Mold from Concrete
Step-by-step DIY guide to make a concrete bird bath mold, cast and cure, then finish and maintain for birds.
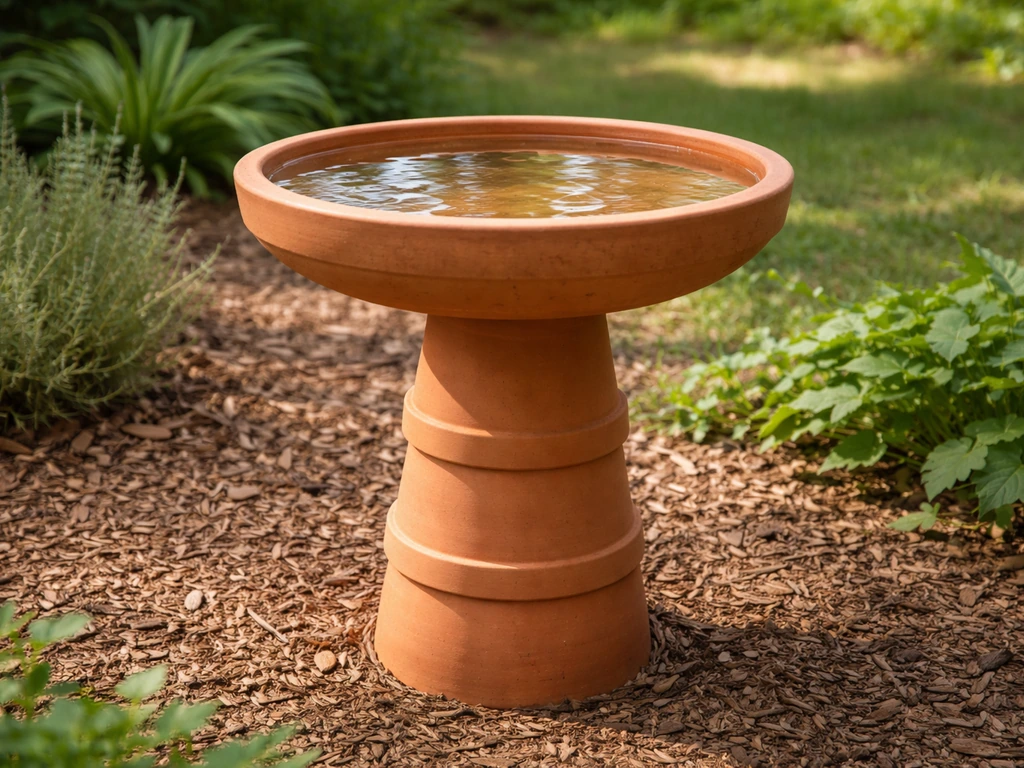
How to Make a Bird Bath Out of Clay Pots: DIY Guide
Step-by-step DIY guide to build a stable, bird-safe clay pot bird bath with waterproof sealing, placement, and easy main