You can mosaic a concrete bird bath yourself in a weekend or two, and the result will outlast almost any painted or plain bath you can buy. The basic process is: start with a solid concrete base, prep the surface so adhesive actually bonds, lay your tiles using a polymer-modified thin-set, grout with an exterior-rated polymer grout, then seal and waterproof the whole thing before you ever fill it with water. If you’re specifically interested in hypertufa, the process changes a bit, but you can still finish with a proper waterproofing and sealing routine hypertufa bird bath. Done right, a mosaicked concrete bird bath handles rain, sun, and constant splashing for years. Let me walk you through exactly how.
How to Make a Mosaic Bird Bath: DIY Concrete Guide

Marcus Henley
12 May 2026
Picking the right concrete base and planning your mosaic design
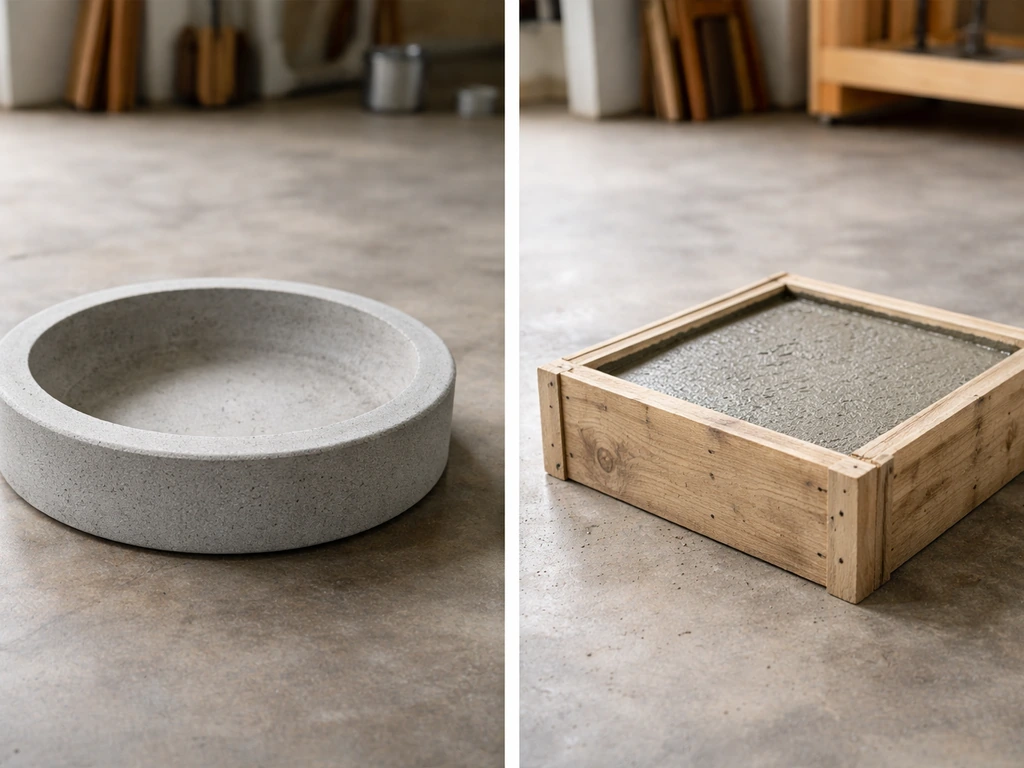
The concrete base is where this project either succeeds or fails before you ever touch a tile. You have two realistic options: buy a precast concrete bird bath basin, or cast your own. Precast is the easier path. Look for a basin with walls and a floor at least 1.5 to 2 inches thick. Thinner sections crack faster under freeze-thaw stress, and once your mosaic is on top, cracking in the substrate means cracking tiles and grout. Engineered precast bowls are spec'd around 4000 psi concrete at 28 days, which is a solid standard to aim for if you're casting your own.
If you live somewhere that freezes in winter, this choice matters even more. Concrete, glass, and stone are all susceptible to freeze-thaw cracking, so a thicker, denser base gives you more thermal mass and reduces the risk. A shallow, thin decorative basin from a garden center is a risky starting point for a mosaic you're investing real time in.
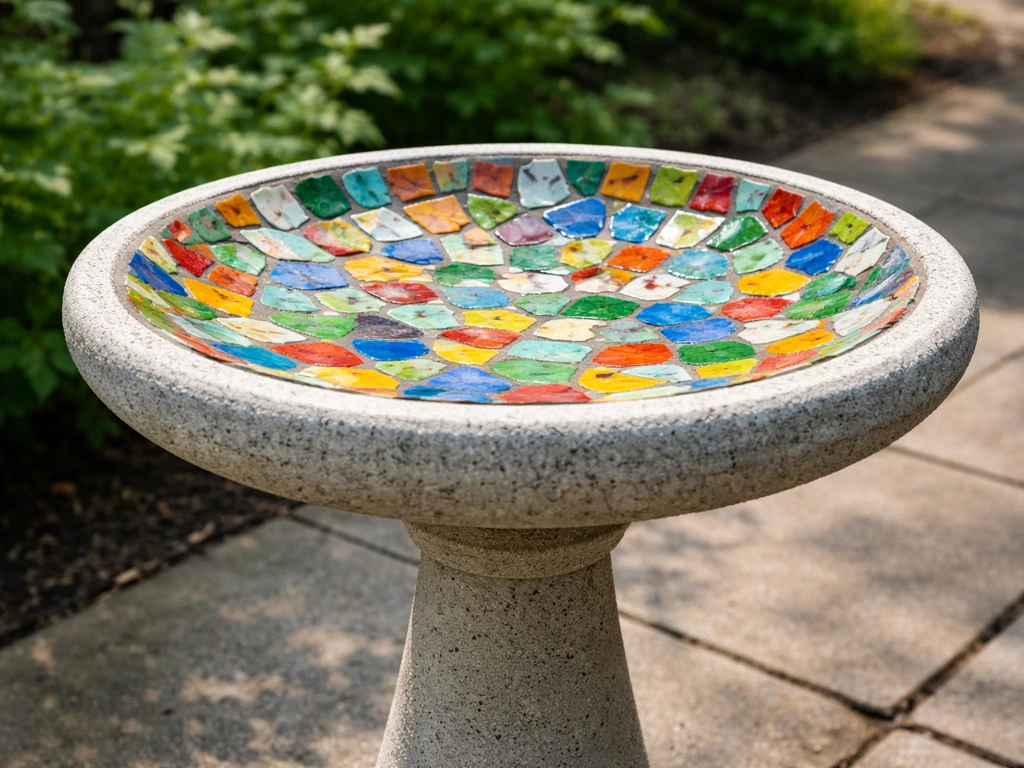
For the design itself, sketch it out on paper before you buy anything. Simple geometric patterns (sunbursts, spirals, or concentric rings) work beautifully and are much easier to cut and lay than pictorial designs. Save detailed bird or flower motifs for the outer rim where you have flat vertical surface to work on. Keep the basin floor simple with consistent tile sizes so water drains predictably and doesn't pool behind uneven sections. A gentle slope toward the center of the basin, even just a degree or two, helps prevent standing water that leads to algae, staining, and eventual freeze damage under the tile.
Materials, tools, and which tiles actually work outdoors
Outdoor and wet-area use narrows your tile choices considerably. Smooth, polished tiles get slippery when wet and are harder for birds to grip. Textured and matte finishes are safer for birds and better for outdoor conditions generally. Here's what works and what to avoid:
| Tile Type | Water Absorption | Freeze-Thaw Performance | Best Use on Bird Bath | Notes |
|---|---|---|---|---|
| Porcelain (vitrified) | Very low (<0.5%) | Excellent | Basin floor and walls | Best all-around outdoor choice; resists fading and moisture |
| Stained/fused glass | None | Good if thick enough | Decorative rim and accent | Beautiful color; use frost-rated glass mosaic pieces |
| Quarry tile | Low to medium | Good | Basin floor | Naturally textured; very durable |
| Terracotta (sealed) | High if unsealed | Poor if untreated | Decorative elements only | Must be fully sealed; risky in hard freeze climates |
| Ceramic (standard) | Medium to high | Fair to poor | Avoid for wet areas | Higher absorption means more freeze risk over time |
Porcelain mosaic tiles (typically 1x1 inch or 2x2 inch) are the most practical choice for the basin floor and inner walls. They're low absorption, durable, and widely available in mesh-backed sheets that make layout faster. Glass mosaic pieces add visual pop and are great for rim decoration, but stick to frost-rated glass in cold climates.
Tools you'll need
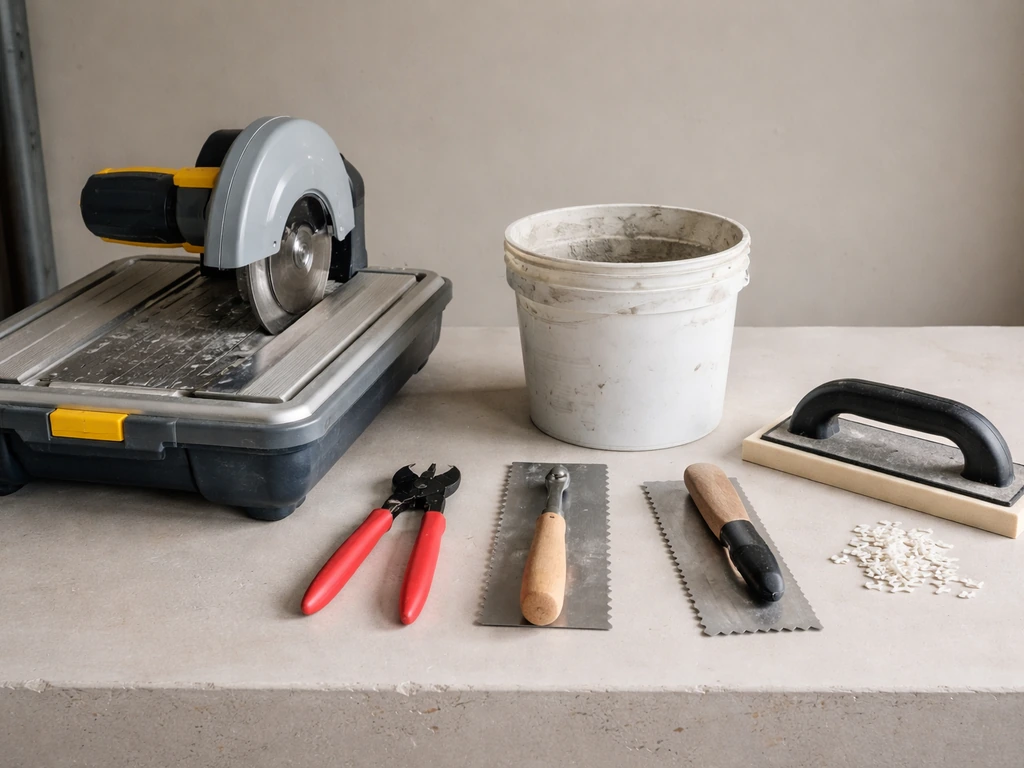
- Wet saw (essential for straight cuts, L-cuts, and curved relief cuts on larger tiles)
- Tile nippers (for cleaning up curved cuts and shaping small mosaic pieces)
- Notched trowel (1/4-inch V-notch or square-notch for thin-set application)
- Rubber mallet and float
- Mixing bucket and drill with paddle attachment
- Grout float and sponges
- Safety glasses and gloves
- Measuring tape, pencil, and graph paper for layout planning
- Level
For adhesive, use a polymer-modified thin-set mortar rated for exterior and wet-area use. A DIYer on r/Tile discusses selecting blank" rel="noopener noreferrer">thin-set rated ANSI A118.4/ANSI A118.11 and how that affects real shopping and spec decisions. Products like LATICRETE 254 Platinum or Custom Building Products Multi-Bond 506 are both solid choices and widely available. LATICRETE 9235 waterproofing membrane is described as a thin (0.02 in / 0.5 mm), load-bearing, flexible, liquid-applied waterproofing membrane system blank" rel="noopener noreferrer">LATICRETE 254 Platinum. These bond well to concrete and handle the constant moisture of a bird bath. Mix 254 Platinum at roughly 3.6 parts powder to 1 part clean, cool water, and let it slake (rest) for about 10 minutes before re-stirring and using. For the mortar bed option (if you're embedding tile into a fresh mortar bed rather than thin-set bonding), the traditional ratio is 1 part portland cement to 4 parts damp sand by volume.
Prepping the concrete surface so your tiles actually stay put
Surface prep is where most DIY mosaic projects go wrong. Concrete looks solid, but if there's any sealer, paint, mold release compound, oil, or efflorescence on the surface, your thin-set won't bond properly and tiles will eventually pop. Don't skip this step.
- Clean the basin thoroughly with a stiff brush and water to remove loose debris, dirt, and dust.
- Inspect for any factory sealers or curing compounds. Many precast concrete products are treated before sale. If you see any sheen or water beads on the surface, those need to go.
- Remove paint, sealers, adhesives, or wax either by mechanical scarification (grinding or sandblasting) or chemical removal, depending on what's present. Fine Homebuilding's guidance on floor prep applies here: get down to bare concrete. There are no shortcuts.
- Rinse the basin completely and let it dry. Check for any cracks or low spots in the concrete. Fill hairline cracks with a polymer-modified patching compound and let it cure fully.
- If you're applying a waterproofing membrane before tiling (recommended), apply it now to the clean concrete surface, let it dry to the touch, and allow a full 7-day cure at around 70°F before laying tile over it. Once cured, you must use a latex or polymer-fortified thin-set complying with ANSI A118.4 to bond tile to the membrane surface.
- Dampen the concrete surface lightly before applying thin-set, but don't leave standing water on it.
If a new concrete base was cast or poured, it needs to cure for a minimum of 28 days before you tile over it. Fresh concrete is still releasing moisture and will shrink slightly as it cures. Tiling too early almost guarantees bond failure. If you're using a mortar bed installation method, that mortar bed itself needs a minimum of 7 days of curing before glass tile installation begins.
The mosaic process step by step
Dry layout first
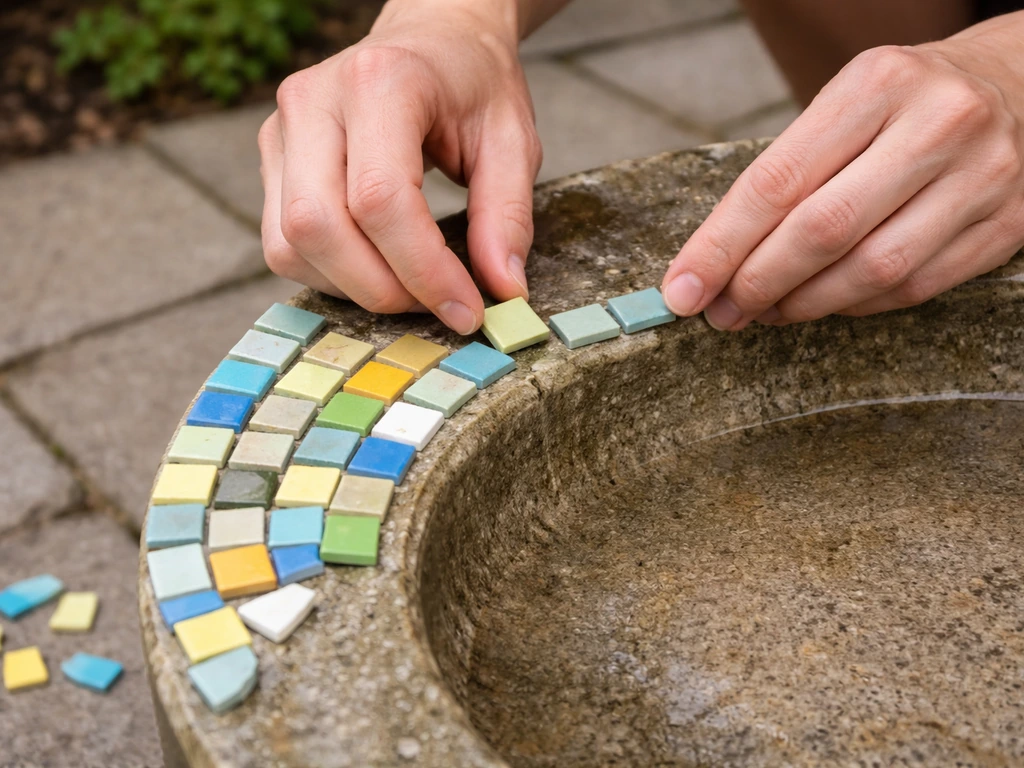
Before any adhesive comes out, do a complete dry layout of your design directly on the bird bath. This is your chance to test how tiles fit, identify where you need cuts, and adjust the design before it's permanent. For the basin floor, start from the center and work outward. Use plastic tile spacers (1/16 inch is usually right for small mosaic tiles) to keep grout joints consistent. Inconsistent joint width makes lippage worse and the final surface look amateur. Photograph your dry layout before you start setting tiles.
Cutting tiles for curves and edges
A wet saw handles most cuts cleanly. For curved cuts around the rim or basin edge, make a series of straight relief cuts into the tile toward the curve line, then use tile nippers to clean up and refine the curve. Work slowly with the nippers and take small bites. Rushing causes the tile to crack in the wrong direction. For an uneven surface or curved basin walls, keep the tile on a stable flat surface when cutting to avoid wobble reducing accuracy.
Applying thin-set and setting tiles
- Mix your polymer-modified thin-set per manufacturer instructions. For LATICRETE 254 Platinum, that's about 3.6 parts powder to 1 part clean, cool water. Let it slake for 10 minutes, re-stir, then use.
- Spread thin-set on a small section of the concrete surface (work in sections of about 2-3 square feet so you don't outrun your working time).
- Comb through it with your notched trowel to create ridges. Full coverage under each tile is essential in wet outdoor applications.
- Press tiles firmly into the thin-set with a slight twisting motion to collapse the ridges and ensure full contact. Use a rubber mallet and beating block for mesh-backed sheets.
- Check your work frequently with a level. Any lippage over about 1mm between adjacent tiles will be visible and create spots where water pools.
- Remove spacers before the thin-set sets fully.
- Allow the thin-set to cure before grouting. LATICRETE mortar can begin the next installation steps after a minimum of 24 hours at 70°F, but cooler temperatures require longer cure time. When in doubt, give it 48 hours.
Grouting, waterproofing, sealing, and finishing
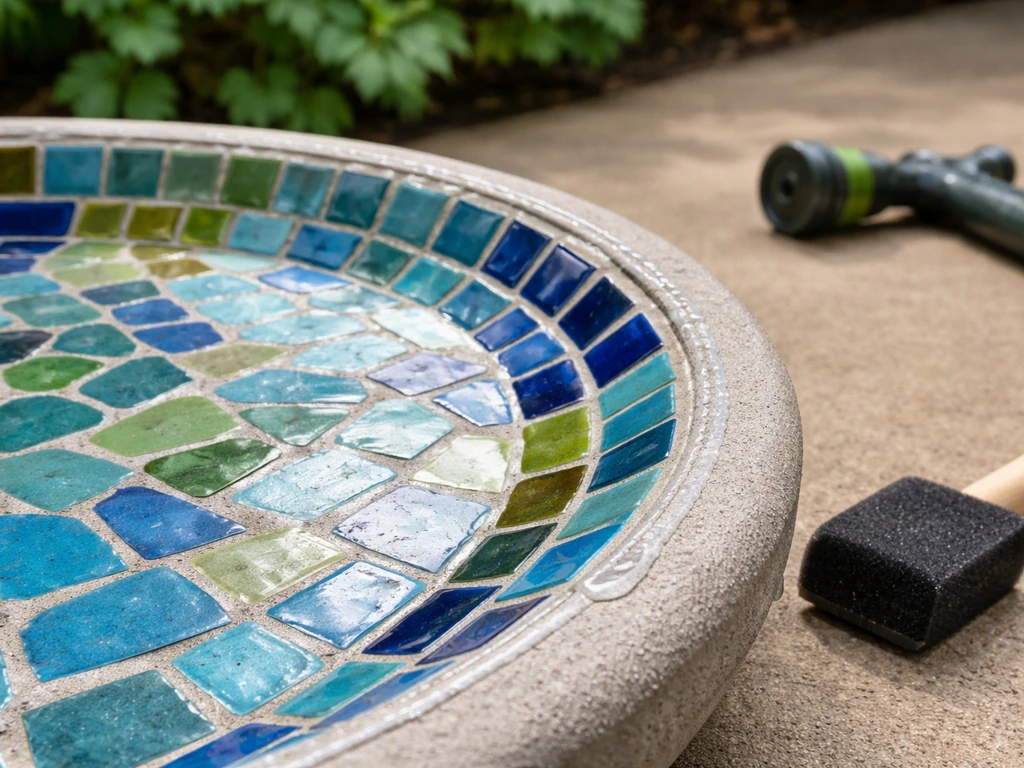
For exterior and wet-area applications, you want a premium unsanded polymer-modified grout. MAPEI's Keracolor U unsanded is a commonly recommended product for exactly this use. Unsanded grout is the right call for grout joints under 1/8 inch, which is typical for small mosaic tiles. Polymer modification is what gives the grout the flexibility and water resistance it needs outdoors.
- Mix grout to a peanut butter consistency. Too watery weakens it; too stiff makes it hard to work into joints without air pockets.
- Apply with a rubber grout float held at a 45-degree angle, working diagonally across the tile surface to push grout fully into joints.
- Work in sections and wipe off excess with a damp sponge before it hazes over. Don't wait too long or you'll be fighting hardened grout smears on your tile surface.
- Allow grout to cure according to the product instructions, typically 24-72 hours for initial cure.
- Once grout is fully cured, apply a penetrating grout sealer to protect against moisture intrusion and staining. Don't skip this on an outdoor installation.
- For the concrete basin itself, apply a waterproof membrane or sealant to any exposed concrete surfaces not covered by tile. LATICRETE 9235 waterproofing membrane requires a full 7 days at 70°F and 50% relative humidity before flood testing or covering, so plan that into your timeline.
- Apply a tile and grout sealer to the entire finished mosaic surface. This is your last line of defense against water infiltration, algae, and efflorescence.
One thing I always tell people: let everything cure fully before you put water in it. It's tempting to fill it up immediately, but giving the grout and sealant a full week of dry cure time pays off enormously in long-term durability. Standing water that gets into partially-cured grout joints causes staining, algae, efflorescence (those white chalky deposits), and eventually freeze damage.
What to look for in a mosaic bird bath video
If you want to supplement this guide with video, look specifically for tutorials that show the full surface prep process (not just the fun tile-placing part), the correct thin-set application technique with a notched trowel, and the grouting diagonal-float method. The most common mistakes visible in DIY videos are: inadequate surface prep, too-thick or too-thin thin-set, and rushing the grout cleanup. If a video skips the curing steps or doesn't mention waterproofing, treat it as inspiration only, not instruction.
Installing and placing your bird bath for maximum bird action
Height and location matter as much as the bird bath itself. Most birds prefer a bath placed 2 to 3 feet off the ground, which mimics natural water sources and gives them sight lines to spot approaching predators. That said, some ground-feeding species like robins and thrushes are equally happy with a ground-level bath. If you have cats in the neighborhood, get the bath up higher.
- Place the bath within 10 feet of shrubs or trees so birds have a quick escape route and a perch to preen after bathing, but not directly under a tree where debris accumulates and predators can ambush from above.
- Keep it in partial shade in warm climates to slow algae growth and keep water cooler and more appealing to birds.
- Avoid placing it directly against a fence or wall that blocks the birds' view in any direction.
- Make sure the pedestal or base is on level, stable ground. A mosaic concrete bird bath is heavy, and an uneven base creates stress on the basin and risks tipping.
- Position it where you can see it from inside your house. You did the work; you should enjoy watching the birds.
The water depth in the basin is a detail that surprises a lot of people. Most songbirds prefer water that's 1 to 2 inches deep at the center, with a gradual slope toward the edges so smaller birds can wade in from the shallows. If your basin is deeper than 2.5 inches in the center, add a flat stone or two to give smaller birds a safe footing.
Keeping your mosaic bird bath clean and trouble-free
Regular cleaning routine
A mosaic bird bath needs the same basic cleaning as any other concrete bath, but with a little more care around the grout lines. If you are also dealing with mold or mildew on a bird bath, focus on keeping the surface sealed and cleaning regularly so it does not take hold in the grout mosaic bird bath. Empty and scrub the basin every 2 to 3 days in warm weather when algae grows fast, or weekly in cooler seasons. Use a stiff brush (not metal bristles) and plain water or a very diluted white vinegar solution. Avoid bleach or harsh chemical cleaners directly on unsealed grout, as they degrade the grout over time. The sealed surface actually makes this easier than an unsealed bath: algae and debris wipe off rather than soaking in.
Dealing with algae
Algae is the most common maintenance issue with any bird bath, and the mosaic surface doesn't change that. Partial shade, regular water changes, and good sealing are your main prevention tools. If algae persists, a small amount of white vinegar added to the scrub water is bird-safe and cuts through algae effectively. Some people add a small solar-powered fountain or dripper to the basin, which keeps water moving and dramatically slows algae growth. Moving water also attracts more bird species, which is a nice bonus.
Winter care for freeze climates
Freeze-thaw is the biggest enemy of any tiled or mosaic surface. Water that gets into grout joints or beneath tiles, then freezes and expands, will crack grout and pop tiles off over a single hard winter. Your best defenses are: keep the grout and tile fully sealed with a quality penetrating sealer, re-apply that sealer each fall, and keep water moving if you're running the bath through winter. A submersible bird bath heater keeps the water liquid and, more importantly, keeps water from pooling and freezing in the tile joints. If you're not heating the bath through winter, empty it completely, dry it out, and cover it so rain and snowmelt can't sit in it. A heavy concrete bath with good thick walls and well-sealed tile will survive many winters with this care.
Troubleshooting grout and tile issues
If you see efflorescence (white chalky deposits) forming in your grout lines, that's a sign moisture is getting through. Dry the bath out completely, scrub off the efflorescence with a diluted vinegar solution, let it dry fully, and re-seal. If individual tiles start to pop or loosen, address them immediately before water gets under the surrounding tiles. Chip out the loose tile, clean the adhesive residue from both the tile and the concrete substrate, and re-bond with fresh polymer-modified thin-set. Re-grout the joint once the adhesive cures. Catching one loose tile early is far easier than re-doing a whole section.
A mosaic bird bath takes more upfront effort than a plain concrete or ceramic bath, but the maintenance is genuinely manageable once the surface is properly sealed. If you're already thinking about other DIY bird bath approaches, similar surface-prep and sealing principles apply whether you're working with clay pots, cast concrete, or other material combinations. If you are exploring other styles, you can also learn how to make a brick bird bath with the same focus on waterproofing and durable outdoor materials. If you specifically want a ceramic bird bath look, you can adapt the same waterproofing and grout-cure basics to your ceramic pieces DIY bird bath approaches. If you want to skip the mosaic concrete route, you can also learn how to make a bird bath out of clay pots using a simple stacking and waterproofing approach. The fundamentals of bonding, waterproofing, and freeze protection stay consistent across all of them.
FAQ
Can I mosaic directly onto an existing pre-made bird bath that is already painted or sealed?
Only if you remove everything that prevents bonding. Take off paint, sealer, and any glossy coating, then scrub and dry the surface until there is no chalking, oil, or residue. If you can’t confirm a clean concrete surface (or the old coating won’t come off easily), it’s safer to start with a fresh base because thin-set can fail even if tiles look stuck at first.
What thin-set and grout should I use if my bird bath has tiny grout joints (like 1/16 inch)?
Use an exterior, polymer-modified thin-set for the bond and an exterior-rated polymer-modified grout intended for unsanded use. With very tight joints, sanded grout can leave scratchy texture, create higher lippage, and trap debris. Stick to grout products specified for joints under about 1/8 inch, then make sure you fully fill the joints during grouting.
How long should I wait before I grout, and how long before adding water after sealing?
After setting tiles, grout after the thin-set has had enough time to reach a stable cure (often at least 24 hours, but follow your mortar’s instructions). After grouting, do not rush the water test, wait a full week for the grout and sealant to dry and cure, then start with shallow water and check for leaks or dampness at the edges over the next day.
Why do tiles sometimes pop off after winter, even when they were grouted and sealed?
Usually it’s moisture getting behind tiles or into grout joints, then freezing and expanding. Common causes are skipping thorough waterproof sealing, using the wrong type of grout, rushing cure time, or bonding over a contaminated concrete surface. If you see a few tiles loosening early, re-bond and re-grout that area immediately so water doesn’t route further under the mosaic.
Do I need waterproofing sealer before grouting, or is sealing only after grouting enough?
For most mosaic bird baths, sealing after grouting is the critical step, but some projects also use a grout-focused waterproofing approach depending on the sealant system. If your climate is very freeze-thaw heavy or your grout is showing staining, prioritize a penetrating sealer that is compatible with your grout type, and re-apply on schedule (typically each fall) rather than assuming one coat lasts forever.
What’s the safest tile choice for birds, and what should I avoid on the basin floor?
Choose textured or matte porcelain mosaic for the floor and inner walls to reduce slipping when wet. Avoid polished or glossy surfaces on the standing-water area because birds can struggle to grip. If you use glass for accents, keep it for areas that are less likely to be used as the primary wading surface.
How do I keep water from pooling if my basin is slightly uneven?
Test drainage during a dry layout phase by visualizing the slope and dry-fitting tile thicknesses consistently. During installation, maintain an even thin-set thickness and use spacers so the mosaic surface doesn’t create low pockets. After curing, do a controlled water test and look for slow-draining corners, then correct them early rather than letting algae establish.
Can I mosaic a bird bath that freezes hard, but I do not want to use a heater?
Yes, but you must plan for winter. Empty and fully dry the bath before freezes, prevent water and snowmelt from collecting in the basin, and cover it so moisture doesn’t get into grout lines. If you see efflorescence or dampness after winter, it indicates water intrusion, and re-sealing is your best first correction.
What should I do if I see white chalky efflorescence in the grout lines?
Treat it as a sign moisture is reaching the surface. Dry the bath completely, scrub off the deposits with diluted vinegar, let it dry fully, then re-seal using a sealer that is compatible with polymer-modified grout. If efflorescence returns quickly, you may need to investigate bonding quality or sealant coverage at edges and cracks.
How can I clean algae without damaging grout or sealant?
Use a stiff brush and rinse with plain water first. For stubborn algae, use a very diluted vinegar solution, then rinse thoroughly. Avoid bleach or strong chemical cleaners directly on grout, especially if the seal is worn, because harsh chemicals can degrade grout and leave the mosaic more absorbent over time.
What’s the best water depth for birds, and do I need to change it because of the mosaic tile surface?
Aim for about 1 to 2 inches deep at the center with a gradual slope to the edges so smaller birds can wade safely. Mosaic tile thickness usually only changes depth slightly, but if your basin is already deep (over about 2.5 inches), add a flat stone or a bath insert to create shallow footing rather than letting small birds stand in deep water.
Next Article
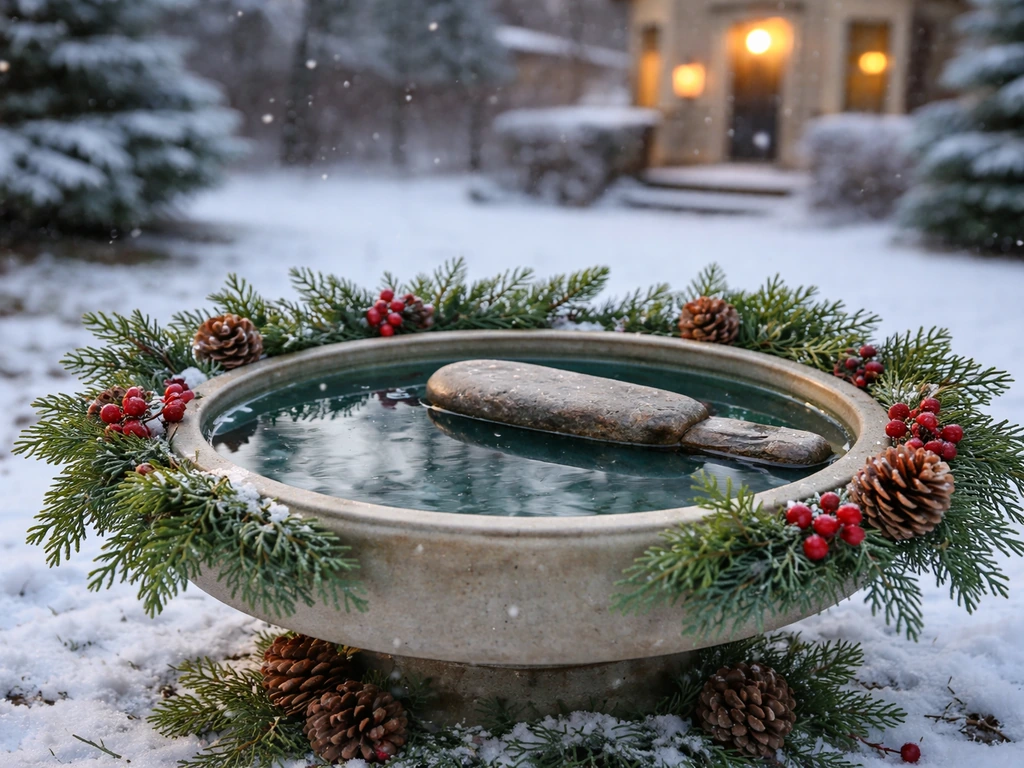
How to Decorate a Bird Bath for Christmas Safely
Step-by-step tips to decorate a Christmas bird bath with safe non-toxic accents, prevent freezing, and keep water clean.