To make a concrete bird bath mold, you build a two-part form (usually out of foam, sand, or melamine-coated wood) that shapes both the basin and the pedestal, coat the interior with a release agent, pour in a Portland cement mix, and let it cure for at least 7 days before demolding. Done right, you end up with a dense, weather-resistant bath that lasts decades and costs a fraction of a store-bought concrete piece. If you are specifically trying to make a ceramic bird bath, you will want to switch materials and curing methods to match ceramics and glaze safety for outdoor water concrete bird bath.
How to Make a Bird Bath Mold from Concrete

Marcus Henley
18 Jun 2026
What You Need: Materials and Tools for Making a Concrete Bird Bath Mold
Getting the materials list right before you start saves a lot of frustration. Concrete bird bath molds fall into two categories: the form itself (what shapes the concrete) and the mix ingredients (what becomes the bird bath). If you are interested in a lighter, more porous option, you can also learn how to make a hypertufa bird bath using a similar basin and mold approach Concrete bird bath molds. Here is what I keep on hand for a standard basin-and-pedestal project.
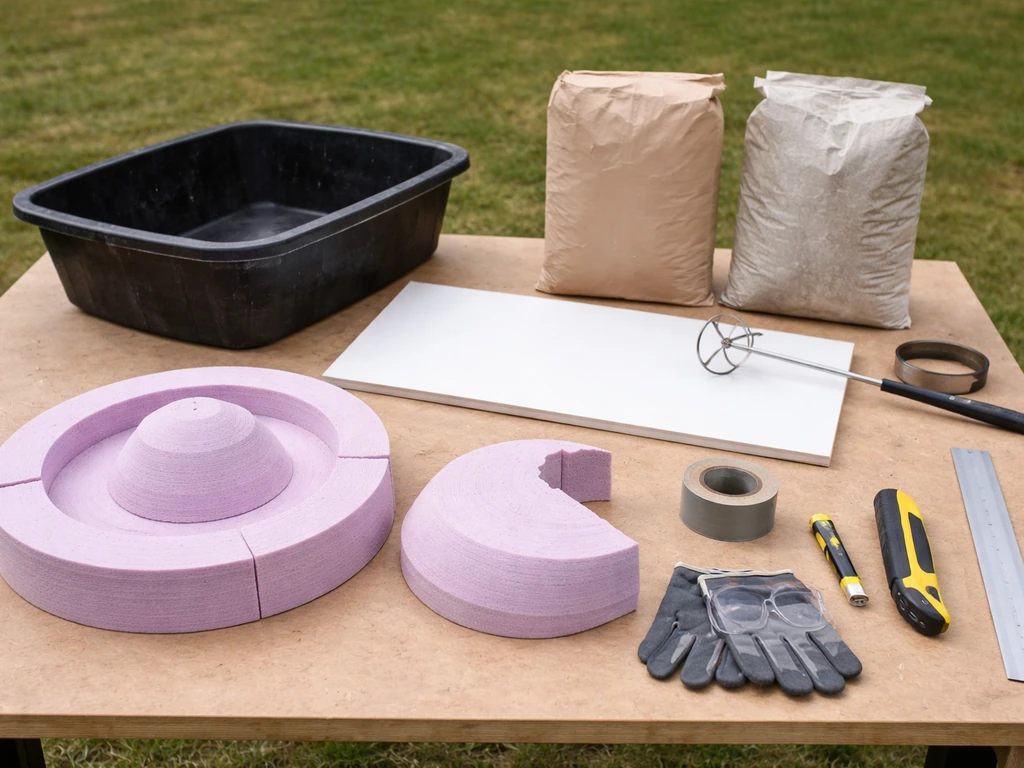
Mold-making materials
- 2-inch rigid foam insulation board (pink or blue): easy to cut, carve, and stack into basin shapes; great for one-off molds
- Melamine-coated particleboard or plywood: reusable, the slick surface releases cleanly, good for making multiple identical molds
- Play sand or builder's sand: used to pack a sand mold for free-form basin shapes (no cutting required)
- Form-release agent or mold release spray: petroleum jelly, cooking spray, or commercial mold release all work; apply generously
- Hot glue gun or construction adhesive: seals foam joints so concrete does not seep through
- Duct tape: backup sealing along seams
Concrete mix ingredients
- Portland cement (Type I or Type II): the binder; do not substitute with mortar mix for structural pieces
- Fine sand (play sand or masonry sand): aim for a 1:2 cement-to-sand ratio for basin work
- Pea gravel or coarse aggregate (optional): adds strength to thicker pedestal sections; use a 1:2:3 mix (cement:sand:gravel)
- Fiber reinforcement (polypropylene fibers): mix in at 1 lb per cubic yard to reduce cracking in thin sections
- Wire mesh or hardware cloth (1/4-inch grid): cut to fit inside the basin for tensile reinforcement
- Water: start at a 0.45 water-to-cement ratio; the mix should hold its shape when squeezed, not slump
Tools
- Utility knife or serrated bread knife for cutting foam
- Jigsaw or circular saw for cutting melamine board
- Mixing tub or a rented electric mixer for batches over 50 lbs
- Rubber gloves, safety glasses, and a properly fitted N95 or P100 respirator (mandatory when mixing dry cement or sanding cured concrete)
- Margin trowel and finishing trowel for packing and smoothing
- Buckets for measuring and carrying water
- Spray bottle for misting during curing
- Plastic sheeting for covering the form while curing
A word on respiratory protection: dry Portland cement and sand both contain respirable silica. NIOSH and OSHA both flag mixing, grinding, and sanding concrete as high-exposure tasks. OSHA’s construction guidance for respirable crystalline silica notes that grinding and abrasive blasting of silica-containing materials, including concrete, can generate very high short-term exposure, making dust control and respiratory protection important [mixing, grinding, and sanding concrete as high-exposure tasks. ](https://www.
osha. gov/silica-crystalline/construction-info). NIOSH/CDC notes respirator use is relevant for tasks that can expose workers to silica dust during concrete work such as mixing, sawing, jackhammering, chipping, grinding, and cleaning operations [respirator use is relevant for concrete tasks that expose workers to silica dust](https://www. cdc.
gov/niosh/bulletin/2020/respirators-construction. html). Wear a respirator every time you open a cement bag, mix dry ingredients, or sand a cured surface. An N95 is the bare minimum; a P100 half-face respirator is better if you are doing this regularly.
Choosing or Designing Your Mold: Size, Shape, and How Many

Before you cut a single piece of foam, decide on a few key dimensions. A functional bird bath basin needs to be at least 24 to 30 inches in diameter and no deeper than 2 to 3 inches at the center. If you want a brick bird bath instead of a concrete one, follow a dedicated guide for how to make a brick bird bath so the basin holds water reliably.
Most birds prefer a gradual slope from the rim to a central depth of about 1. 5 to 2 inches. Shallower is safer for small songbirds; hummingbirds want water barely half an inch deep at the edges. If you want to attract a variety of species, aim for a basin that starts at about 0.
5 inches at the rim and slopes to 2 inches in the middle.
Foam mold (best for one-off custom shapes)
Stack and glue two or three layers of 2-inch foam board to get the total height of your basin form. Carve the depression into the top layer using a utility knife and sandpaper. This becomes the inner form that sits inside a larger outer form, with concrete packed or poured in between. The gap between the inner and outer foam walls determines basin wall thickness; I aim for about 1.5 to 2 inches. Foam molds are typically destroyed during demolding, so they are perfect for a one-time cast.
Sand mold (fastest setup, free-form results)
Pack damp sand into a large plastic tub or a ring of lumber scraps, then press a mixing bowl or round form into the sand to create the basin impression. Pour concrete directly onto the sand. Once cured, the sand just brushes away. This method produces a slightly rougher texture, which birds actually prefer because it gives better footing. It is not ideal if you want to make multiple identical molds, but it is great for a single rustic-looking bath. If you want a simple project with clay pot bird bath instructions, this single-bath approach is a great place to start rustic-looking bath.
Melamine board mold (best for reusable, multiple casts)
If you want to make several bird baths (a common request when neighbors see one in your yard), cut melamine-coated panels into the sides and base of a box form. The slick coating releases concrete cleanly without tearing, and a well-built melamine mold can produce 20 or more casts with light maintenance between pours. For a round basin, you can bend thin melamine strips or use a large plastic bowl as the inner form. This approach takes more upfront time but pays off quickly.
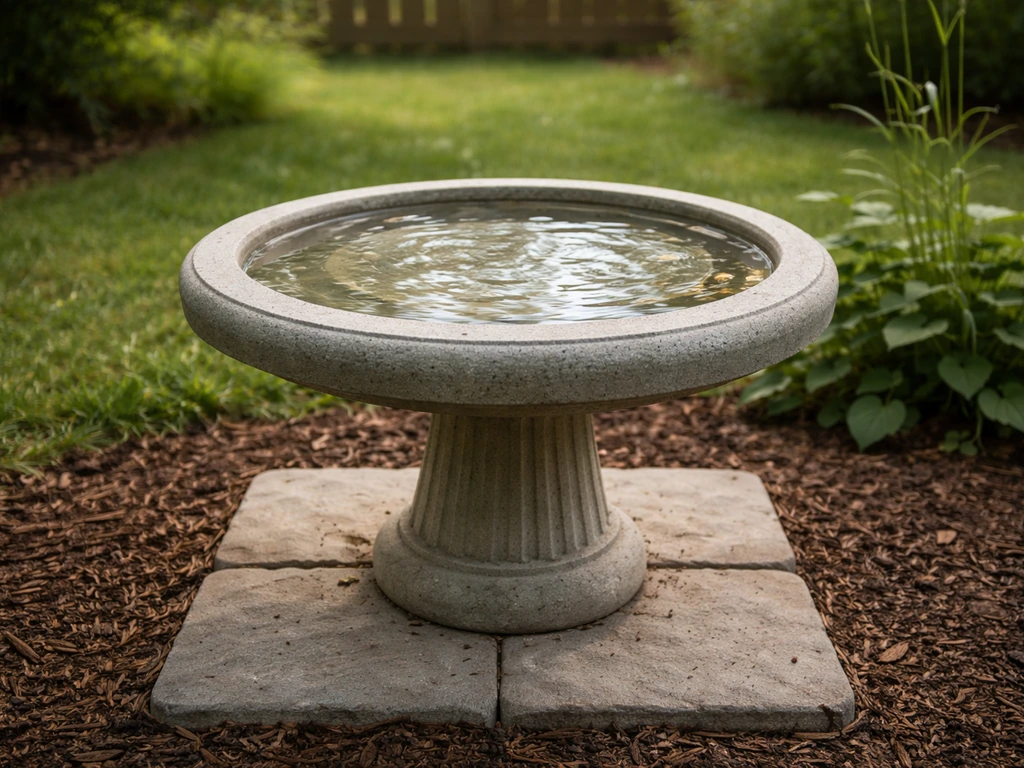
Pedestal vs. ground-level basin
A pedestal style raises the bath 24 to 36 inches off the ground, which helps songbirds spot approaching cats. The pedestal is usually cast as a separate cylinder (using a Sonotube or a section of large-diameter PVC pipe as the form) and then mortared to the underside of the basin. A ground-level or low-profile basin on a flat concrete base is simpler to cast but offers birds less protection from predators. I generally recommend the pedestal style for most backyard setups.
Step-by-Step: Making the Mold and Casting the Bird Bath

- Build the outer form first. For a foam mold, cut your outer foam walls and hot-glue them into a ring or rectangle slightly larger than your intended basin. Seal every seam inside with hot glue and let it cool fully. For a melamine box, screw the panels together and caulk the interior joints.
- Shape the inner form. Carve your inner foam piece to match the basin profile you want (gradual slope, 1.5 to 2 inches deep at center). For a sand mold, pack damp sand firmly and press your bowl or form into it to a consistent depth. Check the depth with a ruler at several points.
- Apply mold release. Coat every surface that will touch concrete with a generous layer of petroleum jelly, cooking spray, or commercial release agent. Do not skip corners and edges. Reapply if the form sits out in the sun for more than an hour before you pour.
- Mix the concrete. Combine 1 part Portland cement with 2 parts fine sand in a mixing tub. Add polypropylene fibers now if you are using them. Slowly add water, mixing thoroughly, until the mix holds its shape when squeezed but does not crumble. Avoid a soupy mix; excess water weakens the final product.
- Place the first layer of concrete. Pack about 0.5 to 0.75 inches of mix into the bottom and sides of the mold. Work it into corners with a margin trowel and tamp lightly to remove air pockets.
- Add reinforcement. Lay your cut wire mesh or hardware cloth over the first layer, keeping it centered and at least 0.5 inches from any edge or surface. For the pedestal, insert rebar or threaded rod vertically at this stage.
- Fill to final thickness. Pack the remaining concrete over the mesh, bringing the total wall thickness to 1.5 to 2 inches. Smooth the top (which will become the basin floor) with a finishing trowel. For a textured surface that gives birds better grip, skip the final smoothing pass or lightly drag a stiff brush across the wet surface.
- Tap the form. Gently tap the outside of the mold with a rubber mallet to vibrate out air bubbles. This step significantly reduces pitting on the finished surface.
- Cover and start the cure. Drape plastic sheeting over the entire form. The concrete needs to stay moist, not dry out. You are aiming to keep it damp, not wet.
Curing Tips for a Smooth, Durable Finish
Curing is where most DIY concrete bird baths fail. People rush it. Per ACI 308R guidance for concrete flatwork, a minimum of 7 days at temperatures above 50°F is needed to achieve adequate strength and durability. In practice, I leave bird bath basins in the mold for 7 days and then let them cure uncovered for another week before putting them in service. In hot, dry weather (above 85°F), mist the covered form two or three times a day to prevent the surface from drying too fast, which causes surface cracking.
- Keep the temperature above 50°F: if you are casting in fall or early spring, move the form to a garage or cover it with an insulating blanket overnight
- Do not let it freeze: concrete that freezes in the first 24 to 48 hours of curing loses a significant percentage of its eventual strength
- Mist daily: lift the plastic cover, lightly spray the surface, and replace the cover
- Avoid direct sun on the plastic cover for the first 3 days: overheating causes rapid moisture loss from the edges
- Resist the urge to demold early: the concrete will feel hard after 24 to 48 hours but is nowhere near full strength
If you want an extra-smooth basin surface, mix a thin slurry of Portland cement and water (consistency of thick paint) and brush it onto the interior of the mold before your first concrete layer. This cream coat fills surface voids and produces a much smoother finish after demolding. This is especially worth doing if you are using a rough foam or sand mold.
Demolding, Finishing, and Getting It Ready for the Yard
After 7 days, you can demold. For foam molds, simply peel or cut the foam away from the concrete. For melamine box molds, unscrew the sides carefully and lift the panels off. Do not pry directly against the concrete surface. If anything sticks, work a thin wooden shim around the edges and wiggle gently.
Surface finishing
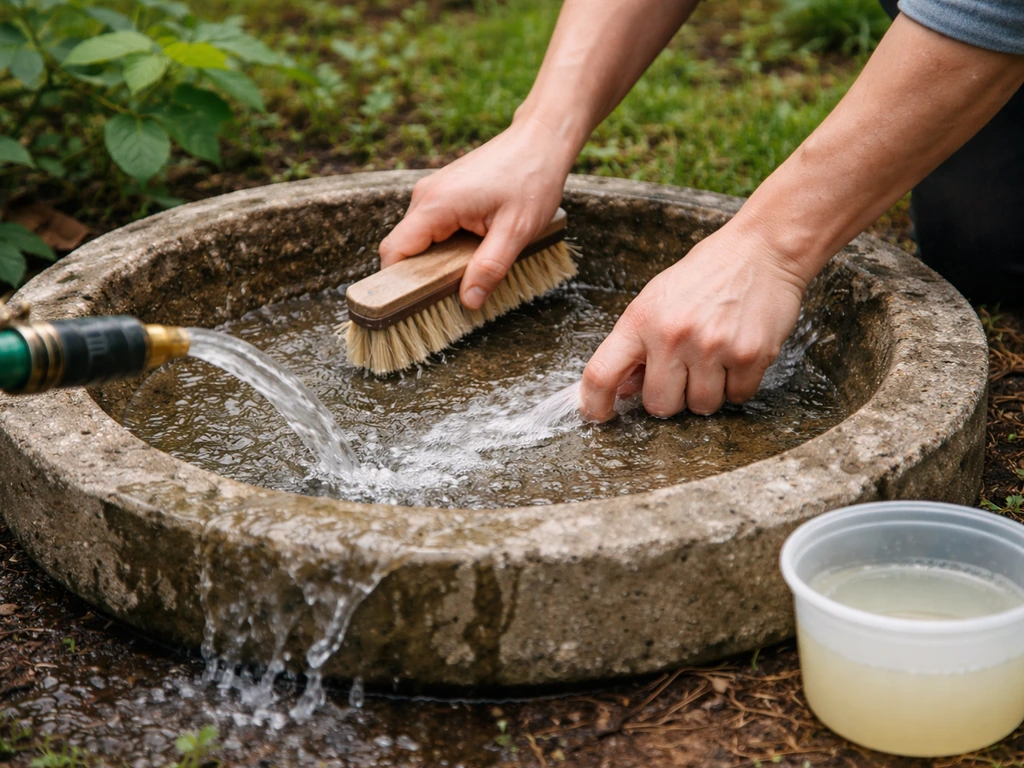
Inspect the basin for air pockets, honeycombing, or rough spots. Mix a small batch of cement slurry (Portland cement plus water, no aggregate) and press it into any voids with a gloved finger. Let that patch cure for 2 to 3 more days under plastic before doing any sanding. If sanding is needed, wet-sand with 80-grit silicon carbide paper under running water to control silica dust, then finish with 120-grit for a smoother feel. Remember your respirator for any dry sanding.
Sealing (optional but recommended)
Unsealed concrete is porous and absorbs water, which accelerates freeze-thaw damage in cold climates and encourages algae in any climate. A penetrating concrete sealer rated for water contact (look for products labeled as safe for potable water or fish ponds after curing) will extend the life of the bath significantly. Apply one or two coats to a fully dry basin, let it cure per the product label (usually 24 to 72 hours), and then rinse the basin thoroughly before filling with water for birds.
Placement prep
New concrete is highly alkaline, and that pH can irritate birds' feet and alter the water chemistry. Leach the basin before putting it in service: fill it with water, let it sit for 48 hours, then dump it and refill. Repeat this two or three times over a week. You can speed the process by scrubbing the basin with a diluted white vinegar solution (1 part vinegar to 10 parts water), rinsing thoroughly, and then doing one more soak cycle. After leaching, position the bath in partial shade (morning sun, afternoon shade) on a firm, level surface. Avoid placing it directly under trees where leaf litter and bird droppings from perching birds above will foul the water faster.
Troubleshooting Common Mold and Concrete Problems
| Problem | Likely Cause | Fix |
|---|---|---|
| Surface honeycombing (lots of small holes) | Air pockets not tapped out; mix too stiff | Patch with cement slurry; tap mold more vigorously next pour; slightly increase water ratio |
| Cracks along the basin rim | Too-rapid drying; mix too wet; wall too thin | Keep covered and misted longer; aim for walls at least 1.5 inches thick; add polypropylene fibers |
| Concrete stuck to foam mold | Insufficient release agent | Use a thin wooden shim to work the foam loose; apply release agent more generously next time |
| Rough, sandy surface texture | Coarse aggregate at surface; no cream coat applied | Wet-sand and apply a cement slurry finish coat; use cream coat technique on next pour |
| Basin warped or uneven depth | Mold shifted during pour or inner form floated | Weight down the inner form before pouring; check level before and after placing concrete |
| Concrete crumbles at edges after demolding | Demolished too early; poor mix ratio; cured below 50°F | Wait full 7 days minimum; check your cement-to-aggregate ratio; protect from cold overnight |
If your finished basin has a significant lean or one side is noticeably thicker, do not try to grind it flat from the outside. Instead, use a self-leveling concrete resurfacer on the interior to even out the depth, or simply accept a slight asymmetry that does not affect function. Birds care about water depth and footing, not geometric perfection.
Keeping Your Concrete Bird Bath Working Well After Installation
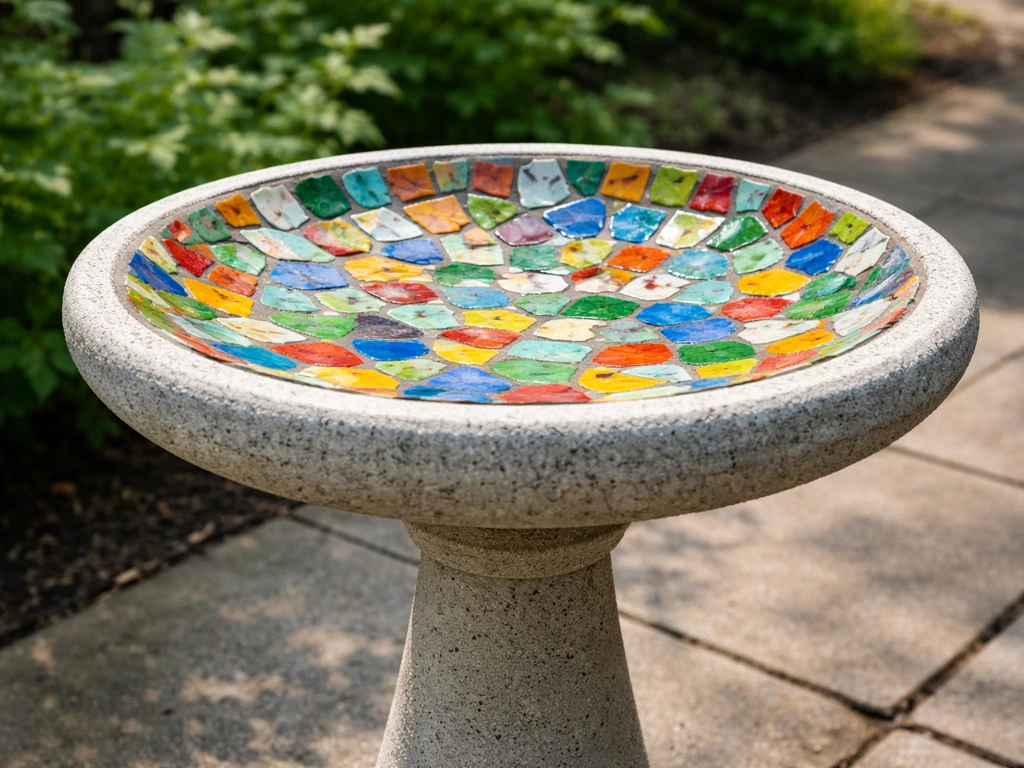
Making the mold and casting the bath is only half the job. To make a mosaic bird bath, you can use the same basic concrete bird bath mold logic, then top it with mosaic tile and grout for a decorative finish. What happens after installation determines whether birds actually use it. Concrete bird baths are excellent at holding heat, which means algae grow fast in warm weather. Here is how I manage the three main maintenance challenges.
Algae control
Change the water every 2 to 3 days in summer, every 4 to 5 days in cooler weather. When you change it, scrub the basin with a stiff brush and a solution of 1 part white vinegar to 9 parts water. Rinse thoroughly before refilling. For persistent algae, a small amount of diluted hydrogen peroxide (about 1 tablespoon of 3% hydrogen peroxide per gallon of water) disrupts algae growth without harming birds at that concentration.
Avoid bleach in concentrations above a very dilute rinse solution (1 part bleach to 32 parts water) and always rinse the basin completely before birds have access. Partial shade is your best long-term weapon: algae need sunlight to thrive, and a bath in morning sun with afternoon shade will stay cleaner than one baking in full sun all day.
Preventing freeze-thaw damage
This is where unsealed or poorly cured concrete bird baths crack and fail, usually after the first or second winter. Water trapped in porous concrete expands when it freezes, and the force is enough to fracture a 2-inch wall. If you sealed the basin before installation, you have already addressed most of this risk. In climates with regular hard freezes (below 25°F), either bring the basin indoors or dump and dry it before the first hard freeze.
Alternatively, use a submersible bird bath heater (rated around 50 to 150 watts) to keep the water just above freezing. Never use rock salt or chemical deicers in a bird bath. If you did not seal the basin, add that step now during a dry period in late fall before temperatures drop.
Reducing mosquito breeding
Mosquitoes need standing water that sits undisturbed for at least 7 to 10 days to complete their larval cycle. Changing water every 2 to 3 days eliminates the problem almost entirely. If you want extra insurance, drop in a Bacillus thuringiensis israelensis (Bti) dunk or crumble a small piece of one into the water. Bti is a naturally occurring bacteria that kills mosquito larvae but is completely harmless to birds, other wildlife, and people. One quarter of a standard Bti dunk treats a typical bird bath basin for about 30 days. Adding a small solar-powered dripper or mister also keeps the water moving, and mosquitoes strongly prefer still water for egg laying.
General cleaning schedule
| Frequency | Task |
|---|---|
| Every 2 to 3 days (summer) | Dump, rinse, and refill with fresh water |
| Weekly | Scrub basin with a stiff brush and diluted vinegar solution; rinse well |
| Monthly | Check for cracks, chips, or scaling; patch with cement slurry if needed |
| Each fall | Deep clean, dry completely, inspect sealant, reapply sealer if needed, decide whether to store or heat through winter |
| Each spring | Inspect for freeze-thaw damage, patch any cracks, rinse leaching soak before returning to service |
If you enjoy the mold-making process and want to experiment further, the same basic principles used here translate well to other DIY bird bath styles. Making a bird bath from clay pots, building a hypertufa bath (which uses Portland cement mixed with peat moss and perlite for a lighter, porous finish), or casting a ceramic-style basin each start with a similar mold logic but call for different mix recipes and cure times. The concrete mold approach covered in this guide is the most durable option and the most forgiving for beginners who want something that will genuinely last in the yard.
FAQ
My first cast has pits and honeycombing, what did I do wrong and how can I fix the next one?
If you build a mold correctly but still get a rough, pitted interior, the usual causes are under-compaction, too-watery concrete, or a weak bond at the surface. Fix it by mixing to a thick, peanut-butter consistency (not pourable), vibrating or tapping the mold after filling, and brushing a cement slurry coat into the mold before your first concrete layer (as described in the article) so surface voids get filled.
Can I reuse the same concrete bird bath mold to make multiple identical baths?
You can, but only if you match your project to the mold type. Melamine molds and foam molds are sized for one basin geometry, and changing the design means re-cutting the forms. If you want multiple identical baths, use melamine for repeatability, keep the inner form dimensions constant, and label the foam layers or melamine cuts so the second and third cast match.
How do I prevent trapped air and uneven surfaces when I pour into my bird bath mold?
Skip the “shake and pour” approach. Concrete needs time for entrapped air to escape and for the mix to settle into corners. After filling, tap the outer form firmly around the perimeter several times, then smooth the top and cover. If you see surface ridges or voids after demolding, it usually indicates you did not pack or settle the mix enough.
Even after 7 days of curing, my bath seems unsafe or has cracks, what should I check first?
Most DIY failures are actually leaching and curing related. For alkalinity, do the water leach cycles (multiple 48-hour soaks over a week). For cracking, do not rush service, keep the form above the recommended minimum cure time, and in hot dry weather mist to prevent rapid drying of the surface.
Can I waterproof my bird bath with a coat of exterior paint instead of a penetrating sealer?
Yes, but “paint” is not the same as “sealer.” Use a penetrating, water-contact rated sealer after the concrete is fully dry, and rinse thoroughly after the sealer’s cure window before adding water. If you try to coat too early, you can trap moisture inside the concrete and increase cracking risk.
How do I adjust basin dimensions for different birds without making it unusable for them?
If you are changing the basin depth by design, keep the slope and footing in mind for birds. Avoid making a deep center, birds often prefer a shallow central depth and a gradual transition. If you want hummingbirds to use it, you can target very shallow edge water while maintaining a safe slope rather than increasing depth for looks.
When is the best time to demold, and how do I avoid chipping the rim?
Demolding usually works best right after the minimum cure period, but you can reduce risk of edge damage by waiting the full 7 days in-mold and then demolding carefully with shims. For melamine, unscrew and remove panels gradually. If it sticks, do not pry against the concrete face, use a thin wooden shim and wiggle.
What placement details matter after I build the mold and the bath is cured?
For outdoor use, concrete should be leached and then positioned on stable, level ground. Don’t set it on loose gravel or soft soil, because rocking and trapped water at the base can accelerate cracking. Also avoid leaf-heavy placements, under tree canopies leaf litter fouls the water faster.
Is wet-sanding really necessary, and what respirator level should I plan for during finishing?
Dry sanding releases silica dust, even after the piece is cured. Wet-sanding is the safest approach for any finishing, and you should still wear a respirator. If you have to sand a lot, consider extra time on surface slurry and mold finishing to reduce the need for abrasive cleanup.
What’s the best way to prevent mosquitoes if I cannot change the water as often?
For mosquito prevention, the key is disrupting standing water. If changing water every 2 to 3 days is hard, a Bti dunk or crumble can help, but only if you still keep water movement or regular maintenance. Also note that mosquitoes can breed in less water than you think if it stays undisturbed, so empty and refill promptly after rain when possible.
If my bath leans, can I level it after demolding, or should I rebuild the mold?
A slight lean or uneven thickness is usually fixable, but resurfacing works only on the interior where you want a functional depth. Use a self-leveling interior resurfacer rather than trying to grind exterior mass flat. If the lean is severe, consider whether the mold forms were aligned, because fixing a structural mismatch after curing may not restore durability.
My concrete bird bath cracked after the first winter, what steps should I take differently next time?
If you see cracking after the first winter, the causes are often freeze-thaw from water absorption plus insufficient sealing or incomplete cure. Next time, seal during a dry stretch late fall, ensure adequate curing, and in hard-freeze climates either drain and dry before the coldest periods or use a low-watt bird bath heater.
Next Articles
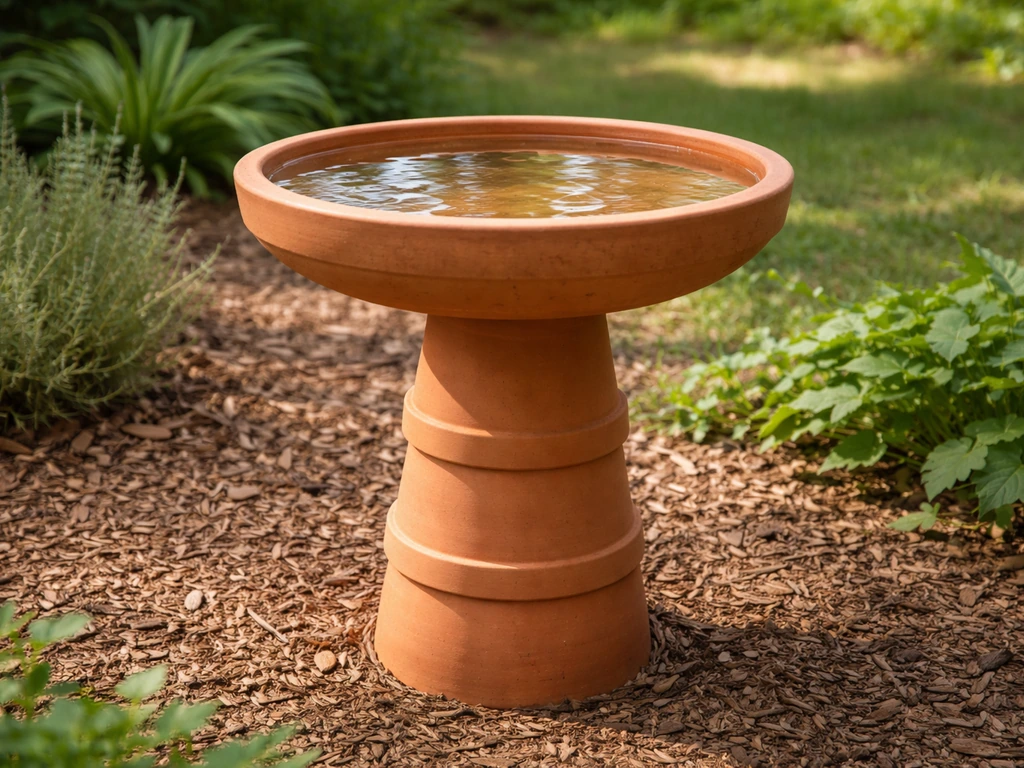
How to Make a Bird Bath Out of Clay Pots: DIY Guide
Step-by-step DIY guide to build a stable, bird-safe clay pot bird bath with waterproof sealing, placement, and easy main
How to Make a Mosaic Bird Bath: DIY Concrete Guide
Step-by-step guide to build and mosaic a concrete bird bath, from prep and tile cutting to grouting, sealing, and instal

How to Decorate a Bird Bath for Christmas Safely
Step-by-step tips to decorate a Christmas bird bath with safe non-toxic accents, prevent freezing, and keep water clean.