You can build a functional, bird-friendly bird bath in an afternoon using materials from any hardware or garden store. The most important things to get right are depth (keep it 1 to 1.5 inches at the center), a gradual slope from the edges inward, a rough non-slip surface, and a stable base that won't tip when a crow lands on the rim. Everything else is just style.
YouTube How to Make a Bird Bath: Step-by-Step DIY

Marcus Henley
20 Jun 2026
Picking the right DIY bird bath style and materials
Before you start building, pick a style that matches your skill level and yard. If you want to do it yourself bird bath projects, the style and material choices below can help you pick a build that matches your yard and skill level. Most YouTube tutorials focus on three or four classic designs, and each has real trade-offs. Here's a quick breakdown so you're not halfway through a project that doesn't suit you.
| Style | Best material | Skill level | Key advantage | Main drawback |
|---|---|---|---|---|
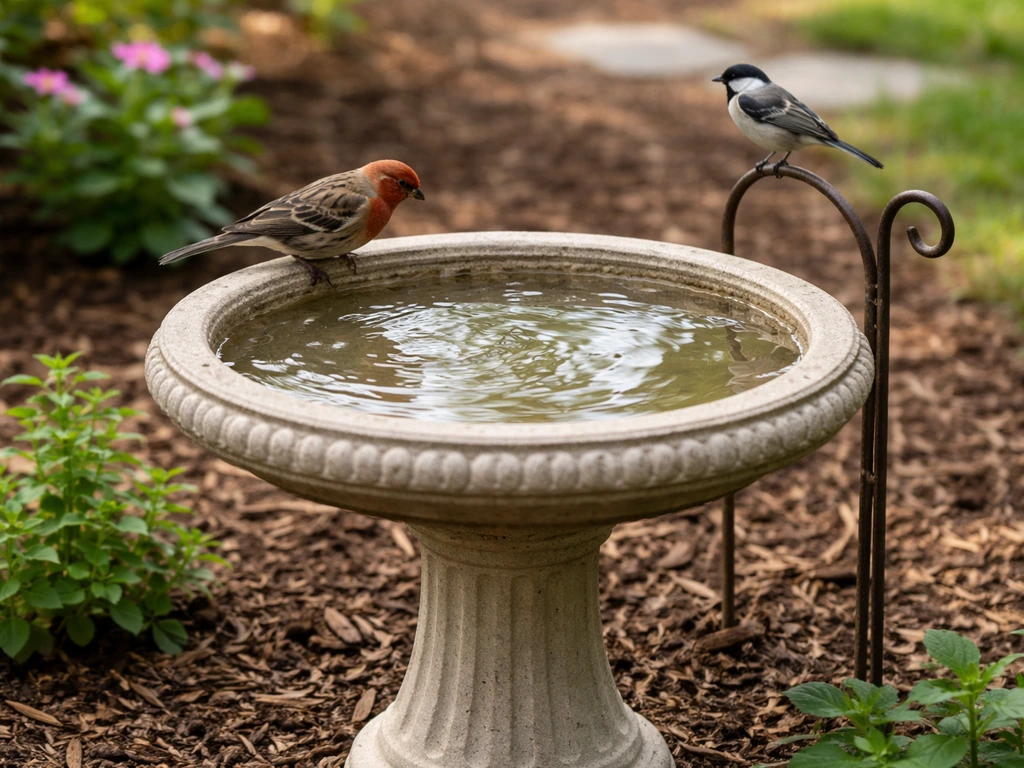
| Pedestal (classic) | Concrete or ceramic | Intermediate | Stable, classic look, durable | Heavy, takes effort to move |
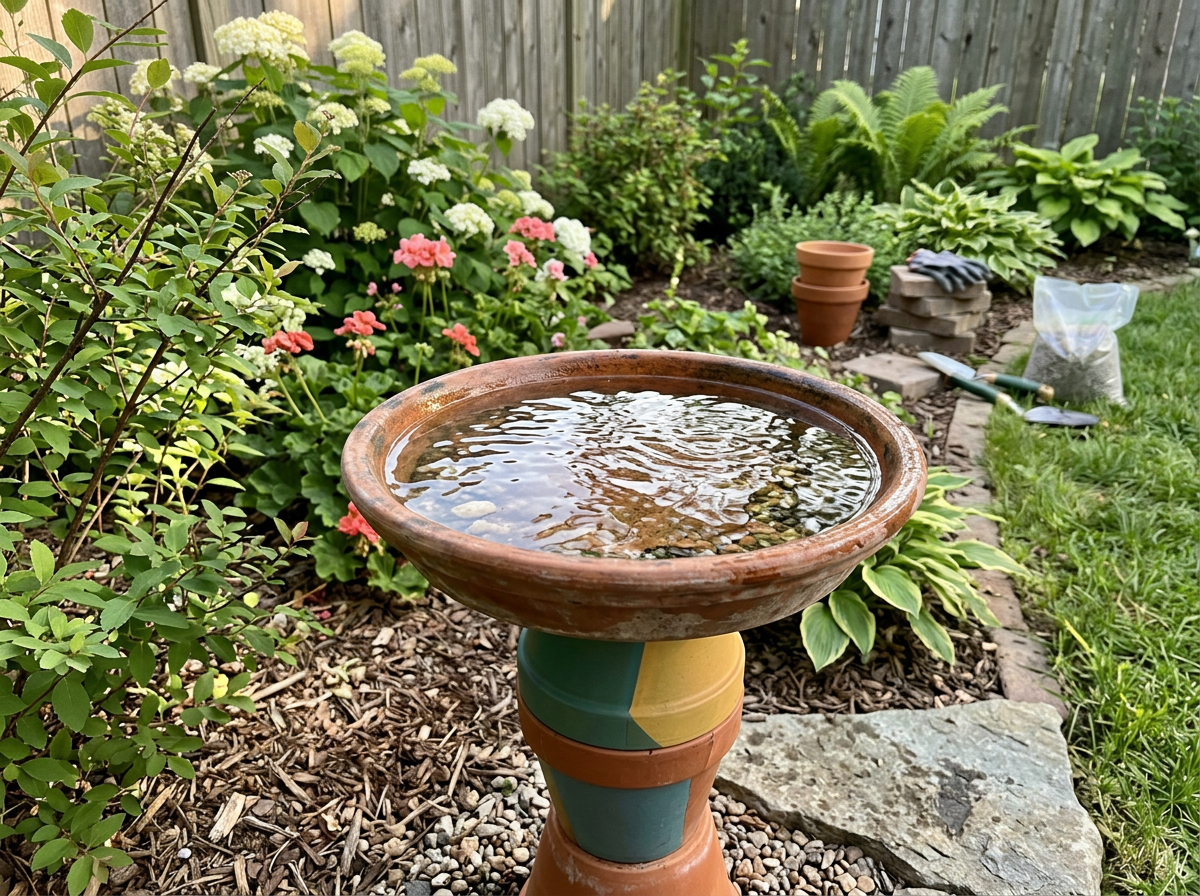
| Ground-level basin | Concrete, terracotta, or metal pan | Beginner | Easy, cheap, birds love it | More predator exposure |
| Hanging basin | Ceramic, repurposed pan | Beginner | Space-saving, cat-proof | Can swing and spill |
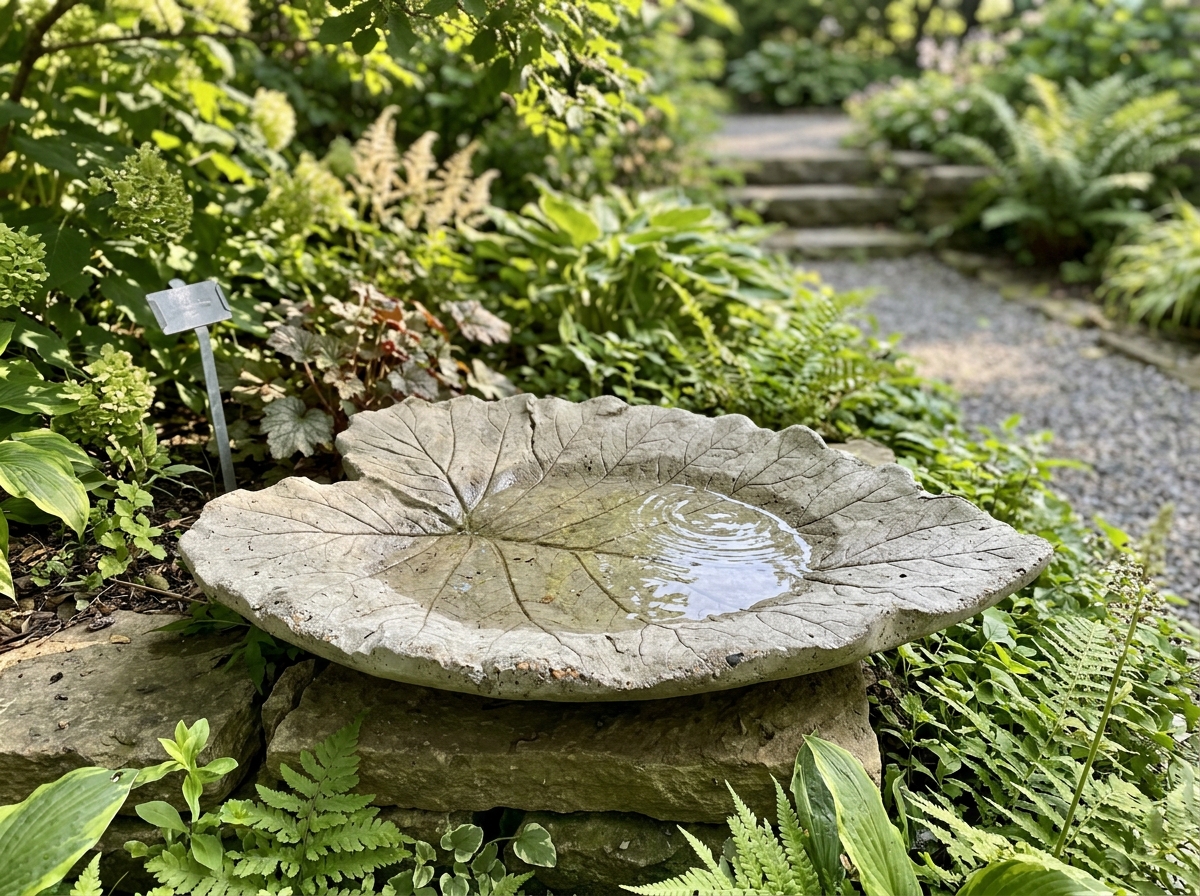
| Elephant ear leaf cast | Hypertufa or concrete | Intermediate | Unique look, natural texture | Longer curing time |
| Solar/fountain basin | Pre-formed + solar pump | Intermediate | Moving water attracts more birds | Pump needs sun and cleaning |
For a first build, I'd steer most people toward a simple ground-level or pedestal basin using a pre-formed concrete or terracotta bowl. It's fast, inexpensive, and the results are genuinely good. If you've already built a basic version and want to go further, a hypertufa elephant ear cast or a solar fountain build is a rewarding next step. The hanging bird bath approach is worth exploring too if space or cats are a concern.
For materials, concrete and hypertufa (a mix of Portland cement, peat moss, and perlite) are the most forgiving and durable for outdoor use. Terracotta and ceramic are great but can crack in hard freezes if water sits in them. Galvanized metal pans work surprisingly well and age nicely, but avoid anything with sharp edges or rust that hasn't been sealed. Repurposed items like cake pans, trash can lids, or wok lids are all fair game as long as you address the surface texture and sealing.
Tools, supplies, and keeping it safe for birds
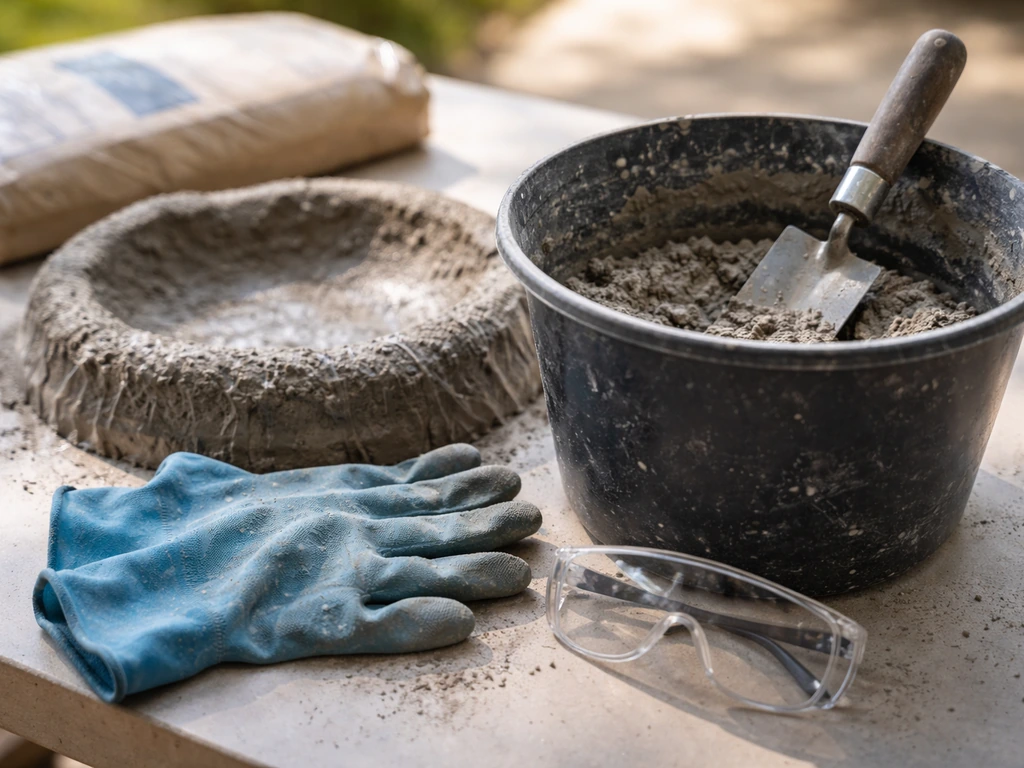
The safety side of a DIY bird bath is where a lot of people cut corners, and it shows up in birds avoiding the bath entirely. Slick surfaces, toxic sealers, and sharp edges are the three most common problems. Here's what to gather before you start.
Tools you'll need
- Mixing bucket and trowel (for concrete or hypertufa builds)
- Rubber gloves and safety glasses (concrete is caustic when wet)
- Wire brush or coarse sandpaper (for texturing surfaces)
- Level (critical for making sure your basin doesn't pool to one side)
- Drill with masonry bit if adding a drainage hole
- Plastic sheeting or a garbage bag for mold lining
Supplies and bird-safe finishes
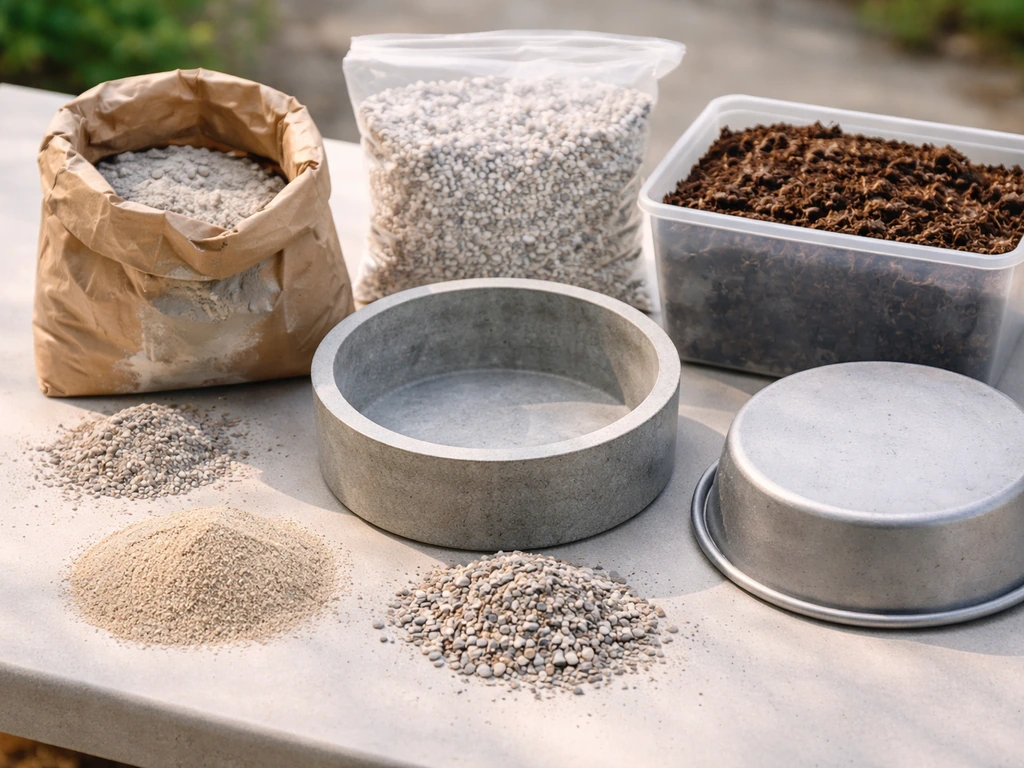
- Portland cement, peat moss, perlite (for hypertufa), or pre-mixed concrete
- A mold: an old mixing bowl, a cake pan, or a large planter saucer works perfectly
- Sand or fine gravel to press into the surface while wet for grip
- A bird-safe sealer: look for products certified to NSF/ANSI Standard 61, which means they're approved for contact with potable water. Water-based acrylic concrete sealers, butyl rubber sealants, and urethane-modified epoxy liners that meet NSF 61 are all solid choices. Avoid oil-based paints and standard hardware store sealers not rated for water contact.
- Non-toxic exterior paint if you want color (look for zero-VOC, water-based formulas and let them fully cure before adding water)
The sealer question matters more than most guides admit. Bare concrete is actually fine once it's fully cured and you've done a water-change cure (see below), but if you want color or extra durability, stick to a water-based low-VOC acrylic sealer or an NSF 61-rated epoxy coating. Never use spray paint, lead-based paint, or anything with a strong solvent smell. If you wouldn't let it touch your drinking water after it dried, don't let birds sit in it.
Step-by-step build instructions
This walkthrough covers a simple pedestal-style concrete bird bath, which is the most versatile beginner project. The same principles apply if you're casting an elephant ear leaf or building a ground-level basin. Adjust the mold, keep the depth and slope rules, and the rest is the same.
Step 1: Build or choose your mold
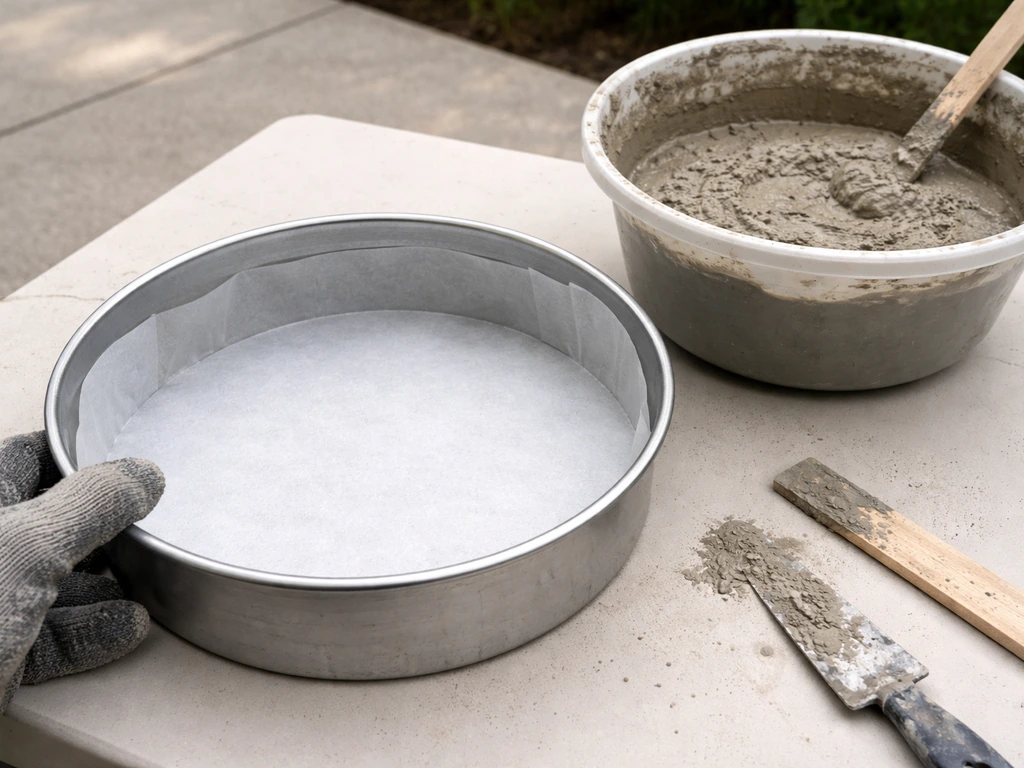
Pick a bowl or pan mold that's at least 12 inches (30 cm) across. To get the best results, follow the steps for building your own Minecraft bird bath so it matches what Minecraft players expect from the design build or choose your mold. Wider is better. The RSPB recommends going over 30 cm (about 12 inches) to give multiple birds room to use the bath at the same time. A large plastic plant saucer, a mixing bowl, or a cake pan all work. Line it with plastic sheeting so you can release the cast later.
Step 2: Mix your concrete
Mix your concrete or hypertufa to a thick, peanut-butter-like consistency. Too wet and it slumps; too dry and it won't bond. For hypertufa, a common ratio is 1 part Portland cement to 1.5 parts peat moss to 1.5 parts perlite by volume. Add water slowly until you can squeeze a handful and it holds its shape without dripping.
Step 3: Form the basin with the right depth and slope
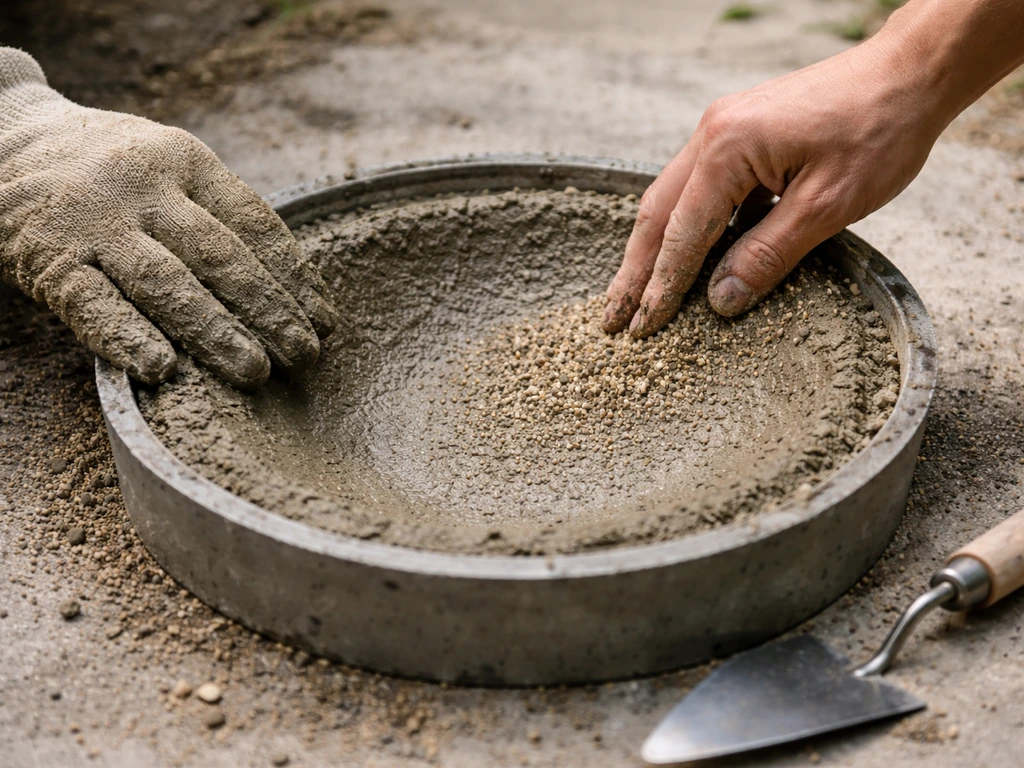
This is the most important step for bird behavior. Press the mix into your mold about 1.5 to 2 inches thick on the walls and bottom. Shape the inside so it slopes gently from the rim down to the center, with the deepest point being no more than 1.5 inches (about 3.8 cm). Audubon recommends 1 to 1.5 inches deep for most backyard birds. The Oklahoma Department of Wildlife Conservation adds that you want a dry edge around the perimeter, meaning the very rim of the basin stays above the waterline so birds have a place to stand. If your mold is a flat-bottomed pan and you can't create the slope naturally, pack more mix at the center to raise the floor.
Step 4: Texture the surface
While the concrete is still wet, press coarse sand, fine gravel, or even a piece of burlap into the surface and peel it away. This creates the grip birds need to wade confidently. Smooth concrete or glazed ceramic is genuinely slippery when wet, and birds will avoid it. Audubon specifically calls out roughness and grip as key to getting birds to enter the bath rather than just drink from the edge.
Step 5: Add a drainage option
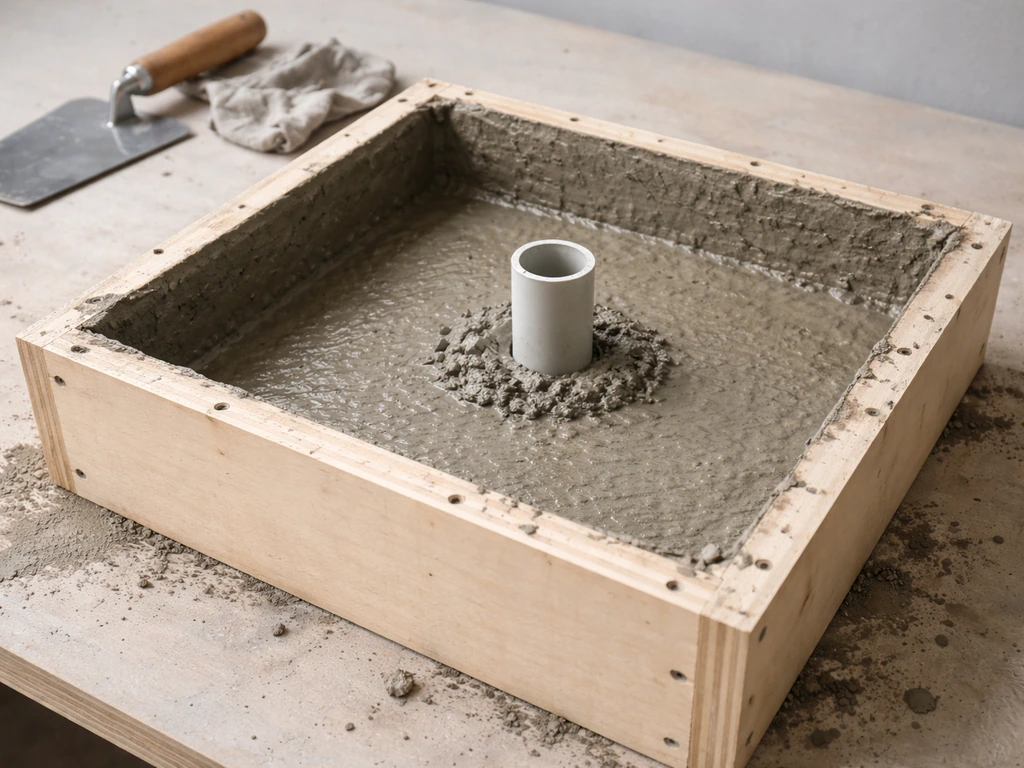
Before the concrete sets, press a small piece of PVC pipe or a cork through the thickest part of the basin floor to create a drainage hole. A 3/4-inch hole is enough. You can plug it with a rubber stopper during use and open it when you need to drain and clean. It makes maintenance dramatically easier, especially once algae starts building up.
Step 6: Cure, seal, and prep for water
- Let the cast cure for at least 24 to 48 hours before demolding, then cure in the open air for a full week.
- Fresh concrete is alkaline and can irritate birds. Do a leaching cure: fill the basin with water, let it sit for 48 hours, dump it, and repeat at least twice before putting the bath into service.
- Once fully cured, apply your bird-safe sealer if desired and let it off-gas completely (at least 48 hours, longer is better).
- Set the basin on your pedestal or base and use a level to make sure it sits flat. A tilted basin loses water fast and pools debris on one side.
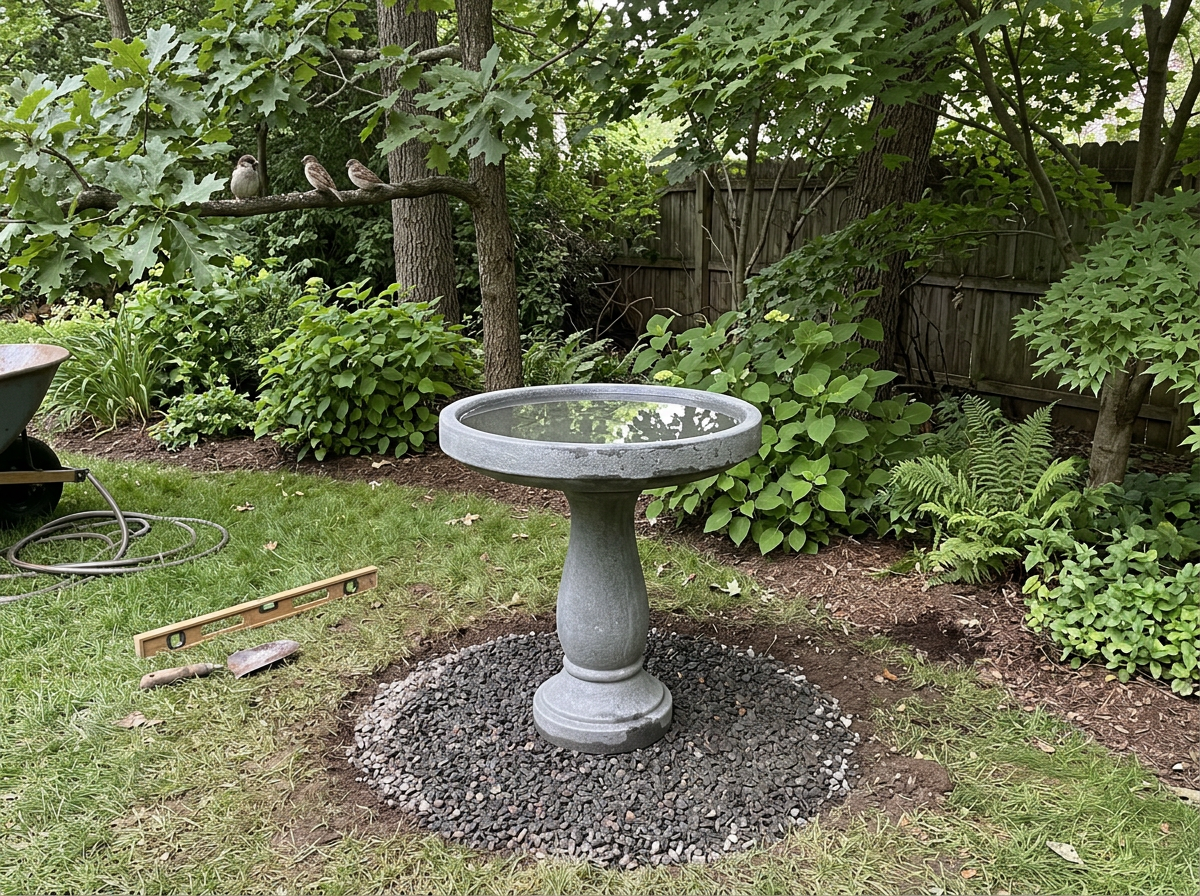
- For stability, set a pedestal base in a shallow bed of packed sand or use a heavy flagstone as the base platform. The whole assembly should not rock or tip when you press firmly on the rim.
Placement and setup for maximum bird traffic
You can build a perfect bird bath and still have no birds use it if it's in the wrong spot. Placement is something I've experimented with a lot, and a few principles make a real difference.
- Place the bath in partial shade. Full sun heats the water quickly and grows algae faster; full shade makes birds nervous because they can't see approaching predators. Morning sun with afternoon shade is close to ideal.
- Keep it 10 to 15 feet away from feeders. Bob Vila and others recommend this distance to reduce cross-contamination between food scraps and water, and to give birds space to move between stations without crowding.
- Put it within sight of shrubs or trees, but not right next to them. Birds want to retreat to cover quickly if startled, but dense foliage immediately beside a bath lets cats and hawks ambush from close range. About 10 feet of open ground around the bath is a good target.
- Visibility matters to birds. A bath in a corner or tucked behind a planter gets ignored. Put it somewhere birds can see it from a branch or perch as they survey the yard.
- Ground-level baths should be in an open area where you can spot a cat approaching. Pedestal baths give a bit more safety margin naturally.
- Consider adding a few flat stones inside the basin if you're attracting smaller birds like warblers. The stones give tiny birds a shallow wading spot even if the center depth is a bit generous.
Seasonal care: cleaning, algae control, and freezing prevention
Cleaning routine
The Iowa DNR recommends fresh water and a good scrub at least once a week, and that's the right baseline. In hot summer weather or if you're seeing a lot of bird traffic, bump it to every 3 to 4 days. Use a stiff brush and a solution of nine parts water to one part white vinegar, which is the cleaning formula Audubon recommends. Rinse thoroughly before refilling. If you're dealing with persistent slime or heavy contamination, a diluted bleach solution (about 1 part bleach to 9 parts water) works well, but you need to rinse and air-dry completely before birds use it again.
Keeping algae under control
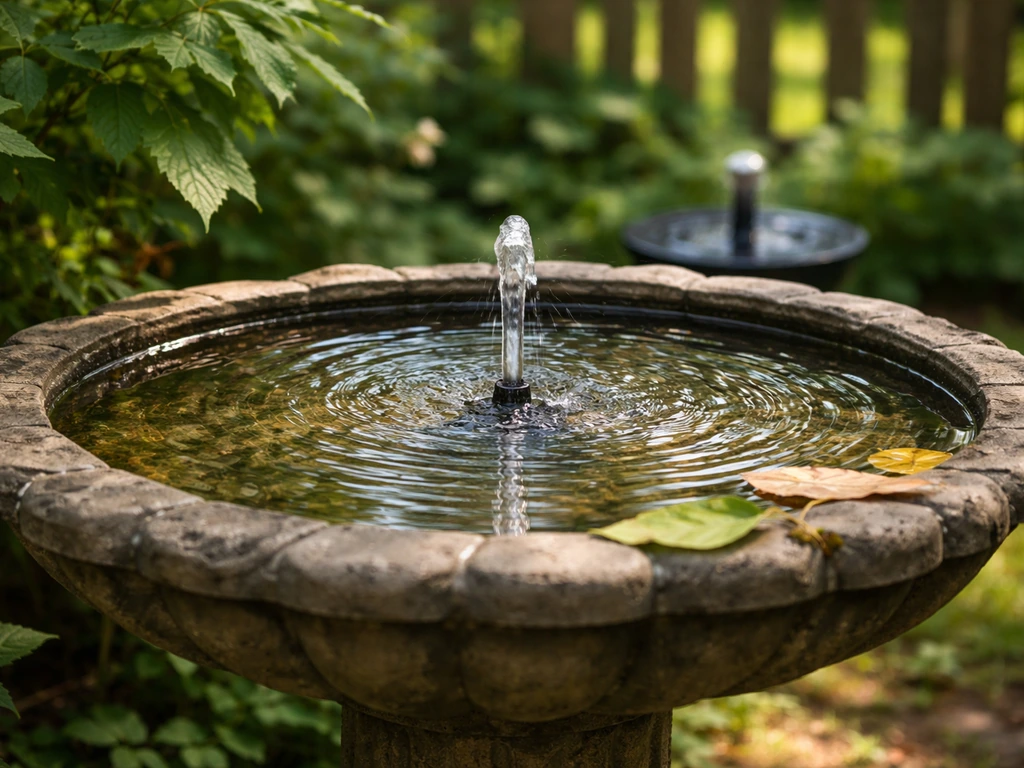
Algae grows fast in warm, still water with sunlight. The best prevention is frequent water changes and partial shade placement. Adding a small solar-powered fountain pump creates water movement that slows algae growth considerably and also attracts more birds through the sound of moving water. Copper is sometimes cited as an algae deterrent, and a small copper pipe fitting in the basin can help a bit, but don't rely on it as your main strategy.
Winter and freezing prevention
If you're in a climate where temperatures drop below freezing, you have a few options. The simplest is to pour out the water before a freeze and bring terracotta or ceramic basins inside, since freeze-thaw cycles will crack them. Concrete is more resilient but not immune. For year-round use in cold climates, a submersible bird bath de-icer or heated bird bath is the practical solution. Most de-icers are thermostat-controlled and only activate below freezing. After any extended cold snap, give the de-icer about 60 minutes to reset its thermostat before assuming it's malfunctioned. A heated bird bath de-icer instruction sheet (Farm Innovators) also advises allowing the unit to reset via its thermostat after it has been exposed to sub-freezing conditions, such as waiting around 60 minutes before assuming it has malfunctioned Bird bath heater/de. North Carolina State Cooperative Extension and others note that keeping water open in winter is one of the most valuable things you can do for birds when natural sources are frozen.
Mosquito reduction and water management
Standing water breeds mosquitoes in as little as a week, and a neglected bird bath is a real contributor to that problem. The good news is the same habits that keep the bath clean also keep mosquitoes in check.
The Washington State Department of Health recommends changing the water in bird baths and fountain basins at least twice a week during mosquito season. That frequency alone breaks the larval development cycle before it completes. If you're in a humid climate or have a large basin that's hard to dump frequently, Bti (Bacillus thuringiensis israelensis) is the right tool. It's a naturally occurring bacteria that kills mosquito larvae without harming birds, other wildlife, or people. The EPA confirms there's no documented resistance to Bti, and it's widely available as dunks or granules you drop into the water. One dunk typically treats about 100 square feet of water surface for 30 days. Cut them into smaller pieces for a bird bath basin.
The simplest upgrade you can make is adding a solar fountain pump. Moving water prevents mosquito larvae from establishing, keeps the bath cleaner, and is one of the most effective ways to attract birds. A basic solar pump costs $15 to $30 and requires no wiring.
Troubleshooting: why birds aren't using your bird bath
If you've built the bath and set it up but birds are ignoring it, run through this list before giving up. Most problems have a quick fix.
| Problem | Likely cause | Fix |
|---|---|---|
| Birds drink from the edge but won't wade in | Too deep or too slippery in the center | Add flat stones or gravel to raise the floor; brush the surface rougher |
| No birds at all after two weeks | Bad placement or birds haven't found it yet | Move it closer to an existing feeder or perch; add a dripper to create sound and movement |
| Birds visit once then stop | Water got dirty or stale | Increase change frequency to every 2-3 days; scrub the basin |
| Algae coating within days | Too much direct sun + warm temps | Move to partial shade; add a solar pump for water movement |
| Bath tipping or wobbling | Unstable base | Pack sand under the pedestal base; use a heavier flagstone platform |
| Mosquito larvae in the water | Water sitting still for more than 4-5 days | Add a Bti dunk; increase water changes; install a solar fountain pump |
| Birds startled and not returning | Predator pressure near the bath | Move bath away from dense low shrubs; ensure 8-10 feet of clear space around it |
Patience matters here. A new bird bath in a new spot can take two to four weeks before birds discover and trust it. Adding a dripper or a small solar fountain pump dramatically speeds up discovery because birds hear moving water from a distance. If you've had the bath out for a month with zero interest and you've ruled out depth and surface problems, the placement is almost certainly the issue. Move it and give it another two weeks.
When building isn't the best fit
Building your own bird bath is genuinely rewarding and gets you a custom product for $20 to $50 in materials. But if you're short on time, want a heated option right away, or need something that holds up to hard winters without annual maintenance, a commercial heated bird bath or a quality concrete pedestal bath is worth the investment. Many of the same principles here apply to installing a store-bought bath. If you’re installing a store-bought bird bath, follow the same placement, depth, and drainage steps so birds can use it safely from day one install a bird bath. The placement rules, the depth requirements, the cleaning routine, and the mosquito management are identical regardless of how the basin was made.
FAQ
Can I use my DIY concrete bird bath right away, or does it need curing first?
Yes, but only after the bath is fully cured and you’ve done a water-change cure to flush out residue. If you apply color or a protective coating, use a water-based low-VOC or an NSF 61-rated epoxy, then keep birds off it until any smell has completely gone and the surface has had time to cure.
What if my bird bath ends up deeper than recommended?
If the water is deeper than about 1.5 inches at the center, many backyard birds will avoid it. Measure the depth when the basin is filled to your normal “fill line,” then adjust by using less water, adding a shallow insert (like a clean, roughened stone platform), or choosing a smaller bowl size for better proportions.
Do I really need a drainage hole, or can I maintain the bath without one?
A drainage hole is the easiest way to prevent buildup, but it only helps if you actually drain and clean on schedule. If you can’t drill a hole, be strict about frequent dumping and scrubbing, and use a gravel or coarse-sand texture to reduce algae slip on the floor.
Can I waterproof a concrete bird bath with regular spray paint or a quick-dry sealant?
Don’t. Sealers and paints can leach or create odors that make birds avoid the bath. Stick to the specific sealer types the article mentions (water-based low-VOC acrylic or NSF 61-rated epoxy), and test by letting water sit in the basin, then refreshing the water and checking for lingering odor.
My hypertufa mix seems too wet or too dry. How do I fix it?
For hypertufa, avoid overwatering. If it feels like it won’t hold shape when squeezed, it’s too wet, and if it won’t pack or it crumbles when you press it, it’s too dry. Adjust gradually, then keep the mix thick enough to pack into the mold walls and bottom before it starts to set.
How should I clean the bath if vinegar doesn’t remove algae or slime?
Water-based vinegar cleaning is fine for routine scrubbing, but for heavy slime you’ll likely need a diluted bleach soak and a full rinse and air-dry period. After using bleach, don’t refill immediately, rinse until there’s no chemical smell, and wait for surfaces to dry fully before birds use it again.
Where should I place the bird bath so birds actually feel safe using it?
Placement within about 10 to 15 feet of cover helps birds feel safe, and the bath should be visible from nearby shrubs or perches. Also avoid spots that get full hot sun all day, and keep it away from areas where pets can access it quickly.
Birds are visiting but not getting in. What’s the most likely reason?
If you see birds landing on the rim but not entering, the problem is usually surface grip or water temperature. Add coarse sand or fine gravel to create a rough wading surface, and ensure the water stays fresh since very cold or very stagnant water can discourage entry.
Is it okay if my bath looks smooth and polished after curing?
A bath that’s too clean-looking but slippery can be worse than a lightly dirty one. Use your roughness method (burlap texture or coarse material pressed into the surface), then maintain with regular scrubbing and frequent water changes rather than trying to make the floor perfectly smooth.
Can I add a fountain pump without ruining the bird-friendly water depth?
Yes, but only if the water movement doesn’t create splashing that keeps the water constantly above the depth birds can wade. Use a gentle dripper or low-flow solar pump, and periodically check that the center still stays around 1 to 1.5 inches deep at your normal fill level.
What should I do with the bird bath during hard freezes in winter?
During freezes, terracotta and ceramic should be brought inside to prevent cracking from freeze-thaw cycles. For concrete, you can leave it out if it’s not constantly filled with water that will expand, but the safest year-round method is a heated or de-icer approach that only activates below freezing.
I still get mosquitoes in the bird bath. How do I troubleshoot the issue?
If you’re seeing mosquitoes despite regular maintenance, the key is frequency and treatment coverage. During mosquito season, change water at least twice a week, and if dumping is difficult, use Bti according to the surface area of the basin so the larvae are targeted before they mature.
How long should I wait before assuming birds won’t use the bath?
It typically takes time for birds to trust a new setup, often two to four weeks. If there’s zero interest after that, move it to a safer, more visible location near cover, add a dripper or gentle pump for sound, and confirm your depth and non-slip surface match the guidelines.