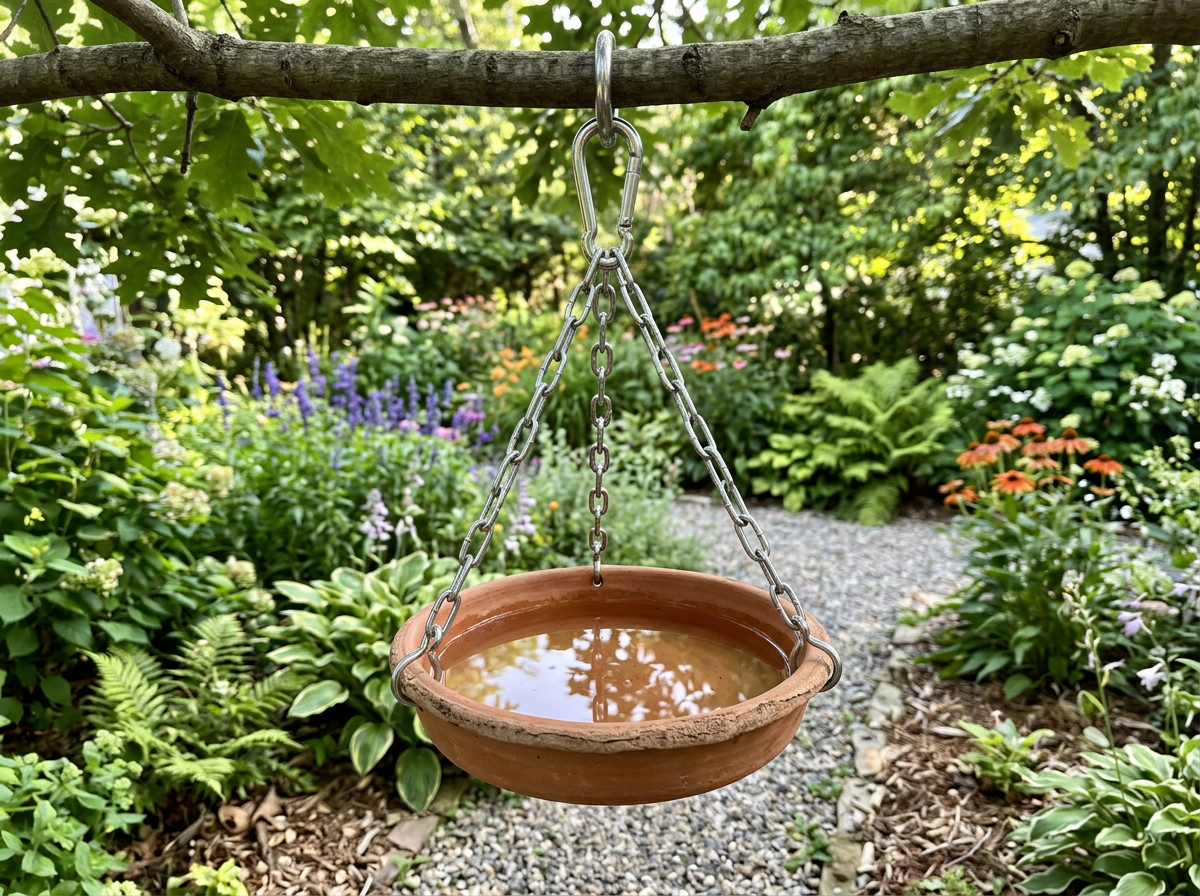
You can hang a bird bath safely today with a few pieces of hardware, a solid mounting point, and about an hour of work. Whether you already own a bath and want to suspend it, or you want to build a simple hanging version from scratch, the process is the same at its core: find a strong anchor, use corrosion-resistant hardware rated for the weight, set the right height, and lock down any swing before you add water. Here is exactly how to do both.
How to Make and Hang a Bird Bath Step by Step

Marcus Henley
22 Mar 2026
Choose the right hanging bird bath setup
Your first decision is whether you are hanging an existing bath or building one yourself. Both work well, but they call for slightly different starting points. If you already have a shallow basin (ceramic, resin, copper, or metal), check the base for a center hole or a recessed bottom you can drill. Most hanging baths are designed with a single suspension point or three evenly spaced chains that meet at a swivel hook above. If your basin has none of that, you are essentially building a hanging version from scratch, which is easier than it sounds.
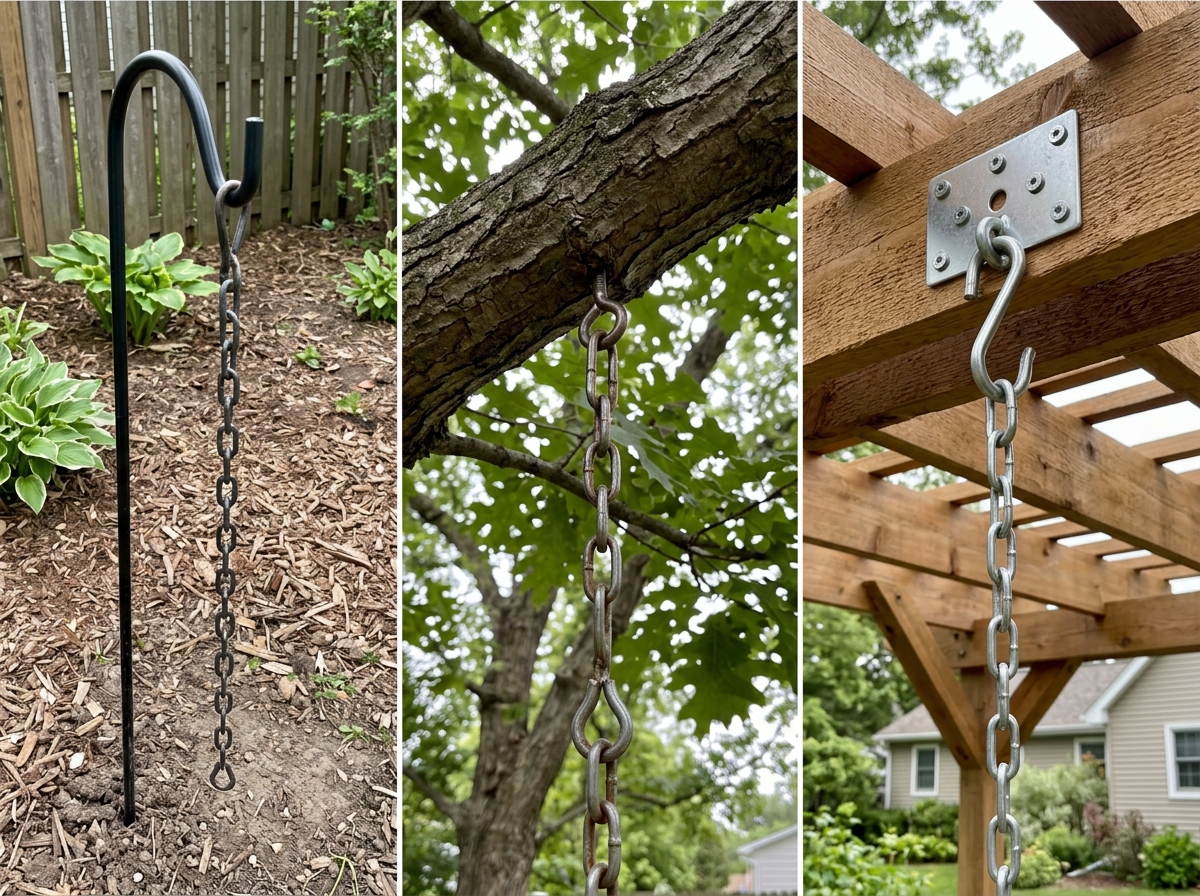
For the mounting point, you have three practical options: a shepherd's hook, a tree branch rated for the load, or an eyebolt screwed into a beam, pergola post, or deck overhang. Wingscapes specifically recommends a shepherd's hook for their hanging copper bird bath, and it is genuinely the easiest option because you can reposition it without any drilling. That said, a well-placed eyebolt in a solid timber gives you more stability and less swing, which birds actually prefer.
Keep the total suspended weight in mind from the start. A full bird bath basin holds more water than most people expect. A typical ceramic or resin basin weighs 3 to 6 pounds empty, and a gallon of water weighs about 8. 3 pounds.
Even a shallow 2-inch-deep bath with a 12-inch diameter holds roughly half a gallon. Add it all up and you are looking at 7 to 12 pounds minimum once filled. The Perky-Pet 33-inch hanging chain is rated to 16 pounds, and the Duncraft chain with S-hooks holds up to 15 pounds, so either of those covers a standard lightweight basin but leaves very little margin for a heavy ceramic bowl. When in doubt, go heavier on the hardware.
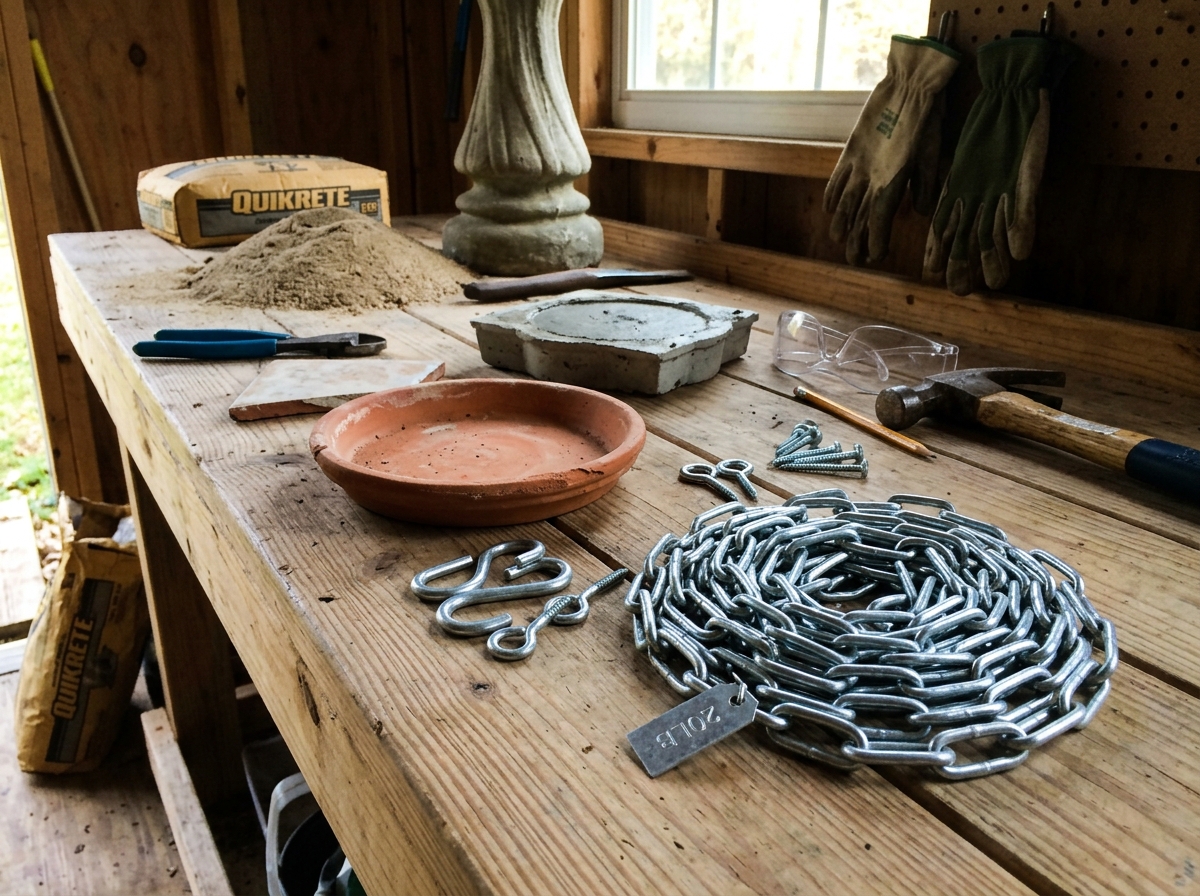
Materials and tools for DIY hanging (and for hanging an existing bath)

Here is what you need for each scenario. The overlap is significant, so read through both lists before you shop.
Hanging an existing bird bath
- Hanging chain rated to at least 20 pounds (hot-dip galvanized or stainless steel preferred for outdoor use)
- S-hooks or quick-link connectors (stainless or galvanized, one per chain connection point)
- Eyebolt with nut and washer, hot-dip galvanized or 316 stainless (for screwing into wood); size 3/8-inch diameter minimum for structural support
- Lag screw pilot bit (drill bit sized to your lag screw shank for clean pilot holes in wood)
- Swivel hook or three-way chain connector to gather multiple chains at the top
- Optional: corrosion-resistant turnbuckle (316 stainless or galvanized) to fine-tune length and reduce sway
- Drill and bits
- Pliers or chain-link opener
- Level (even a small bubble level or a phone app)
Building a hanging bird bath from scratch
- Shallow basin: terracotta saucer (14–16 inch diameter), glazed ceramic plant tray, or a purpose-made resin bath basin
- Three lengths of galvanized or stainless chain, each 18 to 24 inches long
- Three small eyebolts or D-ring screws to attach chain legs to the basin rim (if the basin has no holes)
- Waterproof epoxy or silicone adhesive if bonding hardware to a ceramic or glazed surface
- Central swivel hook or ring to join the three chain legs
- Main hanging chain (33–36 inches) from the swivel to the anchor point
- All the hardware listed above for the mounting point
On hardware material: hot-dip galvanized steel gives you the best corrosion resistance for the price outdoors. Albany County Fasteners categorizes it as excellent for weather exposure, and McMaster-Carr echoes the same. Zinc-plated steel looks similar in the store but rusts noticeably faster in rain and humidity. If you live somewhere with salt air or heavy seasonal rain, spend a bit more on 316 stainless steel for the eyebolts and chain connectors. It is the same metal used in marine rigging and will outlast everything else.
Plan placement: height, location, and stability
Height matters for two reasons: bird safety and your own ability to refill and clean the bath without straining. Aim for the water surface to sit between 2 and 3 feet off the ground. Lower than that and cats can reach it easily; higher than about 4 feet and smaller songbirds get nervous about the exposure. If you are hanging from a branch or pergola, plan your chain length so the bottom of the basin lands in that 2-to-3-foot zone after the chain is attached.
Location is just as important as height. The general recommendation from multiple birding sources is to place the bath 10 to 15 feet from the nearest shrubs, brush piles, or low tree cover. That distance gives birds a clear sightline to spot approaching predators while still keeping shelter within a quick flight. Our Habitat Garden pegs the sweet spot at 10 to 12 feet from cover specifically. The Washington Department of Fish and Wildlife notes that having a small shrub or low branch within about 10 feet can actually attract more birds because they use it as a staging perch before hopping in. So you want cover nearby, just not so close a cat can crouch under it and pounce.
Partial shade is your friend. Full sun heats the water fast, encourages algae, and evaporates the water quickly. Full shade makes the bath harder for birds to spot and can feel exposed to them behaviorally. A spot that gets morning sun and afternoon shade is ideal in most climates. Also keep the bath away from bird feeders if you can. Seed hulls and droppings fall from feeders and contaminate the water quickly, meaning you will be cleaning it every day instead of every few days.
Step-by-step: hang a bird bath safely
This process covers hanging an existing bath from a solid overhead anchor. If you are using a shepherd's hook, skip to step 3.
- Identify your anchor point. Choose a structural timber, pergola beam, or thick tree branch that is visibly solid and does not flex when you press on it. Avoid thin branches under 3 inches in diameter and any wood that looks weathered or soft.
- Drill a pilot hole for your eyebolt. Use a drill bit sized to the shank (not the threads) of your eyebolt. For a 3/8-inch eyebolt, that is typically a 1/4-inch pilot hole in softwood or 5/16-inch in hardwood. A clean pilot hole prevents the wood from splitting and makes the bolt seat tightly.
- Thread the eyebolt fully into the pilot hole by hand, then use pliers or a screwdriver through the eye to torque it snug. Add a washer and nut on the exposed side if you have access (on a beam where the top is reachable). Do not leave it loose.
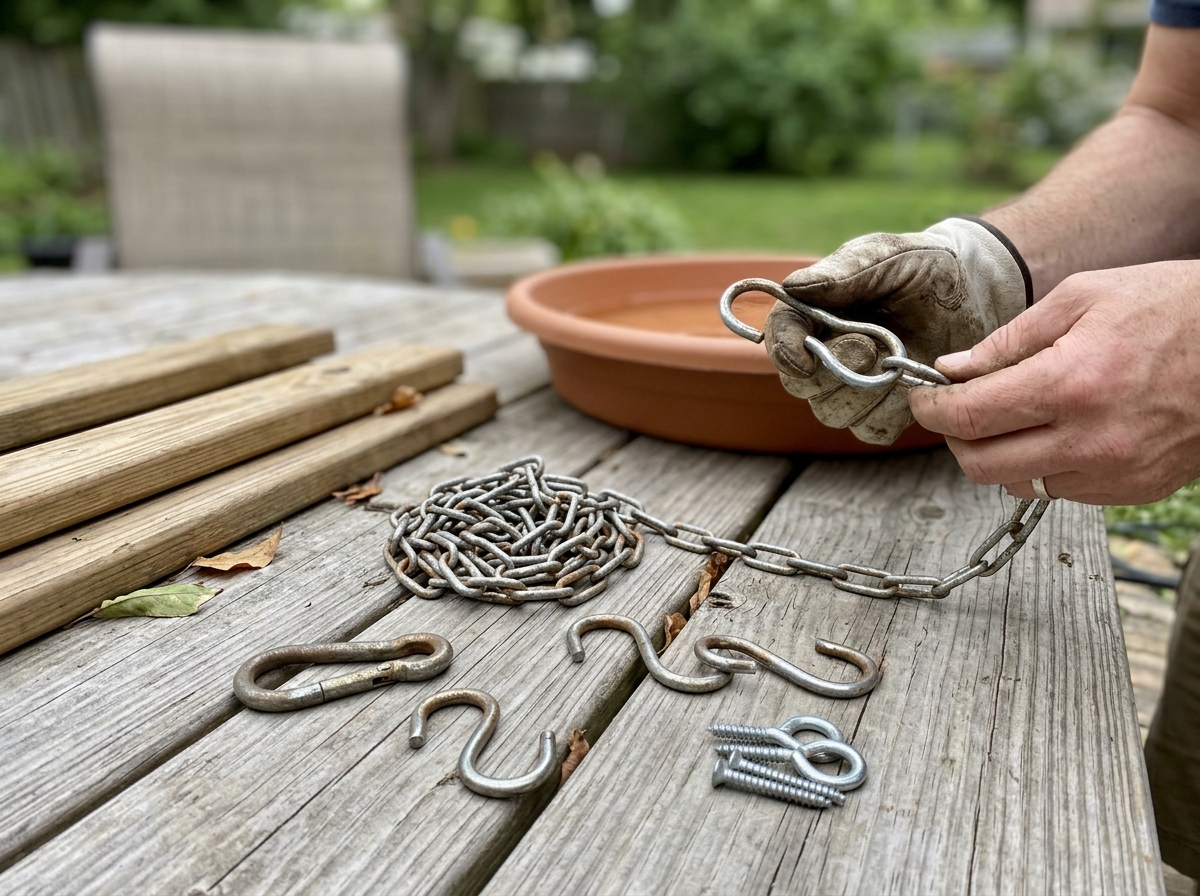
- Attach the main hanging chain to the eyebolt with a quick-link connector or a heavy-duty S-hook. Close S-hooks completely with pliers so they cannot open under load.
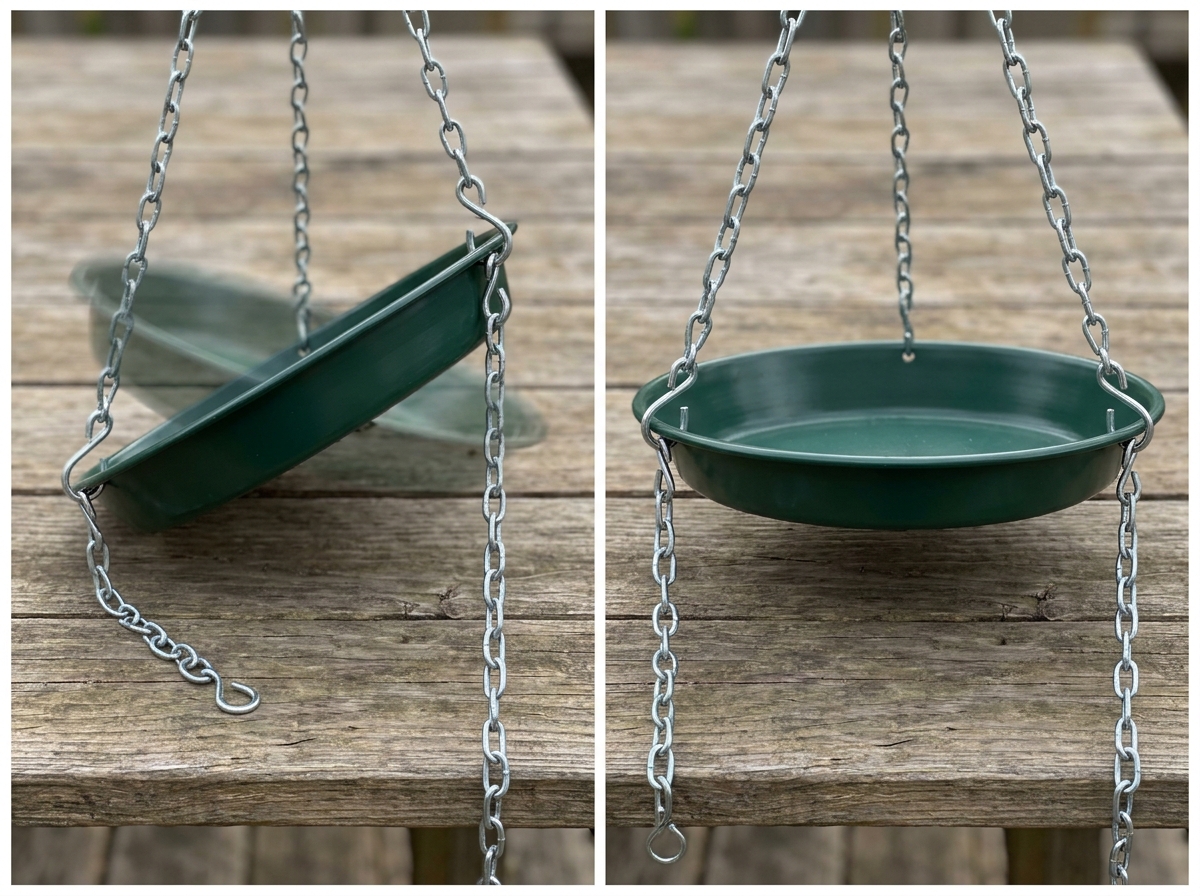
- Determine how many suspension points your basin has. A single center hole calls for one chain drop and a flat-bottom cradle or a wire ring. Three evenly spaced holes around the rim (120 degrees apart) let you run three equal-length chain legs up to a central swivel hook, which distributes the load and keeps the basin level.
- Attach chain legs to the basin and bring them together at a swivel hook or three-way connector. Use split rings or small quick-links at the basin end so the chain can pivot slightly without prying at the basin material.
- Connect the top of the swivel to the main hanging chain. Adjust the number of chain links to hit your target height. Most chains let you add or remove links; if yours does not, use a turnbuckle in the main chain to dial in the final height and reduce side-to-side swing.
- Before adding water, grab the basin and apply gentle side pressure. It should resist movement and return to level quickly. If it swings freely, see the troubleshooting section below.
Step-by-step: make your own hanging bird bath
Building your own hanging bath is a great weekend project, and the materials cost less than most pre-made options. If you want a visual walkthrough, search for a youtube how to make a bird bath video and follow the same safety and hardware steps.
If you are figuring out how to make a bird bath from scratch, start by choosing a basin and then match the hardware and mounting height to the weight and location guidelines in this section. A DIY bird bath can be finished in an afternoon, so keep your plan focused on safe hanging, the right height, and corrosion-resistant hardware do it yourself bird bath.
The simplest version uses a large terracotta or glazed ceramic saucer as the basin, which you can find at any garden center for a few dollars. If you want to make an elephant ear bird bath, use the same hanging-bath safety rules, then shape or position the elephant ear leaf or tray as the basin and secure it so it cannot tip how to make elephant ear bird baths.
- Choose your basin. A 14-to-16-inch terracotta or ceramic saucer works perfectly. It is naturally shallow (1 to 2 inches deep, which is ideal for birds), weather-resistant, and easy to find. Avoid anything deeper than 3 inches at the center unless you plan to add flat stones for birds to stand on.
- Mark three equidistant points around the rim, about 1 inch from the edge, at 120-degree intervals. Use a marker and a protractor or just eyeball it roughly equal.
- Drill through the rim at each mark using a masonry or tile bit rated for ceramic. Go slow with light pressure and keep the bit wet to avoid cracking. If drilling feels risky on a glazed surface, use waterproof epoxy to bond small stainless D-ring screws to the outside of the rim instead.
- Thread a short length of chain (18 to 24 inches per leg) through each hole or D-ring. Secure each end with a quick-link connector or bend the chain end through a split ring so it cannot pull back through.
- Bring all three chain legs up and join them at a central swivel hook or a three-way ring connector. Make sure all three legs are the same length, or the basin will hang tilted.
- Add your main hanging chain from the swivel up to the eyebolt or shepherd's hook at your anchor point. A 33-to-36-inch main chain is typical for a branch or pergola at 7 to 8 feet height.
- Before filling with water, hang the empty basin and check that it sits level. Adjust chain length on individual legs by adding or removing links until the basin is flat. Even a slight tilt causes water to pool unevenly and the basin to look crooked.
- Fill with about 1 to 2 inches of water and watch the basin for 5 minutes. Look for any dripping at the holes (seal with waterproof silicone from inside if needed), and check that the whole assembly holds steady without swinging.
Leveling, testing, and troubleshooting wobble and swing
Ken Forging, which manufactures industrial eyebolts, specifically cautions against using a single eyebolt to support a load that can rotate freely. The fix for rotation is a swivel hook or a anti-rotation connector between the eyebolt and the chain. For lateral swing, the most effective solution is a turnbuckle inserted into the main hanging chain. A 316 stainless or galvanized turnbuckle lets you shorten the main chain by an inch or two, pulling the basin closer to the anchor and reducing the pendulum effect. To make a bird bath in Minecraft You can also run a second light wire or bungee from the basin to a nearby post or fence to dampen swing without looking too industrial.
Swing and rotation
Ken Forging, which manufactures industrial eyebolts, specifically cautions against using a single eyebolt to support a load that can rotate freely. The fix for rotation is a swivel hook or a anti-rotation connector between the eyebolt and the chain. For lateral swing, the most effective solution is a turnbuckle inserted into the main hanging chain. A 316 stainless or galvanized turnbuckle lets you shorten the main chain by an inch or two, pulling the basin closer to the anchor and reducing the pendulum effect. You can also run a second light wire or bungee from the basin to a nearby post or fence to dampen swing without looking too industrial.
Leveling
If the basin hangs at an angle after installation, the most likely cause is unequal chain leg lengths. If your hanging bird bath is still wobbling or not leveling correctly in Virtual Families, use these same chain-length and balance checks to fine-tune the setup how to fix the bird bath in virtual families.
Take the basin down, lay it flat on a table, and measure each chain leg from the basin attachment point to where it meets the swivel connector. Adjust by adding or removing links until all legs match. Alternatively, if you used a single center hang point and the basin still tilts, the basin itself is not perfectly balanced (common with handmade ceramic pieces).
You can compensate by sliding a small rubber washer or adhesive pad under the lighter side of the basin rim where it rests in a wire cradle.
Hardware check before trusting it fully
After the first week, re-check every connector. S-hooks open slightly under repeated load cycles; close them again with pliers. Check the eyebolt in the wood, especially if you have had rain, to confirm it has not loosened as the wood expanded and contracted. Tighten the nut finger-tight plus a quarter turn if needed. This one-week check is a habit worth keeping every spring.
A quick comparison: hanging options at a glance
| Mounting option | Stability | Portability | Best for | Corrosion risk |
|---|---|---|---|---|
| Shepherd's hook | Moderate (can tip in soft soil) | High (reposition anytime) | Renters, open lawns, quick setups | Low if galvanized or powder-coated |
| Eyebolt in wood beam/pergola | High (fixed point, minimal swing) | None (permanent) | Decks, pergolas, covered patios | Low with hot-dip galvanized or stainless |
| Tree branch hang | Moderate (branch flexes in wind) | Low (moving it means re-rigging) | Natural garden settings, established trees | Low (hardware only, branch handles itself) |
| DIY three-chain saucer build | High when leveled properly | Moderate (can be re-hung elsewhere) | Budget builders, garden centers, renters | Low with stainless/galvanized chain |
Care and maintenance after installing
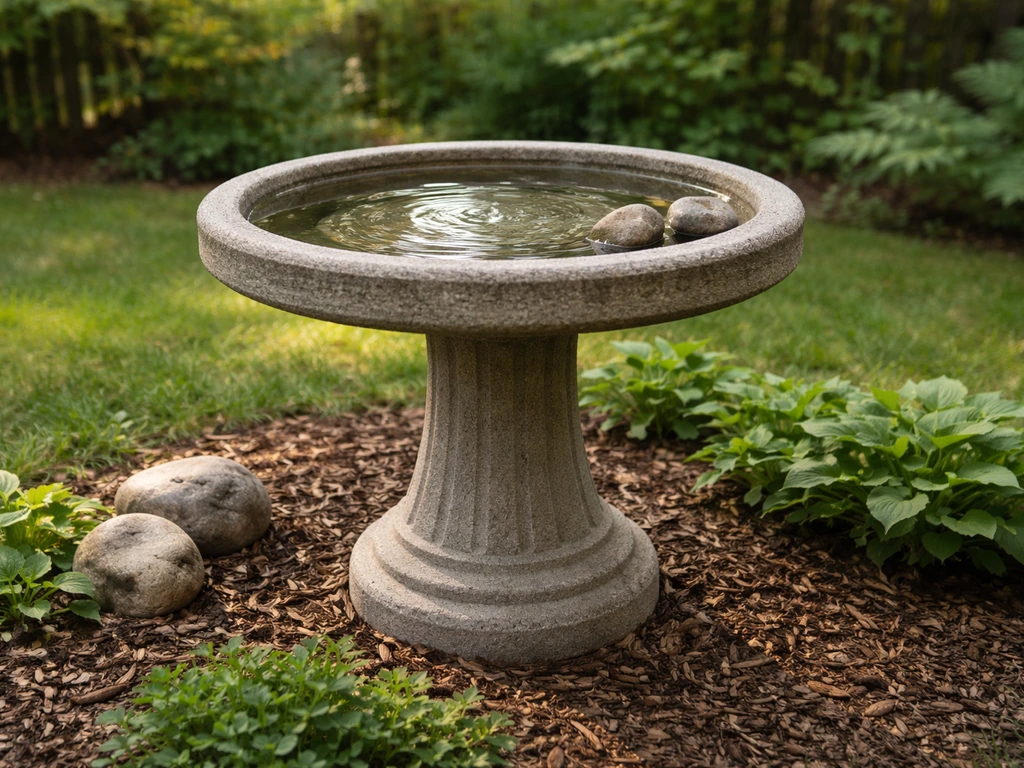
A hanging bird bath needs more frequent attention than a pedestal bath because wind blows debris in faster and the movement can disturb the water. The good news is that the routine is simple once you build the habit.
Daily and weekly water care
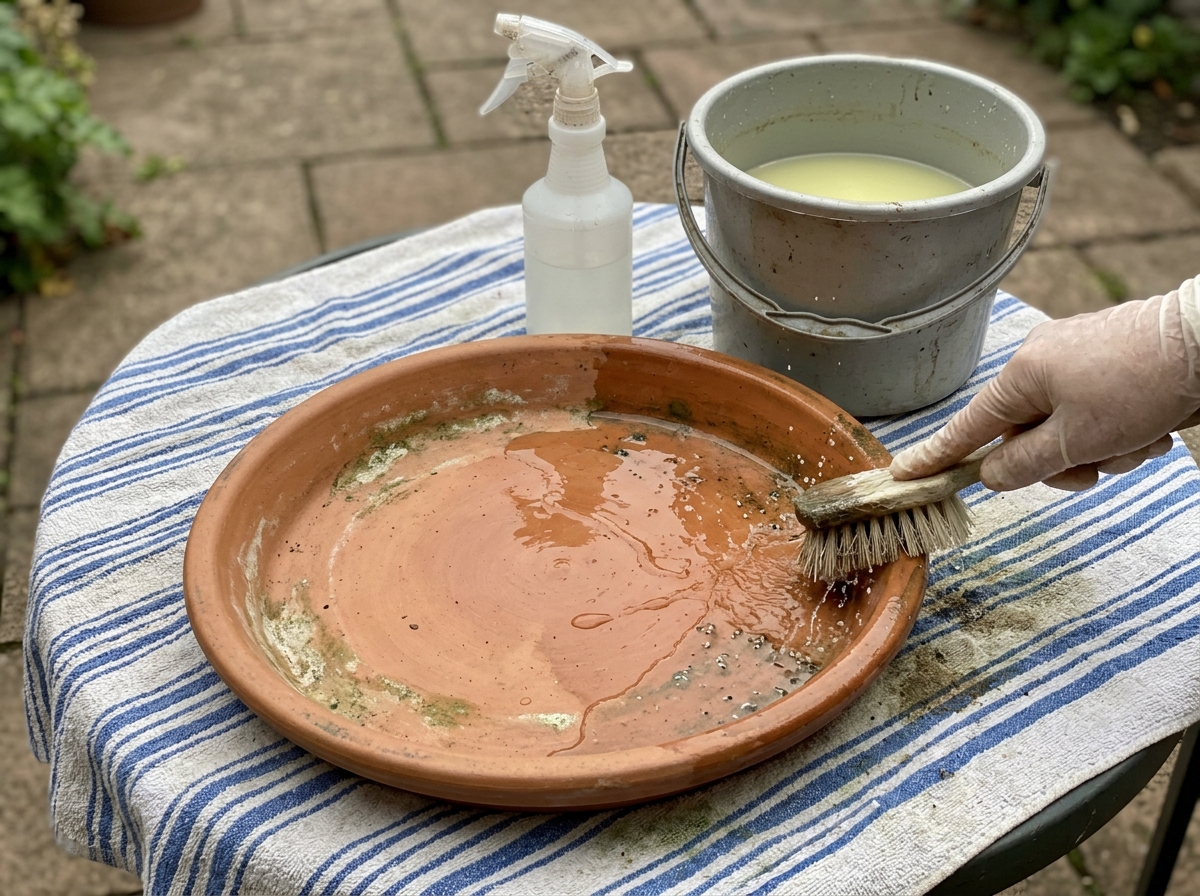
Rinse the basin and replace the water daily if you can. The University of Idaho extension recommends exactly this: daily rinse and refill, weekly scrub. Standing water grows algae and mosquito larvae fast in warm weather, and a quick dump-and-refill takes about 30 seconds with a hose. Once a week, take the basin down (or work around it if it is awkward to remove), scrub the interior with a stiff brush to knock off algae buildup, and rinse thoroughly. Tom's Guide recommends this weekly deep scrub specifically to interrupt algae growth before it becomes a film that birds refuse to use.
Deeper cleaning with vinegar or dilute bleach
For a thorough clean every few weeks, use a dilute bleach solution (roughly 1 part bleach to 9 parts water is a commonly cited ratio for bird baths) or a white vinegar solution. Ausable Valley Audubon specifically mentions dilute bleach for cleaning bird feeding stations and baths. Martha Stewart's birding guidance cites the vinegar approach as the weekly deep-clean standard, letting the basin soak for a few minutes, scrubbing, and then rinsing extremely well before refilling. Whichever you choose, rinse until you cannot smell any residue. Bleach or acid residue on the surface harms birds.
Seasonal and winter considerations
At the start of each season, Moana Nursery recommends doing a full sterilization clean with a weak bleach solution before putting the bath back into regular service. This is a good moment to also inspect every link of chain, every connector, and the eyebolt for corrosion or wear. Replace anything that looks pitted, rusted through, or feels gritty when you flex it.
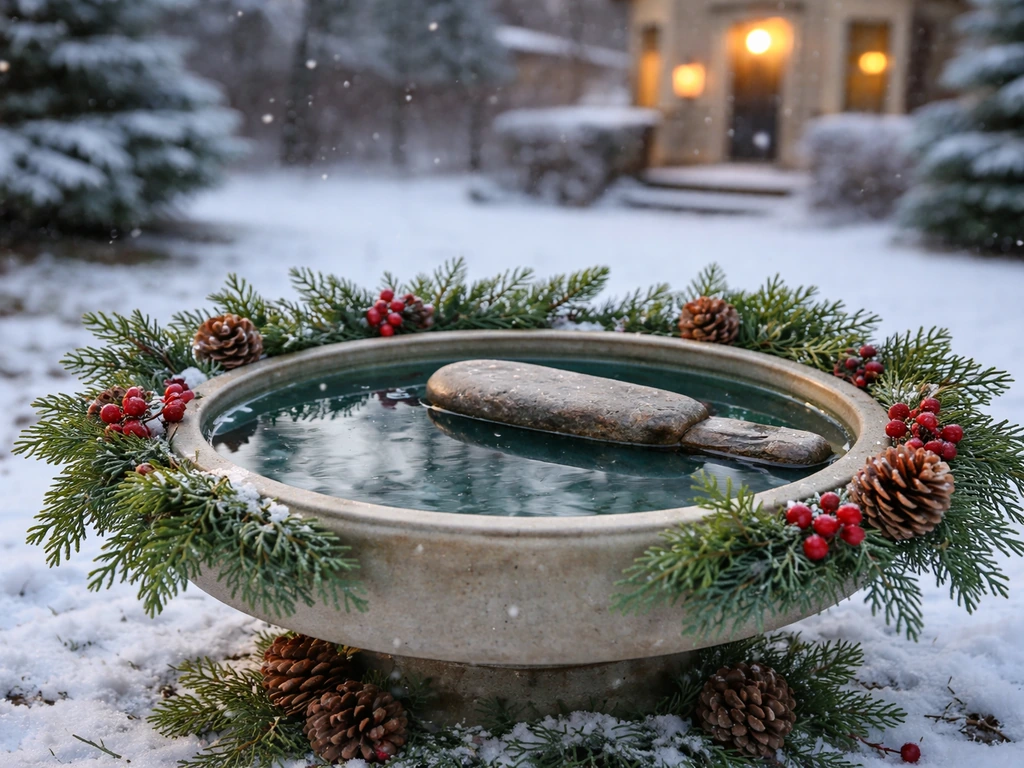
In freezing climates, the main risk is ice cracking ceramic or terracotta basins. Moana Nursery notes that metal, resin, and plastic baths are generally impervious to freeze damage, while ceramic and concrete can crack when water freezes and expands inside them. If you live somewhere that freezes, either bring a ceramic basin indoors for winter or add a bird bath heater to keep the water from freezing solid. A heater also keeps the bath usable all winter, which birds genuinely appreciate when natural water sources are locked under ice.
Hardware maintenance
Once a season, take the entire hanging assembly apart and inspect it. Look for opened S-hooks, stretched chain links, rust spots on galvanized hardware, and any softening or cracking in the wood around your eyebolt anchor. A rusted or cracked link can fail suddenly and drop the filled basin, so this inspection is worth taking seriously.
If you used hot-dip galvanized or 316 stainless steel from the start, you are unlikely to see serious corrosion for several years, but it is still worth a look. Hot-dip galvanized steel protects the underlying steel through a sacrificial-zinc mechanism, meaning the zinc sacrifices itself to protect the steel until the surrounding zinc is consumed. Replace any questionable hardware immediately.
Chain and eyebolts are inexpensive, and the alternative is a broken basin and a messy fall.
FAQ
Can I hang a bird bath from vinyl siding or a hollow fence post?
Avoid it. Vinyl siding can’t reliably support a load and hollow posts can split or pull out. If you must use a nearby structure, anchor into solid framing, a solid wood post core, or use a securely mounted bracket that spans studs or beams.
How do I prevent the basin from swinging too much in strong wind?
If you already have a three-chain or center-swivel setup, the most effective options are adding a turnbuckle (to shorten the main chain legs slightly) or adding a secondary light tether from the basin rim to a nearby stable post. This reduces pendulum motion without over-stressing the main chain.
What if my chains are the same length but the bath still hangs tilted?
Measure chain leg lengths from the basin attachment to the swivel connector, confirm they match, then check the basin’s balance. Handmade ceramic saucers and uneven rims can tilt, in which case you can level it by adding a small rubber washer or adhesive pad under the lighter side where the basin rests in the cradle.
How much spare hardware should I buy for a heavy ceramic basin?
Use a little margin. If your basin could realistically end up near 12 to 15 pounds when filled, choose hardware rated well above that limit (and consider whether your chain length and installation angle create extra leverage). Replace anything that feels loose or grinds when adjusted, since wind loads repeat the stresses.
Is hot-dip galvanized steel always safe for birds?
Generally yes, but focus on the condition of the finish. If the galvanized hardware develops deep rust pits or flaking, replace it. Also make sure no sharp wire ends or protruding bolts are exposed inside the bird access area.
Can I use a rope instead of chain if it looks easier to adjust?
For safety, use chain and metal connectors as the primary suspension. Rope stretches, degrades in sun and rain, and can fray where it rubs, which increases the chance of uneven support or sudden failure.
How often should I refill if I’m away for a few days?
If you can’t do daily dumps, prioritize cleaning over letting it stagnate. For warm weather, plan a top-up schedule that keeps water from going still for long periods, and do a thorough scrub as soon as you return. Mosquitoes can develop quickly in standing water.
Do I need to remove the basin weekly for deep cleaning?
Not always. If it’s impractical to lower, you can scrub in place with a stiff brush and long-handled tools, but still rinse thoroughly afterward. If you notice persistent algae film, lowering the basin makes it much easier to clean the underside and rim edges where buildup starts.
What’s the safest way to clean with bleach or vinegar?
Use a dilute solution, then rinse repeatedly until you cannot detect any residue or odor. Never leave chemical films to dry on the basin surface, since residue can irritate or harm birds. If using bleach, consider soaking time carefully and rinse longer than you think you need.
Should I hang the bath closer or farther from shrubs?
Aim for cover that supports quick landings but not ambush. A commonly workable range is roughly 10 to 15 feet from low cover, with enough nearby perches for birds to stage, while keeping the distance large enough that cats cannot crouch effectively under cover.
How can I protect the bath during freezing weather without buying a heater?
If you have a ceramic or terracotta basin, the safest option is bringing it indoors for winter. If you keep it outside, use a heater or choose a non-ceramic basin material (metal, resin, or plastic) that tolerates freeze-thaw better. Even with protection, avoid locations where ice forms and tips the basin.
What should I check for after the first storm or heavy rain?
Do an immediate spot-check of connectors (S-hooks and swivels), the eyebolts, and the surrounding anchor wood. Look for any loosening, gaps, or movement you didn’t notice before, since wood can expand and contraction plus repeated loading can loosen fasteners over time.
Next Articles
How to Decorate a Bird Bath for Christmas Safely
Step-by-step tips to decorate a Christmas bird bath with safe non-toxic accents, prevent freezing, and keep water clean.
How to Decorate a Bird Bath: Step-by-Step Ideas
Step-by-step tips to decorate a bird bath safely, including concrete fixes, bird-friendly landscaping, and easy upkeep i
Should a Bird Bath Be in the Sun or Shade? Placement Guide
Sun or shade placement for a bird bath: temperature, algae, freezing risks, and simple rules for cleaner, safer water.