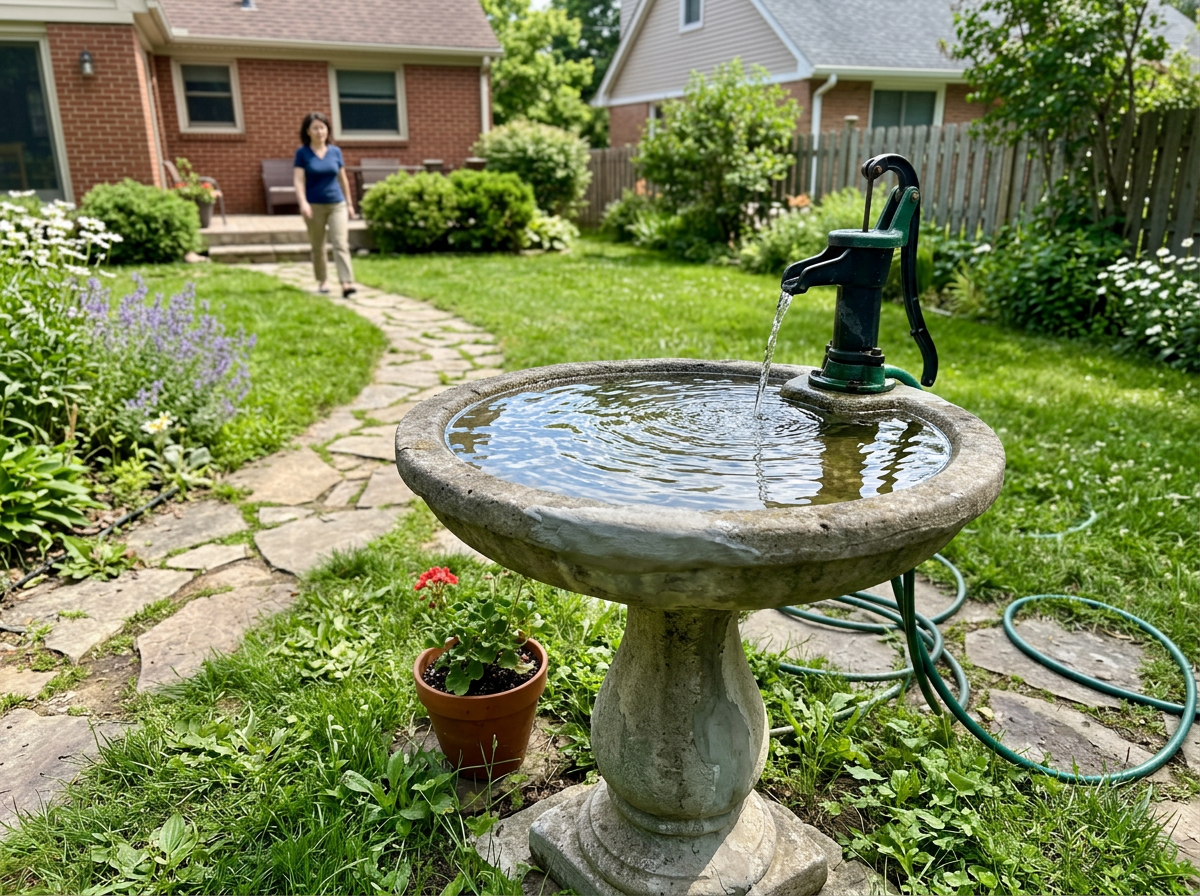
If you want to build a DIY bird bath, here is the short answer: a simple pedestal-style flat bath made from a terracotta pot and saucer is the easiest starting point, takes about an hour, and costs under $30. If you want moving water (which attracts far more birds), a fountain-style bath with a recirculating pump adds maybe $20–$50 to the budget and another hour of setup. Both work. Which one you build depends on whether you have a nearby outdoor outlet, how much time you want to spend on maintenance, and honestly, how many birds you want showing up. Let me walk you through both, start to finish.
Do It Yourself Bird Bath Plans: Simple Bath to Fountain

Marcus Henley
22 Mar 2026
Flat bath vs. fountain: which one should you build?
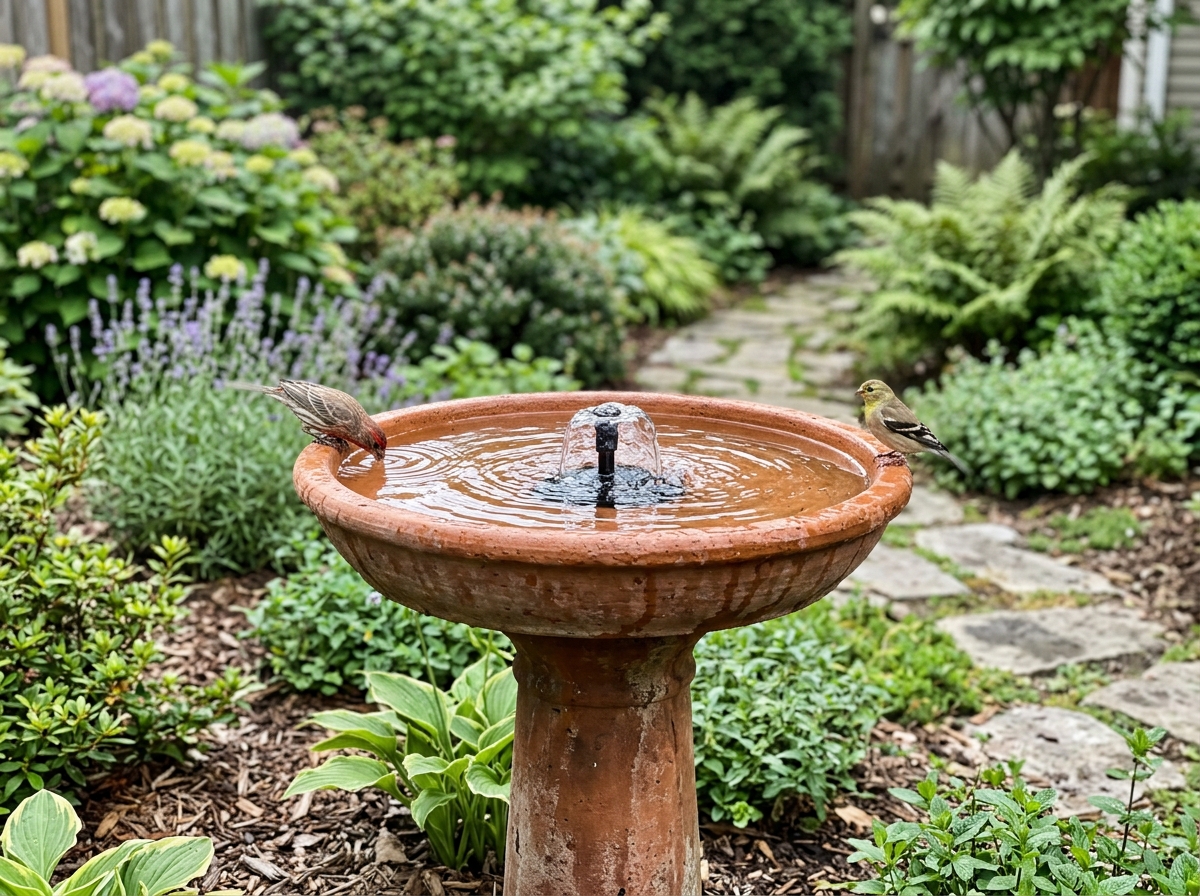
This is the first real decision, and it matters more than the specific materials you choose. A flat, static bath is simpler to build, easier to clean, and requires zero electrical work. A fountain-style bath with a recirculating pump or solar panel adds moving water, which birds find irresistible because they can hear it from a distance. If you have ever noticed birds flock to a dripping faucet or a puddle after rain, that is exactly what a fountain replicates.
The Cornell Lab points out that birds naturally prefer baths that mimic rain puddles: shallow, with gradually sloping sides. Neither style has an advantage there since you control the depth either way. Ornithology Education also recommends keeping bird-bath basins shallow, ideally no more than 1, 2 inches deep, with gently sloping sides so birds can wade safely shallow baths no more than 1–2 inches deep with gently sloping sides. The real tradeoffs are about complexity, cost, and maintenance. Moving water also resists algae and mosquito larvae better than standing water, which is a meaningful practical benefit if you live somewhere warm or humid.
| Feature | Flat Static Bath | Fountain-Style Bath |
|---|---|---|
| Build difficulty | Easy (beginner-friendly) | Moderate (requires pump setup) |
| Typical cost | $15–$35 | $35–$80 (pump or solar panel included) |
| Electrical needed? | No | Yes (outlet or solar panel) |
| Bird attraction | Good | Excellent (sound draws birds) |
| Algae/mosquito resistance | Lower | Higher (moving water) |
| Cleaning effort | Moderate (standing water) | Slightly easier (pump filters debris) |
| Winter use | Simple (drain and store) | More steps (pump must be removed/stored) |
| Best for | Renters, small spaces, beginners | Dedicated garden spaces, bird enthusiasts |
My recommendation: if you are brand new to this and just want to get something in the yard this weekend, build the flat bath first. If you already know you want to go all-in on attracting birds, skip straight to the fountain version. Both plans are below. If you want a complete end-to-end walk-through, see how to make a bird bath in minecraft for a simple build approach you can adapt to your setup.
Materials and tools you will need
Here is a single consolidated checklist covering both build options. Items marked with an asterisk are only needed for the fountain version.
For the basic flat bath
- One large terracotta or concrete plant saucer (14–18 inches diameter, 2–3 inches deep) — this is your basin
- One or two terracotta pots to stack as a pedestal (or a pre-made pedestal base)
- Waterproof construction adhesive such as Liquid Nails or similar outdoor-rated product
- Non-toxic waterproof sealant or concrete sealer (if using unsealed concrete or terracotta)
- Gravel or flat stones to place inside the basin (for bird footing and to vary water depth)
- Level (for checking the basin is flat)
- Sandpaper or wire brush (to rough up bonding surfaces before gluing)
- Bucket and scrub brush (for pre-cleaning surfaces)
Additional items for the fountain version
- Submersible fountain pump rated for outdoor/garden use (UL-listed; avoid unlisted or counterfeit pumps) — look for one rated at 50–100 GPH for a small bath
- OR a solar-powered pump kit if you do not have a nearby outdoor outlet
- Plastic tubing matched to your pump outlet (typically 1/2 inch inner diameter)
- A larger waterproof container or glazed ceramic pot as the main reservoir (if not using the saucer setup)
- Drill with a masonry or ceramic bit (if you need to route tubing through a pot)
- Bulkhead fitting with rubber gasket (if drilling a hole through a container wall for tubing — do not rely on silicone alone to seal this penetration)
- GFCI-protected outdoor outlet (required for any electric pump; if yours is not GFCI-protected, have an electrician add one or use a GFCI plug adapter)
- Zip ties or tubing clips to secure the pump cord and tubing
Shared optional upgrades
- Outdoor-rated spray paint or concrete paint for decorating the pedestal
- Stepping stones or pavers to create a stable base under the bath
- A drip irrigation timer (for automating top-offs in hot climates)
- A birdbath heater or immersion de-icer for winter use (GFCI outlet required)
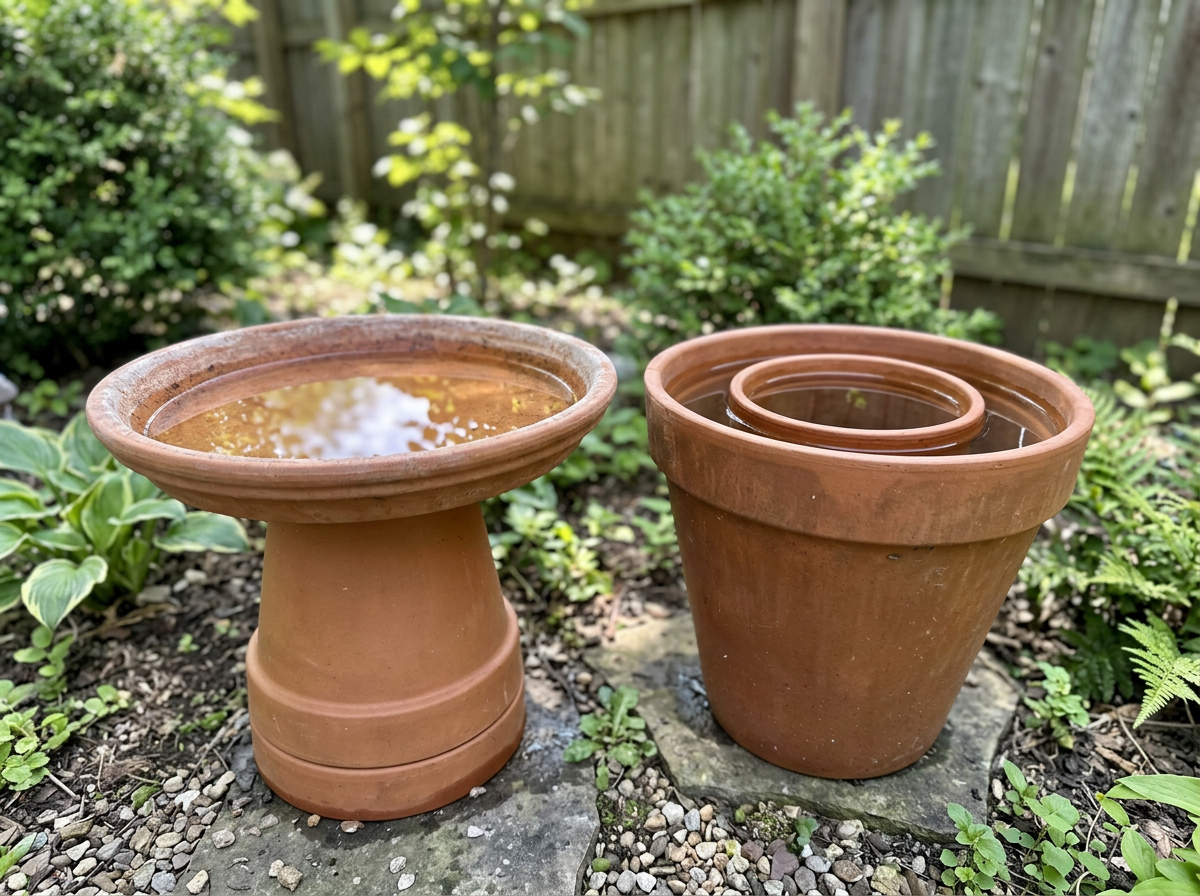
How to build a basic DIY bird bath
This pedestal-and-saucer design is the classic starter build. It looks good, holds up to weather, and you can have it finished in a single afternoon. The key to making it last is sealing the basin properly so water does not soak into and crack the terracotta over a freeze-thaw cycle.
- Clean all your materials thoroughly. Scrub the saucer and pots with a stiff brush and plain water to remove any dirt, dust, or manufacturing residue. Let everything dry completely before you glue or seal anything.
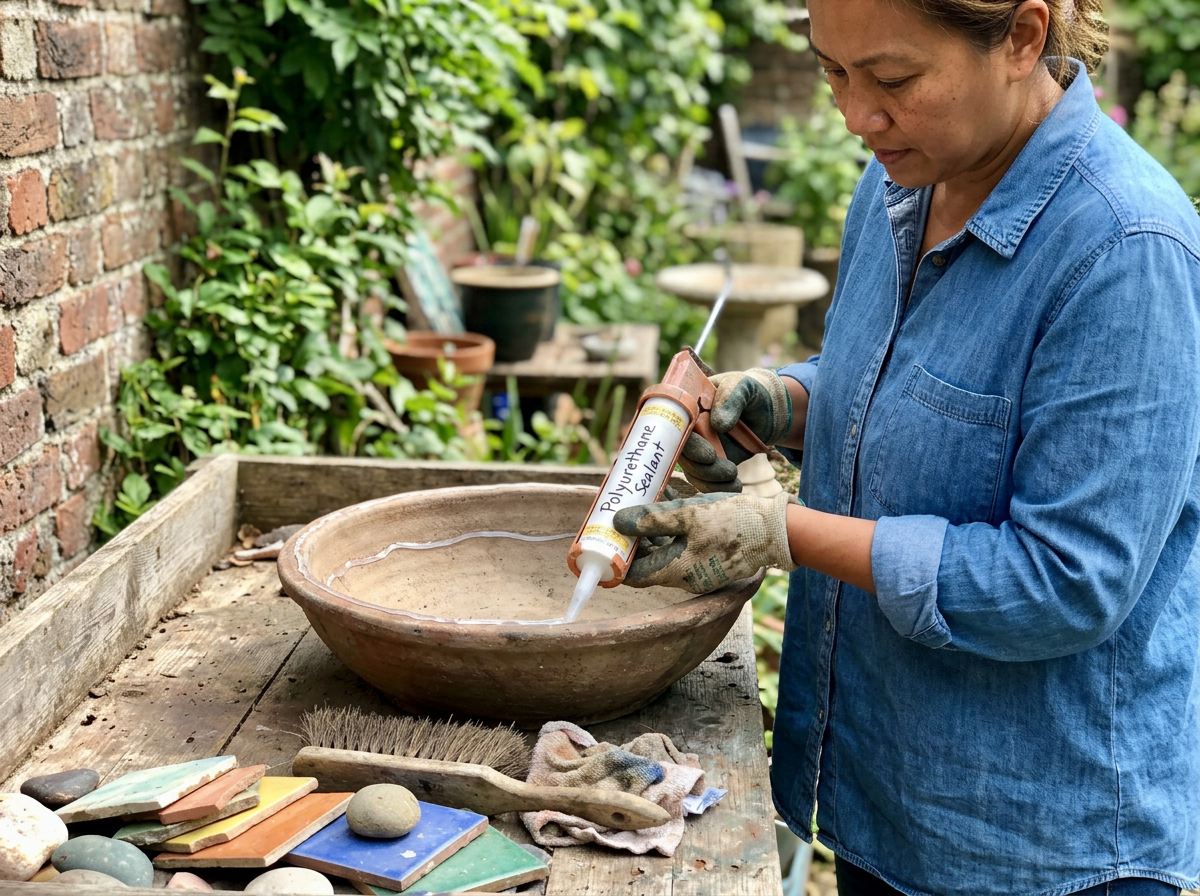
- Seal the basin. If you are using an unglazed terracotta or raw concrete saucer, coat the inside with two layers of non-toxic waterproof concrete sealer. Let each coat dry per the product instructions. This step is not optional if you live somewhere that freezes in winter.
- Build the pedestal. Stack your pots upside down (larger on bottom, smaller on top) or arrange them however looks right for your space. A two-pot stack gives you roughly 18–24 inches of height, which is a decent starting point. Use outdoor-rated waterproof adhesive between pot layers and let it cure fully before loading the basin on top.
- Attach the basin to the pedestal. Apply a generous bead of waterproof construction adhesive to the top rim of the uppermost pot. Center the saucer on top, press firmly, and check it is level with your level tool. Wipe away any squeeze-out. Let it cure for at least 24 hours before filling with water.
- Add stones or gravel inside the basin. Place a few flat stones or a handful of pea gravel in the basin. This gives birds a stable foothold and creates variation in water depth (1–2 inches max is ideal; birds can drown in deeper water).
- Fill the basin and place it in your chosen spot. Fill with fresh water to about 1–2 inches depth. Do not overfill. Place it in position (more on exactly where below).
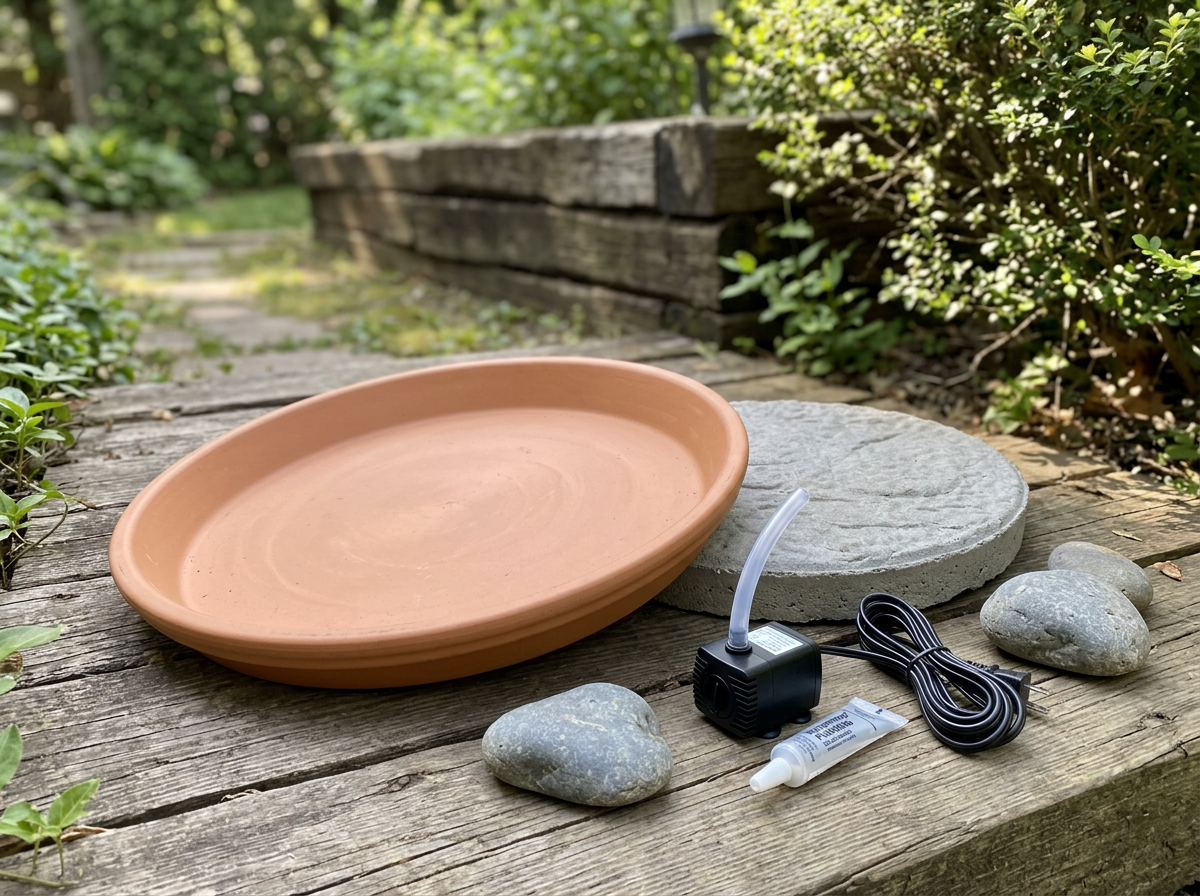
How to build a DIY bird bath fountain
The fountain version follows the same general idea but adds a recirculating pump that pushes water up through tubing and creates a gentle bubbling or spouting effect. If you want more ideas on how to make a bird baths from different container types and styles, those basics are covered in the related guide.
If you want to watch a step-by-step process, search for a YouTube video on how to make a bird bath fountain using a recirculating pump youtube how to make a bird bath. If you are specifically trying to make elephant ear bird baths, look for tips on using the elephant ear plant leaves safely around the water setup. how to install bird bath is what makes this version so effective at drawing birds.
For a quick refresher, this is where to find step-by-step guidance for the pump setup in your hanging bird bath how to install bird bath. You have two main routes here: electric pump (more consistent flow) or solar pump (no outlet needed, but flow depends on sunlight).
Electric pump fountain build
- Choose your basin. A larger, deeper glazed ceramic pot or a wide concrete basin works best here because the pump needs to stay fully submerged. A minimum water depth of about 4–6 inches in the reservoir section is typical for small pumps.
- Position the pump in the basin. Place the submersible pump at the bottom of the basin. Route the power cord over the rim and toward your GFCI-protected outdoor outlet. Never bury the cord or run it under standing water without appropriate outdoor-rated conduit.
- Attach the tubing to the pump outlet. Cut a length of plastic tubing to bring water up to just above the water surface level. This creates your fountain head. Many small pumps come with adjustable nozzles; a gentle bubbler head works better for birds than a high jet.
- If routing tubing through a drilled hole in a pot: drill a hole with a masonry bit, install a bulkhead fitting with a rubber gasket, then push the tubing through. Silicone alone will not hold a watertight seal at a wall penetration, so use the bulkhead fitting.
- Fill the basin high before turning on the pump. The pump needs to be fully submerged to start circulating reliably. Fill the basin close to the brim, then plug in the pump and check flow. Adjust the tubing height or nozzle to get a gentle, low bubbling effect rather than a geyser.
- Add stones around the pump inside the basin. This hides the pump hardware, gives birds a landing zone, and helps keep the pump from getting kicked around. Keep stones loose so you can remove them to clean the pump.
- Test for leaks at any drilled penetrations and check that the GFCI outlet trips correctly by pressing the test button. Reset and confirm power comes back. You are done.
Solar pump fountain build
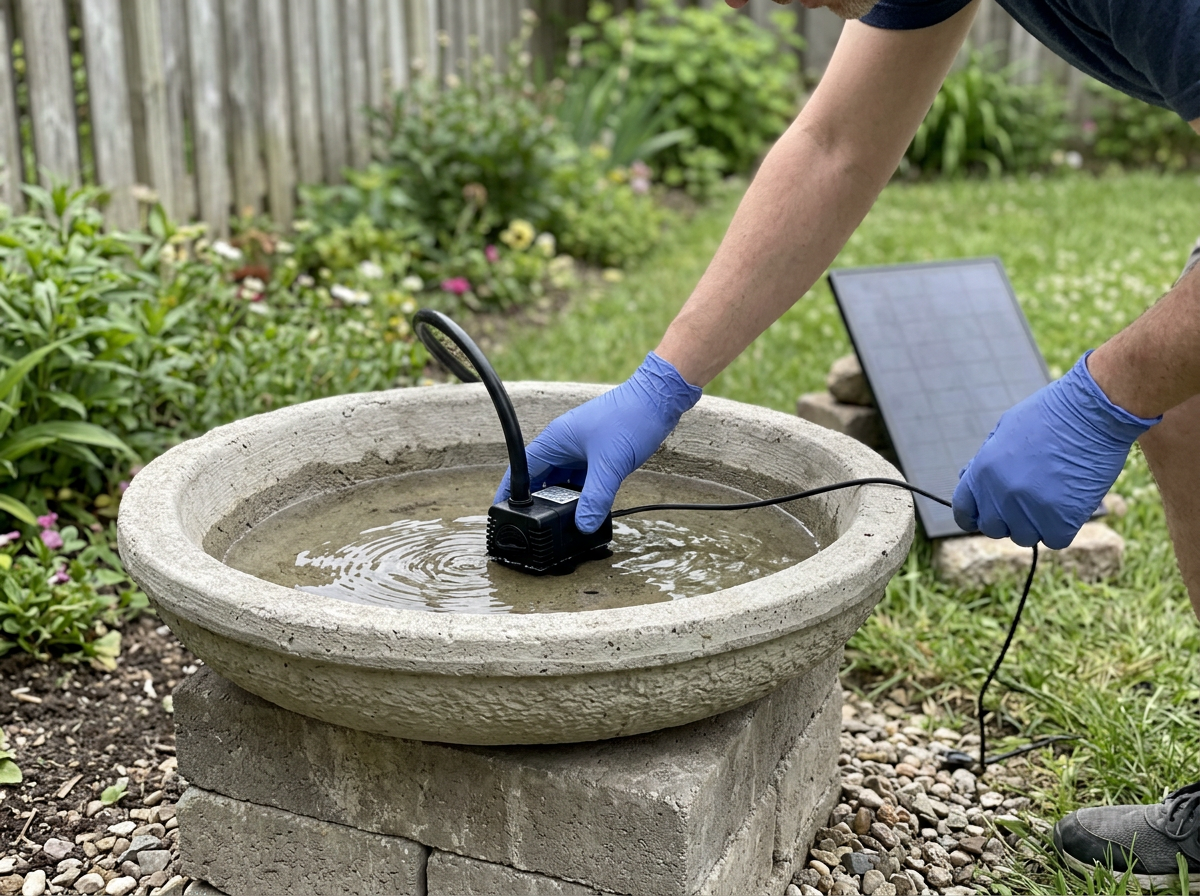
A solar fountain kit simplifies the electrical side entirely since the solar panel feeds power directly to the pump. The trade-off is that flow stops on cloudy days and slows in low light. For attracting birds, intermittent movement is still better than no movement, so solar is a legitimate option.
The build steps are nearly identical to the electric version, except you mount the solar panel in a sunny spot nearby and connect it to the pump via the included cable instead of plugging into an outlet. Follow the Bird Feeder Hub approach of filling the basin nearly full before activating the pump, as this ensures the pump head is submerged and circulation starts without the pump running dry.
Here is how to make an elephant ear bird bath using the same pedestal-style basics, then add your fountain pump if you want moving water elephant ear bird baths.
Where to put it, how high, and how to make it actually work for birds
Placement is where a lot of DIY bird baths underperform. The build can be perfect and birds will still ignore it if the location is wrong. Here are the factors that actually matter.
Distance from cover and predators
Place the bath about 10 to 15 feet away from dense shrubs or trees. Close enough that birds feel safe and can retreat quickly if a predator shows up, but far enough that a cat cannot use the cover for an ambush. This is a real tension: birds want nearby escape routes but also do not want to bathe right next to a hiding spot for predators. The 10–15 foot zone is the sweet spot most birding sources converge on.
Height off the ground
Birds will use ground-level baths, and in some ways they prefer it since it mimics a natural puddle. But if cats are a problem in your yard, raise the bath to about 2–3 feet above the ground. A standard two-pot pedestal gets you into that range. If you go taller than 3 feet, smaller birds get nervous and larger birds have trouble perching properly.
Sun vs. shade
Partial shade is better than full sun for a static bath. Full sun heats the water faster, accelerates algae growth, and causes rapid evaporation. For a fountain bath, some sun is beneficial, especially if you are running a solar pump. A spot that gets morning sun and afternoon shade is close to ideal in most regions.
Visibility and sound
Put the bath somewhere you can actually see it from a window. This sounds obvious but people often tuck baths in corners and then wonder why they never see birds using them. For the fountain version, the sound of moving water carries, so placing it within earshot of a path or patio means you will hear when birds are active.
Stability on the ground
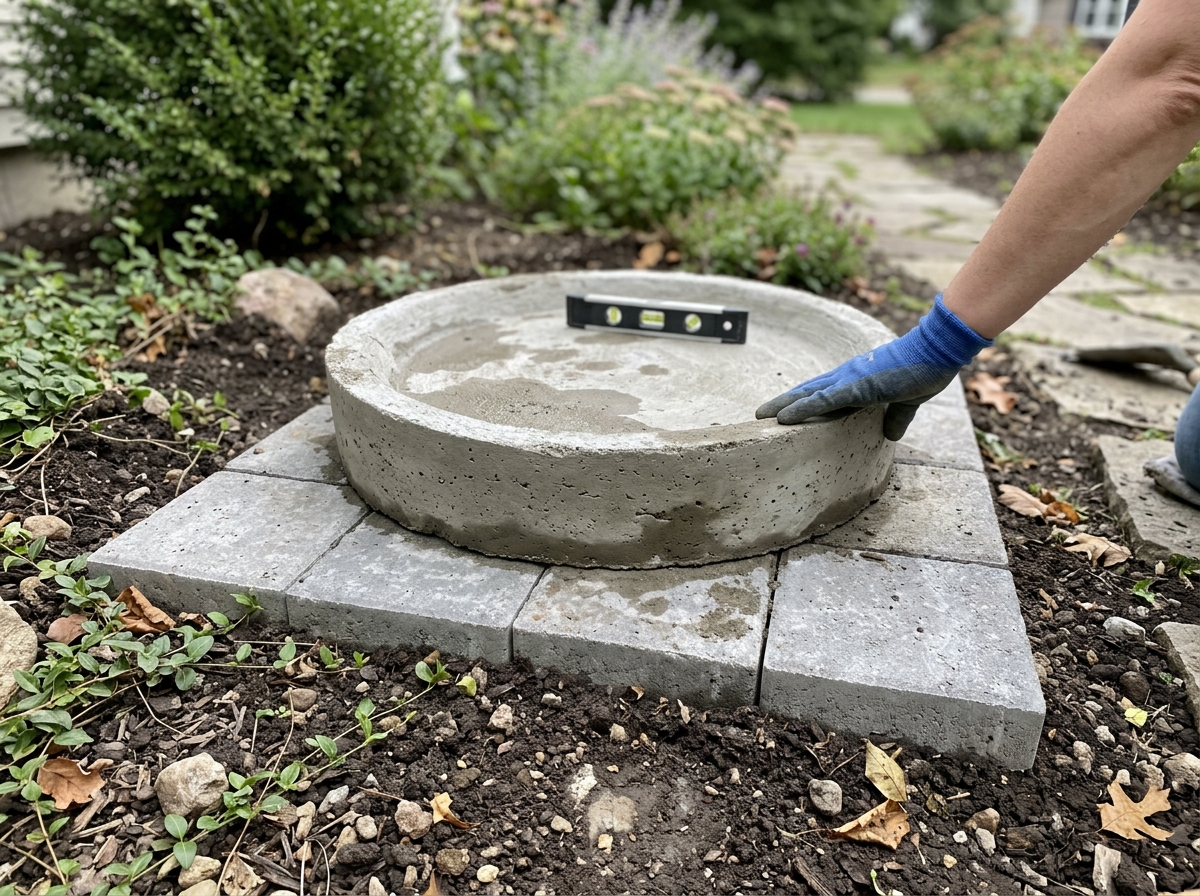
A wobbly bird bath scares birds off and eventually tips over and breaks. Set the base on flat pavers or stepping stones. Check level again after the first heavy rain since soft soil settles. Dig out the sod if needed and create a stable, flat surface before placing the bath.
Keeping the water clean and the bath healthy year-round
Maintenance is where most DIY bird baths fail over time, not the construction. The good news is that a good cleaning routine takes less than 10 minutes once you know what you are doing.
Routine water changes
Change the water every two to three days minimum. If the water looks cloudy or you can see debris sitting on the bottom, change it that day. Do not just top it off: dump the old water, rinse the basin, and refill with fresh water. This alone prevents most algae and mosquito problems. Mosquitoes need standing water for about four to seven days to complete their larval cycle, so frequent changes break that cycle entirely. Mosquitoes need standing water for several days because their larvae develop in water before they pupate and emerge as adults mosquito larvae.
Weekly scrub
Once a week, give the basin a proper scrub with a stiff brush. A 9-to-1 water-to-white-vinegar solution works well for routine cleaning and loosens algae buildup without leaving harmful residues for birds. Rinse thoroughly after scrubbing before refilling.
Monthly deep clean
About once a month (more often if you see heavy buildup), do a deeper disinfection. A 9-parts-water-to-1-part-bleach solution is what the National Wildlife Health Center recommends for sanitizing bird baths and feeders. Scrub the entire basin with this solution, let it sit for a few minutes, then rinse extremely thoroughly and let the bath air dry completely before refilling. Never let birds access the bath while bleach solution is in it.
Disease outbreak protocol
If you start seeing sick or dead birds in your area, temporarily remove or empty the bird bath entirely. This is guidance from the National Wildlife Health Center repeated by OSU's extension service: during active disease outbreaks, bird baths become congregation points that can accelerate disease transmission. When the outbreak passes and you bring the bath back, do a full bleach-solution disinfection before refilling.
Winter care
In freezing climates, you have a few options. The simplest is to bring the bath inside or drain and store it once consistent freezing temperatures arrive. Terracotta in particular will crack if water freezes inside it. If you want to keep the bath running through winter, move it to the sunniest spot in your yard during the day to use solar heat to slow freezing. For more reliable winter access, add an immersion-style birdbath heater or de-icer to maintain water above freezing. If you use an electric heater, it must be on a GFCI-protected outlet, which is a non-negotiable safety step. For fountain baths, remove the pump before temperatures drop to freezing since frozen water can crack the pump housing.
Safety, durability, and fixing the most common problems
Most DIY bird bath problems fall into a handful of categories. Here is how to handle them before and after they show up.
Leaks
A crack in a terracotta or concrete basin is usually not repairable in a way that lasts. Seal the basin before this happens with proper waterproof sealant. For fountain builds with drilled penetrations, if you notice seepage around the hole, silicone alone is likely the culprit: replace it with a proper bulkhead fitting and gasket. For glazed ceramic basins with hairline cracks, a two-part epoxy waterproof patch can work as a temporary fix, but a replacement basin is usually the better long-term answer.
Instability and tipping
If the bath rocks or tips, the base is the problem. Add more adhesive between pot layers if they have separated, or reset the whole structure on a flatter, firmer surface. In high-wind areas, consider partially filling the base pots with sand or gravel before stacking to lower the center of gravity.
Pump clogs and flow problems
If your fountain pump loses flow or stops, the first thing to check is the filter and intake screen. Remove the pump from the basin, disassemble the filter housing, rinse the filter material under running water, and clear any debris from the intake. This fixes the vast majority of pump issues.
If you are troubleshooting how to fix the bird bath in Virtual Families, start by checking the pump, tubing, and water level the same way you would for a real fountain bath. If flow is still weak after cleaning, check that the tubing is not kinked and that the pump is fully submerged. If the pump runs but produces no water movement, the impeller may be stuck: consult the pump manual for impeller access and cleaning.
Electrical safety
Every electric pump or heater used outdoors near water must be on a GFCI-protected outlet. This is not optional and is standard practice for all exterior outlets under residential electrical codes. Only use pumps that are UL-listed for submersible outdoor use. Counterfeit or off-brand pumps without proper safety listings have caused electrical hazards, so buy from a reputable retailer and check the UL marking before you purchase.
Algae buildup
Green or brown slime means too much sun, not enough water changes, or both. Move the bath to a shadier spot, increase your cleaning frequency, and add a few copper pennies or a copper mesh disc to the basin. Copper naturally inhibits algae growth and is safe for birds in small amounts. For fountain baths, moving water inherently slows algae compared to static baths.
Birds not using the bath
Give it a week or two after initial setup. If birds are still ignoring it, check location first: is it too close to dense cover, too exposed, or too high? Try moving it. Adding a drip feature (even a plastic bottle with a tiny hole hung above the basin) creates sound and movement that attracts birds faster. For fountain baths, lower the spray height to a gentle trickle rather than a tall jet since most songbirds prefer shallow, calm water they can wade into.
The good news about all of these problems is that they are fixable. A DIY bird bath is not a set-it-and-forget-it project, but the ongoing time investment is small, maybe 10–15 minutes a week once you have a routine down. Build it this weekend, get it placed and filled, and then adjust from there based on what you observe. Birds will tell you pretty quickly whether the setup is working.
FAQ
Can I add stones or a small platform inside the DIY bird bath to make it easier for birds to land and wade?
Yes, but do it cautiously. If you add rocks or decorative “platform” pieces inside the basin, use clean, non-porous stones and keep the edges shallow and smooth so birds can wade. Avoid placing water so deep that birds cannot reach the bottom with their feet, and remove any rock that traps debris where water cannot circulate or be cleaned.
Will using the fountain instead of changing water less often still prevent algae and mosquitoes?
It can, depending on where you live and the bird species you attract. If you notice heavy insect presence, test your approach by keeping water fresh and scrubbing on schedule, then try a fountain or more frequent changes before adding anything else. Avoid strong chemicals or algaecides, they can irritate birds’ skin and feathers.
What’s the safest way to control algae if I don’t want to use vinegar or bleach regularly?
Do not use regular table salt or fertilizer products. If you want to discourage algae, follow the same principle as the copper approach mentioned in the article, and keep any copper additions tiny. Even “safe” metals can create uneven hotspots, so use one small method consistently rather than mixing multiple treatments.
If birds ignore my do it yourself bird bath after I build it, what should I troubleshoot first?
Start by confirming the birds are safe before you assume the water is the problem. Re-check the 10 to 15 feet spacing from cover, then verify the bath is not in a windy corridor, and ensure the basin is level and stable. Also look for “competition” factors like nearby feeders that keep birds busy, then give the bath a full week in the exact placement you chose.
Can I use a drain pan or catch tray to reduce splashing and algae stains under my do it yourself bird bath?
Yes, and it’s a common upgrade. You can reduce mess and make cleaning easier by placing the bath on an easy-to-clean surface (pavers) and adding a shallow catch tray under the basin. If you do this, keep overflow drainage away from dense shrubs and make sure the tray does not hold standing water.
What should I do if birds visit to drink but do not bathe in the fountain bath?
If you see birds drinking but not bathing, slow down the “noise” and splash. For fountain builds, lower the spray or reduce flow so water movement is audible but not aggressive. Add a gentle trickle drip feature above the bath as a transitional step, then gradually increase movement only if birds start using the basin.
Is it a good idea to place a do it yourself bird bath on a hot, dry patio in full sun?
You can, but plan for water storage and stability. Use a tighter, more sheltered location and expect more frequent cleanings due to rapid evaporation. For pump systems, make sure tubing stays below the water line at startup, then check that the pump does not overheat or run low during hot spells.
Why do my birds suddenly stop using the bath after refilling it?
It usually indicates either poor water access or timing. Many birds prefer baths early morning or late afternoon, and some avoid very fresh water if it’s too cold relative to air temperature. Try refilling with water closer to outdoor temperature and keep the basin shallow with gently sloped sides.
What’s the safest winter plan for a terracotta do it yourself bird bath (especially a fountain with a pump)?
For frozen regions, the safest move is to remove the fountain pump and drain/store the terracotta so water cannot freeze inside. If you leave any part outside, protect the basin by draining completely and covering it to prevent water from re-freezing in place. For electric heaters, only use GFCI-protected outdoor outlets, and keep cord connections off wet surfaces.
Next Article
How to Fix the Bird Bath in Virtual Families
Fix a nonworking bird bath in Virtual Families with quick steps, interaction checks, placement tips, and next troublesho