Installing a bird bath is genuinely one of the easier backyard projects you can tackle in an afternoon, but a few small decisions made upfront, like where you put it, how you level it, and how you anchor it, make the difference between a bath that stays put and one that tips over, goes unused, or turns into a mosquito pond. Here's how to do it right the first time. If you end up running into problems after setup, such as a virtual setup that feels off or unstable, the troubleshooting steps in how to fix the bird bath in virtual families can help you correct it quickly.
How to Install a Bird Bath: Step-by-Step Guide

Marcus Henley
22 Mar 2026
Choose the best spot for your bird bath
Location is the single most important decision you'll make. Get this wrong and birds will ignore the bath no matter how nice it looks. The goal is a spot that feels safe to birds, is easy for you to maintain, and keeps the water clean longer.
Place the bath in a spot that gets partial shade, especially in the afternoon. Full sun heats the water quickly, speeds up algae growth, and evaporates water fast. Full shade can make birds feel exposed or cause the water to go stagnant. A spot that gets morning sun and afternoon shade is ideal in most climates.
Distance from cover matters a lot. Audubon recommends keeping the bath some distance away from dense shrubs or ground cover so cats and other ambush predators can't hide nearby and surprise bathing birds. A good rule of thumb is at least 5 to 10 feet from thick bushes or low-hanging branches. At the same time, birds like to be within reasonable flying distance of trees so they can escape quickly if they feel threatened, so having some taller trees or shrubs within 15 to 20 feet works well.
Keep it away from your bird feeders. Seed hulls, droppings, and debris from feeders foul the water fast. A separate location, at least 10 feet from feeders, keeps maintenance manageable.
Think practically too. You'll be refilling this daily, so put it somewhere you can reach easily with a hose or watering can. Tucking it behind a shed or in a far corner of the yard sounds peaceful, but you'll skip refills when it's inconvenient. Somewhere visible from a window is a bonus, since half the joy of a bird bath is watching it get used.
Tools and materials you'll need
Most pedestal bird baths don't require much to install. Here's what to have on hand before you start:
- A level (a small 9-inch or 12-inch torpedo level works great)
- A rubber mallet or regular hammer with a scrap piece of wood
- A hand trowel or small spade
- Coarse sand or fine gravel (for leveling and, in some models, filling hollow bases)
- Flat pavers or stepping stones (optional, for setting the base on uneven ground)
- Measuring tape
- Work gloves (concrete and resin baths can be heavy and have sharp edges)
- A bucket of water for the first fill
- A fist-sized smooth rock (for placing in the basin as a perch)
If your bath comes with ground stakes, check the package for the number. Many models, including several popular ones from Outsunny and similar brands, come with three stakes for triangulated stability. If your bath has a hollow base or pedestal pole, you'll need sand, gravel, or small rocks to fill it as ballast. More on that in the anchoring section.
Prep the ground and measure for level placement
A bird bath that isn't level will leak water from one side, look crooked, and be far more likely to tip. This step takes maybe 10 minutes and is worth every second.
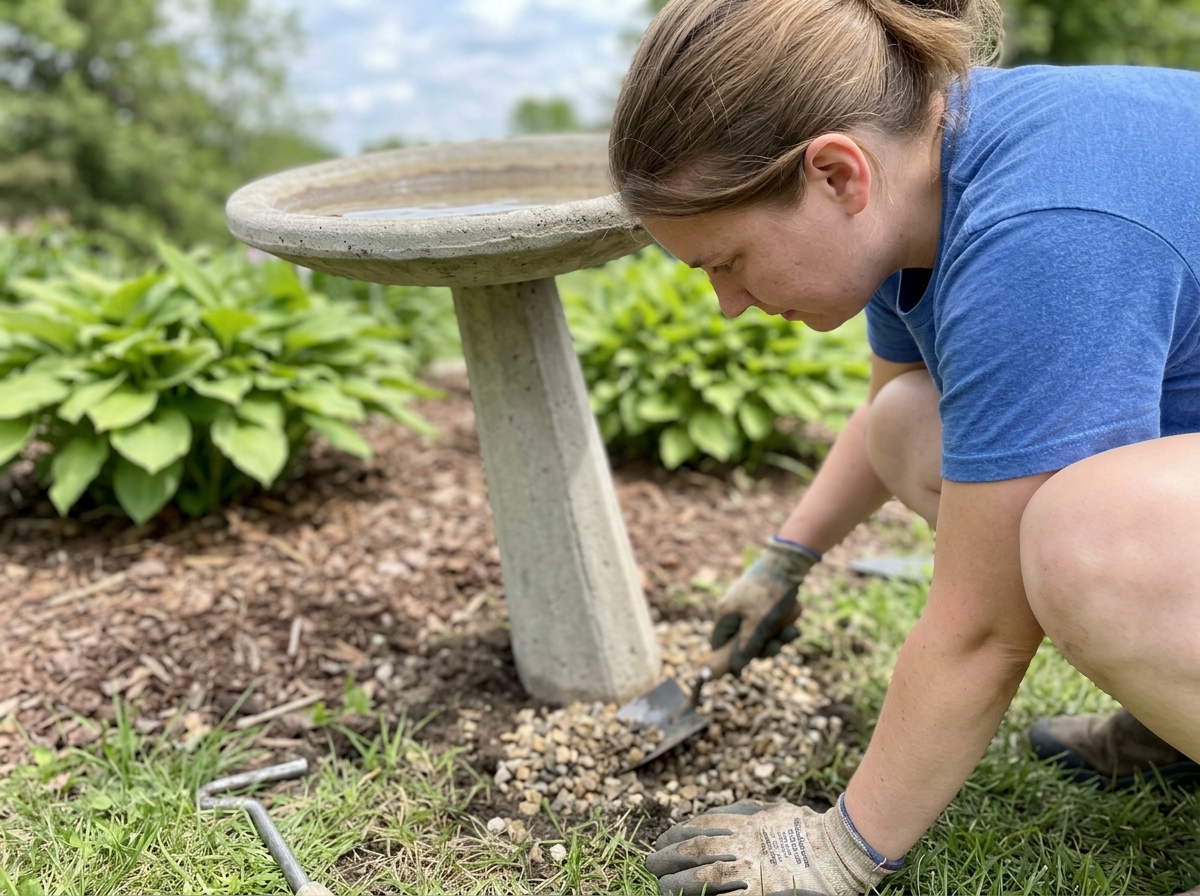
Start by clearing the area. Remove any rocks, roots, or debris. If you're placing the bath on grass, consider using a spade to cut a circular patch just a few inches wider than your base, then remove the sod and about an inch of topsoil. This gives you a firm, clean surface to work with and keeps the bath from sinking unevenly as the ground shifts.
For soil installation, firm soil is essential. One manufacturer's guide puts it plainly: do not install a staked bath into loose soil, because it will tip. If your soil is soft or sandy, dig down a few extra inches and pack in some compacted gravel before setting the base. This creates a stable foundation that won't shift after rain.
If you're placing the bath on an existing patio, concrete, or pavers, check the surface with your level first. Even surfaces that look flat often aren't. If you find a slight slope, you have a few options: use thin rubber shims under the base, add a thin layer of sand and reposition, or choose a different spot. Concrete and paver surfaces are actually great for stability, just make sure the base won't slide (rubber feet or a rubber mat underneath helps).
Once your surface is prepped, set the base (not the assembled bath yet) in position and check it with your level in two directions, front to back and side to side. Add or remove a little sand underneath until the bubble sits centered. Mark the spot with a small stake or spray paint if you need to move the base while you assemble the rest of the unit.
Assemble the bird bath (common base and pedestal steps)
Most standard pedestal bird baths come in two or three main pieces: the basin (bowl), the pedestal or pole, and sometimes a decorative element like a bird figure or finial that attaches to the bowl edge. Some also have a two-piece pedestal that screws or slots together. Always check your specific model's instructions, but here's how the process typically goes.
- Lay out all the parts and hardware on a clean surface before you begin. Identify any bolts, studs, flat washers, nuts, and rubber caps that came with the kit.
- If the pedestal is hollow, fill it with coarse sand, small gravel, or rocks before assembly. Some manufacturers specify a precise amount, for example one common design calls for about 0.2 gallons of sand. This ballast weight dramatically improves stability.
- Connect the pedestal sections together if there are multiple pieces. These usually twist-lock, thread together, or are secured with a threaded knob. Hand-tighten first, then give a firm quarter-turn with a wrench if hardware is provided.
- Attach the bowl to the top of the pedestal. Many models use a stud-and-washer system: the stud pokes up through a hole in the bowl base, you add a flat washer, thread on a nut, and then cap the exposed bolt end with a rubber cap to prevent scratching the bowl. Tighten snugly but don't overtorque on resin or lightweight concrete.
- If your model includes a decorative bird, finial, or similar piece, slot or press it into the hole at the bowl edge as directed. Most clip or press in without adhesive.
- Do a quick wiggle test before moving on. The assembled unit should feel solid with no play between bowl and pedestal.
Important: assemble the bath near the installation spot rather than carrying it fully assembled. Fully assembled pedestal baths are awkward to carry, and some resin or concrete models are surprisingly heavy. Assemble in place or as close to the final location as possible.
Install and anchor it to prevent wobble and tipping
A stable bird bath is a safe bird bath. Birds won't use a wobbly basin, and a tipping bath can injure birds, damage your yard, or break an expensive concrete bowl. Here's how to anchor different types securely. If you specifically want a hanging bird bath, the same stability and anchoring principles apply, but you'll also need the right hanging hardware and a secure mounting point how to make a hanging bird bath.
Pedestal baths on soil or grass

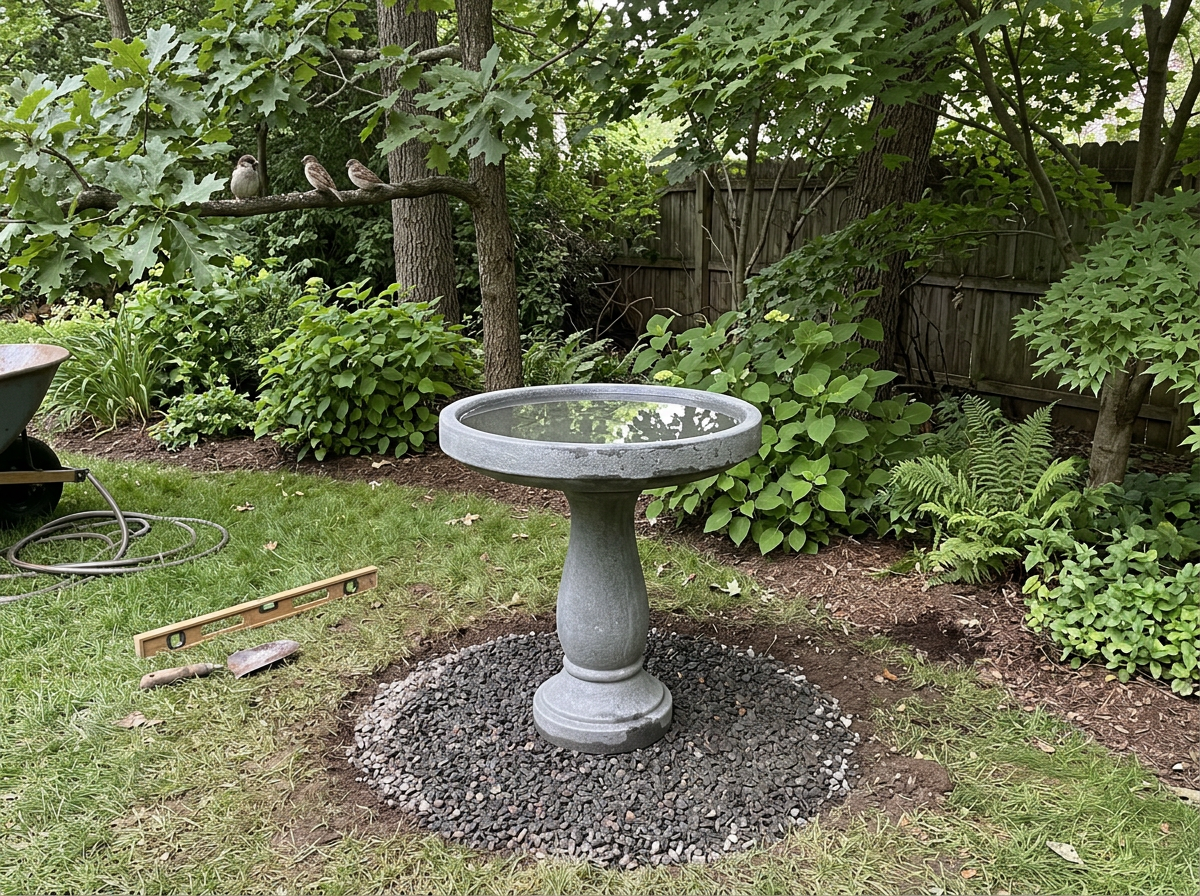
Set the assembled bath in your prepped, leveled spot. If your model came with ground stakes, drive them through the stake holes in the base using a rubber mallet. Angle stakes slightly outward for better grip. Pound them flush with or just below the base surface. Models with three stakes offer better stability than those with two, since they prevent rocking in any direction. After staking, grab the pedestal near the top and push in several directions to check for movement. If it still wobbles, add another stake or pack firm soil tightly around the base.
Pedestal baths on patios or pavers
On hard surfaces, stakes aren't an option. Stability comes from a combination of ballast (the filled pedestal or base) and the weight of the water itself once filled. For extra security, you can use outdoor-rated construction adhesive to bond the base to a paver, though this makes repositioning harder. A simpler option is to place the bath on a rubber mat or use non-slip pads under the base feet. This prevents sliding without permanently anchoring it.
Pole-style baths with a garden stake
Some designs, like those from Good Directions and similar brands, include a separate ground stake that attaches to the pole assembly. Drive the stake into the ground first, then connect the pole to it according to the instructions. The key here is making sure the stake goes into firm ground, not a soft or recently disturbed patch. If the ground is very hard, use a metal rod or screwdriver to pre-punch a pilot hole before driving the stake.
Once the bath is in place, do a final level check with the bowl sitting on the pedestal. Small adjustments are easier now than after it's been sitting for a season. The bowl should hold water without it pooling heavily to one side.
Fill, placement tweaks, and early maintenance
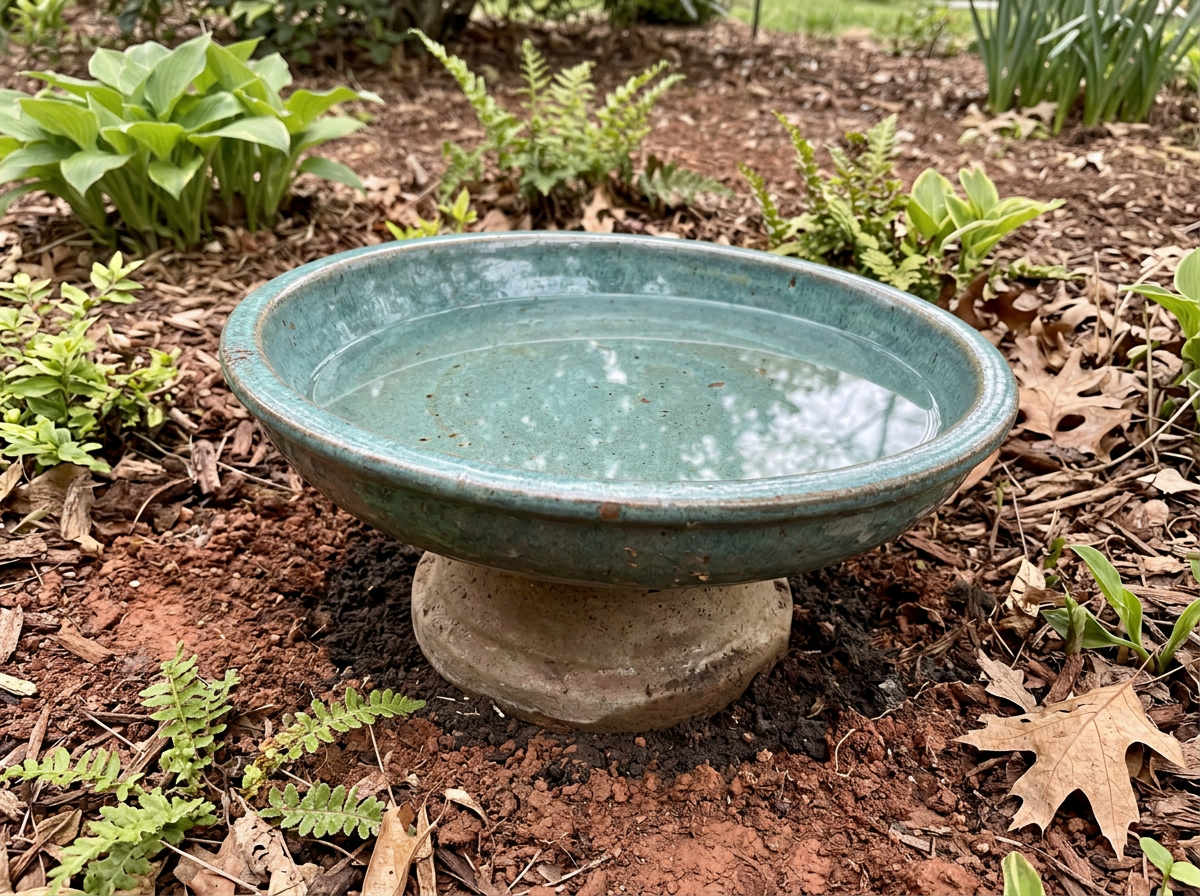
Now the fun part. Fill the basin with fresh water to a depth of about 1 to 1. Ornithology Education notes that birdbath basins should stay shallow, ideally no more than 1, 2 inches deep, with gently sloping sides to support safe wading and bathing water depth of about 1 to 1. 5 inches. Audubon specifically recommends this depth, roughly 2.5 to 3.8 cm, for small and medium songbirds. The water should cover the bottom of the basin with a gentle slope up the sides. Birds need to feel the ground under their feet while bathing, so a deep pool is actually a deterrent.
If your basin is deeper than 2 inches at its center (common with decorative bowls that have a sculpted bottom), add a flat smooth rock or a submerged brick to raise the effective floor. This is especially helpful if you want to attract a variety of species, since smaller birds like warblers and finches won't step into water they can't gauge the depth of.
Drop a fist-sized smooth rock in the center of the basin. It gives birds a dry perching and preening spot, which many species prefer before and after bathing. It also helps bees and other beneficial insects get a drink without drowning.
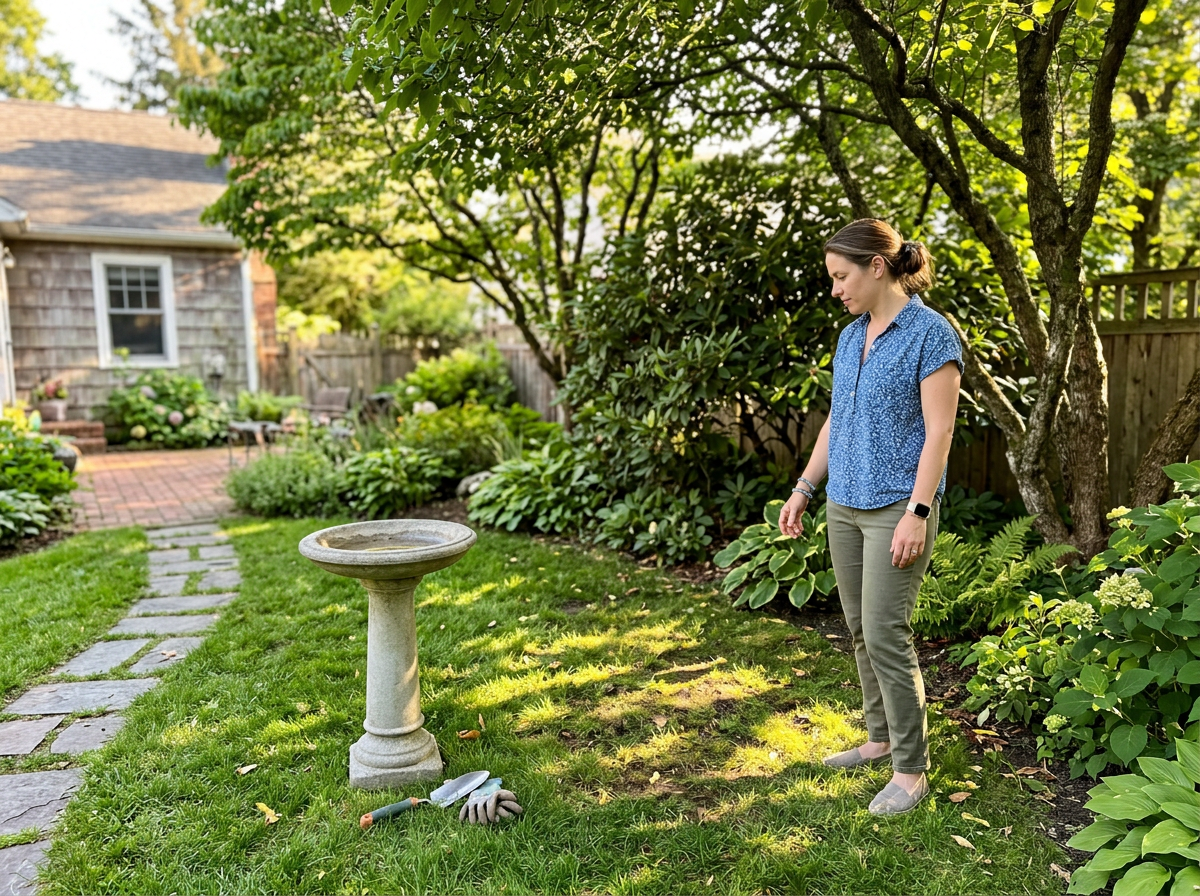
Step back and look at the overall setup. Is the bath visible from multiple angles in the yard? Is there a clear flight path in from nearby branches? If it looks blocked or cramped from the approach angle birds would use, it's worth shifting it a foot or two now, before it becomes a habit to leave it where it is. Remember the warning from Jeco's instructions: don't attempt to move the bath once it's filled. Empty it first, then reposition.
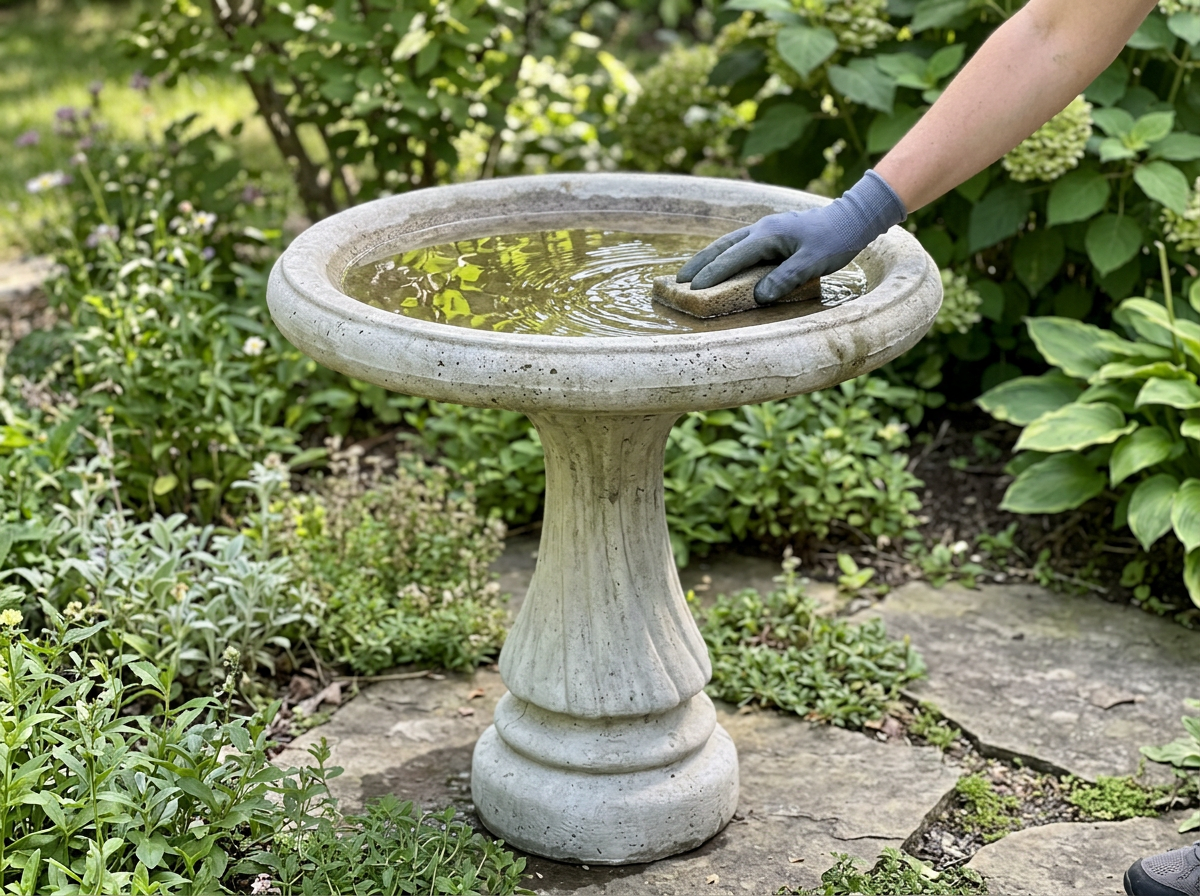
From day one, get into the maintenance rhythm. The RSPB recommends refilling with fresh water daily and doing a thorough disinfecting rinse weekly. The RSPB advises refilling with fresh tap water daily and thoroughly disinfecting weekly to keep garden birds healthy doing a thorough disinfecting rinse weekly. For that weekly clean, empty the basin, scrub it with a stiff brush (no household cleaners or bleach, which are harmful to birds), and rinse thoroughly with cold water. Let it air dry before refilling. Concrete and stone baths in particular can develop algae quickly if you let this slip, so consistency matters more than intensity.
Troubleshooting common installation problems
The bath keeps wobbling even after staking
This usually means the soil is too loose or the stakes aren't long enough to reach firm ground. Try packing coarse gravel around the base before re-staking. If your stakes are short (under 8 inches), consider replacing them with longer landscaping stakes of the same diameter. Alternatively, set the base on a buried paver to create a solid platform, then stake into the surrounding soil.
The bath keeps sinking or leaning over time
Sinking is almost always a drainage problem. If the ground under the base stays wet after rain, the soil softens and the base slowly sinks to one side. Fix this by excavating 4 to 6 inches under the base, filling with compacted gravel for drainage, and resetting on that prepared base. This is the same logic used for fence posts in wet soil.
The water level always looks wrong on one side
If water pools to one edge of the bowl, the bath isn't level. Even a quarter-inch difference across the basin is enough to be noticeable. Empty the bath, loosen it from any staking, recheck with your torpedo level, and adjust. Add sand under the low side of the base, or use a rubber shim on hard surfaces.
Birds aren't visiting yet
Give it time. Birds in an area with no existing water source may take a few days to a couple of weeks to discover a new bath. Make sure the water is fresh (stale water won't attract them), keep it at the right depth, and make sure the location isn't too exposed or too close to heavy foot traffic. If birds still seem hesitant, you can compare your setup to a youtube how to make a bird bath video to double-check depth, freshness, and placement. Adding a small solar-powered dripper or wiggler creates movement on the water surface, which birds detect from a distance and find irresistible. That single addition often dramatically speeds up adoption.
The bath is too tall or too short for the birds in your yard
Standard pedestal baths sit around 24 to 36 inches off the ground, which suits most songbirds and gives cats less easy access. Ground-feeding birds like doves, robins, and towhees often prefer a bath much lower, practically at ground level. If you want to attract both, consider adding a second shallow dish at ground level in a separate spot rather than compromising the height of your main pedestal bath.
The basin cracked during assembly or after installation
Concrete and cast resin bowls can crack if over-tightened during the bolt-and-washer assembly or if dropped. Small cracks can sometimes be sealed with aquarium-safe silicone sealant, which is non-toxic once cured. Larger cracks usually mean replacing the basin. This is a good argument for buying a bath with a separately replaceable basin, which many mid-range and higher-end models offer.
What type of bath to choose for your situation
If you're still deciding on which style to buy before installing, here's a quick comparison of the most common types and how they affect installation.
| Bath Type | Installation Difficulty | Stability | Best Surface | Notes |
|---|---|---|---|---|
| Pedestal (concrete) | Easy to moderate | High once ballasted | Soil, grass, gravel | Heavy, less likely to blow over, harder to move |
| Pedestal (resin/plastic) | Easy | Moderate (needs ballast or staking) | Soil, grass, patio | Lightweight, easier to reposition |
| Staked pole style | Easy | High in firm soil | Soil, lawn | Check soil firmness first, great for garden beds |
| Ground-level dish | Very easy | Low (no anchoring) | Any flat surface | Best for ground-feeding birds, higher predator risk |
| Hanging bath | Moderate | High (suspended) | Overhead structure needed | No ground prep, great for small spaces |
For most people installing their first bird bath, a mid-weight resin pedestal with ground stakes is the sweet spot. It's light enough to adjust if your first location doesn't work out, stable enough when properly staked and ballasted, and durable enough to last several seasons without the cracking risk of cheap lightweight plastic or the weight challenges of full concrete. If you're the type who wants to experiment with placement before committing, start with a staked resin model. If you want something permanent and low-maintenance, a concrete pedestal on a well-prepped gravel base is hard to beat.
If building your own appeals to you, there are great options beyond buying a kit. If you're looking for the DIY version, this guide also walks you through how to make a bird bath in Minecraft. Making your own bird bath from found materials, repurposed dishes, or hypertufa concrete lets you customize depth and size. But for a same-day install, a purchased unit is the practical choice.
You're set. If you're still wondering how to make a bird bath from scratch, follow the same steps but choose materials and a basin shape that work for the depth and stability you want how to make a bird baths. Pick your spot, prep the ground, assemble in place, ballast and stake it, check the level, fill to about an inch and a half of water, drop in a rock, and step back. The hardest part is waiting for the first bird to show up, but once they find it, they'll be back every single day.
FAQ
Can I install a bird bath on grass without stakes?
Yes, but only if the legs or base have a way to resist tipping. For a staked pedestal, use the stake holes as designed, and on pavers or concrete add a rubber mat or non-slip pads under the feet. Avoid relying on ballast alone if the basin rocks, since that can injure birds and loosen joints over time.
What should I do if my bird bath keeps sinking after it rains?
Remove loose debris from the area, then add a drainage-focused layer under the base. If you notice the ground stays wet after rain, excavate 4 to 6 inches, replace with compacted coarse gravel, and reset the base. This fixes sinking that simple leveling cannot solve.
How deep should the water be if my bird bath is deeper than 2 inches at the center?
Use the right water depth for the species you want, typically about 1 to 1.5 inches in the basin for small and medium songbirds. If your bowl is sculpted or naturally deep at the center, raise the effective floor with a flat smooth rock or submerged brick so small birds can step in confidently.
Can I move a bird bath after it has been installed (and filled)?
You can, but it usually backfires unless the bath is already stable and level. It is safer to empty it, then reposition, because carrying a filled pedestal can cause wobble, cracked bowls, or loosening of stake holes. After moving, recheck level with the bowl in place.
How much ballast do I need for a hollow-base pedestal bird bath?
For pedestal baths, you generally need only enough ballast to prevent the unit from wobbling and tipping once filled. Fill hollow bases with sand, gravel, or small rocks as the model specifies, then verify by pushing the pedestal near the top in multiple directions. If it moves, add ballast or soil and restake rather than adding more water.
My bird bath rocks slightly, how do I fix wobbling?
If it wobbles, first confirm the base is level in both directions, then check whether stakes are reaching firm ground. Add coarse gravel around the base before re-staking, or replace short stakes (under about 8 inches) with longer landscaping stakes of the same diameter. Also make sure you angle stakes slightly outward for better grip.
What kind of rock should I place in the bird bath, and where should it go?
A small rock in the basin helps birds perch, but don’t use sharp or porous stones that can crumble. Keep rocks smooth and fist-sized, and avoid making the center so crowded that birds cannot access the shallow bathing area.
Why is the water turning green or dirty so fast?
A common culprit is algae and sediment buildup from sun exposure, feeder debris, or infrequent cleaning. Keep the bath in partial shade, keep it at least 10 feet from bird feeders, and follow a daily refill with fresh water plus weekly disinfecting and brushing with a stiff brush (no household cleaners or bleach).
Can I use soap or disinfectant to clean a bird bath?
If you see a strong algae pattern, reduce time in full afternoon sun and increase the cleaning consistency rather than using chemicals. When cleaning, scrub with a stiff brush and rinse thoroughly with cold water, then let it air dry before refilling to slow regrowth.
How can I attract both ground-feeding birds and small songbirds?
Yes, a second shallow dish at ground level can attract doves, robins, and towhees without compromising the height of your main pedestal bath. Place it separately so the shallow option does not create competition or disturb birds already using the pedestal.
What location issues cause birds to ignore the bath?
Choose a spot with an escape-friendly approach, meaning birds can enter and leave quickly through nearby trees or shrubs, but with enough distance from dense cover to reduce cat ambush risk. If your yard has heavy foot traffic, shift the bath slightly so birds feel safe during approach and bathing.
How can I speed up the time it takes for birds to start using the bath?
If you want quicker adoption, add gentle water movement early and keep everything else ideal. A solar-powered dripper or wiggler is especially helpful, since movement draws birds from a distance. Combine it with fresh water daily and the correct shallow depth so the movement doesn’t mask poor water conditions.