The easiest bird bath you can make today is a shallow ceramic or plastic plant saucer set on top of an upturned terra cotta pot. That's genuinely it. But if you want something sturdier, more attractive, or better suited to your yard, there are a handful of solid DIY options that cost anywhere from nothing to about $30 and take less than an afternoon. This guide walks you through all of them, from choosing the right size and style to picking a good location, assembling the parts, and keeping the water clean enough that birds actually show up.
How to Make a Bird Bath: Step-by-Step DIY Builds
Marcus Henley
22 Mar 2026

Picking the right type and size before you build
Before you buy a single thing, decide which style fits your yard and your goals. The four main types are pedestal (a bowl on a stand), in-ground or ground-level, hanging, and mounted. Most DIY builds fall into the pedestal or ground-level category, and either works well for attracting birds.
Size matters more than most people think, and the key measurement is depth, not width. Audubon recommends keeping the water no more than 2 inches (5 cm) deep, and ideally around 1 to 1.5 inches (2.5 to 3.8 cm) for the shallow edges where smaller birds will stand. All About Birds puts it this way: no deeper than 1 inch at the edges, sloping to a maximum of 2 inches in the center. Birds are not strong swimmers, and a bath that's too deep will be ignored. The basin diameter can range from about 12 inches for a small setup to 24 inches or more for a garden centerpiece. A 16 to 18-inch diameter bowl is a practical sweet spot for most backyards.
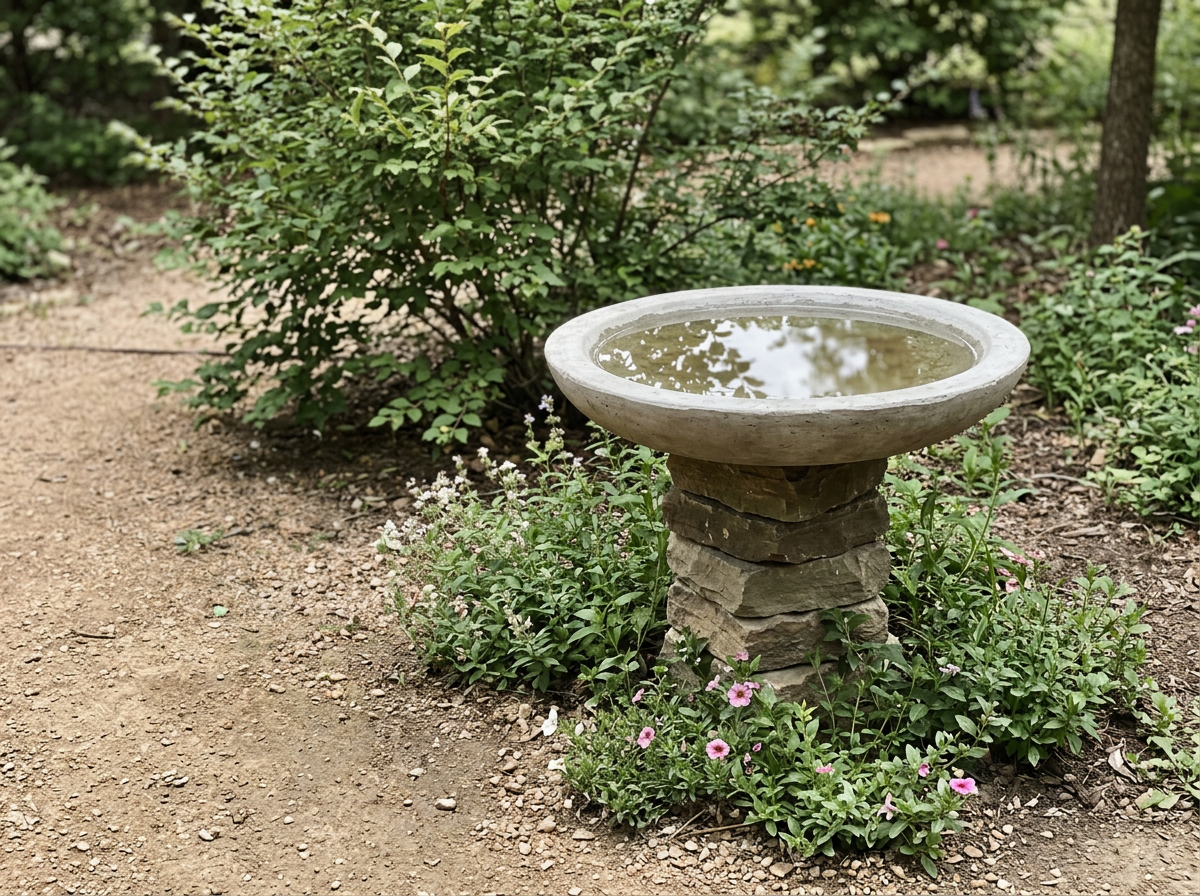
For height, traditional pedestal baths sit around 24 to 36 inches off the ground, which puts birds at a height where they can see predators approaching. Ground-level baths work too, especially for robins and other ground-foraging birds, but they require more vigilance about cat access. If cats are a serious problem in your yard, go with a pedestal.
| Type | Best For | DIY Difficulty | Typical Cost |
|---|---|---|---|
| Pedestal (pot + saucer) | Most yards, beginner builds | Very easy | $5–$20 |
| Ground-level (in-ground or flat) | Natural look, robins, thrushes | Easy to moderate | $0–$30 |
| Hanging | Small spaces, balconies | Easy | $5–$15 |
| Stone/concrete | Permanent feature, large gardens | Moderate | $15–$40 |
Where to put it and how to set it up
Placement is one of the biggest reasons bird baths go unused. Put yours within 10 to 15 feet of shrubs or trees so birds have a perch to fly to after bathing, but keep it at least 6 feet away from dense cover that could hide a cat. Full sun heats the water fast and encourages algae, so a spot with morning sun and afternoon shade is ideal in most climates. If you're in a hot region, shade matters even more.
Set the bath on a level surface so it doesn't tip and so the water depth stays consistent across the bowl. If you're using a pedestal design, make sure the base is stable. A wobbly bird bath scares birds away. For ground-level builds, dig or level the area so the bowl sits flush and doesn't rock. Adding a large flat rock or a few smaller stones inside the bowl gives birds a safe, textured surface to stand on, which most birds strongly prefer over a smooth slippery basin.
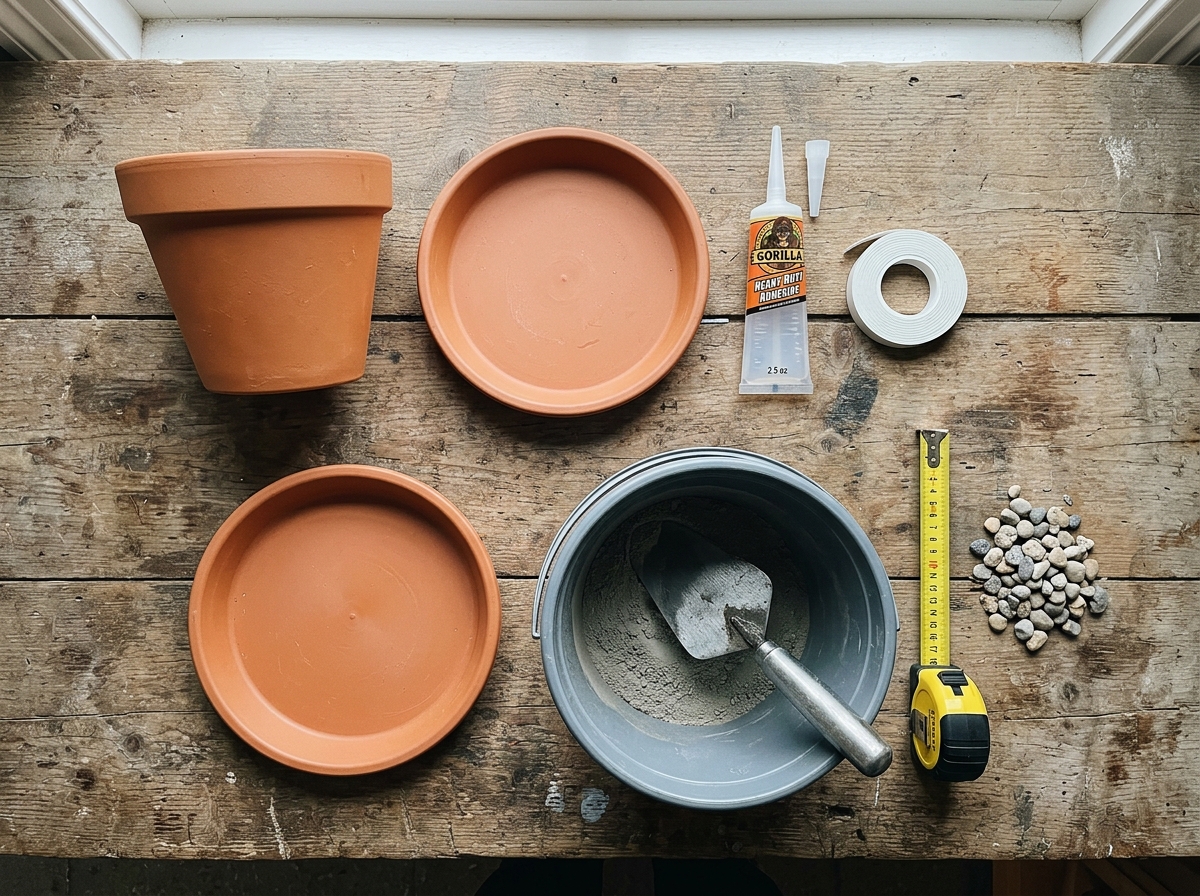
Materials and parts you'll need
For the most popular DIY pedestal build, the shopping list is short. Here's what covers the majority of projects in this guide:
- A shallow bowl or basin (plant saucer, mixing bowl, old wok, terracotta dish, or purpose-made bird bath bowl replacement): 12–24 inches in diameter, 1.5–2 inches deep at the deepest point
- A base or stand (upturned terracotta pot, stacked pavers, a section of PVC pipe, a wooden post, a concrete block, or a repurposed lamp base)
- Waterproof adhesive or non-toxic outdoor silicone sealant if you want to bond the bowl to the stand
- Flat rocks, gravel, or river stones to place inside the bowl for bird footing
- Exterior paint or non-toxic concrete sealer if finishing a raw concrete or terracotta bowl
- A dripping water source (optional but highly effective): a recycled plastic bottle with a small hole, a solar fountain pump, or a misting attachment
- Replacement bowl: if your existing basin cracks, standard plant saucers in 12, 16, and 18-inch sizes are cheap and easy to swap in
If you're building a stone or concrete bird bath, also pick up a bag of quick-setting concrete mix, a flexible plastic mixing tub to use as your mold, and a trowel. That covers the ground-level builds described later in this article.
Simple DIY builds you can actually finish today
The pot-and-saucer build (fastest and cheapest)
This is the one I tell everyone to start with. Grab a large terracotta pot (the 12- to 14-inch size works well) and flip it upside down. Set a wide, shallow terracotta or plastic plant saucer on top. That's your <a data-article-id="EBC02D39-8145-4E8C-A64D-560DF51654C2">bird bath</a>. You can glue the saucer down with outdoor silicone if you want it to stay put. If you are wondering how to install bird bath styles like this pot-and-saucer setup, the same basics of leveling and positioning apply. Paint the pot if you want it to look less like a pot. Total cost at a garden center or hardware store is usually $8 to $15. Birds don't care that it's a pot.
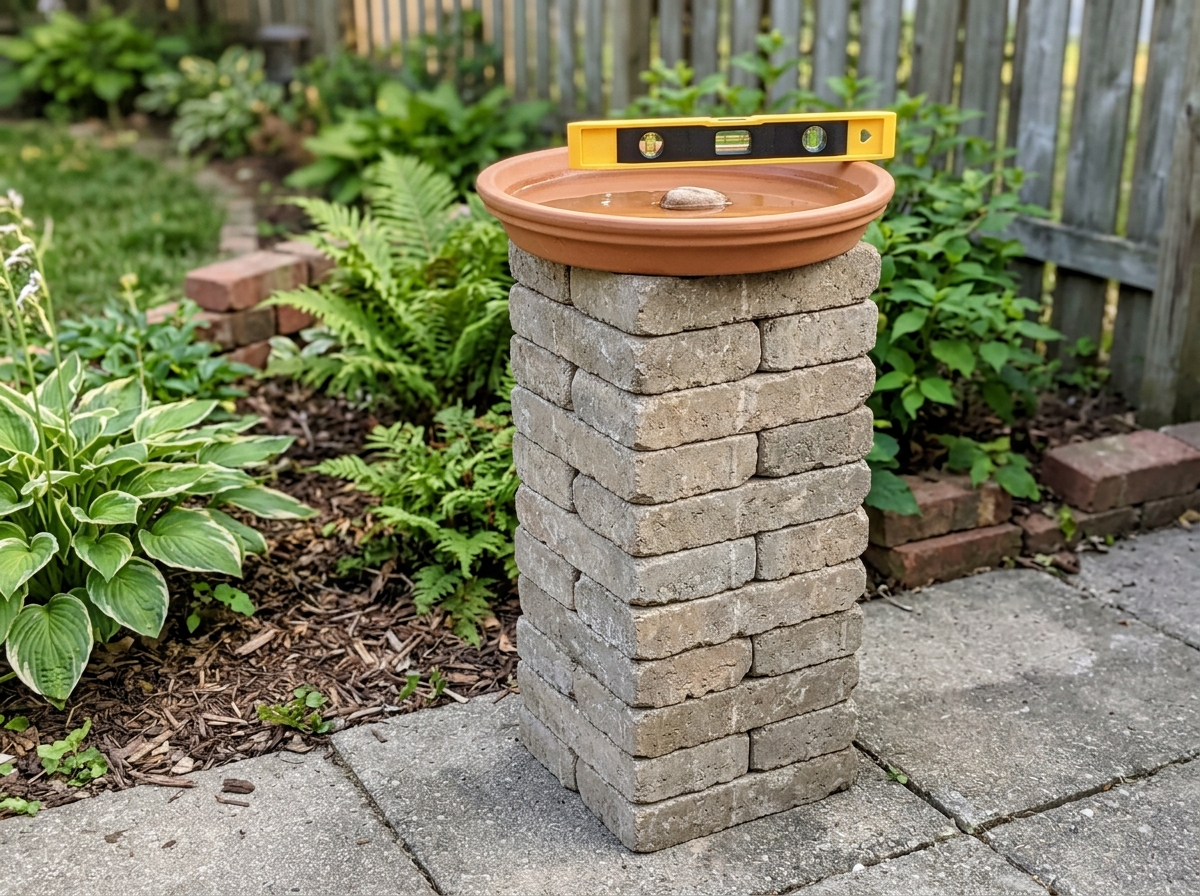
The stacked paver bird bath
Stack three or four concrete pavers or landscape stones to your desired height. Set a wide, shallow bowl or large plastic saucer on top. No tools required. You can use construction adhesive between the pavers to lock them in place. This looks great in a garden bed, blends in naturally, and costs next to nothing if you have leftover pavers. The base is rock solid and won't tip over in the wind.
The bucket bird bath (ground-level)
Take a 5-gallon bucket and fill it with concrete mix, packing it firmly. Before the concrete sets, press a large shallow plastic bowl or a flexible plastic saucer into the top center so it forms an impression, then remove it once the concrete is partially cured. When the concrete is fully dry, set the bowl back into the impression. The concrete base is heavy enough that it won't move, and the removable bowl can be lifted out for cleaning. Alternatively, sink the bucket base slightly into the ground for a more natural look.
The garden bird bath from a large planter
A wide, shallow ceramic or glazed garden planter with no drainage hole (or one sealed with silicone from the inside) makes an excellent low garden bird bath. Set it directly on the ground or on a low riser. Fill with 1 to 2 inches of water, add some flat stones, and you're done. This is a great option if you already have a spare planter sitting around.
Stone and in-ground bird bath options
If you want something that looks more permanent and built-in, a stone or concrete bird bath is the way to go. These take a bit more effort but they last for years and look great in a garden.
Simple concrete bowl
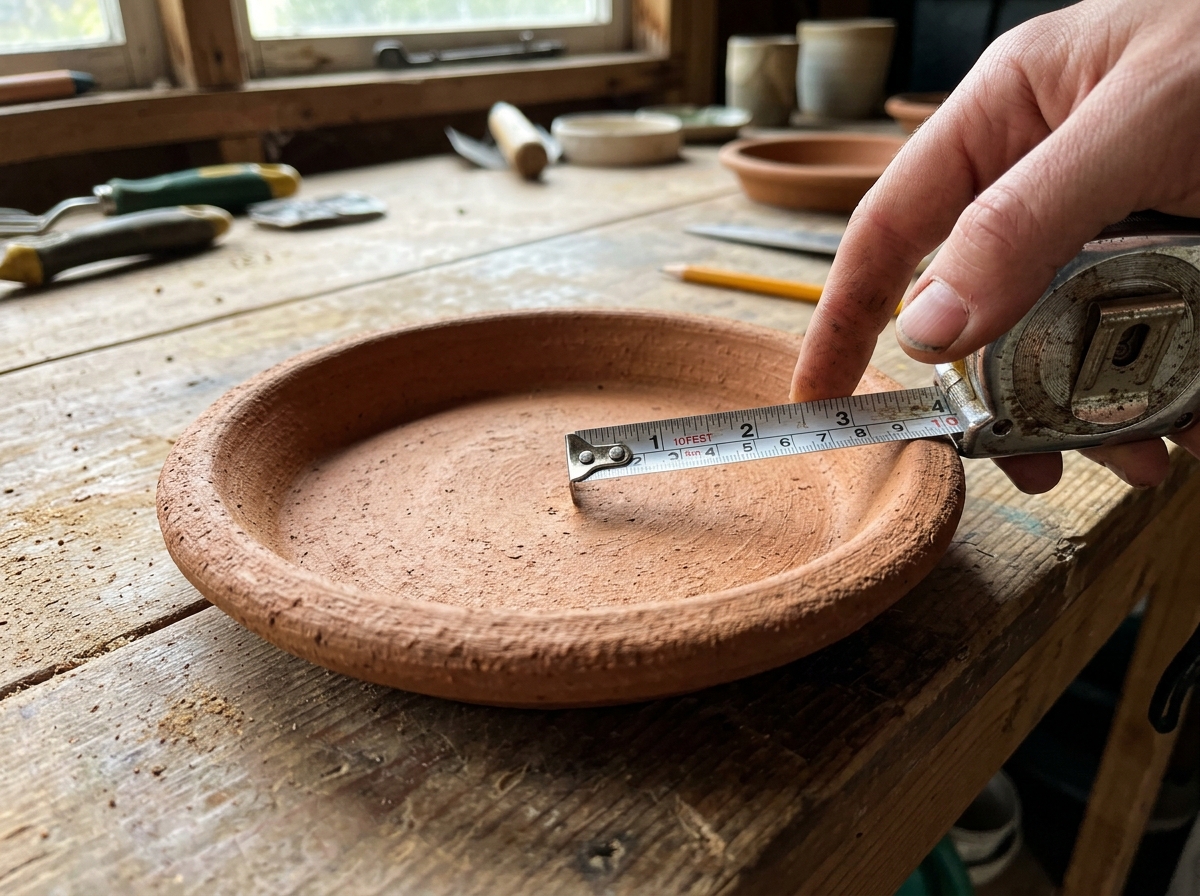
Mix a bag of quick-setting concrete according to the package directions. Line a flexible plastic tub or mixing bowl (the mold) with a thin layer of petroleum jelly so the concrete won't stick. Pour the concrete in to a depth of about 1.5 to 2 inches. Smooth the surface and, before it sets, press a smaller bowl into the center to create the basin depression. Let it cure for at least 24 to 48 hours, then remove the mold and the inner form. Sand any rough edges. Seal the surface with a non-toxic concrete sealer or two coats of exterior masonry paint. Set it on your stand or directly in the ground.
In-ground bird bath
For a truly ground-level option, dig a shallow depression in your garden about 18 to 24 inches across and no more than 2 inches deep at the center. Line it with a flexible pond liner or use your concrete bowl directly in the ground. Add flat stones around the edges for a natural look and a few inside for bird footing. Fill with water and you have a natural-looking in-ground bath. The main maintenance challenge with in-ground baths is keeping debris out, so placing them away from trees that drop a lot of leaves helps.
Large leaf stepping stone bath (decorative)
This is a popular project that produces a beautiful result. Press a large leaf (elephant ear, rhubarb, or hosta leaves all work well) face-down on a mound of damp sand. Mix concrete and pour it over the back of the leaf about 1.5 to 2 inches thick. Let it cure for 24 hours, then peel away the leaf. The veins leave a detailed impression in the concrete. Seal it and use it as a shallow ground-level bath or set it on a pedestal. If this style interests you, there's a more detailed breakdown on making elephant ear bird baths worth checking out.
Step-by-step assembly: bowl, base, and stand
Whether you're building the simple pot-and-saucer version or a concrete pedestal, the assembly process follows the same basic sequence. Here's a clean walkthrough that covers all the main builds:
- Choose and prepare your bowl: check that it is no deeper than 2 inches at its deepest point. If it's too deep, add a layer of gravel or mortar to raise the floor. If it's smooth, roughen the interior surface with sandpaper or add flat stones for bird traction.
- Build or prepare the base/stand: for a pot stand, flip your chosen pot and check that it sits level. For a paver stack, lay each paver on a flat surface and check stability. For a concrete base (bucket method), mix and set the concrete now so it can cure before use.
- Test the height: stand the base up and set the bowl on top. The rim of the bowl should sit somewhere between 18 and 36 inches off the ground for a pedestal style. Adjust the base height if needed.
- Secure the bowl to the base (optional): apply a bead of non-toxic outdoor silicone sealant or construction adhesive around the top rim of the base where the bowl will rest. Press the bowl down firmly and let it cure for the time listed on the adhesive packaging.
- Seal any raw concrete or terracotta: if your bowl or base is unglazed concrete or terracotta, brush on a non-toxic concrete sealer or two coats of exterior masonry paint. Let it dry completely before adding water.
- Add texture inside the bowl: place a few flat river stones or a handful of coarse gravel in the bowl so birds have a non-slip surface to stand on.
- Position the finished bath: move it to your chosen spot, check that it sits level, and adjust as needed before filling.
How to fill, use, and maintain your bird bath
Once the bath is built and placed, the job is not quite done. How you fill and maintain it determines whether birds actually use it. The good news: it's simple. If you are dealing with a problem already in your yard, follow these tips on how to fix the bird bath in virtual families so it stays usable for birds.
Filling the bath correctly
Fill the bath with plain tap water. Don't add any soaps, cleaning chemicals, or additives to attract birds. The ideal fill level is 1 to 1.5 inches at the shallow edges, with the center no deeper than 2 inches. That's it. Pour water slowly over the stones so you can see the depth easily, and stop before it reaches the lip of the bowl. In hot weather, you may need to top it off daily since evaporation is fast. In freezing temperatures, either bring the bowl inside or use a safe bird bath de-icer to keep the water liquid.
Making it more attractive to birds
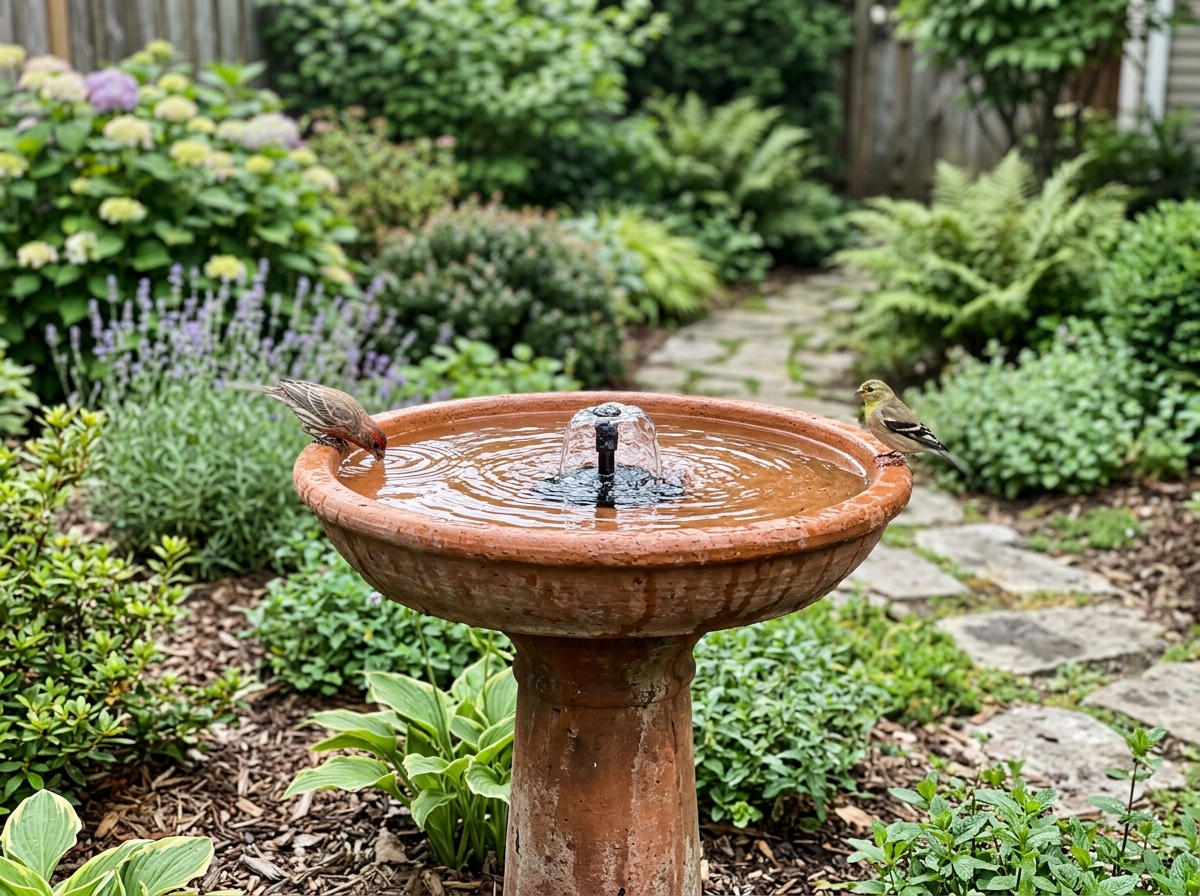
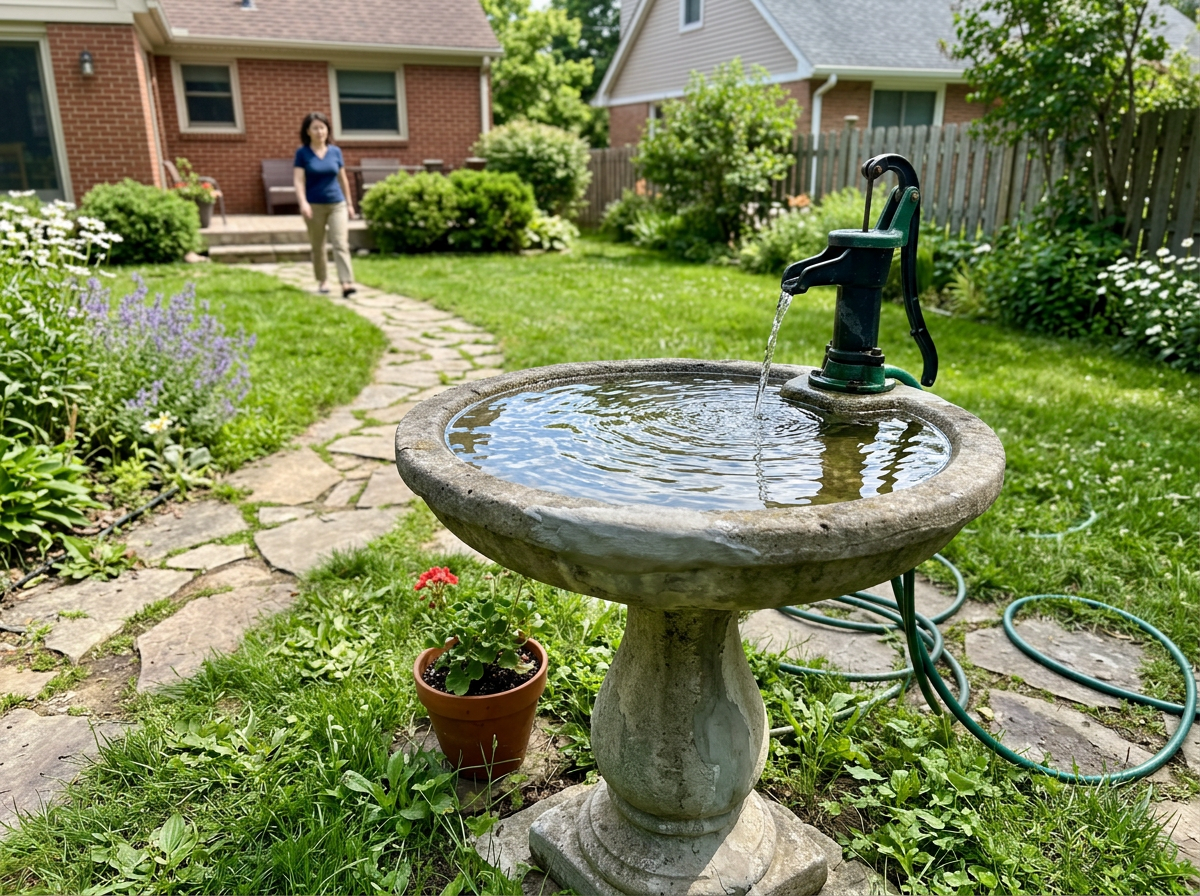
Moving water is the single most effective thing you can do to attract more birds. Even a slow drip from a recycled plastic bottle with a pinhole at the bottom hung above the bath works surprisingly well. Birds detect moving water by sound and will come from farther away to check it out. A small solar-powered fountain pump ($15 to $25 online) takes this further and also helps prevent stagnant water. Beyond water movement, just keeping the bath consistently full and clean is what brings birds back repeatedly.
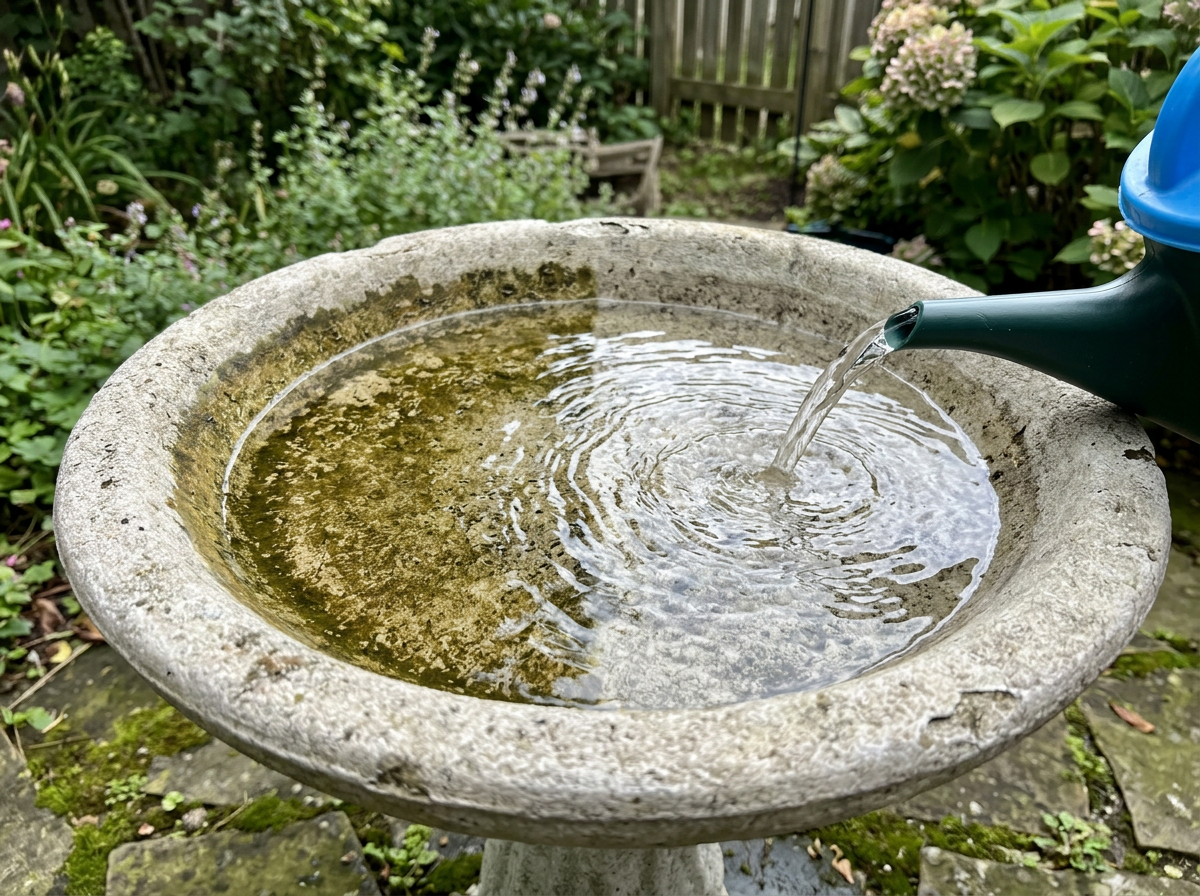
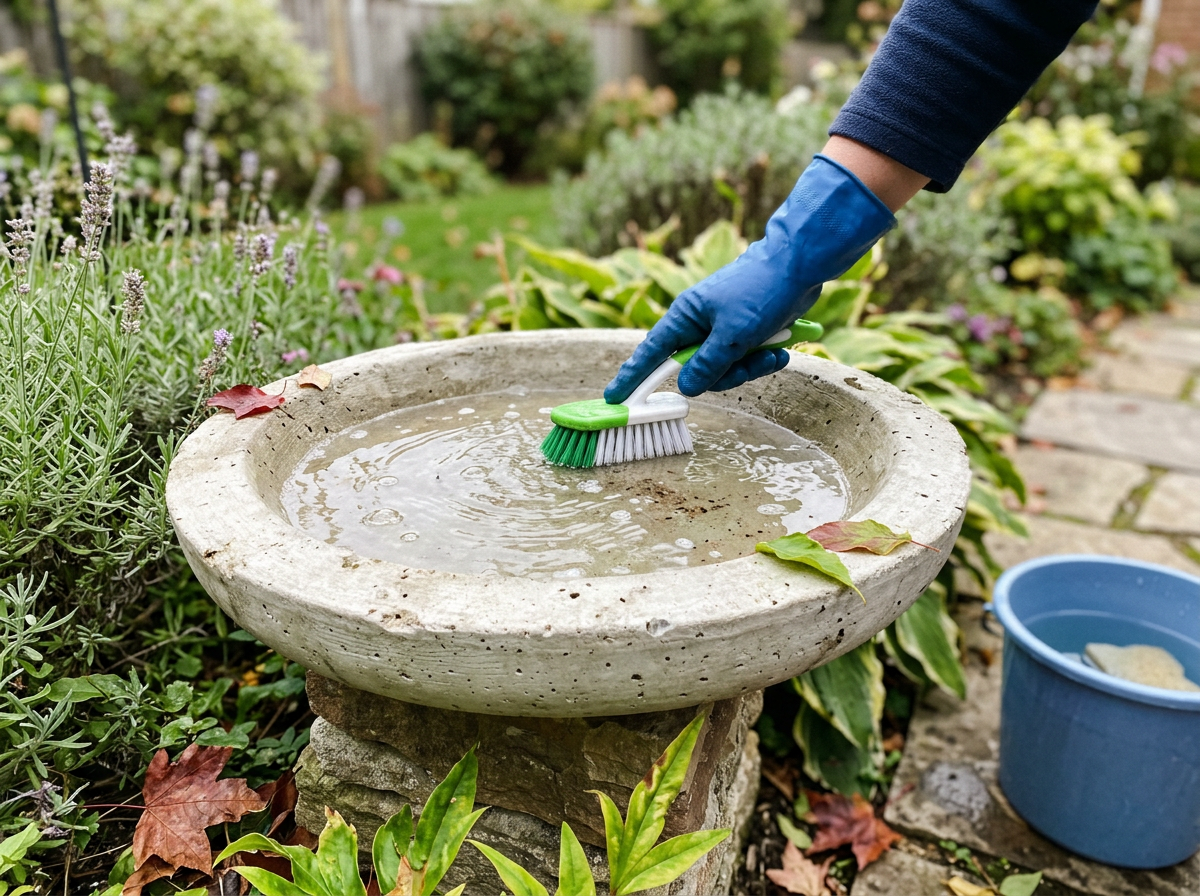
Cleaning schedule and algae control
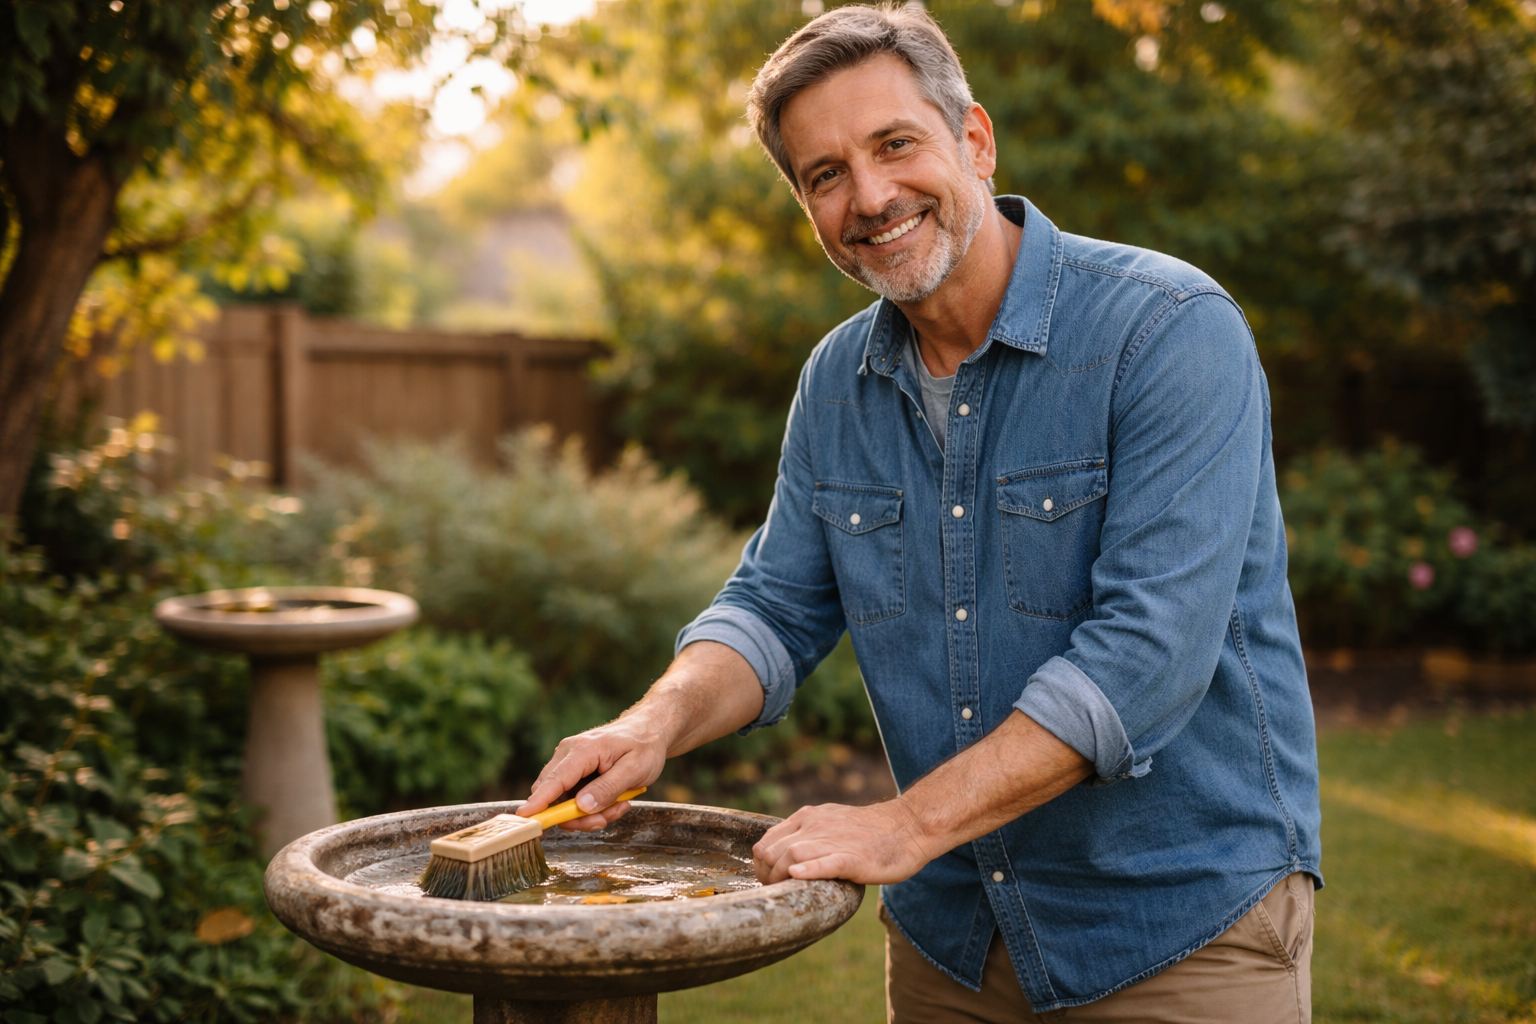
Change the water every two to three days in warm weather, and every day in summer heat. Algae can grow within 24 to 48 hours in direct sun. To clean the bath, dump out the old water, scrub the bowl with a stiff brush (an old scrub brush works fine), rinse thoroughly, and refill. About once a week, do a deeper clean using a 9:1 ratio of water to white vinegar or a diluted bleach solution (1 part bleach to 9 parts water). Scrub, rinse at least twice until you can't smell any bleach or vinegar, and then refill. Never use dish soap or detergent in a bird bath. The residue is harmful to birds.
Seasonal maintenance
In spring and summer, your main jobs are keeping the water level up and cleaning regularly. In fall, watch for leaves dropping into the bath. In winter, if you live in a cold climate, birds still need liquid water when natural sources are frozen. A low-wattage birdbath heater or de-icer (around $20 to $30) is worth having if temps regularly drop below freezing. If you built a concrete bath, bring it inside for winter in very cold climates to prevent cracking from freeze-thaw cycles. Terracotta and unglazed ceramic are especially vulnerable to this, so either cover them or store them between November and March.
The whole system is low-maintenance once you get the routine down. Build the simplest version first, get it set up, and see which birds start visiting. If you want to make a do it yourself bird bath that blends in and lasts, start with the simplest pot-and-saucer plan in this guide. You can always upgrade the bowl, add a pump, or build a fancier version later. The birds will tell you what's working.
FAQ
What water depth should I use if I’m making a bigger bird bath for multiple species?
Use shallow edges and keep the center only slightly deeper. Aim for about 1 to 1.5 inches at the standing area, and do not exceed roughly 2 inches at the deepest point. If your bowl is naturally deep, add flat stones (not smooth marbles) so birds can wade rather than swim.
Is it okay to add river stones, sand, or gravel to the bottom?
Flat stones are best for footing. Avoid fine sand or loose gravel that can drift and collect debris, and skip anything sharp or easily overgrown with algae. Keep the water depth measured from the top of the stones, so it still stays within the shallow range.
How often should I clean a bird bath if it’s in full sun?
Expect quicker algae growth. In full sun, plan on a more frequent refresh, often every day during warm weather. If you see green film forming, dump, scrub with a stiff brush, rinse thoroughly, and refill right away to reset the surface before algae spreads.
Can I use soap, vinegar, or bleach all in the same cleaning session?
No. Choose one cleaner per session and rinse until there is no lingering smell. Mixing chemicals can leave residues or create irritants. After the last rinse, refill with plain tap water only.
What’s the safest way to prevent freezing without harming birds?
Use a bird-bath de-icer or heater that’s made for birds, and avoid open flame or makeshift heating that could create hot spots. If your bath is unglazed terracotta or concrete, consider removing it or protecting it when freeze-thaw is frequent, since trapped water can crack the material.
Do birds drink the water or only bathe in it?
Both. Many birds will sip between bathing bouts, so the cleanliness matters even more than you might expect. Keep the water fresh and avoid adding any chemicals or treatments, because residues can be harmful to birds that drink the same water.
How do I keep mosquitoes from breeding in my bird bath?
Frequent water changes are the most reliable fix, especially during warm weather. If you notice larvae, dump and scrub the bath promptly. Also, avoid placing the bath where debris collects, since organic matter supports mosquito growth.
My bird bath is getting visits but birds look hesitant. What’s usually wrong?
Common causes are a slippery basin, unstable or wobbly placement, or water that’s too deep. Add a textured stone footing layer, ensure the base is level, and re-check depth at the edges. If predators are an issue, move the bath closer to visible perches like shrubs but keep it away from dense hiding cover.
Should I paint or seal a concrete bird bath?
Sealing helps reduce staining and roughness, which makes cleaning easier. Use a non-toxic concrete sealer or exterior masonry paint designed to be safe around plants and animals, and let it cure fully before filling with water. After sealing, do one trial fill and dump to ensure no odor or residue remains.
Can I mount a bird bath to a fence or wall?
Yes, but stabilization is key. Make sure the base is secure and cannot shift, and verify the basin stays level so depth stays consistent. Also keep it in a safe placement range, near perches for escape, and away from areas cats can access from above.
What should I do if my in-ground bird bath keeps filling with leaves and debris?
Position it away from heavy leaf drop, and consider adding a simple cleaning routine more often than you would for above-ground baths. Use a small scoop or net to remove floating debris between full water changes, since decaying leaves quickly foul the water.
How can I encourage more birds to use the bath after building it?
Start simple: place the bath where birds already move, within about 10 to 15 feet of cover for an easy escape route. Add gentle water movement, such as a small drip, and keep the bath consistently filled to the correct shallow depth. Give it a few days, because birds often scout before committing to repeated visits.
Next Articles
Do It Yourself Bird Bath Plans: Simple Bath to Fountain
Build simple DIY bird bath or fountain with materials list, step-by-step plans, placement, maintenance, and winter tips.
How to Fix the Bird Bath in Virtual Families
Fix a nonworking bird bath in Virtual Families with quick steps, interaction checks, placement tips, and next troublesho

How to Make a Bird Bath in Minecraft Step-by-Step
Step-by-step guide to build a Minecraft bird bath with water-block tricks, materials, placement tips, and fixes for comm