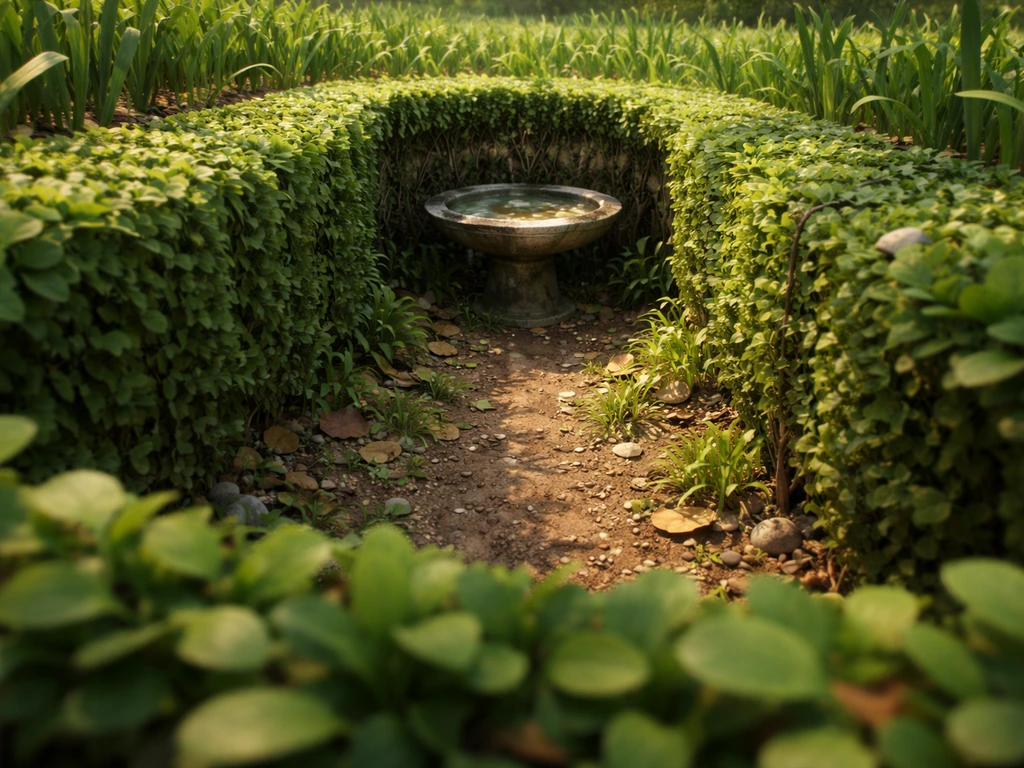
To level a concrete bird bath, set it on a stable surface, check it with a 4-foot spirit level or a laser level, then add or remove material under the base (leveling sand, gravel, rubber shims, or mortar) until the basin reads level in all directions. Lock it in place so it can't rock or shift, then fill it and confirm the water sits at a consistent depth of 1 to 3 inches across the bowl. That's the whole job.
How to Level a Concrete Bird Bath Step by Step

Marcus Henley
9 Jun 2026

What follows is exactly how to get there, step by step, whatever surface you're working with. Follow these instructions and you’ll know exactly how to get on top of the bird bath so it stays level and usable for the birds.
Why leveling your bird bath actually matters
A tilted bird bath isn't just an eyesore. It causes real problems for the birds you're trying to attract and for you as the person maintaining it. When a concrete basin sits even a few degrees off level, water pools deeply on one side while the other side goes nearly dry. Birds landing on the shallow side have no water to bathe in. Birds stepping into the deep side risk going in over their depth, which is dangerous for smaller species. Wildlife guidance from Oklahoma and UF/IFAS recommends a gradual slope to a central depth of roughly 1 to 2 inches, with the shallowest edges acting as a dry perimeter for landing. A tilted bath destroys that design almost immediately.
Beyond bird safety, an unlevel bath is harder to keep clean. Standing water concentrates on the low side, creating the perfect stagnant conditions that algae and mosquitoes love. Mosquitoes need a completely still surface to lay eggs, so any low spot that holds old water is a breeding ground. Proper drainage also depends on level placement: if you're doing a periodic water change, a level bath empties and refills evenly rather than leaving a residue puddle in the low corner. And in winter, a tilt that traps water in one spot speeds up freeze-thaw cracking in the concrete. Getting the bath level is genuinely the foundation of everything else you'll do to maintain it.
Assess before you fix anything
Before you grab a shovel or a bag of sand, spend five minutes diagnosing exactly what's wrong. The fix for a bath sinking into soft soil is completely different from the fix for a bath sitting on an uneven concrete pad, and using the wrong approach just means repeating the job in six months.
Check the basin first

Remove the basin from the pedestal if your bath has a two-piece design. Place a spirit level directly across the inside of the bowl in two directions: front-to-back and side-to-side. If the basin itself reads level when it's sitting flat on a known-level surface like your garage floor, the problem is in the pedestal or the ground beneath it, not the basin. If the basin reads off even on a flat surface, you may have a warped or chipped base flange, which will need shimming or grinding down. Most of the time the basin is fine and the issue is below.
Diagnose the ground or substrate
- Soil base: Press firmly around the pedestal foot. If the ground gives, you have a settling or soft-soil problem. You'll need to excavate and create a proper gravel-and-sand foundation rather than just shim the surface.
- Paver or flagstone base: Check each paver or stone for rocking. Even one slightly high or low paver throws the whole bath off. Press on the corners of each stone to feel for movement.
- Concrete pad or slab: Lay a long straightedge or level across the slab surface. Look for high spots, cracks, or low depressions. An uneven slab usually needs shims or a mortar bed under the pedestal.
- Gravel base: Gravel is forgiving but can migrate over time. Rake the surface and check whether the base layer has hollowed out under the pedestal foot.
- Look for the cause of tilt: Is the whole bath leaning one direction (a ground settlement issue)? Is it rocking on a single high point (a surface imperfection issue)? Or is the pedestal itself cracked or chipped at the base (a structural issue)? Each has a different solution.
Tools and materials you'll need
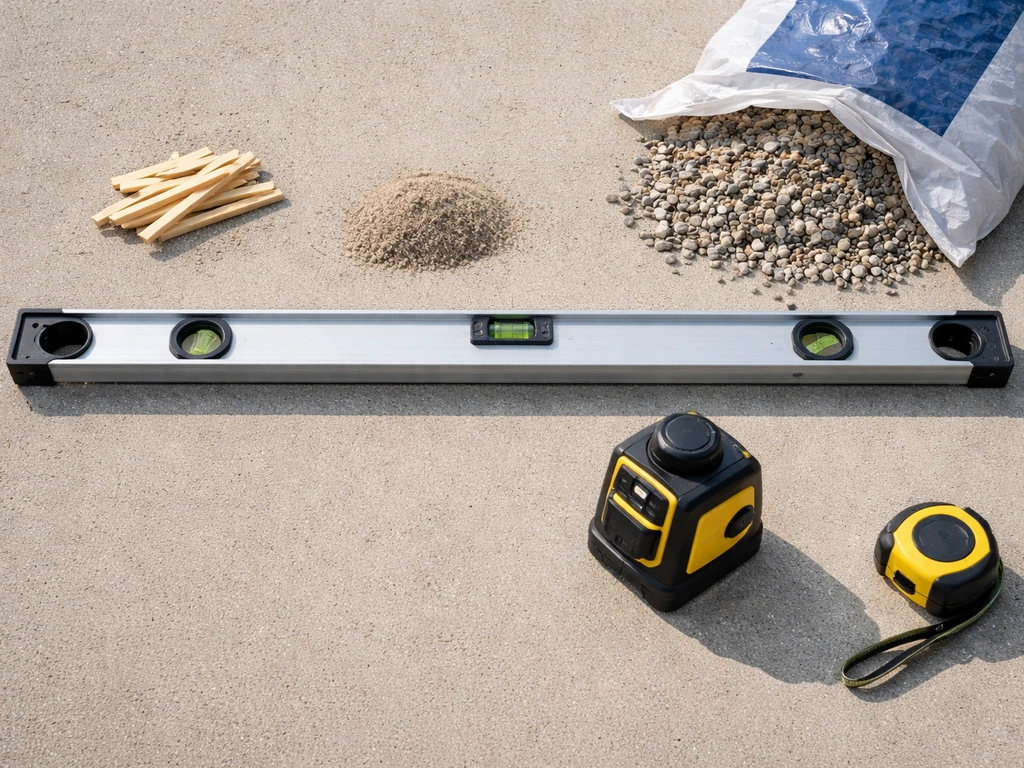
Gather everything before you start. Moving a concrete bird bath repeatedly is slow, heavy work, and you don't want to stop halfway through.
| Item | What It's For | Best Surface |
|---|---|---|
| 4-foot spirit level | Checking level in two axes across the basin | All surfaces |
| Laser level (auto-leveling) | Projecting a reference plane across the work area for ground prep | Soil, gravel, large pads |
| Coarse leveling sand (concrete sand) | Creating a flat, compactable bedding layer under the pedestal | Soil, gravel, pavers |
| Crushed gravel or paver base | Excavated foundation layer beneath sand for drainage and stability | Soil-based installations |
| Rubber or composite shims | Filling small gaps under pedestal on hard surfaces without mortar | Concrete pads, flagstone |
| Mortar or setting compound | Permanently bedding a pedestal on a concrete or stone surface | Pads, existing slabs |
| Non-shrink grout | Filling voids under the base flange when mortar isn't quite enough | Concrete pads |
| Rubber mallet and tamper | Compacting sand and seating pavers or pedestal | Sand, gravel installs |
| Screed board or 2x4 | Striking off leveling sand to a consistent height | Sand bedding installs |
On tool choice: a standard 4-foot spirit level is enough for most bird bath leveling jobs. If you're building up a new gravel-and-sand foundation from scratch, a laser level is genuinely useful for getting the base plane right before you start, especially on sloped ground.
This Old House recommends using a laser level for large areas and notes that different surfaces may require specific techniques to achieve the desired leveling accuracy a laser level is genuinely useful for getting the base plane right before you start. Laser levels project a horizontal reference line you can measure against at any point in the work area, which beats stretching a string line.
An auto-leveling model from any hardware store in the $30 to $80 range is fine for this kind of work.
Step-by-step: leveling a concrete bird bath
These steps are written for a two-piece concrete bath (pedestal plus basin) on a soil or gravel base, which covers the majority of situations. Variations for hard surfaces are noted where the process differs.
- Empty the basin completely and remove it from the pedestal. Set it aside on a flat surface. You're working with the pedestal and base from here until the last step.
- Mark the current pedestal position with chalk or a bamboo stake so you have a reference point. If the bath has been sinking, you'll want to know how much grade you're working with.
- Lift the pedestal off the ground and set it aside. Inspect the contact area: look for soft spots, standing water, root intrusion, or previously failed attempts at shimming.
- Excavate if necessary. For a soil base, dig down at least 4 to 6 inches within a footprint slightly larger than the pedestal base. For a stable installation, you want at least 3 to 4 inches of compacted crushed gravel at the bottom, topped with 1 to 2 inches of coarse leveling sand. This matches standard paver installation practice and gives you a firm, draining foundation.
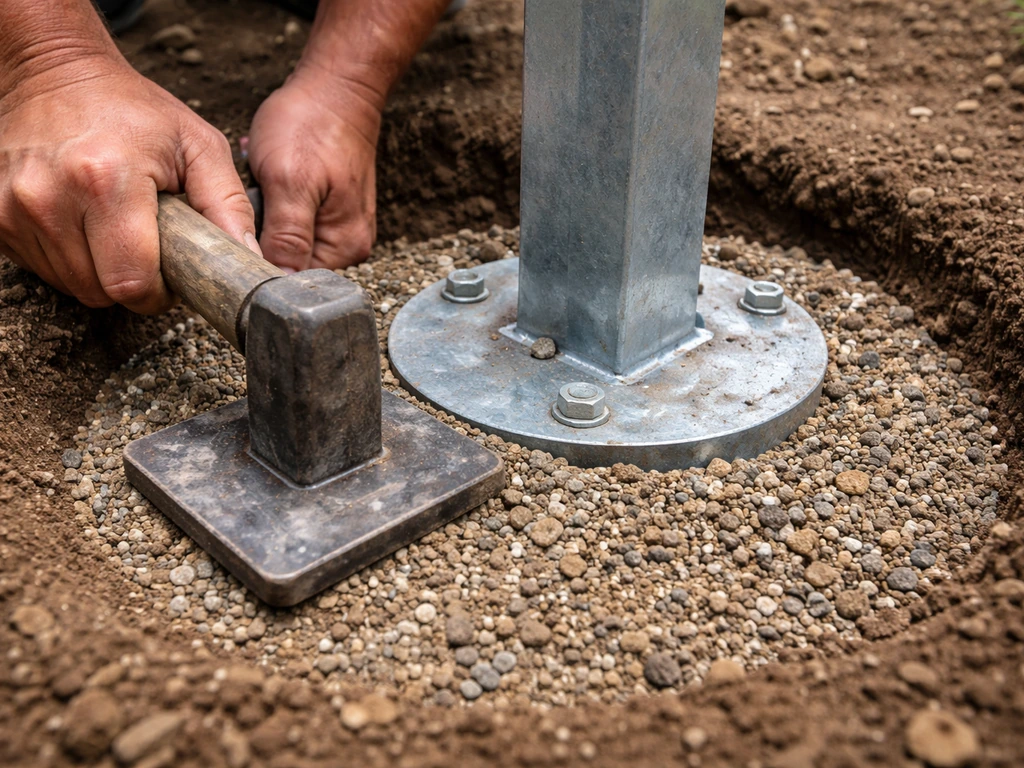
- Compact the gravel layer firmly with a hand tamper. This step matters: loose gravel lets the pedestal sink unevenly all over again.
- Add your sand layer and use a screed board to pull it flat. Check it with your level or laser level. You want the sand surface level in all directions before the pedestal ever touches it. Adjust as needed by adding or removing sand.
- Set the pedestal back onto the leveled sand. Press it in gently so it seats without rocking. Place your spirit level across the top of the pedestal in two perpendicular directions. If one side reads high, press that side down slightly into the sand. If a side reads low, lift and add a small amount of sand underneath.
- For a concrete pad or slab: skip the excavation steps. Instead, set the pedestal and check the level. Mark the high and low points. Slide rubber or composite shims under the low side of the pedestal base until the level reads true. For a permanent fix, bed the pedestal in a thin layer of mortar or non-shrink grout: wet the concrete surface, trowel on the mortar, set the pedestal, check level immediately, and adjust before the mortar sets. Hold the pedestal steady for several minutes and don't disturb it for at least 24 hours.
- For a paver or flagstone base: identify which paver is causing the tilt. Lift that paver, add or remove sand beneath it, reseat it with a rubber mallet, and re-check. Sometimes a single paver with a high corner is the entire problem.
- Once the pedestal reads level, carefully set the basin back on top. Check the basin level again: front-to-back and side-to-side. Most concrete basins seat repeatably on the pedestal, but occasionally there's a small imperfection in the mating surfaces. If the basin rocks, identify where the high contact point is, and use a masonry file or angle grinder to lightly dress the pedestal top or basin base until full, even contact is achieved.
- Fill the basin with water to your intended operating depth (about 1.5 to 2 inches for most songbirds) and visually confirm the water sits at a consistent level across the full bowl. That visual check is the real confirmation that everything is right.
Locking it in so it doesn't wobble again
Getting the bath level is only half the job. To make your bird bath cat proof, focus on stable placement and reduce accessible hiding or climbing spots around the pedestal cat proof bird bath. A concrete bath that's level today but wobbles in a month just means repeating everything.
If you also mean how to keep a bird bath from rocking or wobbling while you use it, secure the pedestal and re-check level after a few minutes how to get on top of the bird bath. Securing the bath is closely related to anchoring and stabilization work that I'd also apply when I'm worried about a bath tipping over entirely in wind or on a slope. If you need the full process, see how to anchor a bird bath so it stays stable through wind and normal use.
If you need help with placement and electrical considerations, see how to get to bird bath grounded for the related steps and safety notes related tips. For a complete walkthrough on how to anchor a bird bath, follow the steps for your surface type so it stays secure in wind and weather anchoring and stabilization work. The approaches vary a bit depending on your surface.
On soil or gravel
The compacted gravel-and-sand base is your main defense here. Once the pedestal is seated and level, tamp the sand around the base perimeter so the foot is slightly recessed into the surface rather than sitting on top of it. You can also pour a thin collar of concrete or mortar mix around the pedestal base to lock it in place. Use a dry-mix approach: pour the dry mix around the base and wet it with a slow trickle of water, which cures in place without disturbing the position. Don't fully encase the base in concrete if you ever want to move the bath, just a stabilizing collar is enough.
On a hard surface
If you bedded the pedestal in mortar, the cure time (24 to 48 hours) is your security. Don't fill the basin until the mortar has set. For shim-based setups on a slab, use a construction adhesive rated for masonry to bond the shims in position, then optionally apply a bead of flexible polyurethane caulk around the perimeter of the pedestal base to seal the joint and prevent water from getting under the base and freezing there.
The basin-to-pedestal connection
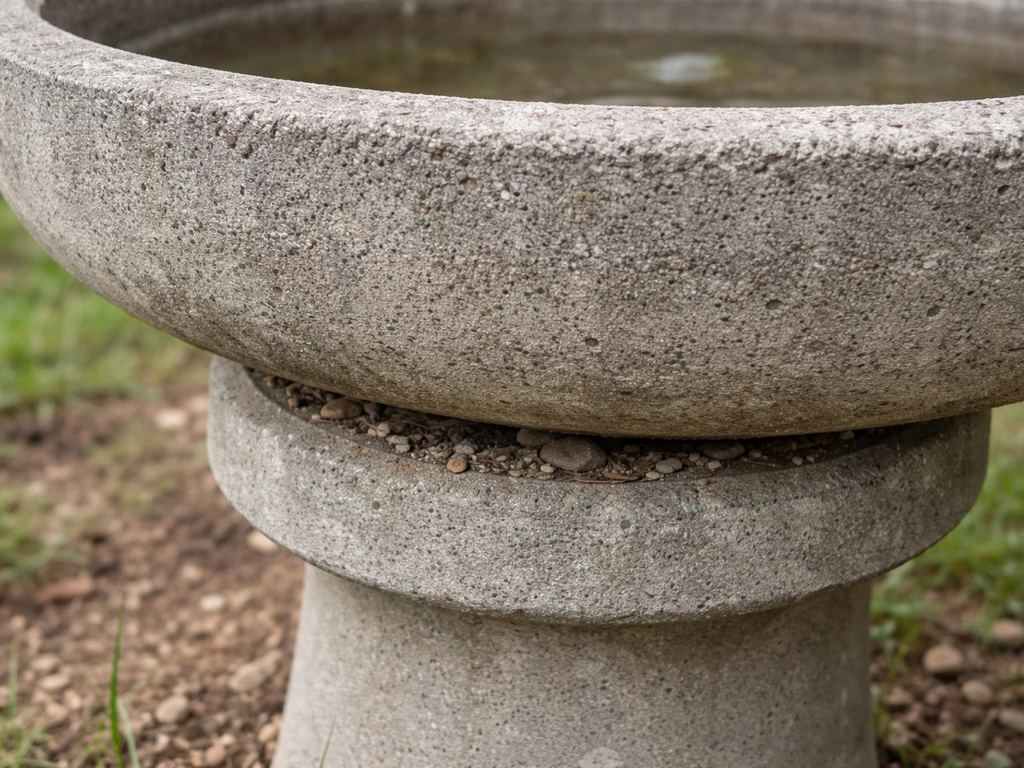
Most concrete bird baths don't mechanically fasten the basin to the pedestal, they just rest there by weight. That's usually fine, but if your basin has a tendency to shift (cats, wind, curious crows), a dab of outdoor silicone or construction adhesive on the pedestal top will hold it in place while still allowing removal for cleaning.
Don't use a rigid, permanent bond on the basin: you need to lift it for cleaning, and cracking a concrete basin trying to free it from an over-secured pedestal is a genuinely painful mistake. TCC Materials markets Landscape Loc Mulch & Rock Bond as an environmentally safe and non-toxic locking compound intended to stabilize ground cover environmentally safe and non-toxic locking compound to stabilize ground cover.
Test it before you call it done
Fill the basin fully and walk away for a few minutes, then come back and look at the water line. If it's level and consistent around the full circumference of the basin, you're done. While you're at it, do these quick checks:
- Water depth: Aim for 1 to 2 inches in the center of the bowl for small songbirds. Larger species like robins and mourning doves can handle up to 3 inches, but shallower is safer and more broadly accessible. If the basin is deeper than that by design, add a flat stone or a purchased bath rock to give birds a shallower entry point.
- Drainage check: Tip a small amount of water over the edge deliberately and watch it drain away from the base. You don't want water pooling at the pedestal foot, which leads to frost heaving in cold climates.
- Rocking test: Press firmly on opposite edges of the basin with your hands. There should be zero movement. Any rocking means you have a contact-point issue between basin and pedestal, go back and identify the high spot.
- Visual bird-access check: Stand back and look at the bath from bird height (roughly 6 to 18 inches above the rim). The water line should be clearly visible from a landing bird's approach angle, and the rim should have a dry edge wide enough for a bird to perch before stepping in. A level bath restores the gradual-slope design that works exactly this way.
- Stability under load: Press down firmly on the pedestal itself. The whole unit should feel completely solid, no wobble, no give.
Still not right? Quick troubleshooting
If the bath still isn't level after going through these steps, resist the urge to just shim it again. Go back to the foundation. In my experience, a bath that keeps going out of level has a drainage problem under the base: water is getting under the gravel layer, saturating the soil, and the pedestal is sinking unevenly with freeze-thaw cycles or rain.
The fix is re-excavating to a greater depth (6 to 8 inches rather than 4) and ensuring at least 4 inches of well-compacted gravel with positive drainage away from the base. On a slab, a bath that won't sit level usually means the slab itself is settling or cracked, and a masonry shim-and-mortar approach is a temporary fix until the slab is addressed.
Maintenance once the bath is level

Leveling the bath sets you up for much easier maintenance going forward, but it doesn't run itself. Here's what to stay on top of to keep things clean, safe, and functional.
Water changes and algae prevention
Change the water at least every three days, and more often during warm weather when algae grows fast. To keep water in a bird bath, you also want a steady level so you can drain and refill completely without leaving low, stagnant pockets behind. A level bath helps here because you can empty it completely without leaving a stagnant puddle in a low corner, which is exactly where green slime takes hold first.
When you do a full scrub (weekly in summer is a good target), use a stiff brush and a dilute white-vinegar solution or a small amount of dilute bleach, rinse thoroughly, and refill. The CDC recommends emptying and scrubbing at minimum once a week specifically to prevent mosquito breeding. Algae tends to be less aggressive in a bath that doesn't have stagnant low spots, so a level basin genuinely reduces how often you'll be scrubbing.
Mosquito control
Mosquitoes need completely still water to lay eggs. The most effective deterrent is simply keeping the water moving: a solar-powered fountain head or a small dripper attachment keeps the surface agitated and makes the bath far less attractive for egg-laying. Beyond movement, the regular water change schedule is your backup: mosquito eggs hatch in roughly 48 to 72 hours, so emptying and refilling every three days breaks the cycle before larvae can develop. A level bath that drains cleanly is easier to empty fully each time, which removes any existing eggs along with the water.
Freezing and winter drainage
If you're in a climate with hard freezes, the drainage you set up at the base leveling stage matters a lot in winter. Water that pools under the pedestal foot will freeze, expand, and lift the bath out of level all over again. Make sure your base has a slight grade away from the pedestal in all directions, even just half an inch of fall over a foot.
A heated bird bath de-icer is a great addition in cold climates: it keeps water available for birds through winter, but it also keeps water moving slightly, which reduces freeze-thaw stress on the concrete basin. If you leave a concrete bath through a freeze-thaw cycle with standing water in the bowl, that water will eventually work into micro-cracks in the concrete and chip the surface.
Either use a de-icer, cover the basin, or drain and turn the basin upside down for the season.
Re-check level seasonally
Every spring, set your level back on the basin and confirm it hasn't shifted. If you are looking for where is the bird bath in Grounded, it is located at a specific spot you can find once you know which area to check. Soil-based installations in particular will move with freeze-thaw cycles, and catching a small shift early (a quick sand adjustment) is far easier than dealing with a bath that's been sinking all season. This check takes about two minutes and saves a lot of headaches. While you're at it, look at the pedestal base for any cracking, frost heaving, or erosion that might undermine the foundation you built.
FAQ
How do I level a bird bath if I do not know whether my patio slab or garage floor is perfectly flat?
Use the slab as a reference only long enough to diagnose. Place the level on a known-straight edge or rail across several points, then re-check with the level turned 180 degrees (same spot, opposite direction). If both readings agree, the reference is consistent enough to locate whether the pedestal or basin is the issue. If readings contradict across nearby points, assume the slab is the culprit and plan to re-shim or address the settling area rather than chasing the level endlessly.
Can I level a bird bath by putting shims only under one side or corner?
Avoid point-shimming. A concrete pedestal needs an even support plane, so concentrate on bringing the entire base area into a single level relationship. If one corner keeps dropping, the fix is usually under the base (soft subgrade, missing compacted gravel, drainage water) rather than adding thickness to that one spot.
What should I do if the basin itself is warped or chipped and it will not read level even on my flat floor?
If the basin is the thing that reads out of level on a clearly flat surface, leveling underneath will not correct the functional slope across the bowl. Options are to shim the basin between it and the pedestal top in small, controlled increments, or replace the basin if the damage is significant. Also inspect the pedestal top surface for irregularities that could be transferring the mismatch to the basin.
How can I check level after I fill it, without relying only on eyesight?
After filling, take a second reading by checking the waterline height at several points around the circumference. A practical method is to mark the outside of the bowl at a few clock positions, then compare how close the water reaches those marks. If you have access to a laser, you can also project a horizontal line and measure from the rim to the water surface at multiple points.
How long should I wait before using the bird bath after leveling and setting the pedestal in mortar?
Do not fill immediately. Wait through the full set time used for your mortar, typically 24 to 48 hours, before adding water. Filling early can shift the pedestal and also trap moisture where it can expand and destabilize the base during temperature swings.
Is it safe to fully encase the pedestal base in concrete to prevent wobble?
Usually no, if you might need to move the bath later. A full encasement can lock the pedestal rigidly into a foundation that may shift slightly with freeze-thaw, leading to cracking or an inability to correct the level. A stabilizing collar, plus proper drainage and compacted gravel, is generally a better long-term approach.
My bird bath is level today but starts rocking after a few days. What is the most likely cause?
The foundation likely settled or the base area was not tamped evenly. Re-check level and inspect for gaps between the pedestal foot and the surrounding material. The fastest correction is usually to adjust and re-tamp the material around the pedestal perimeter, then re-check with the level after the bath has been stable for a few minutes.
What is the best way to improve drainage if the bath keeps going out of level?
Treat it as an under-base drainage problem, not a shimming problem. Re-excavate to greater depth, ensure at least several inches of well-compacted gravel beneath, and verify the grade directs water away from the pedestal. Without that, water can saturate soil under one side and cause uneven sinking with freeze-thaw cycles.
How much slope is okay for birds, and how do I keep from making the bath tilt too much?
Aim for a gentle design that creates a central drinking depth while keeping the edges shallower, but you still need the basin level as a whole for consistent bathing depth across the bowl. If you observe a deep pool on one side, that is too much tilt. Use the level reading as your primary constraint, then fine-tune only if you are intentionally restoring a known “center-focused” water depth pattern.
Do I need a heated de-icer if I already cover the basin during winter?
Covering helps, but a de-icer can reduce freeze-thaw stress by keeping water available and slightly agitated. If you cover, also make sure water is not trapped under a cover in a way that promotes freeze expansion around the pedestal. In practice, many people choose either a de-icer or seasonal draining and an upside-down flip, depending on their freeze severity and how well they can prevent standing water from accumulating.
How often should I re-check that my bird bath stayed level, and what should I look for around the pedestal?
Re-check once per season, ideally spring, and again after extreme weather (heavy rain, hard freezes). Look for signs of movement like cracks at the pedestal base, frost heaving, or erosion of the material surrounding the foot. Early correction is usually just a small base adjustment, while ignoring it can lead to more extensive sinking.
Next Article
Where Is the Bird Bath in Grounded: Location Guide
Find the Grounded bird bath location fast with clear routes, access requirements, and fixes if you cannot spot it.