The fastest fix for a bird bath that keeps tipping is to get it on truly level ground and secure the base so it can't shift. Some retail assembly documents also warn that the bird bath should only be used on blank" rel="noopener noreferrer">a flat, level surface, treating levelness and stability as a safety requirement. Sunnydaze product manuals also advise placing the birdbath on a flat, level surface blank" rel="noopener noreferrer">get it on truly level ground. After you’ve leveled and stabilized the base, you can also anchor the bird bath itself so it stays put in wind and rain. That usually means one or more of these: packing or leveling the soil beneath the base, shimming a concrete pad, anchoring with ground stakes or masonry bolts, or swapping a lightweight bowl for a heavier one. Which approach you actually need depends on what type of bird bath you have and what your yard surface looks like, and I'll walk you through the whole thing below.
How to Keep a Bird Bath From Falling Over: Fixes That Work

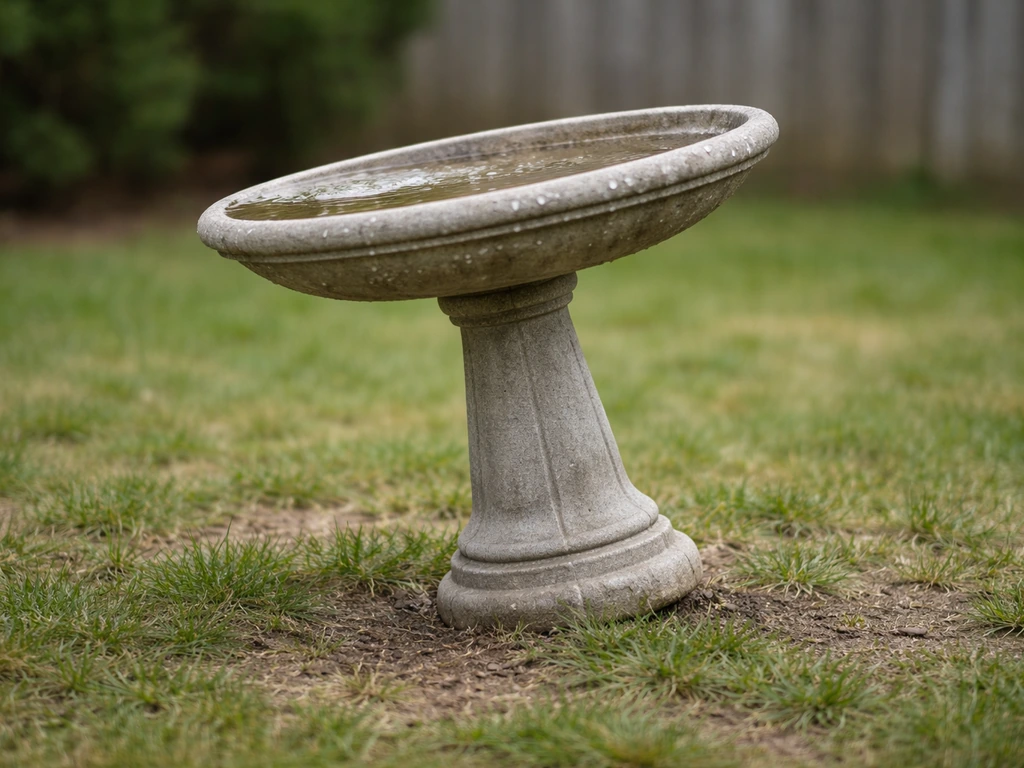
Why bird baths tip over in the first place
Before you start throwing fixes at the problem, it helps to know exactly what's causing yours to tip. Most cases come down to a handful of culprits.
- Uneven or soft ground: The most common cause by far. Soil settles, shifts after rain, and compresses unevenly under the weight of the base. A small lean at ground level becomes a big lean at the bowl.
- Lightweight construction: Raised metal or plastic pedestal baths are often surprisingly light. Even a moderate wind gust can knock them over, especially when the bowl is only half full.
- A slippery or smooth base contact point: Some pedestals have a glazed, flat bottom that slides easily on pavers or packed dirt. Nothing is actually anchoring it in place.
- Wind and animal activity: Squirrels climbing up the pedestal, dogs brushing past, or a sustained wind from an exposed position are all common mechanical causes.
- Improper placement: Putting the bath on a slope, on grass that's actively growing under the base, or too close to foot traffic areas increases tip risk significantly.
- Missing or failed mounting hardware: Some pedestal baths have pre-drilled holes or set screws designed to anchor to a base or slab — and a lot of people just skip that step entirely.
A quick diagnostic: if water is consistently pooling on one side of the bowl rather than sitting flat, that tells you the base has shifted or was never truly level to begin with. That's your starting point.
How to stabilize a bird bath: base types and what actually works
Different base designs need different stabilization approaches. Here's a quick breakdown before we get into step-by-step fixes.
| Base Type | Main Tip Risk | Best Stabilization Approach |
|---|---|---|
| Concrete or stone pedestal | Uneven ground, poor soil contact | Level the surface, use a concrete slab, anchor with masonry bolts if needed |
| Lightweight metal pedestal | Wind, narrow base footprint | Ground stakes/anchor spikes, weighting the base, protected placement |
| Plastic pedestal | Wind, sliding on hard surfaces | Drill base and anchor with tap-in bolts or masonry screws, add grip pads |
| Self-standing (flat-bottom bowl) | Sliding on slick surfaces | Non-slip mat, recessed gravel bed, or adhesive grip pads |
| Hanging or post-mounted | Post instability, soft soil | Deeper post setting, concrete footing around post base |
The general principle across all of them is the same: start at the ground, work upward, and mechanically connect things where you can. Temporary solutions like stacking rocks around the base are not reliable, they shift too and won't stop a hard tip.
Step-by-step fixes for the most common scenarios
Scenario 1: Pedestal bath on soil or grass

- Clear the area. Remove any grass, mulch, or loose material under and around the base footprint. You need to work with actual soil.
- Check level. Place a small bubble level on the bowl or across the top of the pedestal. Note which direction it reads low.
- Compact or build up the surface. If the ground is soft, tamp it down firmly. If it's low on one side, add packed gravel or sand and tamp again. Keep checking the level as you go.
- Set the pedestal and re-check. Place the base back down and confirm it reads level in two directions (front-to-back and side-to-side).
- Anchor it. For a concrete or heavy stone pedestal, drive two or three metal ground anchor stakes (the L-shaped or spiral type sold for garden furniture) into the soil right against the base edges. For a plastic pedestal, drill two small holes through the base flange and screw in long tap-in anchor bolts directly into the compacted soil or use spiral ground anchors with a strap.
- Fill the bowl and watch. Check that water sits evenly. If it still pools to one side, the ground under one side of the base has a remaining low spot — add a thin shim of flat stone or packed gravel under that side and re-check.
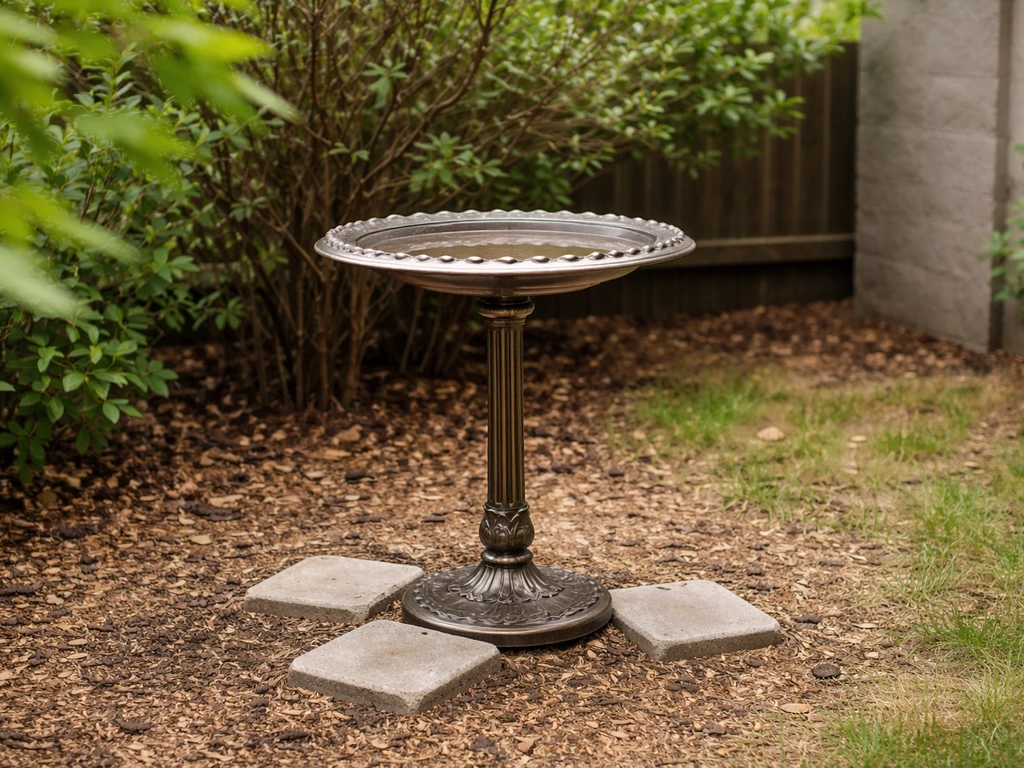
Scenario 2: Pedestal bath on a patio, deck, or concrete pad
- Confirm the surface is actually level. Patios slope slightly for drainage, which can be enough to tip a tall pedestal. Use a level to check.
- Add grip. Place a non-slip rubber mat or rubberized shelf liner under the base. This prevents sliding without any drilling.
- For a permanent install, anchor with masonry hardware. Drill through the pedestal base (if it has pre-drilled holes, use those) and into the concrete with a masonry bit. Insert a masonry screw with plug or a tap-in anchor bolt. Snug it down — don't overtighten on ceramic or stone bases or you risk cracking.
- If the patio surface has a slight slope, use plastic or rubber shims under the uphill side of the base to bring the pedestal plumb, then apply the grip mat on top of the shims.
Scenario 3: Lightweight metal or plastic bath in a windy spot
- Move it to a more sheltered position first if possible — a fence line, a wall corner, or a large shrub nearby can dramatically reduce wind load.
- Add a concrete paver or stepping stone base. Set one or two large flat pavers level in the ground (flush with or just above the grass line), then place the bath on top. The mass helps.
- Use spiral ground anchor stakes driven into the soil around the base perimeter, then run a short length of coated wire or zip-tie through the base flange holes to the anchors. This is especially useful for metal baths with a wide-flange base.
- Consider adding a small amount of weight inside a hollow pedestal column if your design allows access. Sand, gravel, or a zip-locked bag of wet sand tucked inside the column will lower the center of gravity significantly.
Scenario 4: Heavy concrete or stone bath that's shifted over time
Heavy baths rarely blow over, but they do tilt as the ground beneath them slowly shifts or compresses unevenly. The fix here is more about re-leveling than anchoring. If you are wondering how to level a bird bath, start by adjusting the base so the water sits flat, then repeat the check after a week re-leveling. Carefully tip the bath to one side (get a helper for anything over 50 lbs), scrape out the settled soil or add packed gravel to the low side, then set it back and check level. For a permanent fix, pour a small concrete slab, even a 12-inch square, 3 to 4 inches deep, and let it cure fully before placing the bath on top. You can then anchor the pedestal into the cured slab with masonry bolts for a very stable, long-term setup.
Choosing the right placement to prevent re-tipping
Even the best anchoring job will fail if the bath is in a bad location. If you are wondering where the bird bath is in Grounded, check the location guide for the map or mission marker details where is the bird bath in Grounded. Placement affects how much mechanical stress the bath experiences every day, and getting it right means less maintenance and re-leveling over time.
- Level ground is non-negotiable: Every major manufacturer specifies a flat, level surface. If your yard is sloped, you need to either dig in and create a level platform with pavers or gravel, or find a flatter spot.
- Avoid active lawn areas: Grass growing under the base will slowly lift and tilt it over one season. Use compacted gravel, a paver, or bare soil under and around the base.
- 10 to 15 feet from trees and shrubs: This distance gives birds a clear approach and quick escape routes, but it also reduces how often squirrels and cats use nearby branches or cover to launch themselves at the bath. Fewer collisions mean fewer tip events.
- Partial shade is worth prioritizing: A shaded spot isn't just better for water quality — it also tends to be more sheltered from direct wind than a fully open area.
- Avoid high-traffic paths: The more people, dogs, and kids walking near the bath, the more bumps it absorbs. Give it at least 3 to 4 feet of clearance from any regular walkway.
- Good drainage around the base: Don't place the bath in a low spot that collects water after rain. Saturated soil under the base is one of the fastest ways to get a leaning pedestal within a few weeks.
DIY anti-tip upgrades you can do today
You don't need a lot of tools or materials to make meaningful improvements. Here are the most effective DIY approaches ranked roughly from easiest to most involved.
Shims and leveling pads
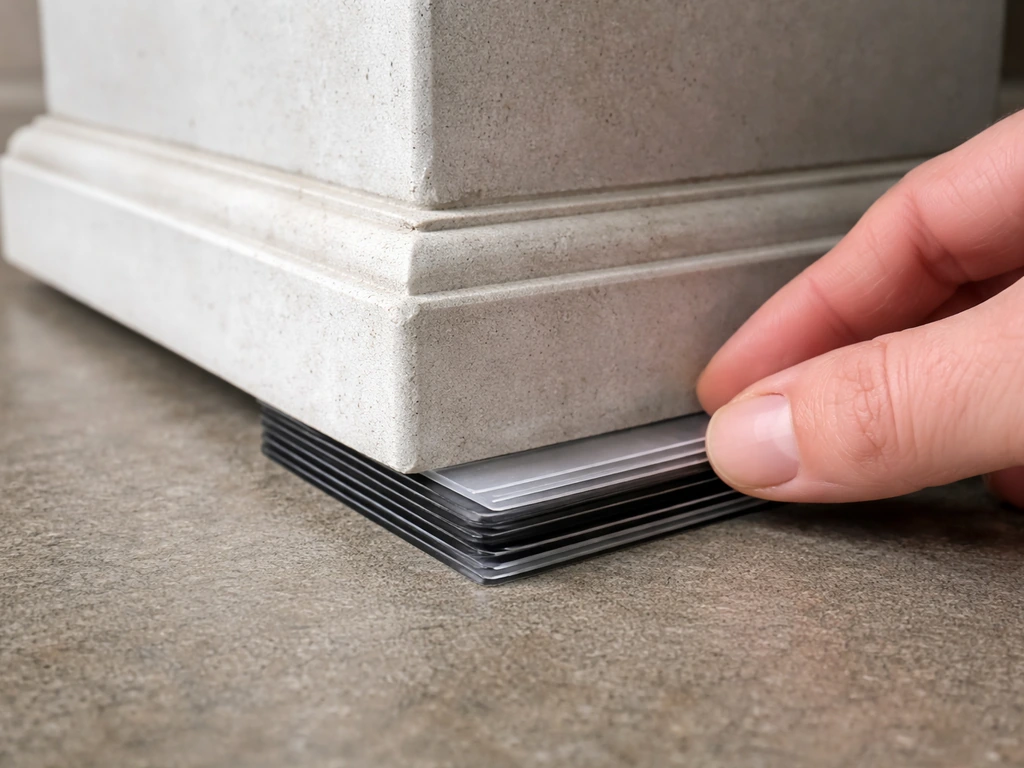
For a quick fix on a hard surface, plastic or rubber shims (the kind used under furniture or appliances) work well under the low side of a pedestal base. Stack them until the bath reads level, then check again after a week to see if they've compressed. Flat pieces of bluestone or slate cut to size are a more durable version of the same idea.
Ground anchor stakes
Spiral or L-shaped metal ground stakes driven into the soil directly against the outside of the base are one of the simplest mechanical anchors available. If you're wondering how to get to bird bath grounded, focus on stabilizing the base on truly level ground and then anchoring it with ground stakes or bolts depending on your surface. Drive two or three around the base perimeter and they'll prevent sideways movement without any drilling into the bath itself. For plastic or lightweight metal baths, you can also run a loop of coated steel cable through the base holes and connect it to the stakes.
Drilling and bolting (for permanent installs)
If you want a truly permanent fix, drilling through the pedestal base and anchoring into the ground or a concrete slab is the most secure option. If you want the best chance of keeping it stable year-round, focus on how to secure a bird bath with a permanent anchor truly permanent fix. For soil installation, drill through the plastic or stone base and drive a long masonry bolt with plug into a pre-drilled hole in the ground substrate or a small concrete footing beneath. For patio installation, use a masonry bit to drill into the concrete, then use a masonry screw or expansion anchor. Always use stainless steel hardware (grade 304 or 316) for outdoor installs, galvanized or plain steel will corrode and eventually loosen, defeating the purpose. If you're anchoring through a ceramic or glazed stone base, use a washer and go easy on the torque to avoid cracking.
Adding weight to the base
For hollow plastic or metal pedestal columns, adding ballast inside is an underrated upgrade. Dry sand, gravel, or even a few flat rocks dropped into the column before final assembly lowers the center of gravity and makes wind tipping much harder. Just make sure you can still drain or access the column if needed for winter storage. Don't use loose soil, it compacts unevenly and can promote internal rust in metal pedestals.
Anti-slip base treatment
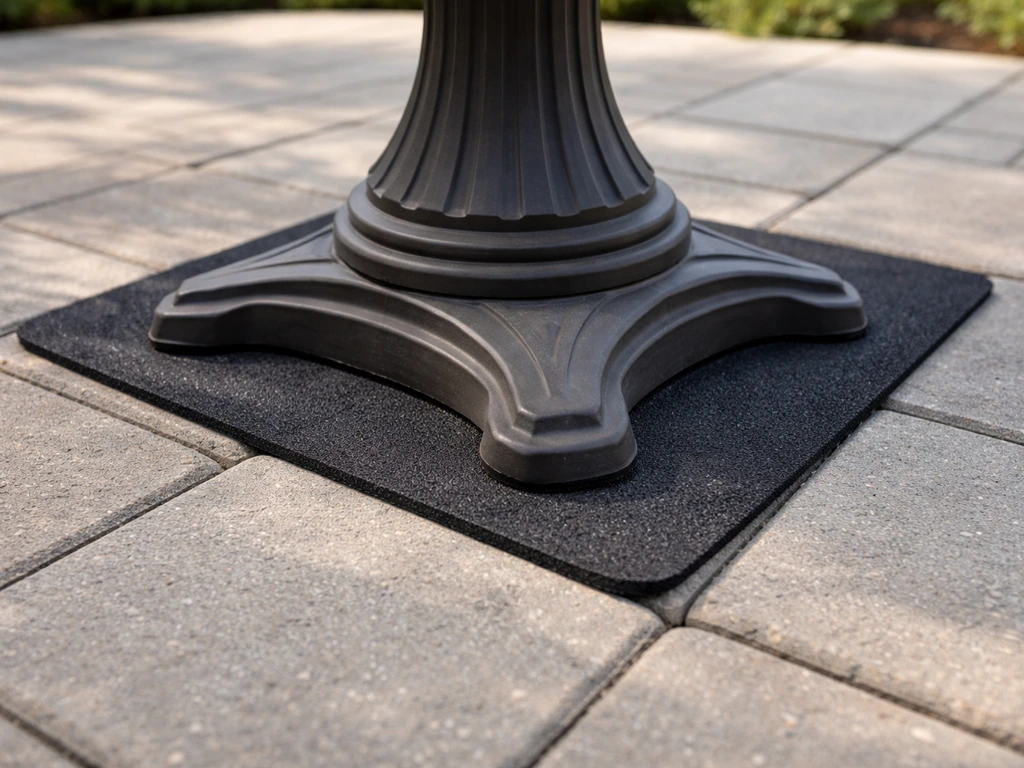
If the base is sliding on a smooth paver or deck surface, a rubberized non-slip mat cut to fit is the easiest fix. If you also need to know how to get on top of the bird bath safely during adjustments, start by stabilizing the base first and use a steady step. You can also use clear rubberized furniture grips (the adhesive-backed disc type) stuck to the underside of the base at several points. These are especially useful under glazed ceramic pedestal bases, which are notoriously slick on smooth surfaces.
Avoiding damage and keeping maintenance easy
The way you stabilize your bird bath should make cleaning easier, not harder. Here are the tradeoffs worth thinking about before you commit to a method.
- Don't over-torque bolts on ceramic or glazed stone: These materials crack under point stress. Use a washer to spread the load and stop tightening the moment you feel resistance.
- Avoid mixing metal types in your fasteners: Pairing aluminum and steel hardware directly together in wet conditions causes galvanic corrosion that can fuse or weaken the joint within a season or two. Use stainless steel throughout, or isolate dissimilar metals with plastic or neoprene washers.
- Keep the bowl removable for cleaning: Whatever anchoring method you use, make sure you can still lift the bowl off the pedestal for scrubbing. A full anchor that permanently fuses the bowl to the pedestal makes the weekly rinse a real chore.
- Never use a pressure washer or abrasive cleaners on ceramic baths: This is straight from the manufacturer guidance. Pressure washing can crack glazed finishes and, if you've used any sealant around anchor points, it'll blast that out too.
- Plan for winter: If you're in a freeze zone and need to bring the bath in seasonally, don't use permanent concrete anchoring unless you're okay leaving the pedestal in place year-round. Ground stakes and bolt anchors are easier to remove and re-set each spring.
It's also worth thinking about how your stabilization choice interacts with leveling over time. Even a well-anchored bath on soft ground will slowly develop a lean as the soil settles. Building in an easy way to re-level, shims you can swap out, a gravel bed you can rake and repack, means you're not starting from scratch every spring. Keeping water sitting flat in the bowl is also better for the birds: a tilted bowl drains faster on one side and leaves less usable water depth.
Quick checklist and what to do if it still tips
Pre-install checklist
- Surface is flat and level in both directions (use a bubble level)
- Soft soil is compacted or replaced with packed gravel under the base footprint
- Base has no-slip contact with the surface (rubber mat, grip pads, or embedded in gravel)
- Hardware is stainless steel or otherwise corrosion-resistant
- Bath is positioned 10 to 15 feet from shrubs/trees with clear approach and escape paths
- Wind exposure is minimized by nearby fence, wall, or natural windbreak
- Bowl can still be removed easily for regular cleaning
- Any bolts through ceramic or stone use a washer and are not over-tightened
If it still tips after your fix
First, check whether water is pooling to one side, if it is, the base has settled or shifted again and you need to re-level before anything else. Add packed gravel or adjust your shims, recheck with a level, and refill. If the bath tips in wind specifically, the problem is almost certainly insufficient base mass or a too-exposed location: add internal ballast to the column, switch to a heavier concrete or stone model, or move it to a more sheltered spot. If cats are a concern, make sure the bath is anchored and weight-balanced so a push won't tip it over how to make a cat proof bird bath. If the bath tips when birds land or when animals brush it, the pedestal footprint is too narrow for the bowl size, consider a wider base stabilizer plate, or anchor directly to a concrete slab. If anchors keep pulling out of soft soil, that soil is too loose to hold: dig down 6 to 8 inches, fill with compacted gravel, and re-anchor into the gravel layer instead of bare topsoil. Still having trouble? The problem may actually be that the pedestal and bowl aren't sitting flush against each other, a wobbly joint between the two pieces creates a lot of instability that no amount of ground anchoring will fully fix. Check that connection point and use a small amount of exterior silicone sealant to stabilize it if needed.
FAQ
My bird bath rocks slightly, it does not tip, what should I fix first?
If the bath wobbles instead of fully tipping, the usual cause is a loose or mis-seated joint between the bowl and pedestal, or uneven contact at the base. Tighten any built-in hardware first, then set the bath back down and recheck level with the bowl empty. If the wobble persists, place shims under the low point of the pedestal base (or use a non-slip mat on pavers) rather than adding more stakes, since anchors only help sideways movement.
What’s wrong with just surrounding the base with rocks to keep it from falling over?
Quick anchors like rocks, bricks, or decorative stones around the base will not hold against repeated wind and splash forces. Use mechanical attachment instead, for example ground stakes driven around the pedestal footprint, or a non-slip mat plus shims on hard surfaces. If you need “easy now, permanent later,” you can temporarily shim for level, then plan the slab or masonry bolt install once weather and access allow.
Why do my stakes or bolts keep pulling out of the soil?
For soft ground, the anchor fails because topsoil is loose and compresses over time. Dig down deeper (about 6 to 8 inches), replace with compacted gravel, then re-attach into that gravel layer. If you can pull an anchor out by hand or it spins, stop and re-do the base preparation, since you are effectively anchoring into a shifting layer.
The water keeps collecting on one side, even after I anchored the pedestal, what does that mean?
If you see pooling water on one side, you need to correct level at the base, not just anchor it. Scrape out settled material or add packed gravel to the low side, then re-level and check again after a week. Also confirm the bowl itself is not warped or cracked at the rim, since a damaged bowl can hold water unevenly even when the pedestal is level.
What type of hardware should I use for anchoring, and does it change by surface?
Use stainless steel hardware outdoors, but also match the anchor method to the surface. On concrete patios, you typically drill with a masonry bit and use a proper expansion anchor or masonry screw rated for outdoor loads. On soil or compactable gravel, use a bolt with a plug into a drilled hole, or stakes for simpler setups. Mixing methods, like using deck screws into concrete or soft soil, leads to fast loosening.
Can I add weight inside a hollow pedestal, and are there any precautions?
Yes. Before adding internal ballast to a hollow pedestal, confirm the column is removable or accessible for winter storage and cleaning. Dry sand and gravel can add weight, but they must be secured so they do not shift and create a new internal lean. Avoid loose soil inside, since it compacts unevenly and can contribute to corrosion risk in metal pedestals.
The bath tips when birds land or when something brushes it, how do I stop that?
If animals brush the bath or birds cause it to wobble, the fix is often increasing the effective footprint, not just deeper stakes. Consider a wider stabilizer plate under the bowl base (or anchoring to a concrete slab) so the pedestal does not pivot around a narrow contact area. Then verify level, because a slight tilt makes landing impacts more likely to rotate the pedestal.
My bird bath sits on pavers or a deck, what’s the best way to prevent it from sliding and tipping?
If your bath is on a smooth paver, deck board, or tile, anchors that rely on soil grip may do little. Start with a rubberized non-slip mat under the base, then add shims only if needed to bring the bowl level. Finish by checking after a week, since mats can compress slightly and level can drift.
How often should I check level after installing an anchor, and how do I make re-leveling easier?
Even with a permanent anchor, soil settling or small base compression can bring the bath back out of level. Build in a maintenance-friendly step, like using adjustable shims you can swap or a gravel bed you can rake and repack. Recheck level every couple of weeks during the first month after installation, then seasonally afterward.