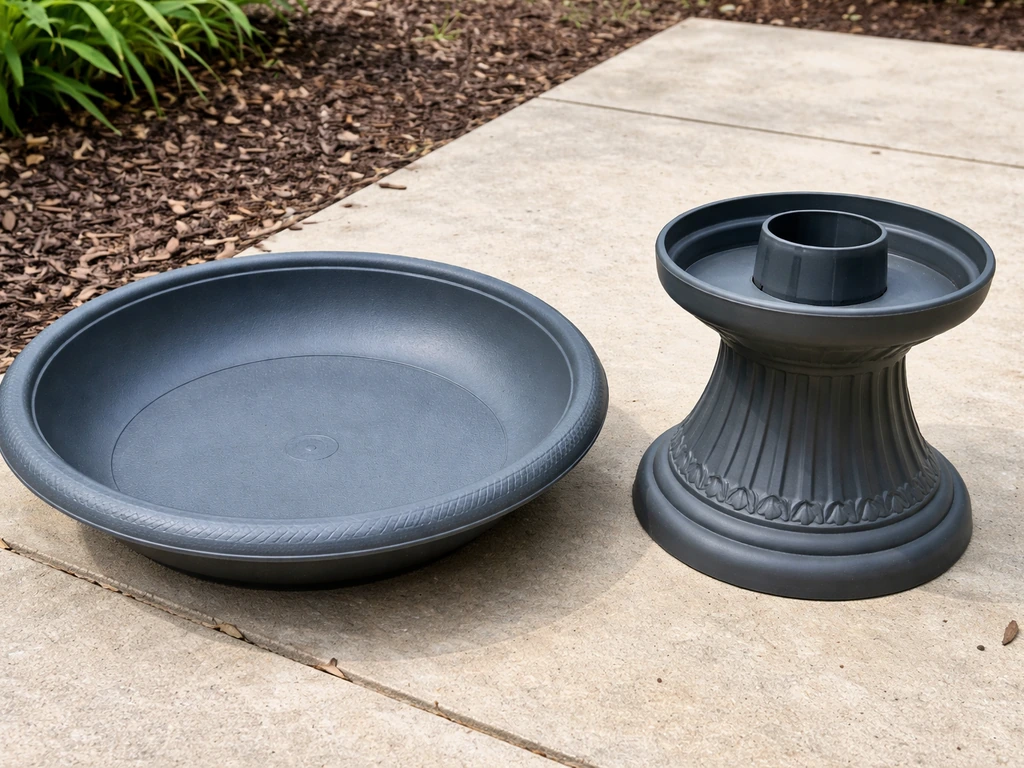
A resin bird bath top is a molded basin, usually made from polyresin (a blend of polyester or polyurethane resin mixed with fillers like stone powder and pigments), designed to sit on a pedestal or ground stand and hold water for birds. For a concise definition and overview, see what is a resin bird bath. It gives you something close to the weight and texture of cast stone at a fraction of the cost, resists chips better than ceramic, and is light enough to move around the yard without throwing your back out. If you are shopping for a replacement top, retrofitting an existing base, or starting from scratch, this guide walks you through everything: what the material actually is, how it stacks up against stone and plastic alternatives, how to pick the right size and depth, how to install or swap it in, and how to keep it clean through every season.
Resin Bird Bath Top: Complete Guide to Choosing, Installing & Maintaining

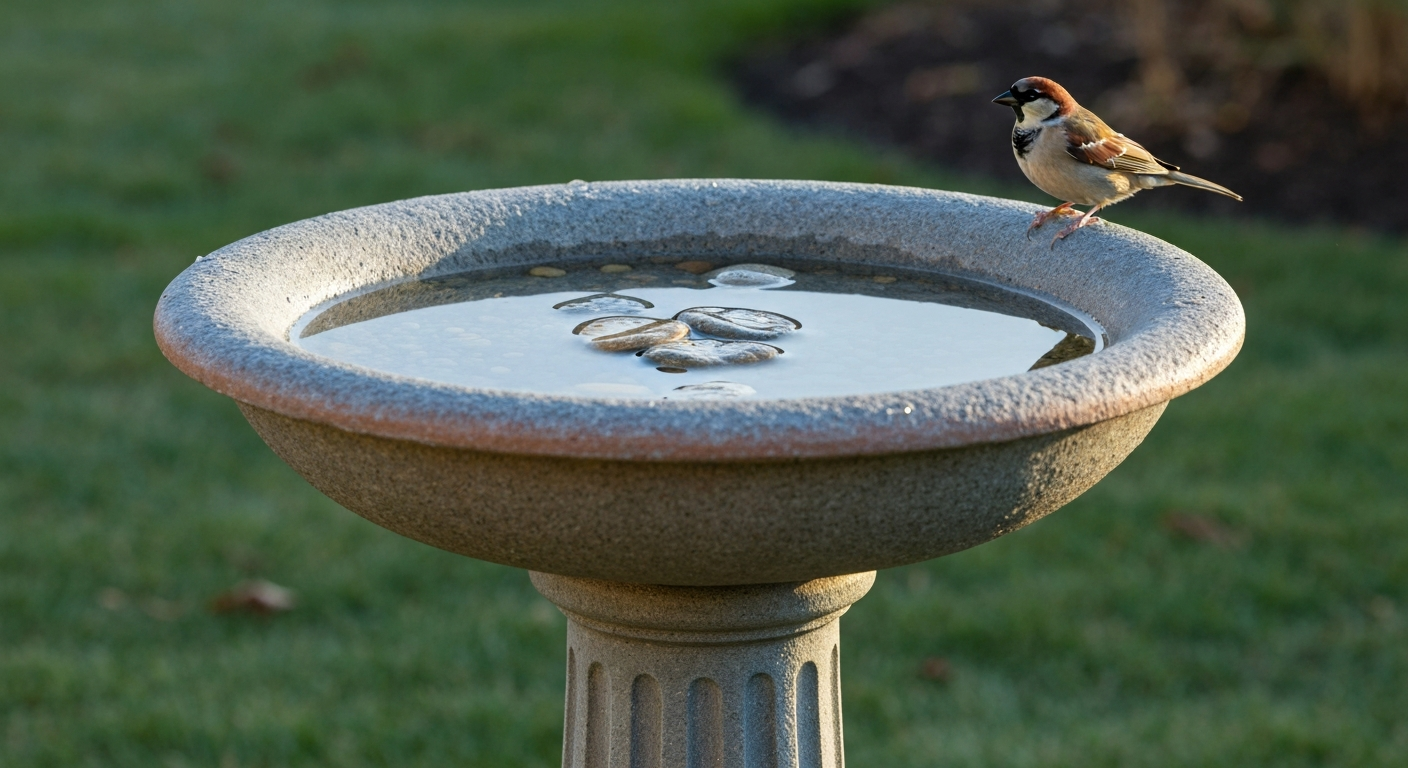
Who this guide is for and what you'll learn
Whether you just cracked your old concrete top moving it across the patio or you are building your first backyard water feature, this article is written for you. Beginners will find a clear definition of the material, a buying checklist they can take straight to a store, and straightforward installation steps. Experienced birders will find the comparison table, species-specific tips, and troubleshooting sections most useful. By the end you will know exactly what measurements matter on a spec sheet, how to match a top to your existing pedestal, how to keep algae and mosquitoes in check, and how to protect your basin through freezing winters.
What exactly is a resin bird bath top?
The term 'resin' covers a family of synthetic polymer materials, but in garden products you will most often see the word 'polyresin' on the label. Polyresin is an industry trade term for a formulation that typically combines a polyester or polyurethane base resin with inert fillers, stone powder, glass fiber strands, and mineral or synthetic pigments. Manufacturers pour or press this mixture into detailed molds, which is how resin tops can mimic the look of rough-hewn stone, aged concrete, or hand-painted ceramic without the corresponding weight. Fiberglass-reinforced polyester (FRP) tops use a similar base chemistry but add woven glass fiber for additional structural strength, and some premium tops use a gelcoat surface layer for a smoother, more weather-resistant finish.
What this means practically: the density of a resin top is typically in the range of 1.2 to 1.6 g/cm³, much lighter than cast stone or concrete at 2.0 to 2.4 g/cm³. A 24-inch resin top might weigh 8 to 12 pounds, while a comparable concrete basin can hit 25 to 40 pounds. That difference matters when you are repositioning the bath, shipping it, or placing it on a lightweight shepherd's hook base.
Why choose a resin top: the real benefits
I have used stone, ceramic, plastic, and resin tops over the years, and resin keeps earning a place in my yard for a handful of concrete reasons. Here is what genuinely sets it apart.
- Lightweight: easy to lift off, move indoors for winter, or carry to the hose for cleaning without help.
- Impact resistance: drops and knocks that would chip ceramic or crack concrete usually just scuff resin.
- Detailed molding: manufacturers can press in rough textures, raised patterns, and realistic stone veining that give birds better footing than smooth plastic.
- Colorfast pigmentation: quality polyresin tops use UV-stabilizing pigments so the color fades more slowly than painted concrete or glazed ceramic.
- Affordable: resin tops typically cost less than cast stone or ceramic equivalents of the same size.
- Non-porous surface: a sealed resin top does not absorb algae spores the way rough concrete does, making routine cleaning faster.
- Wide availability: sold as standalone replacement tops, making it easy to retrofit an existing pedestal.
Drawbacks and trade-offs worth knowing
Resin is not perfect, and I would rather you know the weak points before you buy than discover them mid-season. The biggest issue is long-term UV degradation. Even UV-stabilized polyresin will eventually fade, chalk, or become brittle if left in full sun year-round. Manufacturers make UV-resistance claims, but few publish independent test data. When buying, look for any reference to ASTM D4329 (fluorescent UV lamp exposure) or ASTM G154 testing on the spec sheet. If the listing just says 'UV resistant' with nothing to back it up, treat that claim skeptically.
Freeze-thaw cycling is the other vulnerability. Water that seeps into micro-cracks can expand and widen those cracks through repeated freeze-thaw cycles. Quality FRP tops are tested to blank" rel="noopener noreferrer">ASTM D7792 conditioning standards, but most mass-market polyresin tops are not. In USDA hardiness zones 5 and colder (regularly below 0°F / -18°C), I store my resin top indoors from November through early March rather than leaving it outside filled with ice. Thin-walled, budget resin tops also flex noticeably when you fill them, which over time can stress the mounting point and cause cracking at the pedestal contact zone.
Resin vs. stone, plastic, ceramic, and metal
Every top material has a sweet spot. Here is an honest side-by-side so you can match the right material to your situation. If you are specifically weighing resin against a plastic top, that comparison deserves its own deep dive, and the same is true for stone alternatives. The short version of my recommendation: resin is the best all-around choice for most backyard birders who want a realistic look, easy handling, and mid-range durability without paying stone prices.
| Material | Typical Weight (24") | Freeze Durability | UV Durability | Impact Resistance | Texture/Grip | Relative Cost | Best For |
|---|---|---|---|---|---|---|---|
| Resin / Polyresin | 8–12 lb | Moderate (store indoors in harsh climates) | Moderate (UV-stabilized formulas better) | Good (flexible, resists chips) | Good (molded texture) | Mid-range | Most backyard birders, easy replacement tops |
| Cast Stone / Concrete | 25–45 lb | Good if dense-cast; can crack if porous | Excellent (no polymer to degrade) | Poor (brittle, chips and cracks) | Excellent (rough surface) | Low–Mid | Permanent installations, heavy pedestals |
| Natural Stone | 30–60+ lb | Excellent (dense granite/slate) | Excellent | Poor (brittle under point impact) | Excellent | High | Premium, permanent setups |
| Plastic (HDPE/PP) | 2–5 lb | Good (flexible at cold temps) | Poor without additive (fades fast) | Excellent | Poor (often slippery) | Low | Budget setups, temporary use, DIY retrofits |
| Ceramic / Glazed | 10–20 lb | Poor (glaze cracks, absorbs water) | Good (glaze protects) | Poor (chips and shatters) | Poor (glazed = slippery) | Mid–High | Decorative, mild climates only |
| Metal (galvanized/copper) | 5–15 lb | Good | Good (patinas, does not degrade) | Good | Fair (smooth unless textured) | Mid–High | Modern aesthetic, heated setups |
Stone tops are genuinely superior for permanence and bird footing, but the weight makes them impractical for anyone who wants to move the bath seasonally or clean it at the hose. Plastic tops are the lightest and cheapest option but usually lack the surface texture birds need for a confident foothold, and budget versions go chalky in a single season of direct sun. A plastic bird bath top is the lightest, most budget-friendly option and can serve as a temporary or long-term basin if you accept smoother texture and faster UV fading. If you are curious about the stone comparison in more detail, a look at stone bird bath tops covers density, freeze-thaw cycling, and rough-surface benefits thoroughly. And if budget is the overriding concern, you might also consider a trash can lid bird bath as a very temporary, zero-cost basin while you decide on a longer-term setup.
Picking the right resin top: size, depth, rim, texture, and color
Basin size
For most backyard species, a basin with a usable water diameter of 14 to 20 inches works well. Smaller than 14 inches and you limit the number of birds that can bathe at once; bigger than 24 inches and the top becomes heavy and harder to tip for cleaning. Measure your existing pedestal's mounting point before ordering a replacement, because 'fits a standard pedestal' is not a precise spec.
Depth
This is the single most important measurement for bird safety. According to Audubon and Cornell Lab's All About Birds guidance, the ideal birdbath has shallow edges of about 1 inch (2.5 cm) sloping gently to a maximum center depth of about 2 inches (5 cm). Most birds bathe in the shallows, not the center. If a top you are considering is 3 or 4 inches deep across the whole basin, fill it only partway or drop in flat stones to raise the floor. Hummingbirds need even shallower water, effectively just a mist or a 0.5-inch puddle on a wide flat rock. Deeper basins can work for larger birds like crows if you include rocks for footing, but they actively deter smaller songbirds.
Rim profile and texture
A wide, flat rim (at least 1 to 1.5 inches wide) gives birds a landing and perching strip before they step into the water. Narrow or rounded rims are slippery and frustrate smaller birds. Interior texture matters too: a rough, pebbled, or ridged basin interior gives birds the grip they need to stand in moving water. Smooth interiors are a common complaint with budget resin and plastic tops. If the top you buy is too smooth, press a handful of clean river pebbles or marbles into the basin before filling.
Color and finish
Darker colors (slate gray, brown, terra cotta) absorb more heat, which warms the water and can accelerate algae growth in summer. Light or neutral tones stay cooler. Matte finishes are preferable to high-gloss for bird confidence: birds are more comfortable approaching a surface that does not reflect like a mirror. Some research suggests birds are more attracted to water features placed in natural-looking surroundings, where earth tones blend with the environment better than bright white.
Weight, UV resistance, freeze resistance, drainage, and long-term durability
Weight
A resin top should be heavy enough to stay stable when a bird lands on the rim, but light enough to lift without strain. For a freestanding pedestal setup, 8 to 15 pounds is a good target range for a 18 to 24-inch top. Anything lighter tends to feel flimsy and may tip in wind; heavier than 20 pounds starts to lose the key advantage resin has over stone. Always check the pedestal's stated load capacity before placing a heavy top.
UV and freeze resistance
Ask for documented UV-resistance data, not just a label claim. The relevant test standards are ASTM D4329 (fluorescent UV lamp exposure for plastics) and ASTM G154 (fluorescent UV condensation exposure). For freeze-thaw durability in FRP or fiber-reinforced tops, ASTM D7792 is the applicable conditioning standard. Very few consumer-grade resin tops come with this documentation, but premium brands occasionally do. At minimum, look for the phrase 'UV-stabilized pigments' rather than just 'UV resistant,' and check reviews for reports of color change or surface crazing after one or two seasons.
Drainage
Some resin tops include a small drainage hole with a plug. This is genuinely useful: you unplug the drain, tip out dirty water in seconds, scrub the basin, and refill without lugging the whole thing to a hose. Not all tops have this feature. If yours does not, plan to tip it by hand or use a small hand pump or turkey baster to remove standing water before scrubbing.
Warranty and wall thickness
Wall thickness is a proxy for durability. Tops thinner than about 4 mm flex noticeably when filled and are more likely to crack at mounting stress points. Premium tops run 6 to 10 mm. Warranty length reflects manufacturer confidence: a one-year warranty is standard, but a three-year or longer warranty on a resin top is a signal the brand has tested for outdoor durability beyond one season cycle.
Compatibility with pedestals and bases
This is where a lot of replacement-top buyers run into trouble. 'Standard pedestal' sizes are not actually standardized across manufacturers. Before ordering, measure the outer diameter of your pedestal's top collar or cup, the depth of any recess the basin sits into, and the distance between any mounting bolt holes. Common collar diameters run from about 3.5 to 5 inches, but this varies widely.
Most resin tops rest on a pedestal by gravity and friction, without bolts. This is fine for casual use but means wind can displace the top. If you live in a windy area or have a top-heavy setup, use a small amount of outdoor-rated silicone sealant at the contact point, or purchase a mounting adapter ring. Some resin tops come with pre-drilled bolt holes; match the hole pattern to your pedestal before buying. If you are mixing brands (e.g., a resin top on a cast-iron or concrete pedestal), measure the pedestal's load capacity and make sure the top's contact surface is flat enough to sit evenly without rocking.
Ground-level and hanging setups
Resin tops are also practical for ground-level placement, sitting directly on a paver, flat stone, or low dish stand. This placement is excellent for ground-feeding birds like mourning doves, juncos, and towhees. For hanging setups, a resin top is too heavy for most standard hanging chains unless you use a purpose-built hanging birdbath frame rated for the weight. Verify the frame's load rating before attempting this.
Placement: where to put your resin bird bath
Location matters more than most people realize. The best spot balances bird safety with bird attraction. Place the bath within 10 feet of shrubs or a tree with lower branches so birds have a quick escape route if a predator shows up, but do not put it directly under a dense shrub where cats can hide. Avoid placing it directly under a bird feeder: falling seed hulls foul the water fast and can introduce mold. Part-shade placement (morning sun, afternoon shade) keeps the water cooler in summer, slows algae growth, and reduces evaporation.
Keep the bath visible from a window if you want to enjoy watching it. Birds take a few days to discover a new bath; if activity is slow after a week, try adding a dripper or mister to create movement and sound, which draws birds in much faster than a still basin.
Installing or replacing a resin top: step by step
- Unbox the top and inspect it for shipping cracks, especially around the rim and mounting area. Fill it with a couple inches of water in a flat area and check for leaks before mounting.
- Clean the top of the pedestal with a damp cloth to remove dirt, old sealant, or debris. A flat, clean contact surface prevents rocking.
- Lower the resin top onto the pedestal collar. Check that it sits level by eye, or use a small bubble level across the rim. An unlevel basin concentrates water on one side and leaves part of the floor dry.
- If the top rocks or the pedestal collar is slightly smaller than the top's base socket, cut a thin rubber gasket ring (a foam pipe-insulation strip works well) and place it between the two surfaces to fill the gap and reduce vibration.
- If your top has bolt holes, hand-tighten mounting bolts with stainless steel hardware. Do not over-torque: resin cracks under point pressure. Finger-tight plus a quarter turn is usually sufficient.
- For a gravity-only mount in a windy location, apply a bead of clear, waterproof outdoor silicone sealant around the top of the pedestal collar before lowering the basin. Let it cure per the product instructions before filling.
- Fill with fresh water to the recommended depth (shallow edges at about 1 inch, center no deeper than 2 inches). Add a few flat rocks or pebbles if the basin floor is deeper than 2 inches.
- Place the bath in your chosen location and confirm it is stable. Give it a gentle push from several angles to check for wobble before birds start using it.
Retrofitting an old pedestal with a new resin top
If your pedestal is sound but the original top is cracked, a resin replacement top is one of the most cost-effective retrofits available. Measure your pedestal collar and search for resin tops described as 'replacement bird bath bowls' or 'bird bath tops with universal fit.' If the collar diameter is between 3.5 and 4.5 inches, most universal-fit tops will work. For oversized or non-standard collars, look for tops that include a foam or rubber adapter insert. In a pinch, a plastic top with the right base diameter makes a very serviceable temporary replacement while you source the right resin top. That said, a purpose-made resin top will outlast and outperform an improvised plastic solution in all but the most basic setups.
DIY and low-cost alternatives
If you need something functional right now and have a pedestal without a top, a large plastic trash can lid (30 gallon or larger, smooth interior) set on top of the pedestal or directly on the ground serves as a surprisingly effective temporary basin. For step-by-step instructions and pros and cons, see the trash can lid bird bath. The main drawback is the smooth plastic surface, which is slippery for birds: add several flat stones or a layer of clean pebbles to solve that. Because it is shallow and wide, it actually meets depth guidelines well. Trash can lid setups are discussed in more detail separately, but they work as a zero-cost proof-of-concept while you decide on a permanent top.
Cleaning and maintenance schedule
A resin top's non-porous surface is genuinely easier to clean than rough concrete, but it still needs regular attention. Stagnant water is a health risk for birds and a mosquito breeding site. Here is the schedule I follow.
| Frequency | Task | Products / Notes |
|---|---|---|
| Every 2–3 days | Dump old water, rinse basin, refill with fresh water | Use the hose; no chemicals needed for routine refresh |
| Weekly | Scrub basin with stiff brush using a 9:1 water-to-white-vinegar solution | Vinegar breaks down mineral deposits and mild algae; rinse thoroughly before refilling |
| Monthly (or after sick bird visit) | Disinfect with diluted bleach solution: approximately 1 part bleach to 9 parts water (about 0.1% sodium hypochlorite / ~1000 ppm) | Scrub, apply solution, let sit a few minutes, rinse completely with fresh water, air-dry before refilling; wear gloves |
| Seasonally (spring/fall) | Inspect for cracks, UV chalking, and mounting wear; check pedestal contact for looseness | Apply fresh outdoor silicone at pedestal mount if needed; touch up with outdoor resin paint if color has faded significantly |
| Before winter (in freeze climates) | Remove top from pedestal, clean and dry thoroughly, store indoors or in an unheated garage | Prevents freeze-thaw crack damage; store off concrete to avoid moisture wicking |
Controlling algae, mosquitoes, and standing water
Algae
Green algae film on a resin basin surface is the most common maintenance complaint. The weekly vinegar scrub handles mild cases. For persistent algae, the monthly dilute-bleach treatment is more effective, but you must rinse completely because even dilute bleach residue harms birds. The two most effective preventive strategies are shade and water movement: a partly shaded basin grows algae far more slowly than one in full sun, and any water movement (a dripper, wiggler, or recirculating pump) disrupts the still surface that algae need to establish. Resin tops with a drainage plug are much faster to empty and scrub than tops you have to physically lift and dump.
Mosquitoes
Mosquitoes can complete their larval stage in a birdbath in as little as 7 to 10 days. Changing water every 2 to 3 days breaks that cycle before any larvae mature. If you want additional protection without chemicals that harm birds, use an EPA-registered Bacillus thuringiensis israelensis (Bti) product, sold as Mosquito Dunks or Mosquito Bits. The CDC recommends EPA-registered Bti products (for example, Mosquito Dunks) for larval control in small standing-water features and provides usage guidance under Larvicides, CDC Larvicides — CDC. For a small birdbath, a quarter of a standard dunk is typically sufficient; follow the product label for exact dosing. Bti is target-specific to mosquito and black fly larvae and is safe for birds, other wildlife, and people at label doses. Adding a small solar-powered wiggler or dripper accomplishes double duty: it deters egg-laying females (who prefer still water) and attracts more birds with the movement and sound.
Winter and heated bird bath options
In climates where temperatures regularly drop below freezing, a resin top either needs to come indoors or be paired with a de-icer to keep water available for birds through the winter months. Water is actually harder for birds to find in winter than food, so a heated bath is a genuinely useful feature if you are committed to year-round birding.
Submersible or floating de-icers in the 50 to 150 watt range are sized for small to medium basins. They typically use a thermostat to cycle on only when water approaches freezing, so they do not run constantly. Always plug de-icers into a GFCI-protected outdoor circuit: NEC Article 210.8 and its 2023 updates require GFCI protection for outdoor receptacles in most residential installations. Use only outdoor-rated cords and never run extension cords under rugs, through windows, or across standing water. If a de-icer is too powerful for a thin-walled resin top, it can cause localized thermal stress; match the wattage recommendation on the de-icer's label to your basin size.
Solar-powered bird bath heaters and solar-powered circulators are also available. They work well in climates where freezing is occasional (temperatures hovering around 28 to 32°F / -2 to 0°C) but typically cannot keep up with sustained hard freezes. In zones 5 and colder, a wired de-icer is more reliable. In zones 7 and warmer, a solar wiggler or dripper is usually sufficient to prevent the shallow freezing that discourages birds, and it doubles as a warm-season mosquito deterrent.
Species-specific tips
Most backyard songbirds (robins, sparrows, finches, chickadees) are well served by the standard 1-to-2-inch depth with a rough-textured floor. But a few species have specific preferences worth accommodating.
- Hummingbirds: need extremely shallow water, 0.25 to 0.5 inches at most, or a misting attachment. A resin top with a raised center island or a very shallow lip section works; alternatively, place a large, slightly concave flat stone in the basin shallows as a hummingbird perch.
- American Robins and thrushes: confident bathers that appreciate a deeper center zone up to 2 inches; they splash vigorously, so a wide rim with vertical clearance helps contain the mess.
- Crows and jays: these larger birds need basins at least 18 to 20 inches in usable diameter and will dunk food in the water, which dirties it quickly. Change water more frequently if crows are regulars.
- Mourning doves and ground-feeding species: prefer ground-level baths or very low stands; a resin top set on a paver at ground level suits them far better than a tall pedestal setup.
- Warblers and small migrants: attracted strongly by the sound and visual shimmer of moving water; a solar dripper mounted above the bath during spring and fall migration can dramatically increase the variety of species stopping to drink and bathe.
Troubleshooting common problems
| Problem | Likely Cause | Solution |
|---|---|---|
| Green algae film within days of cleaning | Full sun exposure, warm water, still water | Move to part shade; add a dripper or wiggler; increase cleaning frequency to every 2 days |
| Birds not using the bath | Too deep, too smooth, wrong location, no perch strip | Add flat pebbles to raise floor; check rim width; move bath closer to cover; add a dripper |
| Basin cracking at pedestal contact point | Uneven seating, thermal stress, over-tightened bolts | Re-seat with rubber gasket; loosen or remove bolts; replace thin-walled top with thicker-walled model |
| Water evaporating quickly | Full sun, shallow basin, warm climate | Move to shade; refill more frequently; consider a wider basin with more water volume |
| Top tipping or shifting | Pedestal collar too small, wind exposure, no securing | Add rubber gasket or foam ring; apply silicone sealant at mount; move to sheltered location |
| Mosquito larvae visible | Water unchanged beyond 7 days | Change water every 2–3 days; add Bti (Mosquito Dunk quarter); add solar wiggler |
| Color fading or surface chalking after one season | Inadequate UV stabilizer, full sun placement | Move to part shade; apply outdoor resin UV protectant spray; switch to a higher-quality UV-stabilized top |
| Basin freezing solid overnight | Cold climate, no de-icer, thin-walled resin | Store indoors in winter OR add a 50–150 W thermostatic de-icer on a GFCI circuit; do not leave thin-walled top filled outdoors below freezing |
Your buying checklist before you order
Run through this list against the product spec sheet before you buy. If a listing does not provide most of these figures, ask the seller or look for a brand that publishes complete specs.
- Basin external diameter (inches or cm): does it fit your pedestal and space?
- Usable water diameter (inner basin, not outer rim): aim for at least 14 inches for most species.
- Maximum center depth: should be no more than 2 inches (5 cm) for general use.
- Minimum shallow-edge depth: should be approximately 1 inch (2.5 cm).
- Wall thickness (mm): 5 mm or more for durability; under 4 mm is a red flag.
- Unit weight (lb or kg): verify your pedestal can support it.
- Material description: look for 'polyresin,' 'fiberglass-reinforced resin,' or specific resin type; avoid listings that only say 'resin' without detail.
- UV-stabilizer claim and any referenced test standard (ASTM D4329 or ASTM G154).
- Freeze-thaw or winter-storage guidance from the manufacturer.
- Warranty length: 1 year minimum; 3 years or more preferred.
- Pedestal compatibility: collar diameter, bolt-hole pattern, or adapter included.
- Drainage plug: present or absent.
- Surface texture: rough/pebbled interior confirmed in photos or description.
- Customer reviews specifically mentioning color stability and cracking after 1 to 2 seasons of outdoor use.
FAQ
What primary authoritative sources should I consult to define safe birdbath depth, placement, and cleaning protocols?
Conservation and wildlife authorities: Audubon, Cornell Lab/All About Birds, and university extension programs (e.g., UC IPM). Use their published guidance on usable water depth (edge ≈1 in / 2.5 cm, center ≈2 in / 5 cm), placement, turnover frequency (every 2–3 days), and cleaning recommendations (e.g., vinegar weekly; bleach disinfection for suspected disease following CDC 0.1% NaOCl guidance). Include direct URLs and quote numeric recommendations.
Which materials- and manufacturing references are needed to accurately describe resin bird bath top chemistry and types?
Industry and materials datasheets: polyresin/polyester/polyurethane resin explainers, manufacturer Safety Data Sheets (SDS) for specific products, MatWeb or equivalent polymer datasheets (HDPE, PP densities, thermal behavior), and FRP/composite process literature. These let you state likely resin formulations, fillers (stone powder), densities, weights, and potential chemical/safety notes. Require vendor SDS to validate specific composition before making health or durability claims.
What measurable product specifications must be collected from vendors to create an actionable buying checklist?
Collect machine‑readable/measurable spec items: external diameter (cm/in), usable water diameter, maximum center depth and minimum edge depth (cm/in), wall/thickness (mm), unit weight (kg/lb), material/resin grade and UV‑stabilizer presence, freeze‑thaw test references or data, warranty length, load capacity for pedestal mounting, and installation hardware compatibility. These items should appear on spec sheets or be provided by vendor testing.
Which standardized tests and lab data are essential to validate claims about UV and freeze resistance?
Specify required test methods: ASTM D4329 or ASTM G154 (accelerated UV exposure/Xenon‑arc or fluorescent UV) for UV resistance; ASTM D7792 and appropriate ISO freeze‑thaw standards for freeze/thaw conditioning of FRP or equivalent composite testing. Ask vendors for independent accelerated‑exposure reports showing exposure hours, changes in color/impact strength/flexural strength, and acceptance criteria.
What engineering/physical measurements and calculations are useful for comparing resin tops to stone, ceramic, or metal?
Collect material bulk densities (e.g., concrete/stone ≈2000–2400 kg/m³; plastics ≈900–1350 kg/m³), measured unit weight of the top, and basin volume. Use these to compute transport weights, pedestal load, center of gravity, and tip/over risk. Also note thermal expansion coefficients and specific heat where relevant for heated setups. Provide sample calculations for typical basin sizes.
What field tests or observations should be done to ensure a recommended top design works for birds in real yards?
Conduct small-scale field trials: install candidate tops in representative microhabitats, record bird visitation rates by species/time-of-day over several weeks, measure water temperature, water turnover and evaporation rates, and inspect slipping/algae buildup. Note species use of depth zones and whether added pebbles/ramps improve access. Document results with photos, counts, and simple water-quality notes (cloudiness, scum).
Plastic Bird Bath Top Buyer Guide: Choose, Size, Install
Buy and install a plastic bird bath top: size, fit, anti-algae care, drainage, and winterizing tips for safe bird bathin