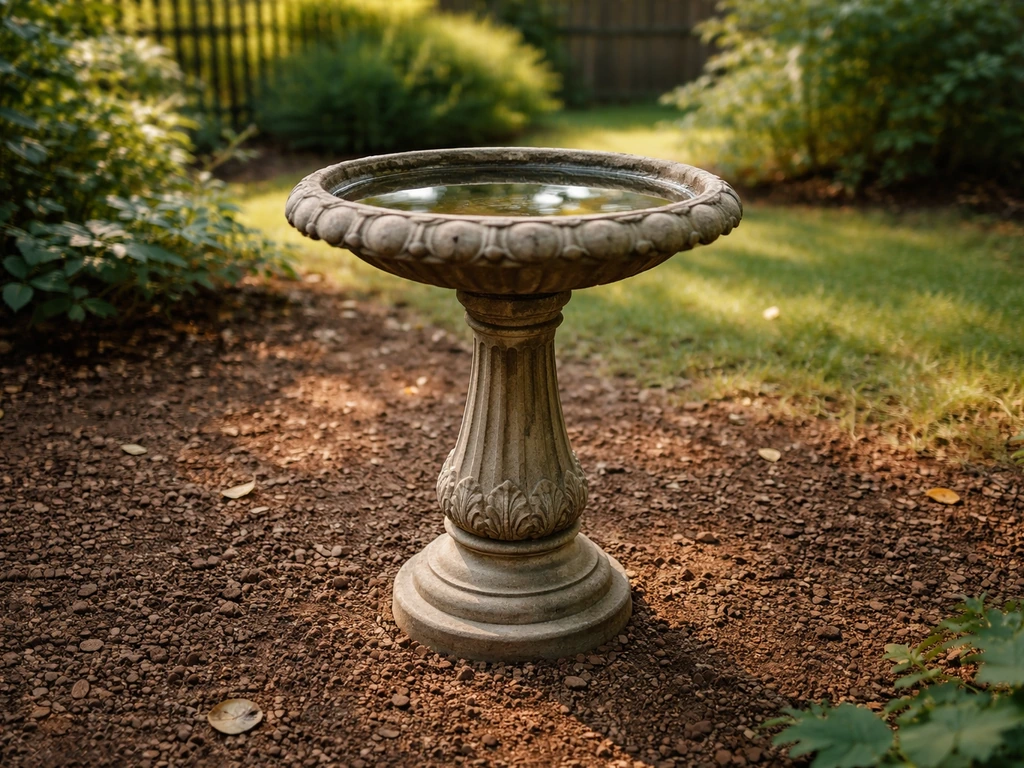
A garden flower pedestal bird bath gives you a decorative focal point that actually works for birds. The best ones sit 24–30 inches off the ground, have a basin depth of 1–2 inches at the edges sloping to no more than 3 inches at center, and are made from non-toxic, weather-resistant materials like cast concrete, glazed ceramic, or powder-coated metal. If you want birds to use it consistently, those three things matter far more than how pretty the flower detailing looks.
Best Garden Flower Pedestal Bird Bath: Top Picks & Care

Marcus Henley
16 Jul 2026
Who this guide is for (and what a flower pedestal bird bath actually does)
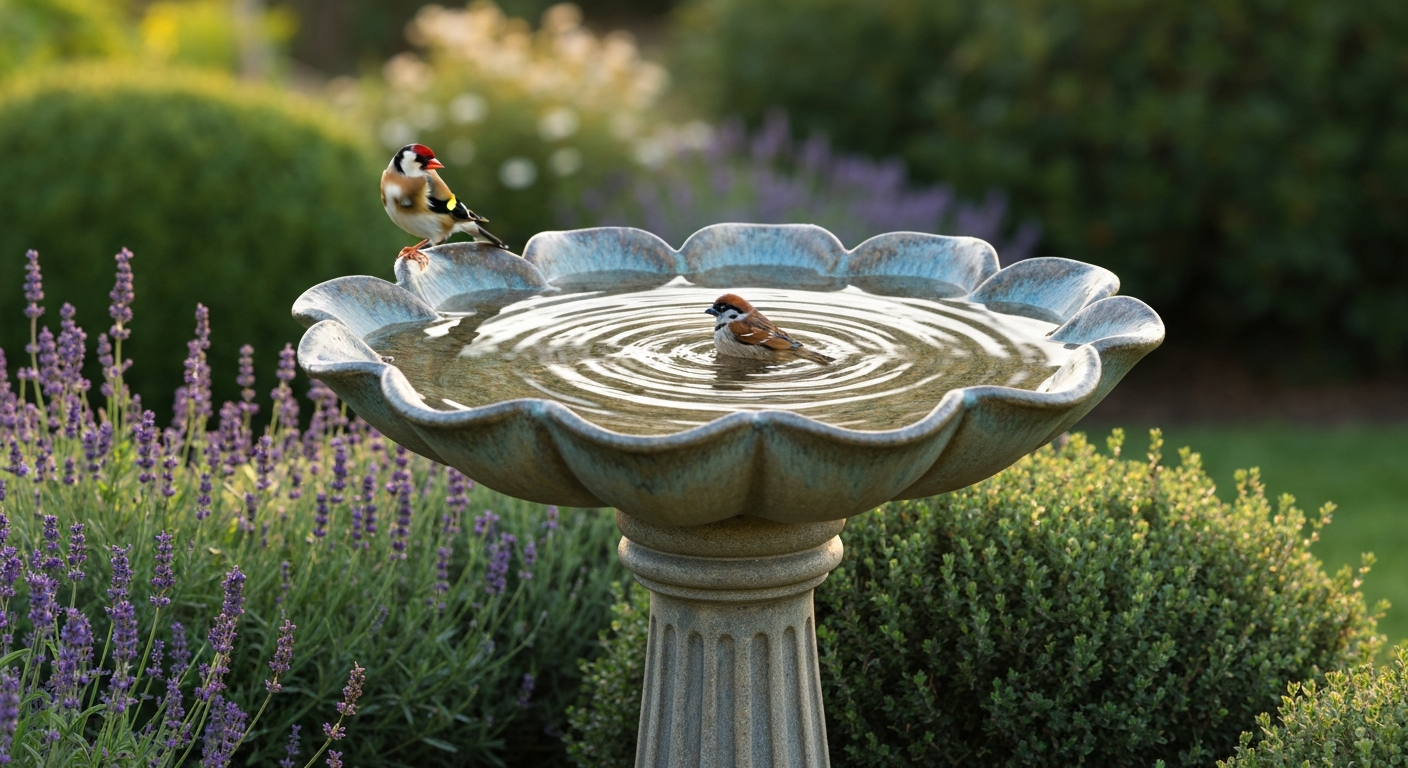
Whether you're setting up your first backyard bath or replacing a cracked pedestal you've had for a decade, this guide walks you through everything: picking the right model, getting it level and stable, keeping the water clean, troubleshooting algae and mosquitoes, running heated or solar versions safely, and even building or restoring one yourself. Flower pedestal bird baths come in two main flavors: baths with flower-shaped basins (petals form the bowl), and classic pedestal baths with flower or vine detailing on the column and rim. Both can work beautifully for birds as long as the basin geometry is right. The decorative element is a bonus. Bird health and usability come first.
Quick buyer's checklist
Before you start comparing models, run through this list. If a bath you're considering fails more than one of these points, keep looking.
- Basin depth: 1–2 inches at the edges, no more than 3 inches at the deepest center point
- Gentle slope: sides should angle gradually inward, not drop straight down
- Diameter: at least 15–18 inches across for most songbirds; 24 inches or more for larger species
- Pedestal height: 24–30 inches from ground to basin rim for safety from ground predators
- Material: non-toxic, weather-rated concrete, glazed ceramic, or powder-coated/stainless metal
- Stability: wide, heavy base or mounting option (spike, ground anchor, threaded bolt)
- Finish: sealed or glazed interior so the surface can be scrubbed without harboring bacteria
- UV and frost resistance if you're in a climate with hard freezes or intense summer sun
- No lead-based paints or toxic sealers in the basin interior
- Integrated planter option if you want flowers around the base (confirm drainage holes don't undermine stability)
Top-rated garden flower pedestal bird baths by material and feature
The market has a lot of noise. Below is a practical shortlist organized by material and feature type, based on commonly available models with verified specs and consistent user feedback.
Concrete flower pedestal bird baths
Cast concrete remains the gold standard for durability and thermal mass. It stays cool in summer, resists tipping in wind, and weathers beautifully over time. The downside is weight: most concrete flower pedestals run 25–60 lbs, so site selection is important before you commit. Top-rated options in this category typically feature a two-piece design (bowl plus pedestal column) for easier transport, a 16–20 inch diameter basin, and a flower-petal or scalloped rim. Textured surfaces give birds better footing than smooth-polished concrete. Look for sealed versions if you want low algae maintenance.
Ceramic and glazed bird baths
Glazed ceramic or stoneware flower pedestal baths are visually stunning and the glazed surface is genuinely easy to scrub clean. The trade-off is freeze-thaw vulnerability: if water sits in an unglazed crack in sub-freezing temps, it will expand and crack the basin. Only buy ceramic baths rated for outdoor use in your climate zone, and bring them in or cover them before the first hard freeze. Basin diameters in this category typically run 14–18 inches with a 1.5–2.5 inch depth, which suits small to medium songbirds well.
Metal flower pedestal bird baths
Cast iron and powder-coated steel flower pedestal baths offer intricate detailing that's hard to achieve in concrete or ceramic. Cast iron is heavy and durable but rusts aggressively if the protective coating fails, and it heats up fast in direct summer sun, which can warm the water uncomfortably. Powder-coated aluminum or steel baths are lighter and rust-resistant, though cheaper versions may have thin basins that flex or chip. Look for at least 18-gauge steel or solid cast iron, with a food-safe powder coat or enamel finish in the basin.
Heated pedestal bird baths
Heated bird baths are purpose-built for winter use and are worth every dollar if you live somewhere with sustained freezing temps. Models from Farm Innovators, K&H, and API/Allied Precision are the most widely available. Thermostatically controlled units only draw power when needed. For a small flower basin (1–2 gallons), a 44–80W unit like the Farm Innovators B-9 (44W) is usually sufficient in mild-to-moderate winters. Larger basins or climates that regularly hit 0°F and below warrant 150–250W units like the Farm Innovators C-50 (150W) or API DT-250 (250W). All outdoor-use heaters should be UL or CSA listed, and the outlet must be GFCI-protected per the NEC requirements for outdoor receptacles.
Solar pedestal bird baths
Solar-powered flower pedestal baths typically include a small submersible pump driven by a separate solar panel. The water movement is the real win here: a gentle fountain or dripper keeps water fresh longer and is highly attractive to birds. Performance depends entirely on sun exposure. Most solar pumps need 4–6 hours of direct sun to run reliably. In shaded gardens, a hardwired or battery-backup pump will serve you better. Solar baths require no trenching or outdoor outlets, which makes them appealing for placement in the middle of a garden bed.
Product comparison: garden flower pedestal bird baths
| Model / Type | Material | Basin Diameter | Basin Depth | Pedestal Height | Notable Feature | Pros | Cons |
|---|---|---|---|---|---|---|---|
| Cast Concrete Flower Pedestal (two-piece) | Concrete | 18–20 in | 1.5–2.5 in | 26–30 in | Textured finish, heavy base | Highly stable, weathers well, stays cool | Heavy (35–60 lbs), may need sealing |
| Glazed Ceramic Flower Basin Pedestal | Glazed stoneware | 14–18 in | 1.5–2 in | 24–28 in | Non-stick glazed interior | Easy to clean, decorative, smooth surface | Freeze-thaw risk, fragile if dropped |
| Cast Iron Flower Pedestal Bath | Cast iron | 16–18 in | 2–3 in | 24–28 in | Intricate floral casting detail | Durable, classic look, heavy base | Rusts without maintenance, heats in sun |
| Powder-Coated Steel Flower Bath | Steel (powder coat) | 16–20 in | 1.5–2.5 in | 24–30 in | Lightweight, modern colors | Rust-resistant, easy to move, affordable | Thinner material, may chip over time |
| Farm Innovators Heated Bath (B-9) | Plastic/resin basin | 15–16 in | 2 in | N/A (basin only or add pedestal) | 44W thermostat-controlled heater | Low wattage, affordable, prevents freezing | Requires GFCI outlet, basic appearance |
| API/Allied DT-250 Heated Pedestal | Resin/metal | 18 in | 2–2.5 in | 24–27 in | 250W deicer, full pedestal unit | Works in extreme cold, integrated design | Higher wattage cost, cord management needed |
| Solar Flower Pedestal with Pump | Resin or concrete | 16–20 in | 1.5–2 in | 24–28 in | Solar dripper/fountain pump | No wiring needed, water movement deters mosquitoes | Needs direct sun, pump output varies |
How to choose the right pedestal bird bath
Size and depth
Cornell Lab recommends birdbaths with a shallow, gradual slope that mimics a natural puddle: 1–2 inches deep at the edges, with a gentle gradient toward a center that's no deeper than 3 inches. Audubon echoes this, noting that the usable bathing area should stay in that 2–3 inch range. A basin that's too deep won't get used by small birds, who need to feel the bottom underfoot. If your bath is deeper than ideal, adding a flat stone or textured gravel to the basin bottom raises the effective depth and gives birds better footing.
Stability and base design
A tipping bird bath is a wasted bird bath. Heavier is generally better: a concrete pedestal that weighs 40+ lbs won't blow over in most wind conditions. For lighter metal or resin pedestals, look for a base diameter of at least 12 inches and consider anchoring options (ground spike inserts, weighted base plates, or securing with a rebar pin through a drilled hole). Integrated-planter bases, where the base column doubles as a planter, add both visual interest and weight when filled with soil.
Finish and non-toxic materials
Avoid any bird bath with a lead-based paint or glaze, especially older ceramic or cast-iron models. For new purchases, look for products labeled food-safe or bird-safe in the basin finish. Glazed surfaces are easier to clean than rough, unfinished concrete, but unglazed concrete with a light sealant strikes a good balance between grip (for bird footing) and cleanability. Avoid petroleum-based sealers inside the basin; use water-based, non-toxic masonry sealers instead.
Integrated planter options
Some flower pedestal designs include a built-in planter ring around the base of the column or a secondary bowl at a lower tier. These look great and work well as long as the planting doesn't undermine stability (deep-rooted plants can shift a lightweight pedestal over time) and the drainage holes are positioned so they don't soak the ground directly under the base, which can cause sinking or frost heave.
Placement and installation
Picking the right spot
Placement is one of the most underrated decisions you'll make. Birds need to see approaching threats while bathing, and they need a fast escape route. Audubon Connecticut recommends positioning a bird bath roughly 6–13 feet (2–4 meters) from dense cover like shrubs or hedges. That range gives birds a short flight to safety without putting them so close to cover that a cat can ambush them mid-bath. Full to partial shade during the hottest part of the day slows algae growth and keeps the water cooler in summer. Avoid spots directly under berry-producing trees or heavy feeders, where dropping debris will foul the water quickly.
Height and sightlines
The standard 24–30 inch pedestal height puts the basin above typical ground-level predator strike range while remaining accessible for perching and approach. Cornell Lab's water-for-wildlife guidance emphasizes unobstructed swoop zones: birds like to approach from an open angle, drop in, and leave the same way. Don't position the bath where it's boxed in on multiple sides by dense plantings or structures.
Step-by-step installation
- Mark your chosen location and clear any debris, sod, or ground cover in a 12-inch radius around the base footprint.
- If installing on soft ground, lay a 2–3 inch compacted gravel pad or a paving stone under the pedestal base to prevent sinking.
- Set the pedestal column on the pad and check level with a bubble level on two axes (front-to-back and side-to-side).
- Place the basin on top of the column; on two-piece models, use a non-toxic waterproof adhesive or exterior silicone to bond the bowl to the pedestal if it isn't pinned.
- For lightweight pedestals on soft ground, drive a 12-inch rebar stake into the center of the base footprint and slip the hollow pedestal column over it, or use a manufacturer-supplied ground anchor.
- Fill the basin with clean water to the correct depth (1–2 inches at edges), confirm level, and add a flat stone or two if the center is too deep.
- Check stability by applying moderate hand pressure from multiple directions before leaving it unsupported.
Anchoring, leveling and stability by base type
The right anchoring approach depends entirely on what your pedestal is made of and where it's sitting.
| Base Type | Best Anchoring Method | Leveling Tip | Notes |
|---|---|---|---|
| Heavy cast concrete | Compacted gravel pad or paving stone; weight alone usually sufficient | Use a bubble level; shim with gravel or non-shrink grout under low side | Rarely needs extra anchoring; ensure pad doesn't settle unevenly |
| Hollow resin/plastic pedestal | Rebar stake through hollow column; or fill base cavity with sand/gravel for ballast | Level pad first; base is light enough to adjust easily | Check after first heavy rain or wind event |
| Cast iron pedestal | Heavy enough to self-anchor; use rubber pad under base to protect surface and prevent corrosion contact | Rubber shims work well for minor leveling | Inspect base-to-ground contact for rust annually |
| Powder-coated steel | Ground spike anchor or threaded bolt into a concrete pad | Use threaded leveling feet if the model includes them | Most prone to tipping; always anchor on exposed sites |
| Integrated planter base (concrete or resin) | Filled-planter weight usually sufficient; use gravel pad | Fill planter before finalizing position | Plant roots can shift lightweight bases over 1–2 seasons |
Tools and materials shopping checklist
For buying and installation
- Bubble level (9-inch or longer)
- Tape measure
- Paving stone or 12-inch square concrete pad
- Pea gravel or crushed gravel (one bag, for drainage/leveling pad)
- Rebar stake (12–18 inch, 3/8-inch diameter) for lightweight pedestals
- Non-toxic waterproof silicone or masonry adhesive (for bonding two-piece baths)
- Rubber mallet (for setting stakes and adjusting base position)
- Work gloves
For cleaning and maintenance
- Stiff-bristle scrub brush (non-metal for ceramic; wire brush for concrete)
- White vinegar (regular household 5% acidity)
- Household bleach (unscented, for disinfection: 1 part bleach to 9 parts water solution)
- Rubber or nitrile disposable gloves (CDC recommends gloves when cleaning bird baths and feeders)
- Garden hose with spray nozzle
- Bucket
- Water-based non-toxic masonry sealer (for concrete re-sealing)
- Mosquito Dunks or Bti bits (EPA-registered larvicide for mosquito control)
For DIY builds and repairs
- Quikrete Countertop Mix or hydraulic cement (for casting or patching concrete pedestals)
- Mold form (plastic bowl, cardboard tube, or foam for casting)
- Rebar or wire mesh (for reinforcing concrete pedestal columns)
- Concrete bonding adhesive (for patching cracks)
- Naval jelly or phosphoric acid rust converter (for cast iron restoration)
- Rust-inhibiting primer (oil-based, for cast iron)
- Exterior enamel or spray paint rated for metal (for cast iron refinishing)
- Paste wax or clear lacquer (topcoat for cast iron protection)
Cleaning and maintenance schedule
Daily
- Check water level and top up if needed
- Remove any leaves, feathers, or debris with your hand or a small net
- In hot weather (above 80°F), consider a full rinse and refill every 1–2 days to prevent rapid bacterial growth
Weekly
- Empty the basin completely
- Scrub with a stiff brush and a 9: 1 water-to-vinegar solution (Audubon's recommended mild routine cleaner)
- Rinse thoroughly with clean water — vinegar residue won't harm birds at low concentrations but a good rinse removes any taste
- During disease alerts or if you notice sick birds visiting, upgrade to a 10% bleach solution (1 part bleach to 9 parts water), scrub, and rinse thoroughly before refilling
- Wear disposable gloves during cleaning, per CDC guidance for handling wild-bird-contact surfaces
Monthly
- Inspect the pedestal base and column for cracks, chips, or movement
- Check that the basin-to-pedestal bond is still solid (no rocking or shifting)
- Inspect any sealant on concrete basins and reapply if surface feels porous or water absorbs quickly
- Check powered heater cords and connections for cracking or damage
Seasonal
- Spring: full deep-clean with bleach solution after winter storage or use; inspect for freeze damage; re-level if frost heaved the base
- Summer: increase cleaning frequency during hot spells; add Bti (Mosquito Dunks/Bits) if standing water sits more than 3 days without movement
- Fall: flush and clean thoroughly before freezing temps arrive; apply fresh sealant to concrete if needed
- Winter: either bring ceramic baths indoors, install a thermostatically controlled deicer in concrete or resin baths, or drain and store lightweight models
Troubleshooting algae, mosquitoes and freezing
Algae
Green or brown algae film is the most common bird bath problem and is almost entirely caused by sunlight plus nutrients (bird droppings, organic debris). Prevention is easier than treatment: move the bath to a shadier spot, clean weekly, and change the water every 2–3 days in summer. For persistent algae on concrete, a good scrub with a 10% bleach solution followed by a thorough rinse clears it fast. Resealing porous concrete reduces the surface area where algae can embed. Copper sulfate products are sometimes marketed as algae treatments, but they can be harmful to birds at higher concentrations, I skip them entirely and rely on the physical scrub plus shade management.
Mosquitoes
Mosquitoes can complete a larval cycle in standing water in as little as 7–10 days in warm weather, but you'll start to see larvae after just 3–4 days. The most effective, bird-safe intervention is Bacillus thuringiensis israelensis (Bti), sold as Mosquito Dunks or Mosquito Bits. Bti is EPA-registered as a biological larvicide that specifically targets mosquito larvae and won't harm birds, other wildlife, or people when used per label directions. Drop a half-dunk in the basin, or sprinkle Bits in the water every 1–2 weeks in summer. Water movement is even better: a solar dripper or small submersible pump that keeps the surface rippling will prevent most mosquito oviposition without any chemistry. Avoid petroleum-based surface oils or monomolecular films in bird baths, they're effective larvicides but can negatively affect non-target aquatic fauna and aren't appropriate for a bird bath setting.
Freezing
For concrete and ceramic baths, freezing water in the basin is the number-one cause of cracking and spalling. If you're not using a deicer, drain the basin before overnight temps consistently drop to 32°F. For winter bird-friendly water, a thermostatically controlled deicer is the right tool: it only activates when needed and costs very little to run at the wattage levels used for small basins. Size the heater to your basin volume and climate severity: 44–80W for small basins in moderate winters, 150–250W for larger baths or sustained sub-zero temperatures. Always plug into a GFCI-protected outdoor outlet, and inspect cords and the heater body before each season.
Using heated and solar bird baths
Heated bird baths: setup and safety
Heated bird baths (or add-on deicers dropped into an existing basin) are genuinely valuable for year-round bird activity in cold climates. Birds that overwinter need liquid water just as much in January as in July. Setup is straightforward: place the deicer flat on the basin floor, run the cord over the basin edge, and plug into a GFCI outdoor outlet. The NEC and modern electrical codes require GFCI protection for outdoor receptacles at dwellings, so if your outdoor outlet isn't GFCI-protected, have an electrician update it before running any water-adjacent electrical device. Keep the cord away from the water level, check it for rodent damage or cracking before each winter season, and only use units that are UL or CSA listed for outdoor use.
Solar bird baths: setup and realistic expectations
Solar fountain bird baths work best in open, south-facing sites that get 4–6 hours of direct sun. The pump runs while the sun shines and stops at night or on overcast days, which is fine, since birds aren't bathing after dark anyway. Position the solar panel so it's not shaded by the bath itself or surrounding plants. Clean the panel face monthly to maintain efficiency. If your garden is heavily shaded, a solar bath with a small built-in battery buffer performs better than a direct-solar-only model. Choose solar for placement flexibility in areas where running an outdoor electrical cord isn't practical.
Species-specific guidance: depth, perch and water motion
| Bird Group | Examples | Ideal Depth | Perch Needs | Water Motion | Notes |
|---|---|---|---|---|---|
| Hummingbirds | Ruby-throated, Anna's | 0.25–0.5 in (very shallow mist or spray) | Fine misting spray or drip; prefer moving water | High: misters and drippers strongly preferred | Rarely use traditional basins; add a mister attachment or dripper |
| Small songbirds | Warblers, wrens, chickadees | 0.5–1.5 in at edge | Low rim or stone perch inside basin | Moderate: drippers and gentle fountains attract them | Most active bathers; shallow edge is critical |
| Medium songbirds | Robins, starlings, sparrows | 1–2 in at edge, up to 3 in center | Basin rim or nearby branch within 3–5 ft | Gentle ripple or still water both work | Most versatile group; a standard flower pedestal bath suits them well |
| Large birds (crows, jays, doves) | American Crow, Blue Jay, Mourning Dove | 2–3 in, flat shallow area preferred | Wide rim, nearby low branch | Still or slow-moving water preferred | Need wide basin (20 in+); crows may cache food in water — clean more frequently |
One practical note on hummingbirds: they almost never use a standard pedestal bird bath basin. If attracting hummingbirds is a goal, add a dedicated misting device to a nearby shrub or fence, or get a shallow saucer-style hummingbird bath that produces a fine spray. A flower pedestal bath will still attract robins, thrushes, sparrows, and jays regardless.
DIY: how to make a concrete bird bath pedestal
Casting your own concrete pedestal is a satisfying weekend project and produces a result that can outlast anything you'd buy. The core approach involves a tubular form (a cardboard concrete tube or a length of large-diameter PVC), rebar for internal reinforcement, and a concrete mix that's workable but not too wet. A full set of measurements, mix ratios, form dimensions, and curing steps are covered in the detailed how-to guide on building a concrete bird bath pedestal on this site, that article walks you through a pedestal height of 24–28 inches, a base flare cast separately for stability, and the process of threading rebar from base to top for strength. Here's a condensed overview to give you a sense of the process.
- Cut a cardboard concrete tube form to 22–24 inches for the column; flare the bottom with a wider tube section or a plastic bucket mold for the base.
- Insert a central 3/8-inch rebar rod running the full column height; add two cross-bars near the base for a footing.
- Mix concrete to a stiff (not soupy) consistency; pour in 6-inch lifts, tapping the form to release air pockets.
- Allow 48 hours before stripping the form, then cure under a damp burlap cover for 7 days minimum.
- Once cured, apply two coats of water-based masonry sealer to the finished column.
- Cast or purchase a separate basin (a shallow mixing bowl or purpose-cast flower basin works well) and bond it to the pedestal with exterior silicone.
How to repair a cracked concrete bird bath
Cracks in concrete bird baths are usually caused by freeze-thaw cycles or impact damage, and most are fixable. Hairline cracks can be filled with a concrete bonding adhesive or hydraulic cement applied with a putty knife, then sealed over once cured. Larger structural cracks need the crack widened slightly with a chisel (a 'V-groove' cut gives the patch more surface area to bond to), filled with vinyl concrete patching compound, and left to cure for 72 hours before refilling. For broken pedestal sections or a shattered basin, a full repair guide covering reattachment with rebar pins and epoxy masonry adhesive is available on this site's concrete bird bath repair guide. That article also covers repainting and re-sealing after the patch is cured.
How to restore a cast-iron bird bath
Rust is the main enemy of cast iron, and it's entirely manageable with the right sequence. Start by scrubbing loose rust with a wire brush or wire-wheel attachment on a drill. Apply a naval jelly or phosphoric acid rust converter to any remaining rust pitting, let it dwell per label time, then neutralize and wipe clean. Prime with a rust-inhibiting oil-based primer, then finish with an exterior enamel in your chosen color. Inside the basin, use a food-safe enamel or a dedicated bird-bath paint. Once cured, a coat of paste wax adds a seasonal moisture barrier. Full step-by-step instructions including dwell times, product recommendations, and safety notes are covered in the cast-iron bird bath restoration guide on this site.
What to do with an old bird bath pedestal
An old pedestal doesn't have to go in the skip. The structural element of a pedestal is often still sound even when the basin is cracked or missing entirely. Common repurpose ideas include: using the column as a garden sculpture or sundial base, topping it with a new aftermarket basin (many are sold separately), converting it into a plant pedestal for a potted specimen, or inverting a wide-based pedestal to use as a chunky garden urn. Detailed upcycle ideas and step-by-step adaptation instructions are covered in the dedicated guide on what to do with an old bird bath pedestal on this site, including how to match a new basin to an existing column.
What to do with a bird bath base
The base alone, without a column, is a surprisingly versatile garden element. A wide, flat concrete base can be leveled and used as a stepping stone or a platform for a potted shrub. A hollow resin base can be filled with gravel and used as a low planter. If the base has a central hole or socket, you can insert a new prefabricated column to build an entirely new bath. Shallow concrete bases with intact surfaces can be repurposed as ground-level bird baths in their own right, since ground-level water sources are used by different species (thrushes, doves, quail) than pedestal baths. A full set of adaptation and conversion ideas is covered in the bird bath base repurposing guide on this site.
Repair, restore and reuse checklist by material
| Material | Common Problem | Repair Approach | Restore/Refinish | Reuse Options |
|---|---|---|---|---|
| Concrete | Cracks, spalling, surface erosion | V-groove, vinyl patch compound, bonding adhesive | Water-based masonry sealer; repaint with bird-safe exterior paint | Planter base, stepping stone, ground-level bath |
| Glazed ceramic | Freeze cracking, chip on glaze | Epoxy for structural cracks; touch-up glaze for chips (food-safe) | Replacement basin if glaze is compromised throughout | Mosaic project, garden ornament, planter |
| Cast iron | Rust, peeling paint, pitting | Wire brush, rust converter, prime and repaint | Oil-based rust-inhibiting primer + exterior enamel + paste wax | Garden sculpture, plant stand, relocated bath with new paint |
| Powder-coated steel/aluminum | Chipped coating, surface rust at chip sites | Sand chip, apply touch-up rust-inhibiting primer, repaint | Full repaint with metal-rated exterior enamel | Repaint for a fresh look; convert to planter or lantern stand |
| Resin/plastic | UV yellowing, cracking at base | Plastic-compatible epoxy for cracks; limited paint adhesion | Spray paint with plastic-adhesion primer first | Fill with concrete for weight/base, repurpose as planter or birdseed tray |
Year-round maintenance calendar
Print this out and stick it somewhere you'll see it. Consistent, light maintenance is far less work than dealing with a cracked basin, heavy algae, or a rusted-out pedestal you let go for two winters.
| Month | Key Tasks |
|---|---|
| January–February | Keep deicer running; check cord weekly; refill as evaporation occurs; clean basin every 7–10 days even in winter |
| March | Remove deicer when overnight temps stay above 35°F; deep clean with bleach solution; inspect pedestal for frost damage; re-level if heaved |
| April | Reseal concrete if needed; add mister or dripper for spring migrants; begin weekly cleaning schedule |
| May–June | Increase cleaning to every 3–5 days in warm weather; add Bti if water sits still for more than 3 days; monitor for algae |
| July–August | Daily refill and debris check; full scrub every 3–4 days; shade bath if in full afternoon sun; inspect solar panel for debris shading |
| September | Return to weekly cleaning; inspect all seals and bonds before fall; patch any cracks before first frost |
| October | Apply fresh masonry sealer to concrete while temps are still above 50°F; drain ceramic baths or bring indoors |
| November | Install thermostat deicer; confirm GFCI outlet is functioning; check cord for cracking; drain and store ceramic or fragile resin baths |
| December | Maintain deicer; weekly basin clean; inspect column for new cracks; monitor water level (cold air dries water faster than you'd expect) |
Where to go from here
If you're buying new, use the checklist and comparison table above to shortlist two or three models by material and feature set, then choose based on your climate and how much maintenance you want to take on. Concrete is the most forgiving long-term. Ceramic is the easiest to clean. Metal looks great but requires the most seasonal attention. If you're working with what you already have, the repair, restore, and reuse sections point you toward practical next steps without having to start from scratch. And if you want to build your own, casting a concrete pedestal is genuinely achievable in a weekend with basic tools. The detailed build guide, repair guide, cast-iron restoration steps, and pedestal/base repurpose ideas are all available as dedicated how-tos on this site, each with full measurements, material lists, and step-by-step photos. Start with whatever your current situation calls for, get water out there, and watch what shows up.
FAQ
What primary research sources should be consulted to ensure the article is accurate and safe for bird health and public health?
Use peer‑reviewed ornithology and ecology studies, authoritative conservation/extension guidance (Cornell Lab All About Birds, Audubon, state wildlife agencies), public‑health agencies (CDC, state health departments), EPA guidance (mosquito control/Bti), National Wildlife Health Center reports, and product/manufacturer specifications (wattage, safety listings). Where disease or human‑health risk applies, prioritize CDC/NWHC/state advisories.
What expert input is essential and how should it be used?
Interview or cite: avian biologists or Cornell/Audubon staff for bird behavior and depth/placement guidance; wildlife rehabilitators/state wildlife vets for disease/cleaning protocols; entomologists/vector control experts for mosquito control options (Bti, larvicides, films); licensed electricians or code experts for heated/solar device installation and GFCI/NEC compliance; materials conservators/metalworkers for restoration/repair methods. Use experts to validate practical how‑tos, safety limits, and troubleshooting steps.
Which standardized measurements and specifications must be defined and consistently reported in product comparisons and recommendations?
Report bath diameter (inches/cm), usable water depth range (edge and center in inches/cm), bowl slope profile, material and finish, bowl capacity (liters/gal), pedestal height (inches/cm), overall footprint and base dimensions, weight, stability metrics (center‑of‑gravity notes or anti‑tip features), deicer wattage and thermostatic setpoint, solar panel wattage/ampere, cord length/GFCI needs, UL/CSA listing, and manufacturer freeze‑rating. Include recommended basin depth: edge 1–2 in (2.5–5 cm), usable center up to 2–3 in (5–7.5 cm) per Cornell/Audubon.
What specific data should be collected for a reliable shortlist of top‑rated garden flower pedestal bird baths by material and feature?
Collect manufacturer specs (above), independent lab/safety listings (UL/CSA), retailer and expert reviews, field testing notes (stability, bird usage, durability), climate suitability (freeze tolerance), maintenance difficulty, integrated planter options, anti‑algae/anti‑mosquito features, warranty/return policy, and price. For heated/solar models, record actual power draw, run time in cold tests, and cord/GFCI requirements.
Which safety and regulatory standards must be observed when recommending heated or wired installations?
Follow NEC/NFPA 70 requirements for outdoor receptacles and GFCI protection, manufacturer installation instructions, and local electrical codes for permanent wiring. Recommend use of outdoor‑rated cords/plugs and UL/ETL/CSA listed devices. Advise homeowners to hire a licensed electrician for hard‑wired or permanent setups and to avoid improvised outdoor connections.
What cleaning and disinfection protocols should the article recommend (routine and disease event)?
Routine: weekly scrub with stiff brush and mild detergent or 9:1 water:vinegar (Audubon), rinse thoroughly, refill with fresh water. When visibly soiled or during disease outbreaks: scrub, then disinfect with 10% bleach (1:9 bleach:water) contact 10 minutes, rinse 3+ times and air dry before refilling (CDC/state guidance). Use disposable gloves and avoid splashing. Record cleaning frequency and safety gear in step lists.
Next Article
What to Do With an Old Bird Bath Pedestal Today
Check an old bird bath pedestal, clean and refinish or replace the basin safely, then troubleshoot algae and freezing is