If your bird bath bowl cracked, rusted through, or you just scored a nicer basin, don't toss the pedestal. Most pedestals are structurally sound long after the top gives out, and with a quick inspection, a good scrub, and the right replacement basin, you can have a working bird bath back in the yard in an afternoon. Here's exactly how to decide what to do, prep it properly, and keep it running without algae, mosquitoes, or freeze damage becoming your next headache.
What to Do With an Old Bird Bath Pedestal Today

Marcus Henley
11 May 2026
Quick ways to repurpose a bird bath pedestal
Before you commit to a full restoration project, it helps to know all the options in front of you. A pedestal that's too far gone for bird bath duty can still earn its spot in the garden.
- Pair it with a replacement basin: The most obvious move. Buy a compatible shallow basin (ceramic, resin, or cast stone) that fits the pedestal's mounting collar or top surface, and you're back in business.
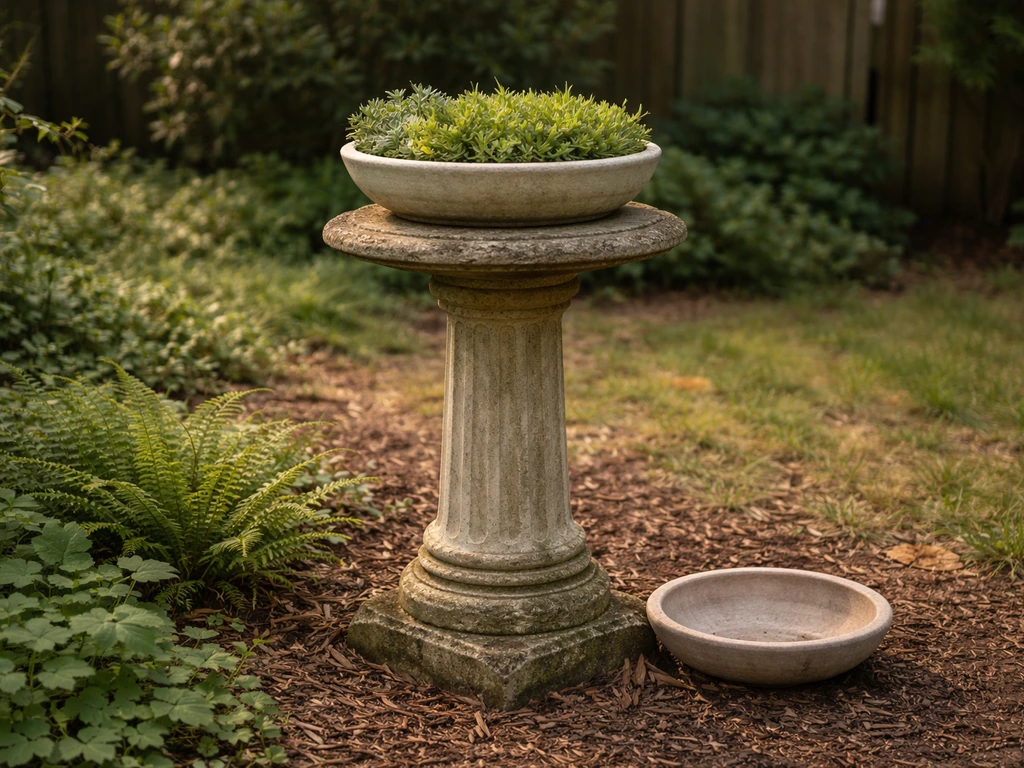
- Use it as a planter pedestal: Set a wide pot or decorative bowl on top and plant trailing flowers or succulents. A concrete or stone pedestal handles the weight easily.
- Turn it into a garden sculpture base: A squat, textured stone pedestal under a gazing ball or small statue looks intentional and adds vertical interest to a border.
- Make a raised feeder stand: With a flat platform top bolted or mortared on, the pedestal becomes a squirrel-deterring raised feeder station.
- Repurpose as a sundial stand: Many sundial bases are designed to sit on exactly this kind of pedestal.
- Retire it safely: If the pedestal is badly cracked, deeply pitted, or leans and can't be corrected, the honest call is to retire it. Concrete can be broken up and used as rubble fill or taken to a masonry recycler. Cast iron can be sold for scrap.
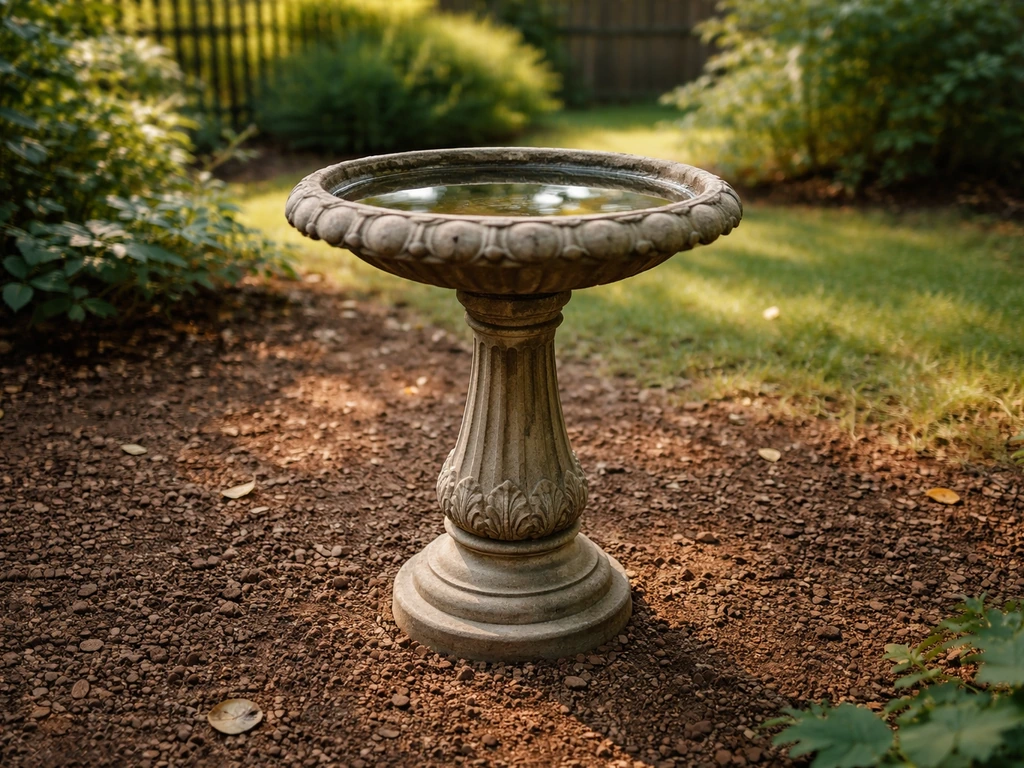
The most useful path for most people is pairing it with a new basin, so the rest of this guide walks through that process from start to finish.
Assessing condition and stability before using it again
A wobbly pedestal with a heavy basin on top is a liability. Spend five minutes on this inspection before you invest time and money in restoration.
What to check on a concrete or cast stone pedestal
- Push it from the side with moderate force. It should not rock, tilt, or shift. Any movement means the base is uneven, the footing has settled, or the base itself is compromised.
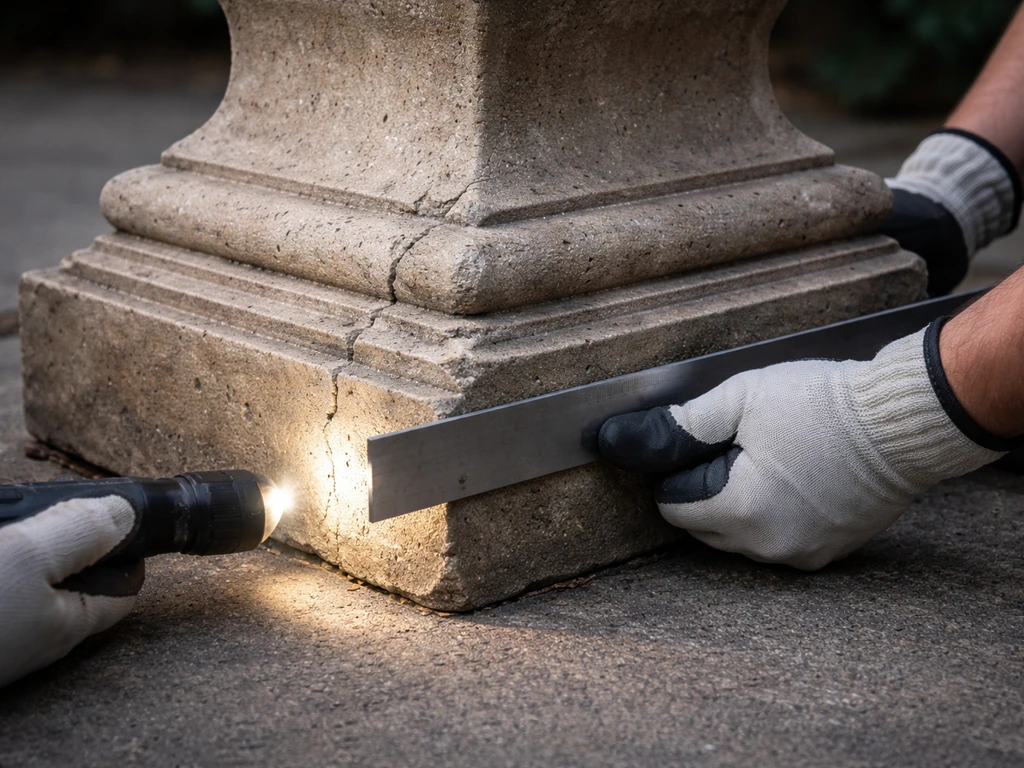
- Look for cracks running vertically through the shaft. Hairline surface cracks are common and usually cosmetic. Wide cracks (you can fit a fingernail in) that run through the full thickness are a structural red flag.
- Check the top mounting surface where the basin rests. It should be flat and intact. Spalling, flaking, or a missing center section means the bowl won't seat securely.
- Inspect the base. If the bottom is crumbling, has chunks missing, or shows signs of significant freeze-thaw damage (pitting and flaking rather than one clean break), the pedestal is likely to keep deteriorating.
- Concrete that has gone through many freeze-thaw cycles accumulates micro-damage over time, so an older pedestal that looks borderline in fall will often be worse by spring.
What to check on a cast iron pedestal
- Look for cracks, not just surface rust. Surface rust is normal and fixable. Through-cracks in the casting, especially near attachment points or at the base flange, are not.
- Check all fastener points. On cast iron bird baths the bowl typically attaches via screws or bolts, and these attachment zones are stress points. Look for cracked metal around existing bolt holes.
- Tap the pedestal lightly with a small hammer or rod. A solid ring means intact iron. A dull thud suggests a crack or internal void.
- Check the base plate. If it's warped, cracked, or the mounting holes are torn out, stability is compromised and the repair may not be worth the effort.
If the pedestal passes these checks, move on. If it fails on structural cracks or an unsalvageable base, retire it rather than risk a heavy basin tipping onto a child, pet, or prized plant.
Deep cleaning and prep for safe outdoor use
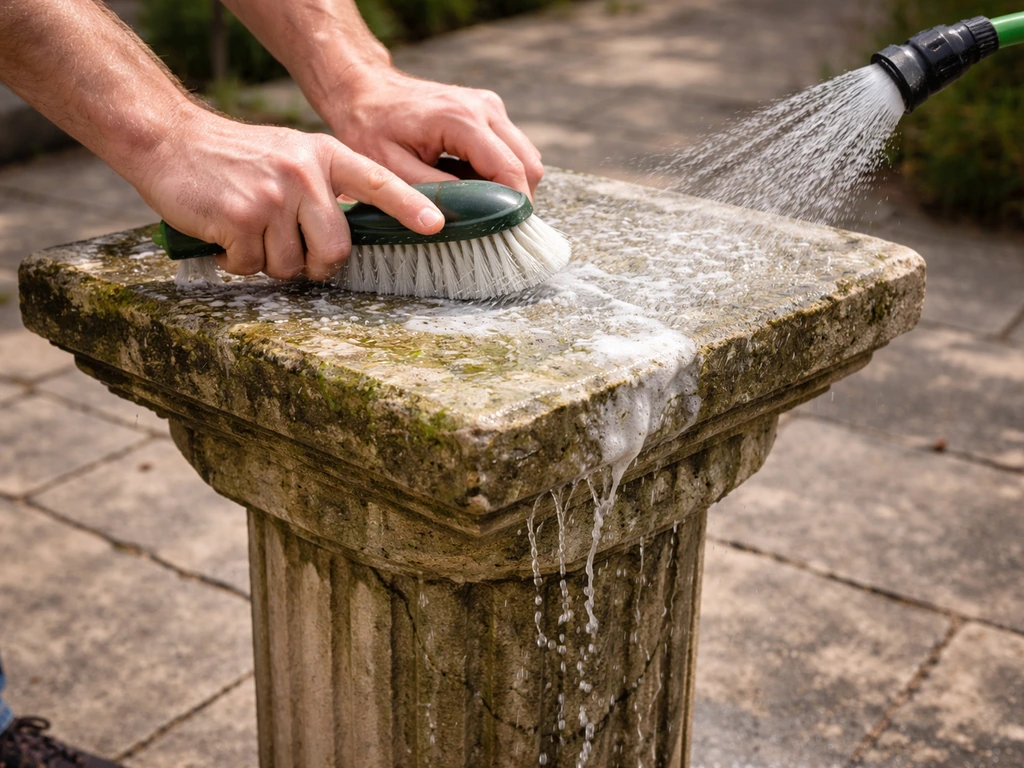
Even if the pedestal looks okay, years of algae, bird droppings, hard water mineral deposits, and organic debris have built up in every pore and crevice. You need to get it genuinely clean before putting a fresh basin on top, both because it affects adhesion if you're mortaring or siliconing a basin in place, and because contamination can leach into the water and harm birds.
- Rinse the whole pedestal with a hose to knock off loose debris.
- Mix a cleaning solution of one part household bleach to nine parts water. This ratio is effective against algae, mold, and bacteria without being so concentrated that it's hard to rinse out.
- Apply the solution and let it soak for 10 to 20 minutes. Cover the pedestal with a plastic tarp or bag during the soak so birds don't land on the wet surface.
- Scrub every surface with a stiff-bristled brush. Pay particular attention to the top mounting surface, any textured areas, and the base where organic material collects.
- For heavy mineral scale or hard water deposits, scrub with undiluted white vinegar before the bleach step. Let it sit for 10 minutes, then scrub and rinse before applying bleach.
- If you have access to a pressure washer, use it after scrubbing to blast out residue from crevices. Keep the nozzle moving on concrete to avoid surface erosion.
- Rinse thoroughly with clean water, then rinse again. Bleach residue is harmful to birds, so don't skip this step.
- Let the pedestal dry completely before moving on to refinishing or basin installation. For concrete, 24 to 48 hours of drying in sun and air is ideal.
Converting the pedestal to a new bird bath setup
Getting the right basin on top is where a lot of people run into trouble, usually because they buy a basin before measuring the pedestal, or because they assume any basin will sit flat. It won't always.
Matching a replacement basin to your pedestal
Measure the diameter of the pedestal's top surface before you shop. A basin should overhang the pedestal slightly all the way around for a natural look, but the bottom of the basin needs to sit flat and stable on the pedestal's top. Most replacement basins are designed for pedestals in the 4 to 6 inch top diameter range, but cast stone and concrete pedestals vary a lot. If the pedestal has a center mounting hole or post, measure that too so you can match a basin with a compatible center hole.
For material compatibility: ceramic and resin basins are lightweight and easy to swap out seasonally, which matters if you live somewhere with hard freezes. Cast stone and concrete basins are heavier and more durable but need more care in winter. If you're restoring a cast iron pedestal, a cast iron or heavy resin basin tends to look the most cohesive.
Placement and leveling
Place the pedestal on firm, level ground. If you're putting it on grass, compact the soil beneath it or set the base on a paver or flat stone so it doesn't sink unevenly over time. Use a small bubble level on the top surface of the pedestal before placing the basin. Even a slight tilt means water pools to one side and the basin may shift or tip. If the ground is uneven, you can shim the base with small flat stones or composite shims, not wood, which will rot and compress.
For bird activity, the ideal placement is in partial shade, about 10 feet from dense shrubs (which can hide predators) but within 10 to 15 feet of trees or branches birds can perch in while waiting. Keep it visible from inside so you can monitor it easily.
Securing the basin to the pedestal
If the basin just rests on top without any fastening, that's fine for many setups, especially heavy cast stone basins. But if the basin has a center hole, you have a few options. For cast iron, thread a bolt through the basin center hole and pedestal, use a rubber washer under the bolt head to create a watertight seal at the basin, and add a bead of clear silicone sealant under the basin rim where it contacts the pedestal. For concrete pedestals, a thin bed of mortar or a few dabs of exterior construction adhesive under the basin holds it in place without permanent commitment. Let any adhesive or sealant cure fully before filling the basin.
DIY refinishing or re-securing the pedestal
Refinishing a pedestal brings it back visually and can protect it from further deterioration. The right approach depends on the material.
Concrete and cast stone pedestals
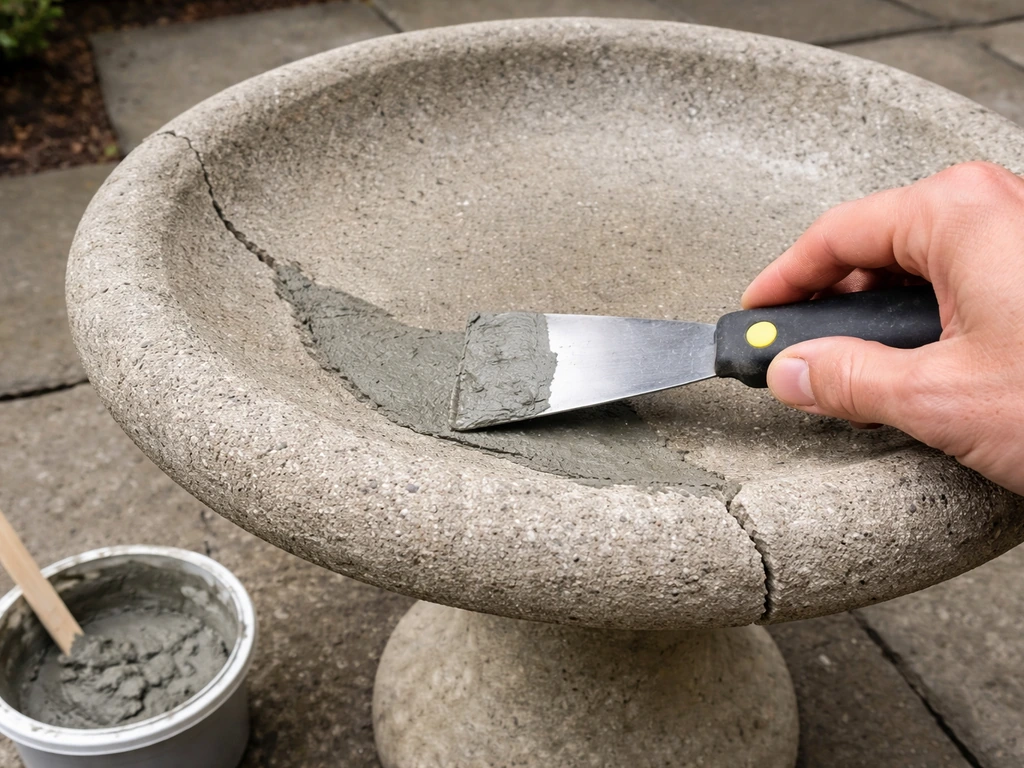
Once the pedestal is fully clean and dry, fill any hairline cracks with exterior concrete crack filler or hydraulic cement. Smooth it flush and let it cure per the product directions, usually 24 hours. For the top mounting surface specifically, you can apply a concrete waterproofer like DRYLOK Original Concrete and Masonry Waterproofer to seal the surface. This prevents water from wicking into the concrete at the most vulnerable point (the joint between basin and pedestal) and reduces freeze-thaw damage over time. Let the waterproofer dry for at least 48 hours before putting the basin on and filling it.
For cosmetic refinishing of the exterior, exterior masonry paint in a neutral earth tone works well and holds up outdoors. Apply two thin coats, letting each dry fully. If you want a more natural look, skip paint and use a penetrating concrete sealer instead, which protects without changing the color much.
Cast iron pedestals
Surface rust is the main issue with cast iron. For specific steps on how to restore cast iron bird bath surfaces, follow the cast iron refinishing and rust-removal guidance in the DIY section. Wire brush or sand the rusted areas down to bare metal, then apply a rust-converting primer (products like Rust-Oleum Rust Reformer chemically convert rust to a paintable surface). Follow with two coats of exterior enamel or spray paint rated for metal. Flat or satin black is the classic choice for cast iron garden pieces and holds up better than glossy finishes outdoors. If you're re-securing a loose joint, use exterior epoxy rated for metal-to-metal or metal-to-stone bonding, and clamp or tape the joint while it cures.
Re-securing a wobbly pedestal base
If the pedestal wobbles because the base has developed a slight lean rather than a structural crack, you can stabilize it by setting it in a shallow bed of fast-setting concrete or mortar. Dig a few inches, set the base in, check level, then pack concrete around the base flange. This is especially useful for cast iron pedestals that have a flat base flange designed to sit on a hard surface. For concrete pedestals, you can also use construction adhesive to bond the base to a paver, which prevents rocking without permanent in-ground installation.
Troubleshooting common issues after reusing
Algae buildup
Algae is the most common ongoing issue with any bird bath, and a reused pedestal with a porous concrete surface gives it extra places to grab hold. The most effective prevention is regular cleaning: scrub the basin every one to two weeks with your diluted bleach solution, rinse thoroughly, and refill. Keeping the bath in partial shade rather than full sun slows algae growth significantly. If algae keeps coming back fast, a quick coat of concrete sealant inside the basin (if it's concrete) makes the surface smoother and less hospitable for algae.
Mosquito prevention
Standing water left unchanged for more than a few days becomes a mosquito breeding site. The simplest fix is changing the water at least twice a week, which the Washington State Department of Health specifically recommends for bird baths.
If you want extra protection, drop a Bacillus thuringiensis israelensis (BTI) dunk into the basin. The Washington Department of Fish & Wildlife also advises moving bird baths into the shade to reduce water temperatures and help keep the bath usable longer move bird baths into the shade to reduce water temperatures.
BTI is a naturally occurring bacteria that kills mosquito larvae and is safe for birds, pets, and people. One dunk treats the water for up to 30 days and is widely available at garden centers. Break a dunk into smaller pieces for a standard bird bath basin so you're not overdosing a small volume of water. Adding a solar-powered water wiggler or small fountain pump also disrupts the still water that mosquitoes need to lay eggs.
Freezing and cold weather damage
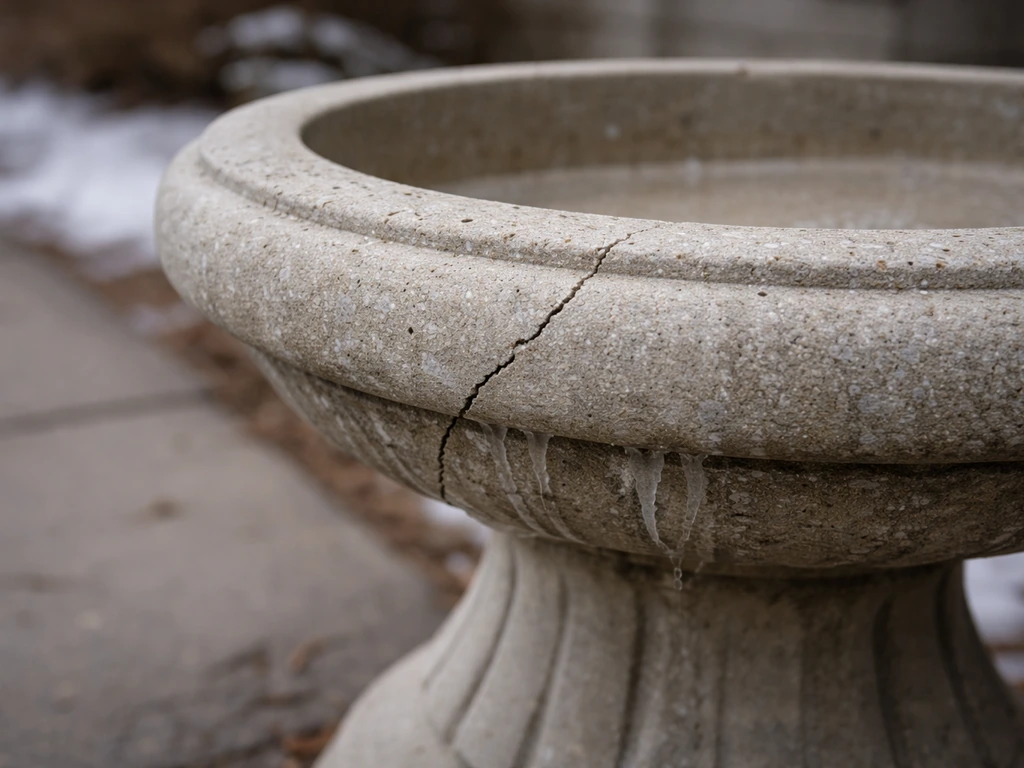
If you live somewhere with real winters, this is the section that will save you a cracked basin or a deteriorated pedestal. Concrete and cast stone both absorb water, and repeated freeze-thaw cycles expand that water into ice and break the material from the inside out over time.
The easy protective steps are drain the basin completely before the first hard freeze, lift the basin off the pedestal and bring it under cover (a shed, garage, or even flipped upside down under a tarp), and raise any base flanges off the ground so the pedestal doesn't freeze into the soil and crack when it heaves.
If you want to keep the bird bath active through winter, a submersible bird bath heater prevents the water from freezing and removes the freeze risk entirely. Cast iron pedestals handle freezing better than concrete but should still be kept drained, since standing water in a seam or joint can crack a casting just as easily as it cracks stone.
Leaks at the basin-pedestal joint
If you're seeing water pooling at the base of the pedestal rather than staying in the basin, the joint between basin and pedestal has a gap. Remove the basin, let both surfaces dry completely, then run a continuous bead of clear exterior silicone sealant around the pedestal's top surface before resetting the basin. Press the basin down firmly and let the silicone cure for 24 hours before refilling. On cast iron setups, adding rubber washers at any bolt attachment points creates a watertight compression seal that silicone alone may not hold long-term.
A properly cleaned, refinished, and leveled pedestal paired with the right replacement basin is genuinely worth more than starting from scratch, and it usually costs a fraction of a new bird bath. If you're working with a damaged pedestal rather than just a worn one, the guides on repairing concrete bird baths and restoring cast iron bird baths cover material-specific fixes in more depth.
If you’re dealing with a cracked or crumbling concrete bird bath, the repair steps in our guide will help you fix it safely and keep it watertight repairing concrete bird baths. And if the pedestal itself is beyond saving but you want to build a replacement, making your own concrete pedestal from scratch is more achievable than most people expect.
If you’d rather start fresh, follow this guide on how to make a concrete bird bath pedestal from scratch.
FAQ
How can I tell if the old pedestal is safe to reuse before I buy a new basin?
In addition to checking for visible cracks, shake the pedestal at the top and watch the base flange for any rocking or separation from the ground. If it moves more than a tiny amount when you push at the basin height, it usually needs stabilization or retirement, because a heavy replacement basin will amplify the wobble over time.
Do I need to fasten the basin to the pedestal, or can it just sit there?
It depends on the basin design and your pedestal material. If there is no center hole and the basin’s bottom seats flat, resting can work well, especially with heavier cast stone. If the pedestal top is slightly rough or you see any water seepage at the rim, use a sealant or mortar bed to prevent the joint from becoming a leak point.
What’s the best way to clean off algae and mineral buildup on a reused pedestal?
Use a two-step approach: first scrub to remove biofilm, then handle mineral deposits separately. After your regular diluted bleach clean, if you still see chalky white buildup, treat those spots with a limescale remover made for masonry or concrete, rinse thoroughly, and let the pedestal fully dry before assembling.
Can I reuse a pedestal if the pedestal top is stained or rough from years of hard water?
Yes, but plan on sealing that contact surface. Rough or porous areas increase the chance of algae and leaks at the joint, so after drying you should waterseal the top mounting area, then apply a new gasket-like layer where the basin meets (silicone or a compatible sealant/mortar bed depending on your materials).
What should I do if the basin wobbles on the pedestal top even after leveling the base?
Check for a pedestal top that is not flat, then correct with shimming under the basin rather than under the pedestal. Use thin composite shims to fill uneven gaps, remove them one-by-one to confirm contact, then reseat and seal the joint so the basin cannot shift when filled.
Is it safe to use bleach, and how do I avoid harming birds when refilling?
Bleach can be used for scrubbing, but only if you rinse aggressively and let the surfaces air out until there is no bleach odor. After rinsing, fill and discard the first fresh water once (dump it) before allowing birds to use the bath, especially if you cleaned just before sunset.
What’s the best way to stop mosquitoes if I don’t want to change water twice a week?
Combine a mechanical approach with a biological one. A small fountain pump or water wiggler reduces standing water long enough that you may not need frequent dumps, and adding BTI provides backup control for larvae. Still, inspect for algae and check that the circulation is actually reaching all parts of the basin.
If my pedestal is porous concrete, should I seal it only on the top or also elsewhere?
Focus on the surfaces that get wet and stay damp, the top mounting area and any interior or seam zones that hold water. Sealing everywhere is not always necessary, but sealing inside a concrete basin and the rim joint reduces algae attachment and limits freeze-thaw cracking caused by trapped moisture.
How should I winterize if I have a basin with a center hole and fasteners?
After draining completely, remove or loosen fittings if water could collect around the bolt area, then reseal any reinstalled joints once fully dry. If you keep the basin under cover, allow it to dry completely before moving indoors or under a tarp to reduce trapped moisture that can crack concrete or cast stone.
My pedestal has rust, but only in small spots. Do I need the full cast-iron refinishing process?
If rust is localized and the metal is still solid, you can spot treat, but you should still remove loose rust to bare metal and apply a rust-converting primer before painting. Even small pits can expand if you just paint over flaky rust, because moisture keeps getting under the coating.
What should I do if water is leaking from the joint between the pedestal and basin?
Remove the basin, dry both mating surfaces completely, then apply a continuous bead of clear exterior silicone around the full contact ring before reseating. Press down firmly, and do not fill until the silicone cures for the full recommended time, because early filling can create a channel that keeps leaking even after curing.
If the pedestal is beyond repair, what are practical alternatives to throwing it away?
You can often repurpose a safe, stable pedestal as a plant stand or container base if the top is intact and not structurally compromised. If it’s unsafe, break down only if you can do it safely, otherwise offer it for scrap or reuse parts like the center mounting hardware or decorative top piece.
Next Article
How to Repair a Concrete Bird Bath: Fix Cracks, Leaks, Holes
Step-by-step DIY guide to repair concrete bird baths: fix cracks, leaks, holes, broken bowls, then seal and test safely.