Most concrete bird bath repairs come down to one of four problems: a hairline or structural crack, a leaking seam or base, a broken-off chunk, or a hole that needs patching. Once you know which one you're dealing with, the fix is straightforward. Clean the damaged area thoroughly, let it dry completely, apply the right patching or sealing product, cure it for at least 48 hours, and your birds are back in business. The tricky part is picking the right material for the right damage, so let's start by figuring out exactly what's wrong.
How to Repair a Concrete Bird Bath: Fix Cracks, Leaks, Holes

Marcus Henley
25 Apr 2026
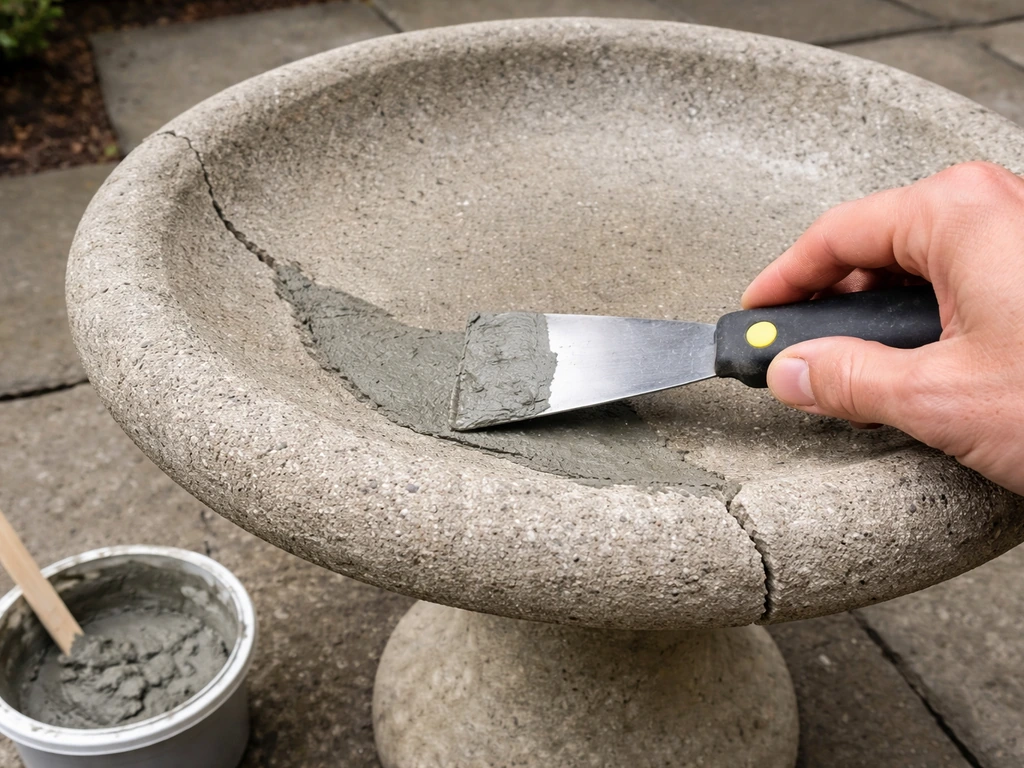
Figure Out What You're Actually Dealing With
Before you buy anything, spend five minutes diagnosing the problem. Run your hand over the basin and check the pedestal base. The damage type dictates the repair method completely, and using the wrong approach wastes time and money. If you're dealing with a cast iron bird bath that needs restoration, the same principle applies: identify the exact damage first so you can choose the right repair approach how to restore cast iron bird bath.
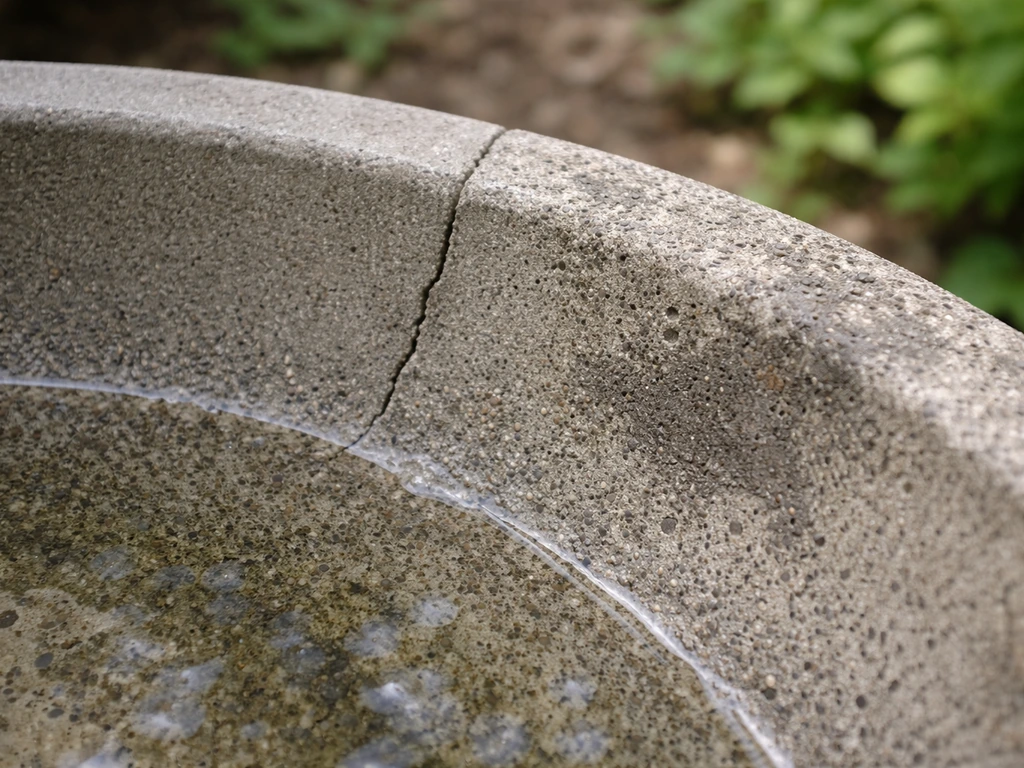
Look for these specific patterns. Hairline cracks that run along the surface and don't go all the way through are usually cosmetic or early freeze-thaw damage. Cracks that are parallel to the surface, or areas where the surface is flaking off in thin layers (called spalling or delamination), are classic signs of freeze-thaw cycles weakening the concrete. If you see flaking chunks breaking loose, especially around any metal hardware or embedded rebar, that can indicate internal corrosion expanding inside the concrete. A wet ring at the base or wet pedestal seam means you have a leak, not just a crack. An obvious gap or missing piece is a structural break. And if you can see daylight through a spot in the basin, that's a hole.
Also, confirm your material. Most older garden bird baths are cast concrete or cement. But many people have what looks like concrete and is actually hypertufa, reconstituted stone, resin, or terracotta. Tap it gently. Concrete sounds dense and solid. Terracotta sounds slightly hollow and rings almost like ceramic. Resin and plastic flex slightly under pressure. This matters because the patching products are different.
Quick Material and Damage Identification
| Material | How to Identify | Best Patch Approach |
|---|---|---|
| Concrete / Cement | Dense, heavy, dull tap sound, often gray or stained | Concrete repair mortar, epoxy, waterproofing sealer |
| Reconstituted Stone | Very heavy, rough texture, mineral flecks visible | Same as concrete; flexible epoxy filler for cracks |
| Terracotta | Reddish-orange clay body, rings when tapped, porous | Waterproof tile grout or epoxy filler, then pond sealer |
| Ceramic / Glazed | Smooth glazed surface, chips show white or cream body underneath | Epoxy adhesive for breaks, waterproof grout for cracks |
| Resin / Plastic | Lightweight, slight flex, hollow sound | Two-part epoxy putty or plastic-compatible adhesive |
| Hypertufa / DIY cast | Rough, often lighter than concrete, visible perlite or peat | Portland cement slurry or thin-set mortar |
Tools and Supplies to Have Ready
You don't need a contractor's toolkit for this. Most bird bath repairs call for a fairly short list of supplies, though the exact products depend on your damage type. Here's what covers the majority of situations:
- Wire brush or stiff-bristle scrub brush (for cleaning out cracks and loose material)
- Vacuum or compressed air (to clear dust from cracks before filling)
- Bucket and clean water
- Concrete bonding adhesive or slurry (helps new patch material stick to old concrete)
- QUIKRETE Polymer Modified Thin Patch (for shallow repairs from 1/16 inch to 1 inch deep)
- Sakrete Concrete Crack Repair or a latex-based crack filler (for cracks up to 3/8 inch deep and 1/2 inch wide)
- Two-part epoxy putty or epoxy concrete filler (for structural gaps, broken chunks, or wider cracks)
- Hydraulic cement or Xypex Patch'n Plug (specifically for active leak points)
- Pond-safe waterproofing sealer or nontoxic penetrating concrete sealer (for the final waterproofing coat)
- Small pointing trowel or putty knife
- Mixing paddle or stir stick
- Painter's tape (for masking edges on resurfacing projects)
- Safety glasses and gloves
- Drop cloth or plastic sheeting to protect your workspace
One note on sealers: because birds will drink from this, you need products labeled nontoxic after curing, or specifically designed for potable water or pond use. A nontoxic penetrating sealer works well for bare porous concrete. If your bird bath has an existing painted or sealed surface, a nontoxic polyurethane sealer is a better choice since penetrating sealers can't absorb into an already-sealed surface. Either way, plan for at least 48 hours of drying time before any water goes back in.
Repairing Cracks and Broken Sections: Step by Step
This is the most common repair and also the one where skipping steps causes failures. The number one mistake is patching over a dirty or damp surface. New concrete materials don't bond to dust, algae, or moisture. Take the prep seriously and the patch will last.
For Hairline Cracks and Shallow Surface Cracks
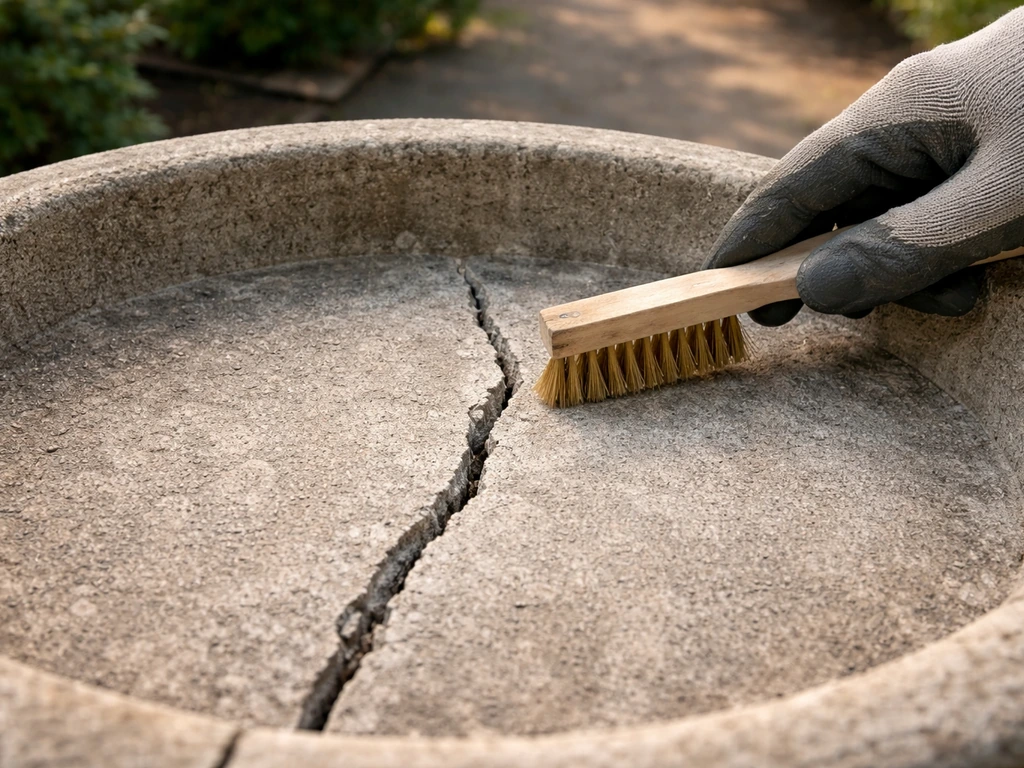
- Empty the bird bath completely and let it dry for at least 24 hours. Longer is better, especially in humid climates.
- Use a wire brush to scrub out any algae, dirt, and loose concrete from the crack. Remove every flake of loose material.
- Blow or vacuum out the crack to clear all dust and debris.
- For cracks up to 3/8 inch deep and 1/2 inch wide, apply a latex-based concrete crack filler directly into the crack with a caulk gun or squeeze bottle. Work it in with a putty knife and smooth the surface flush.
- For slightly wider cracks, mix a small batch of QUIKRETE Polymer Modified Thin Patch to a peanut butter consistency and press it firmly into the crack, feathering the edges so it blends with the surrounding surface.
- Mist the repair lightly with water once or twice during the first hour to slow the cure and reduce shrinkage cracking. This is especially important in hot, dry weather.
- Allow the patch to cure for at least 24 hours before applying sealer. The patch will handle foot traffic after about 3 hours but needs the full cure before water exposure.
- Apply a pond-safe waterproofing sealer or nontoxic penetrating sealer over the entire basin, not just the patched area. Let it dry a minimum of 48 hours before refilling.
For Deep Structural Cracks or Broken-Off Chunks
- Empty, dry, and clean the bird bath as described above. For a broken chunk you're reattaching, clean both the broken piece and the base surface.
- Mix a two-part epoxy concrete repair product according to label directions. These products cure much harder and have better adhesion than plain mortar for structural repairs.
- Apply a thin coat of concrete bonding adhesive to both surfaces before applying the epoxy or repair mortar. This is the step most DIYers skip, and it makes a huge difference in bond strength.
- Press the repair material firmly into the crack or broken area. For a chunk repair, butter both sides with epoxy filler, press together, and hold or prop in place while it sets.
- For very deep gaps (over 1 inch), build up the repair in layers rather than filling it all at once. Each layer should be partially cured before the next goes on.
- Smooth the surface with a damp putty knife or gloved finger while the material is still workable.
- Allow a full 24-hour cure before moving to the sealing step. Don't rush this.
- Seal the entire basin with a waterproof, bird-safe sealer and allow another 48 hours before refilling.
If you have a very fine crack you suspect goes all the way through but isn't gaping open, consider epoxy injection instead of surface patching. This method uses a syringe-style tool to blank" rel="noopener noreferrer">inject low-viscosity epoxy resin into the crack from the inside out, filling the full depth of the crack. It's the same technique used on structural concrete repairs and works well on a deep crack in a bird bath basin. TxDOT describes pressure-injected epoxy as a low-viscosity epoxy resin injected into concrete cracks to restore structural integrity and help prevent water and chloride infiltration blank" rel="noopener noreferrer">epoxy injection restores structural concrete repairs. You can find epoxy injection kits at most hardware stores for under $30.
Stopping Leaks and Sealing a Leaking Bird Bath
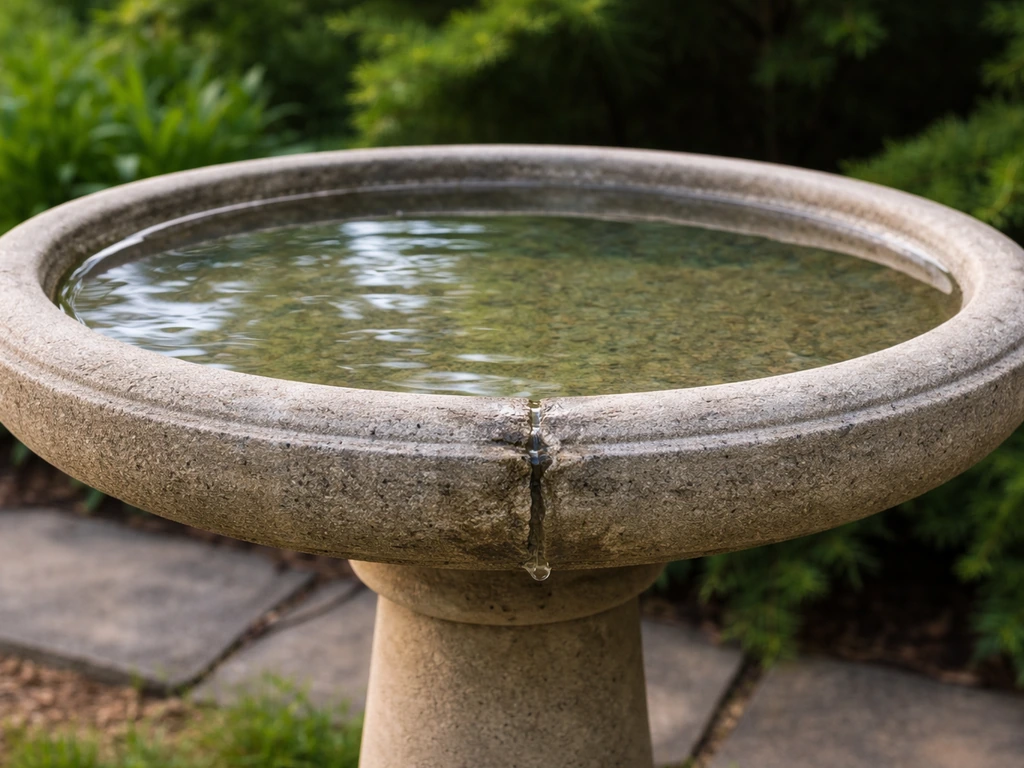
A bird bath that slowly drains is almost always leaking through a crack, a porous spot in the basin, or a gap where the bowl meets the pedestal. Fill it with water, wait 30 minutes without wind (to rule out evaporation), and watch for a wet ring on the ground or a drip line on the pedestal. That tells you where the leak is.
Sealing a Leaking Concrete Basin
If the basin is draining slowly through what looks like intact concrete, the material is just too porous. This happens with older concrete bird baths that were never properly sealed, or where the original sealer has worn off. The fix is straightforward: clean the basin thoroughly, let it dry for a full day or two, and apply two coats of a pond-safe waterproofing sealer. If you're using a multi-coat product, check the recoat window. Some sealers, like CoverTec's concrete sealers, specify a recoat window of 1 to 2 hours between coats, meaning you apply the second coat while the first is still slightly tacky. Let the final coat dry for 48 hours before refilling.
Fixing a Leaking Seam at the Pedestal
If the leak is coming from the joint where the bowl sits on the pedestal, you have two options. If the bowl just rests on the pedestal and isn't bonded, lift it off, clean both surfaces, apply a bead of waterproof epoxy or flexible outdoor sealant around the top of the pedestal, seat the bowl back, and let it cure fully before adding water. If the bowl is cast as one piece with the pedestal and you see a crack at the joint, treat it like a structural crack repair using epoxy filler, then seal the entire joint with a waterproofing coat.
Active Leaks: When Water Won't Stop Long Enough to Patch
If you have an active drip or seep that you can't get to stop long enough for a patch to cure, hydraulic cement is your friend. Products like Xypex Patch'n Plug are designed specifically for this scenario: you mix a thick plug of material, press it hard into the active leak point, and hold it there for a few minutes while it sets almost instantly. It's designed to stop water under pressure. Once the active seep is stopped, you can go back and apply a proper repair mortar and sealer over the top.
Resurfacing and Refinishing the Basin

Sometimes the structure is fine but the surface is rough, stained, pitted, or spalling. Resurfacing gives you a fresh, smooth basin that's easier to clean and better for birds. It's also the right move when you've patched several small cracks and want to unify the whole surface under a fresh layer.
- Empty and scrub the basin with a stiff brush to remove all algae, mineral deposits, and loose material. A diluted white vinegar rinse helps remove mineral scale. Rinse completely and let dry.
- Assess the surface. If the old surface is flaking or has loose sections, remove all of them with a wire brush or cold chisel. You need a stable base for the new layer to bond to.
- Decide whether to mechanically profile the surface (grinding or wire-brushing until you feel texture) or chemically etch it. For small bird baths, mechanical profiling with a wire brush is usually enough. Chemical etching with a concrete etcher (muriatic acid diluted in water) gives better adhesion for resurfacer, but you must rinse thoroughly and neutralize before applying any coating.
- Apply a concrete bonding adhesive to the entire basin surface and let it become tacky (usually 15 to 30 minutes, per the product label).
- Mix QUIKRETE Polymer Modified Thin Patch or a similar resurfacer to a smooth, flowing consistency. It should be like thick pancake batter, not stiff mortar.
- Pour or trowel the resurfacer into the basin and spread it evenly. Work from the center out and feather the edges. You're typically building up 1/8 to 1/4 inch of new surface.
- Smooth the surface with a damp sponge or plastic float. Keep your tools wet to prevent dragging.
- Keep the resurfaced area damp for the first few hours by misting lightly. This slow cure prevents shrinkage cracking.
- After the resurfacer has cured for at least 24 hours, apply two coats of bird-safe waterproofing sealer, allowing proper recoat time between coats.
- Wait a full 48 hours after the final sealer coat before adding water.
A properly resurfaced concrete bird bath can look nearly new and will actually be more durable than the original surface if you seal it correctly. The sealer is what does the waterproofing work, so don't skip it or cut the drying time short.
Special Cases: Holes, Drilling, and Custom Fixes
Patching a Hole in a Concrete Bird Bath
A hole, whether from a broken-through crack or an impact, is patched the same way as a structural crack but with more material. Clean and dry the area. If the hole is small (under 1/2 inch across), pack it with epoxy putty, working it in from both sides if you can access the underside of the basin. For larger holes, use a repair mortar like QUIKRETE Fast-Setting Repair Mortar, which handles repairs from featheredge depth up to about 1/2 inch in a single application. Build up deeper holes in layers. Once the patch is fully cured, seal the basin completely.
Drilling Into a Concrete Bird Bath Bowl

Sometimes people want to drill a drainage hole in the bottom of a bird bath bowl, or need to drill a bolt hole to secure the bowl to a new pedestal. Use a masonry drill bit, ideally a carbide-tipped one, and go slow with light pressure. Concrete bird baths are usually 1 to 2 inches thick, so there's not much margin for error. Keep the drill bit cool by dripping water on the drill point as you work. Avoid percussion or hammer drill mode if the bath is old or cracked, since the vibration can cause new fractures. After drilling, chamfer (smooth) the hole edges with a round file. Before reinstalling or refilling, apply a bead of waterproof sealant around any through-bolts and re-seal the area around the hole.
Repairing or Repositioning a Broken Pedestal
A pedestal that has cracked through or broken at the base is a structural safety issue, not just a cosmetic one. A full bird bath full of water can weigh 40 to 80 pounds depending on size, so a compromised pedestal can topple. You can sometimes repair a clean break in a pedestal with a structural epoxy and rebar pin driven into both sections, but this is only worthwhile if the break is a single clean fracture. Multiple cracks or a crumbled base typically mean the pedestal needs to go. If you have a good basin but a bad pedestal, consider repurposing the bowl on a new mounting. If you have a good basin but a bad pedestal, consider repurposing the bowl on a new mounting. There are plenty of ideas for <a data-article-id="FFAEDD56-6E08-4C2B-A77E-19074EB17BAA">what to do with an old bird bath pedestal</a> or base, including using it as a garden planter stand or replacing it with a decorative stone column.
When Repair Isn't Worth It (and How to Avoid Getting Here Again)
Signs It's Time to Replace
Not every bird bath is worth saving. Here's when to stop patching and start shopping:
- The basin has multiple through-cracks in different directions. This is structural failure, not isolated damage, and patches won't hold long-term.
- You've repaired the same leak twice and it came back. The concrete has probably deteriorated too far for patches to bond reliably.
- The surface is spalling in large sections, not just surface pitting. This is usually deep freeze-thaw damage and the entire matrix of the concrete is compromised.
- The pedestal has cracked through at the base and shows multiple fractures. A leaning or unstable bird bath is a hazard.
- The basin is extremely thin (under 3/4 inch) and has cracked through. There's not enough material left for a patch to anchor into.
Preventing Future Cracks and Leaks
The single biggest cause of concrete bird bath failure is freeze-thaw cycles. Water expands about 9 percent when it freezes. If water is sitting in a porous, unsealed basin when temperatures drop, it freezes inside the concrete pores and cracks the material from within. The fix is sealing. A good waterproofing sealer keeps water from soaking into the concrete in the first place. Reseal your bird bath every one to two years, or whenever water stops beading on the surface and starts absorbing in.
In cold climates, either bring the bird bath indoors for winter or empty it completely before the first hard freeze. Don't leave a full bird bath out through a freeze-thaw cycle and expect it to survive season after season unsealed. If you want to keep water available for birds in winter, look into a heated bird bath or a floating de-icer rather than running a concrete bath through repeated freeze cycles.
Placement also matters. Set the bird bath on a level, stable surface so the bowl doesn't rock or shift. Tilting concentrates stress on one side of the pedestal joint and cracks it over time. Keep the bath away from tree roots that can heave the ground beneath it. And when you clean the basin (which you should do weekly), avoid harsh chemical cleaners that break down the sealer. White vinegar and a stiff brush are enough for algae and mineral scale. Rinse thoroughly after any cleaning before refilling, and you won't need to reapply sealer nearly as often.
If you're interested in building a new one from scratch or upgrading the base, making a concrete bird bath pedestal from a fresh pour is a satisfying project that lets you control the thickness and mix for better durability from day one. You can also follow the same materials and curing guidance when making a concrete bird bath pedestal from a fresh pour make a concrete bird bath pedestal. If you're starting from scratch, the same sealing and curing principles also apply when you build a concrete bird bath pedestal. Either way, whether you're repairing an old favorite or starting fresh, the birds don't care about aesthetics as long as the water is clean, shallow, and reliably there. If you decide to upgrade your setup, choosing the best garden flower pedestal bird bath can also reduce future sealing and leak headaches.
FAQ
Can I repair a concrete bird bath if it’s already been sealed or painted before?
Yes, but you need to match the repair to the surface type. Penetrating sealers and sealant-repair mortars bond differently to sealed or painted layers, so roughen the existing finish lightly (don’t grind through unless needed), then use an outdoor waterproof repair approach that’s compatible with sealed surfaces, and do a small test spot first.
How long should I wait before putting water back in after a repair?
Use the longest cure requirement among your products, not just a blanket time. For example, patches and epoxies often require 24 hours before light handling, but the article’s 48-hour dry plan is safer for bird-safe reintroduction, especially if the area is thicker than a featheredge patch.
What’s the best way to clean the crack so the patch actually bonds?
Remove loose material, then clean until no algae or powder remains, but avoid leaving chemical residue. If you use vinegar or any cleaner, rinse thoroughly and let the area dry completely, because even mild film can prevent epoxy or repair mortar from gripping.
Do I need to seal the whole basin after patching, or only the repaired spot?
Seal the repaired area at minimum, but sealing the entire basin is often more reliable because it prevents uneven moisture movement. Uneven sealing can create new pinholes or re-wetting lines that look like the original leak coming back.
Epoxy putty or repair mortar keeps cracking after it cures, why?
Most failures come from movement, trapped moisture, or patching over dust. Confirm the crack isn’t still active (re-wet test), wait for full dryness, and press epoxy putty firmly so there are no voids. If the bath rocks or the pedestal shifts, fix that first or the repair will crack again.
How can I tell if a crack is cosmetic or structural beyond just seeing it?
Try the water behavior test: fill the basin and observe whether water follows the crack line to the pedestal or creates dampness at a seam, not just surface dampness. Also look for flaking or spalling around embedded metal, that pattern usually indicates deeper weakening even if the crack looks narrow.
Can I fix an active leak with hydraulic cement if I can’t stop the seep completely?
Often you can, but you still need stable contact during set. Make sure the area is accessible enough to hold the plug firmly for the recommended hold time, and once seep stops, remove any loose crumbly material and apply a proper top repair and sealer, otherwise the leak may return under the surface layer.
Is it safe for birds to use sealers labeled “pond-safe” but not specifically potable?
Use extra caution. “Pond-safe” usually means aquatic-safe after curing, but bird drinking is closer contact. Prefer products explicitly described as nontoxic after curing for potable or drinking water use, then confirm the curing time fully before refilling.
How do I drill a new drainage or bolt hole without causing new cracks?
Start with a sharp masonry bit, keep pressure light, and avoid hammer or percussion mode to reduce vibration. Also choose the hole location away from existing cracks or spalled edges, then chamfer the hole and apply waterproof sealant around any through-bolts so water doesn’t wick into the concrete.
My bird bath keeps leaking after repair. What should I check first?
Check the leak path, not just the last repaired spot. Re-test by filling the basin, waiting without wind for about 30 minutes, and look for a wet ring or drip line. If water shows up at the pedestal joint, the problem may be a failed seal or separation there rather than the basin crack you patched.
When should I stop repairing and replace the pedestal or the whole bath?
Replace rather than patch if the pedestal is crumbled, has multiple independent cracks, or a structural break cannot be cleaned into a single stable fracture line for epoxy and reinforcement. For safety, if the bowl rocks or you can feel movement at the base, treat it as non-repairable because repeated filling will worsen the joint.
Next Article
How to Make a Fairy Garden in a Bird Bath: Safe Build & Care
Create a bird-safe fairy garden in a bird bath: step-by-step build, plant choices, safety, care, troubleshooting