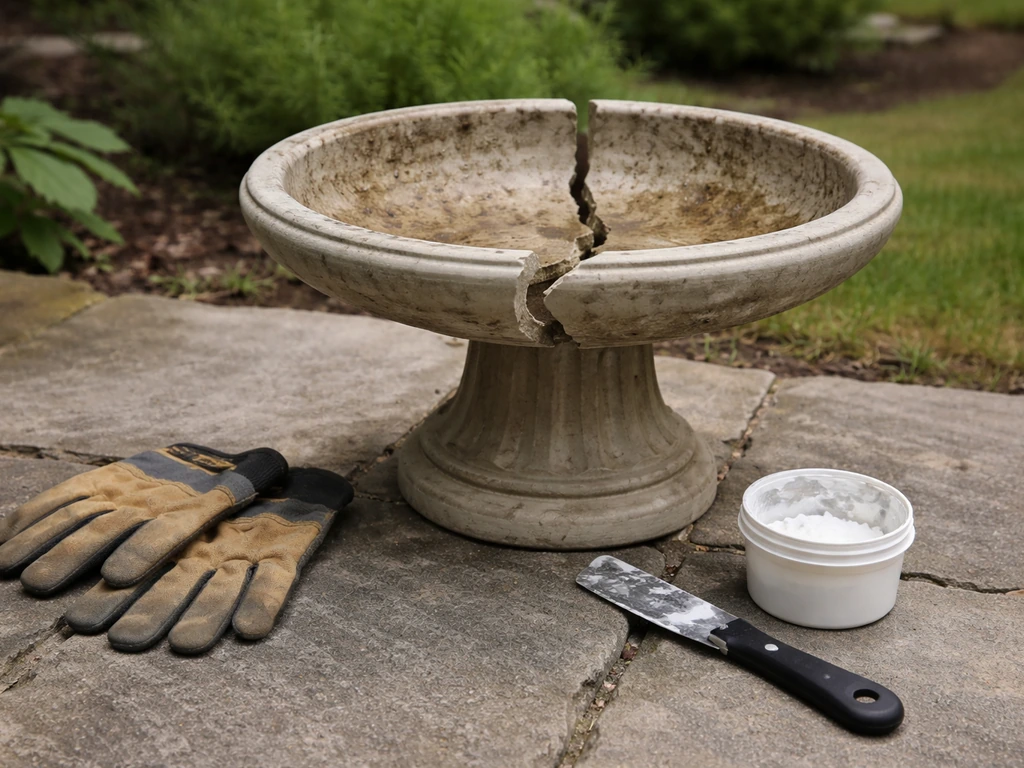
If your bird bath is cracked, leaking, wobbly, or missing pieces, you can almost always get it working again today with basic supplies from a hardware store. The fastest path is: identify exactly what broke, decide in five minutes whether repair or replacement makes more sense, then patch or swap parts using material-specific fixes. Concrete gets a hydraulic fast-plug compound plus waterproof sealant. Ceramic uses epoxy putty and a food-safe sealant. Metal gets rust treatment plus waterproof silicone or a rubber liner. Resin and plastic respond well to plastic-bond adhesive or a basin swap. The sections below walk through every step.
Broken Bird Bath Ideas: Repair, Patch, or Replace Fast
Marcus Henley
18 May 2026
Assessing the damage: repair or replace?
Before you touch anything, spend a few minutes doing a real diagnosis. Run your hand along the basin, the rim, the pedestal, and the contact point between them. What you find will dictate everything that follows.
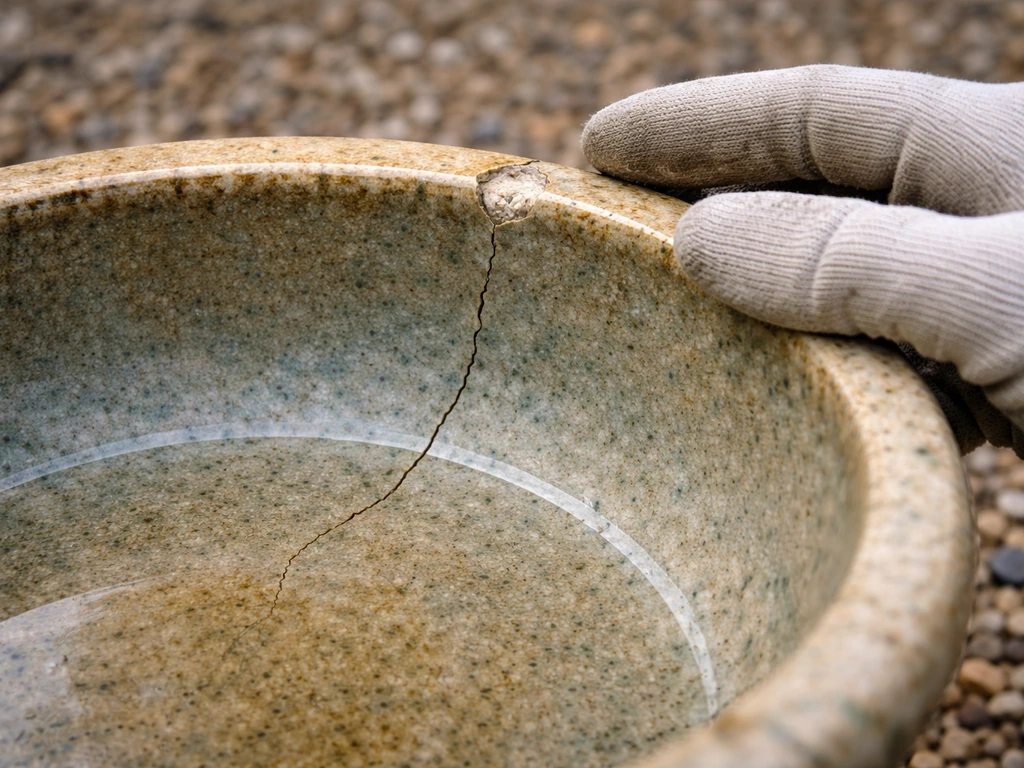
- Hairline crack in the basin: almost always repairable, especially in concrete or ceramic
- Single through-crack that reaches both surfaces: repairable if the two pieces are still aligned, but watch for continued leaking after patching
- Shattered basin or missing chunks: typically better to replace the basin only and keep the pedestal
- Wobbly or leaning pedestal: check whether the base is broken or just on uneven ground before buying anything
- Chipped or sharp rim: must be addressed before birds return, since sharp edges cut feet
- Loose or misaligned basin sitting on a pedestal: often just a matter of re-leveling and adding outdoor construction adhesive
- Full structural collapse: replace; patching a bath that has crumbled in multiple places rarely holds through freeze-thaw cycles
The repair-versus-replace decision is mostly about cost and time. A replacement concrete or resin basin typically runs $20 to $60. If the repair materials for a complex break would cost nearly that much and take hours of work, a new basin wins. But if you have a single crack or a loose connection, repair is the obvious choice and you can finish it in an afternoon.
Quick fixes you can do right now
Some problems need a same-day solution so birds still have water while a proper repair cures. Here are the fastest options for the most common issues.
Stabilizing a wobbly bath
A wobbly bath is a safety hazard for birds and will keep breaking. If the pedestal is on uneven ground, pack gravel or sand under the low side until it sits flat. If the basin rocks on top of the pedestal, slip a folded piece of outdoor rubber mat between them temporarily, then bond them properly once you have construction adhesive on hand. Never leave a wobbly bath filled with water; the shifting weight is what causes the next crack.
Creating a temporary safe basin
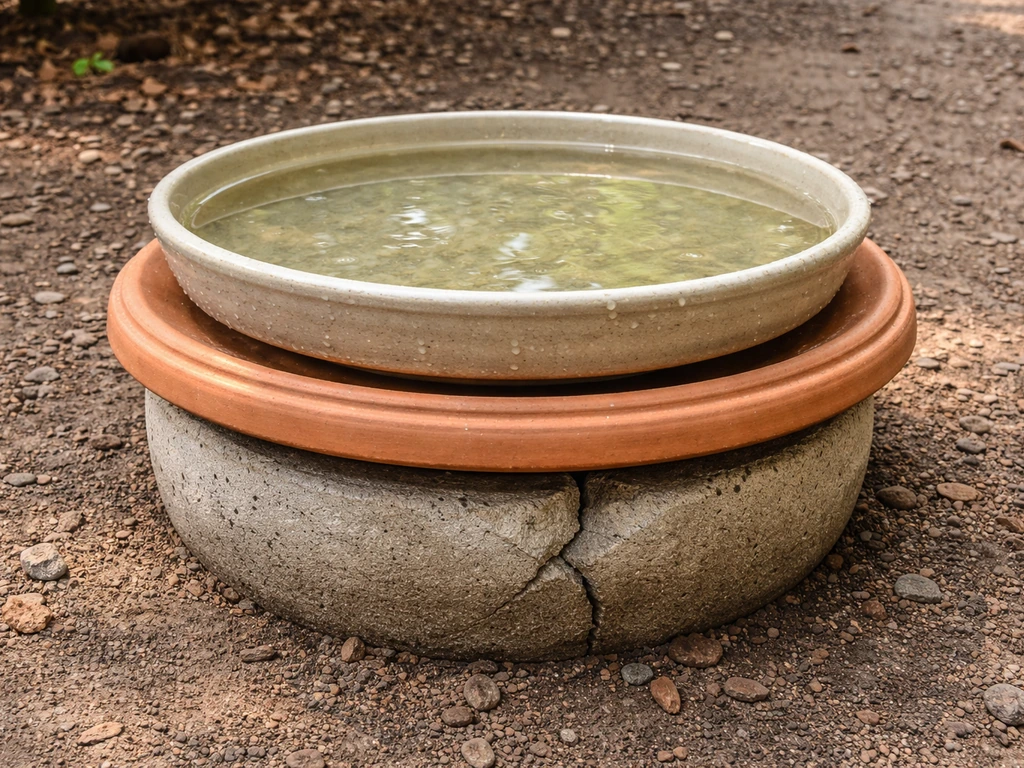
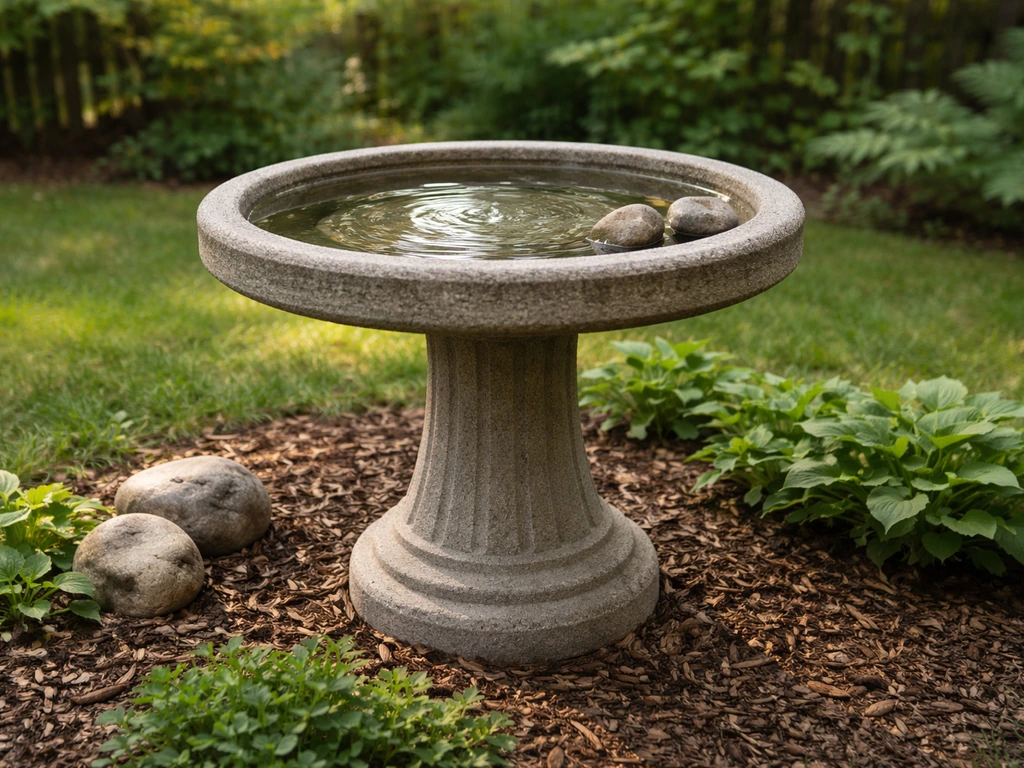
If the basin is cracked and leaking but you want birds to have water today, place a wide plastic plant saucer, a shallow terracotta tray, or even a large ceramic pie dish on top of the pedestal. If you want to go beyond repairs, you can also learn how to make a bird bath out of plastic bottles for a lightweight DIY option wide plastic plant saucer. If you do not want to repair a broken one, this guide can also help you make bird baths from dishes that suit your space. Anything 1.5 to 3 inches deep and at least 12 inches across works. Birds genuinely don't care about aesthetics. This buys you a day or two while adhesives and sealants cure on the main basin.
Smoothing sharp edges
Chipped concrete or ceramic rims leave razor-sharp edges that will cut bird feet. Before the bath goes back into service, take 80-grit wet/dry sandpaper or a rubbing stone to any chip. Work the edge into a rounded profile, rinse well, and check with your fingertip. If it still catches your skin, it will catch a bird's toe. This step takes about five minutes and matters a lot.
Stopping a leak fast
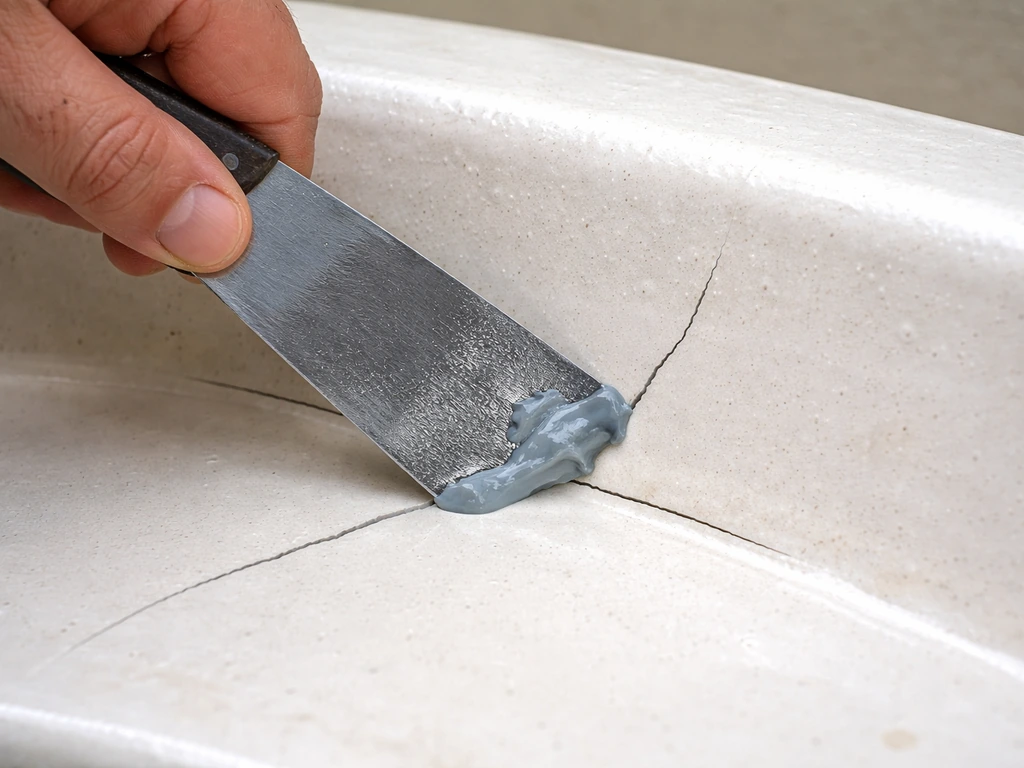
Dry the basin completely, trace the crack with a pencil, and apply waterproof silicone sealant rated for outdoor or aquatic use. Press it into the crack with a putty knife or your gloved finger, smooth it flat, and let it cure the full time listed on the label (usually 24 hours). This is a temporary measure for thin cracks. If the leak is significant, move to the material-specific repair in the next section.
DIY broken bird bath ideas by material
The right repair depends almost entirely on what your bird bath is made from. Using the wrong product for the wrong material is the number one reason patches fail.
Concrete bird baths
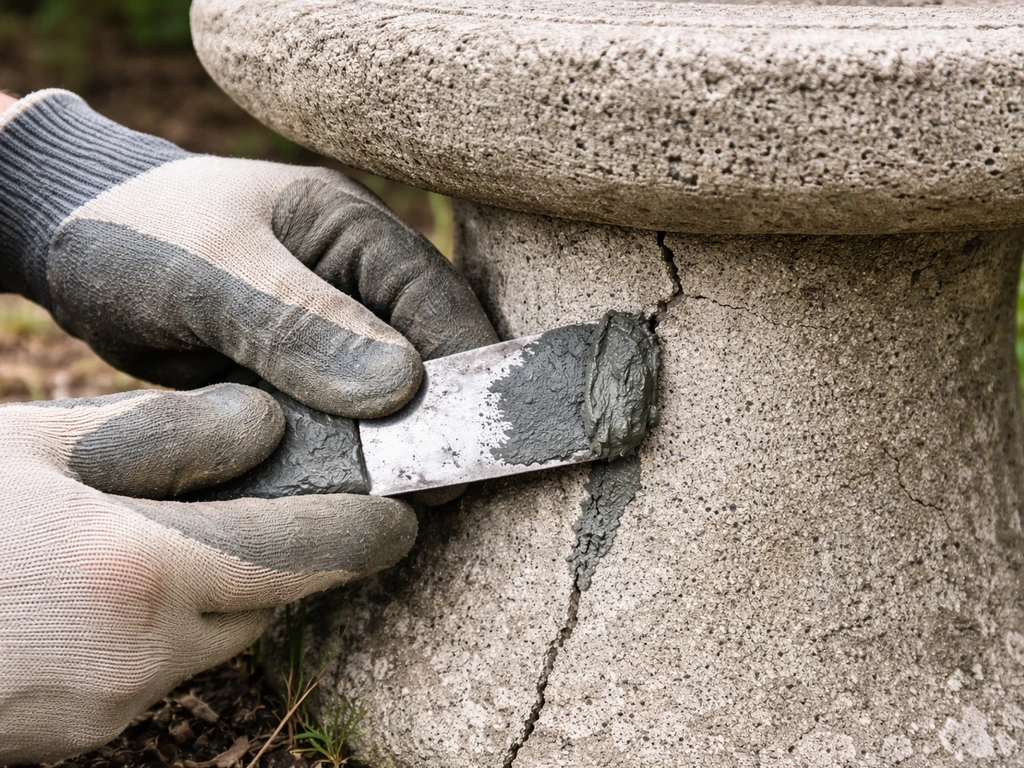
Concrete is the most repairable material out there. For cracks, start with a hydraulic fast-plug compound like DRYLOK Fast Plug. Mix it to a stiff paste, press it firmly into the dry crack, and let it set hard (usually 3 to 5 minutes for fast-plug formulas). Once it's cured, coat the entire interior of the basin with DRYLOK Original Concrete and Masonry Waterproofer or a comparable masonry waterproofing paint. That sealant is what actually holds water in. One coat usually does it; two coats give you better durability. Let it cure fully before filling, which is typically 24 hours minimum. A slow leak might not show up right away, so keep an eye on the water level for the first week after the repair.
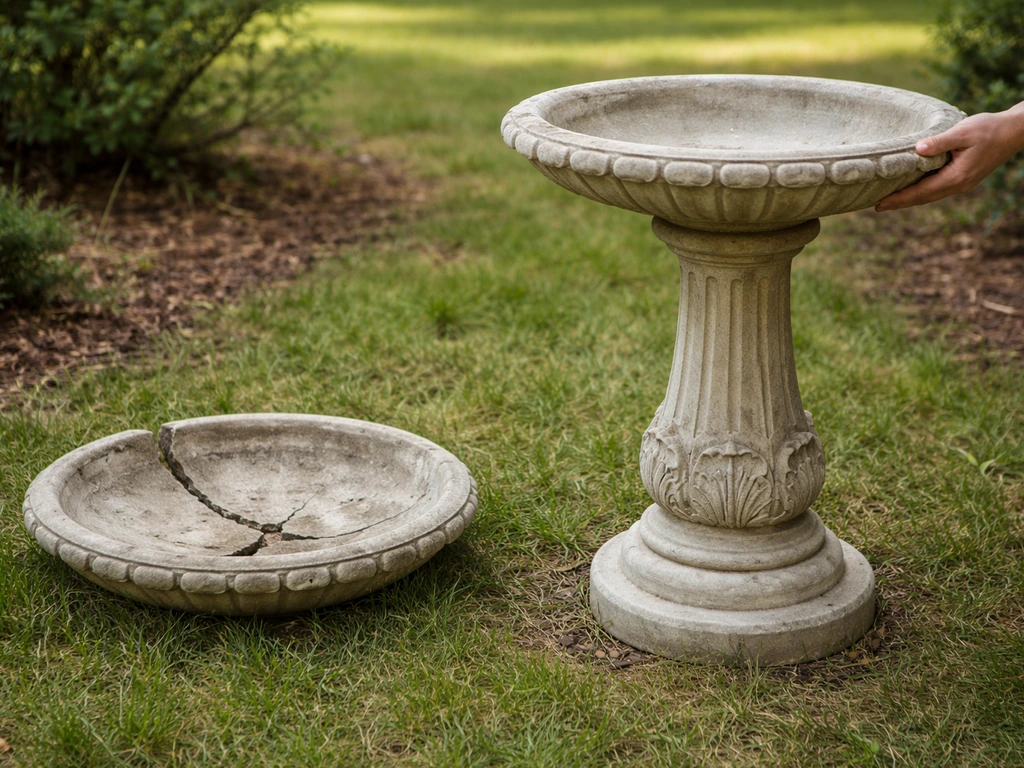
For a broken concrete pedestal, assess whether the break is a clean snap or a crumble. A clean snap at the mid-shaft can be bonded with a heavy-duty construction adhesive like Loctite PL Premium and then supported with rebar pins if the pedestal is large enough. A crumbled base usually means the pedestal is done, but a concrete basin in good shape can be repurposed: set it directly on a stack of flat pavers, place it in a wide planter, or mount it on a tree stump for a completely different look.
Ceramic bird baths
Ceramic repairs need a waterproof epoxy, not regular super glue. Two-part epoxy putty (Gorilla Epoxy or JB Weld WaterWeld both work) lets you press cracked pieces back together and fill gaps. Mix the putty, press it into the crack or along the break line, and clamp or tape the pieces for the cure time. Once cured, seal the interior with a food-safe silicone sealant or an outdoor tile sealant rated for water contact. Standard grout sealers work well here too. Avoid anything with fungicide additives, since those can be toxic to birds.
If a ceramic basin is shattered into several pieces, the honest assessment is that it probably won't hold water reliably even after repair. At that point, use the surviving pieces creatively: nestle them into a garden bed as a mosaic feature, or look up how to make a bird bath from glass vases or dishes, where broken ceramic pieces become the decorative material rather than the structural element.
Metal bird baths
Metal baths, usually copper, steel, or cast iron, fail in two ways: rust and physical damage. For rust, sand down to bare metal with 120-grit sandpaper, apply a rust converter (Rust-Oleum Rust Reformer or similar), let it dry, and then coat with a waterproof sealant. For seams that have opened or small punctures, a waterproof silicone or plumber's epoxy works well on metal. Let everything cure, then fill to check for leaks. If the rust is through the entire thickness of the metal (you can poke a screwdriver through it), the basin needs replacement, not repair. Copper baths are sometimes worth professional repair if they're ornate pieces; plain galvanized steel baths are cheap enough to replace.
Resin and plastic bird baths
Resin and plastic are the trickiest to repair permanently. Plastic-specific adhesives like Loctite Plastics Bonding System or Plastex work on some resins, but the bond quality depends heavily on the specific plastic type. For small cracks, clean and dry the area, apply plastic bond adhesive, and clamp it for 24 hours. Test by filling the basin over a patch of concrete before putting it back on the pedestal. Honestly, though, if a resin basin has cracked all the way through, a basin replacement is usually more reliable than a patch. Resin pedestals with hairline cracks can be reinforced with fiberglass repair tape and resin filler, available at auto parts stores.
Replacing parts and upgrading for longer life
Sometimes the best broken bird bath idea isn't a repair at all. It's upgrading the weak component so you're not doing this again next season.
Swapping just the basin or tray
If your pedestal is solid but the basin is wrecked, shop for a replacement basin separately. Many concrete and resin manufacturers sell basins without pedestals. Alternatively, a wide terracotta bowl or a glazed ceramic planter saucer (16 inches or larger) from a garden center sits nicely on most standard pedestals and costs under $20. Drill a small drainage hole in the lowest point if you want to control overflow, or leave it solid for a traditional setup.
Adding a liner
A flexible pond liner or a pre-formed rigid plastic insert is an excellent permanent solution for a concrete or stone basin that keeps cracking. Cut the liner to fit, press it into the basin, and hold the edges down with rocks or trim. The liner handles the water; the concrete just provides the shape and weight. This approach sidesteps the need to re-seal the concrete every year and is especially good in climates with hard freeze-thaw cycles.
Upgrading the pedestal or base
Wobbly pedestals are usually the root cause of repeat cracking. Replace a hollow resin pedestal with a cast concrete one, or mount a basin directly on a wide, flat stone, a section of patio paver stack, or a tree stump. Making a tree stump bird bath is a great way to reuse a natural base while keeping the bath stable and weather-resistant. You get a much more stable base and a look that fits naturally in a garden. Making a tree stump bird bath is a real option if you have the raw material; it's surprisingly durable and weatherproof when sealed properly. If you want a different look, you can also repurpose household items, like turning an old lamp into a bird bath tree stump bird bath.
Considering a heated bath if freezing caused the break
If your bird bath cracked because water froze and expanded inside it, that's a design problem, not just bad luck. A concrete bath that isn't rated for freeze-thaw cycles will crack repeatedly. Options: switch to a heated bird bath, add a submersible de-icer (25 to 150 watts depending on your climate), or use a resin basin specifically labeled freeze-resistant. A quality de-icer costs $25 to $60 and will outlast many seasons, which is much cheaper than replacing a cracked basin every winter.
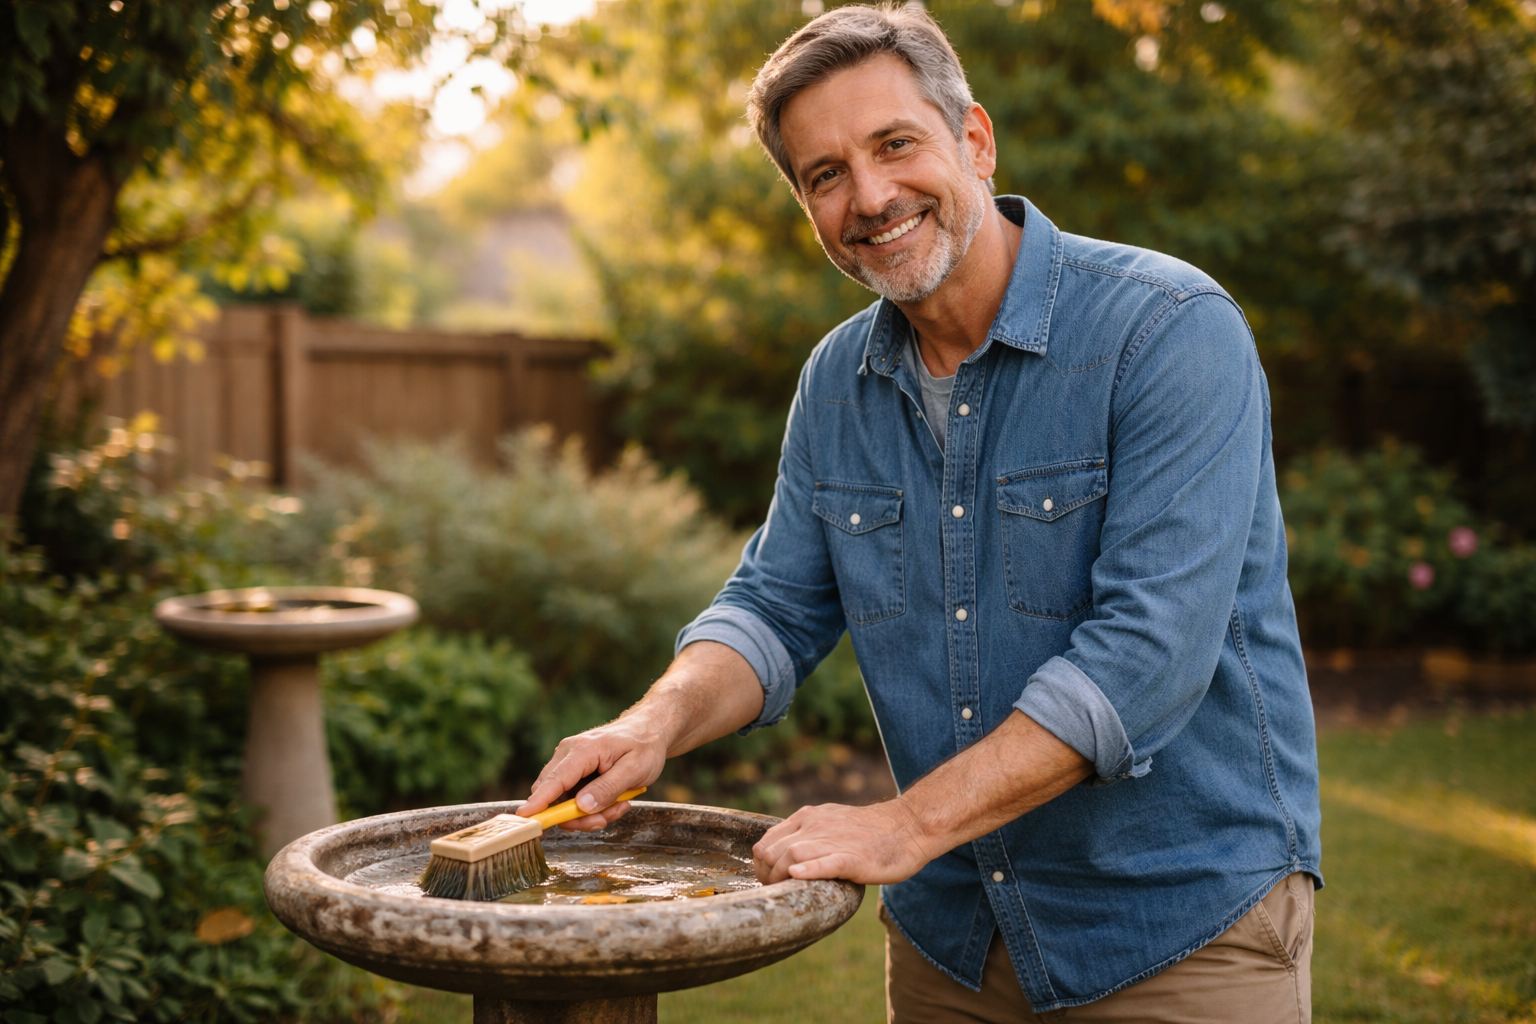
Cleaning and re-sealing so birds will actually use it
A repaired bird bath needs a thorough cleaning before birds return, both to remove repair residue and to reset the hygiene baseline. Scrub the entire basin with a stiff brush and a mix of one part white vinegar to nine parts water. Rinse extremely well. If there's any algae growth, scrub that off completely; a 10 percent bleach solution (1 part bleach to 9 parts water) kills algae, but you must rinse the basin at least 3 to 4 times with clean water afterward and let it air dry before refilling. Any bleach residue is harmful to birds.
Once the basin is clean and dry, apply any sealant your repair requires and follow the cure time on the label. Don't rush this step. Curing times exist because the sealant is still off-gassing chemicals during that period, and those chemicals don't belong in bird water. After curing, fill the bath and let it sit for 12 hours, then dump that first fill and refill with fresh water. That rinse-and-dump step clears any final residue.
Going forward, fresh water and a good scrub at least once a week is the standard. The Iowa DNR and U.S. Fish and Wildlife Service both recommend at minimum weekly cleaning for bird water features to prevent disease from spreading among your backyard birds. In summer, you may find yourself refreshing water every two or three days when heat speeds up algae growth.
Placement and water management after the repair
Where you set the bird bath back down matters as much as how you repaired it. Getting placement right now will prevent a lot of the same problems from happening again.
Level it properly
Use an actual bubble level. A basin that tilts even slightly will constantly slosh water out on one side, erode the surrounding soil unevenly, and create a wobbly situation that stresses the pedestal joint. Set the bath on firm, compacted ground or a paver base. Add or remove soil underneath until the level reads dead-center, then check it again after the first rain.
Shade, overflow, and flow
For the warmer months, place the bath where it gets morning sun and afternoon shade. Direct afternoon sun speeds up evaporation, warms the water to temperatures that promote algae, and makes birds less comfortable. Adding a slow drip or a small recirculating pump keeps the water moving, which both attracts more bird species and significantly slows algae growth. Even a simple overhanging bottle with a pinhole drip works, exactly as All About Birds recommends. Moving water is one of the most effective bird attractors there is.
Mosquito prevention
Standing water that sits unchanged for more than 3 to 4 days becomes a mosquito breeding site. A drip or fountain prevents that entirely by keeping the surface moving. If you can't add a dripper, dump and refill every 2 to 3 days. Mosquito Dunks (Bacillus thuringiensis israelensis, or BTi) are also bird-safe if added per label directions, but honestly, regular water changes are simpler and free.
Anchoring against wind and wildlife
If the bath tipped over in the first place because of wind or a raccoon, plan for that. A wider base pedestal, a concrete anchor pad, or a ground-mounted bath instead of a pedestal bath all improve stability. You can also bond the basin to the pedestal with construction adhesive to prevent it from being knocked off.
When to stop DIYing and cut your losses
Not every broken bird bath is worth the effort of repair. Here are the situations where I'd tell you to move on rather than patch.
- Sharp edges that you can't sand smooth: if the crack goes through the basin wall and leaves an edge you can't reach or fully smooth, birds will get hurt
- Structural instability after repair: if the bath still rocks or shifts after you've tried to stabilize it, the base is compromised
- Multiple cracks that keep returning: if you've patched the same bath two or three times and it keeps cracking, the material has fatigued and will keep failing
- Freeze damage on an unrated concrete bath in a cold climate: repair will buy you one more season at best; a freeze-rated or heated replacement is the real fix
- Lead or unknown-formula old glazed ceramic: vintage glazed ceramics sometimes contain lead in the glaze; if you can't confirm the glaze is lead-free, don't use it for bird water
- Mold deep in porous concrete: if the concrete smells musty and you can't scrub it out, the mold is inside the material itself and poses a disease risk
When you do decide to replace, the parts you salvage from a broken bath often have a second life. A solid pedestal becomes the base for a new basin. Broken concrete or ceramic pieces become stepping stones, mosaic garden art, or filler for a drainage layer under a new planter. If you're interested in going further with creative reuse, looking into how to repurpose a bird bath or how to make a bird bath from dishes will give you plenty of ideas for both broken parts and complete baths that just need a new purpose.
Materials and tools to have on hand
If you want to be ready for the next break without a hardware store run, stock these basics: If you are starting from scratch, learn how to make a bird bath from wood before you commit to tools and materials.
| Item | Use case | Approximate cost |
|---|---|---|
| DRYLOK Fast Plug or similar hydraulic cement | Filling cracks in concrete | $10–$15 |
| Masonry waterproofer (DRYLOK Original or similar) | Sealing concrete basin interior | $15–$25 |
| Two-part epoxy putty (WaterWeld or Gorilla Epoxy) | Ceramic and metal repairs | $8–$15 |
| Outdoor waterproof silicone sealant | Quick crack seals, metal seams | $6–$12 |
| Plastic bonding adhesive | Resin and plastic crack repair | $8–$15 |
| 80-grit wet/dry sandpaper | Smoothing sharp chip edges | $3–$6 |
| Stiff scrub brush | Cleaning before and after repair | $5–$10 |
| Bubble level | Setting the bath perfectly flat | $5–$10 |
| Pond liner or rigid plastic insert | Permanent leak solution for concrete | $15–$40 |
| Submersible de-icer (25W) | Preventing freeze damage | $25–$60 |
With most of these on hand, you can handle the vast majority of bird bath breaks in a single afternoon. The goal is always the same: get safe, clean water back out there for your birds as fast as possible, then build in the stability and maintenance habits that make the next break less likely.
FAQ
Can I use hot glue or regular super glue on a cracked bird bath?
Avoid both for water-tight repairs. Hot glue and cyanoacrylate super glue weaken when they get wet and then re-expand and leak, especially on exterior concrete, ceramic, and resin. If you only need a temporary “bird-safe” cover, use a saucer or dish as a stopgap, then do the correct epoxy or sealant repair once you have curing time.
How long should I wait before putting birds back in the bath after sealing a crack?
Plan for the full cure time on the product label, not just the time it takes to feel dry. Many sealants off-gas while curing, so do your rinse-and-dump routine afterward (fill, let sit, then discard and refill) before leaving the bath for birds overnight.
What’s the safest way to patch a leak if I can’t dry the basin completely?
Drying matters for most adhesives and sealants. If the basin is still damp, pause and towel-dry, then let it air out longer or use gentle warmth (not a torch or high heat that can crack materials). If you must act immediately, switch to a temporary top water dish so birds have water while the main repair cures properly.
Do I need to sand before applying sealant or hydraulic patch on concrete?
Usually yes, at least to prep the crack. For concrete fast-plug and waterproof coatings to grip, remove loose debris and dust, then keep the area dry at patch time. If you skip cleaning and the crack is gritty or sandy, patches can look good but fail within days.
How do I know if rust in a metal bird bath is superficial or through the metal?
Check thickness. If the rust has penetrated completely (for example you can poke a screwdriver through), repair is not reliable and replacement is the safer call. If it’s only surface corrosion, sand to bare metal, apply a rust converter, then seal all interior seams and punctures.
What should I do if the crack keeps spreading after I repaired it?
A recurring crack usually means the underlying stress is still there, often a wobbly base or freeze-thaw cycling. Re-level and stabilize first (compact ground or paver base, avoid rocking), then reassess the material choice. If you’re in a freeze climate, switch to a freeze-resistant setup or add a de-icer rather than repeating the same patch each winter.
Is a bird bath still safe if there is old sealant residue or bleach used for cleaning?
Not until it’s fully rinsed and cured. After bleach treatments, rinse multiple times and air-dry before reassembling and filling, because residue can harm birds. After repairs, do a first-fill discard to clear any remaining off-gassing chemicals from sealants and patches.
Do I need a different repair approach for hairline cracks versus large breaks?
Yes. Hairline leaks often respond to silicone or proper waterproof sealant (after full drying) and a full cure period, while large or structural breaks need material-specific bonding like hydraulic concrete repair, epoxy putty for ceramic, or a basin replacement if it’s fractured into many pieces. When in doubt, judge by whether the basin can hold stable weight without flexing.
Can I add a liner to fix a broken concrete or stone bird bath permanently?
A flexible pond liner or rigid insert can be a long-term fix, especially when concrete keeps cracking. The key detail is to cut and fit it so it sits smoothly, then secure the edges (rocks or trim) to prevent shifting. This approach reduces the need to repeatedly re-seal the concrete itself.
How do I prevent the bath from tipping again due to wind or animals?
Stability fixes are preventative repairs. Use a wider, heavier base, place on compacted ground or a paver base, and consider anchoring for extra security (for example bonding basin to pedestal). If raccoons or other wildlife are tipping it, a ground-mounted option or wider pedestal reduces the leverage animals have.
What depth and placement help birds use a repaired bath?
Keep water shallow enough for easy access (roughly 1.5 to 3 inches) and position it where birds feel safe, near cover but not directly in harsh afternoon sun. A small drip or recirculating flow can also increase visits because moving water is easier to notice.
Next Article
How to Decorate a Bird Bath: Step-by-Step Ideas
Step-by-step tips to decorate a bird bath safely, including concrete fixes, bird-friendly landscaping, and easy upkeep i