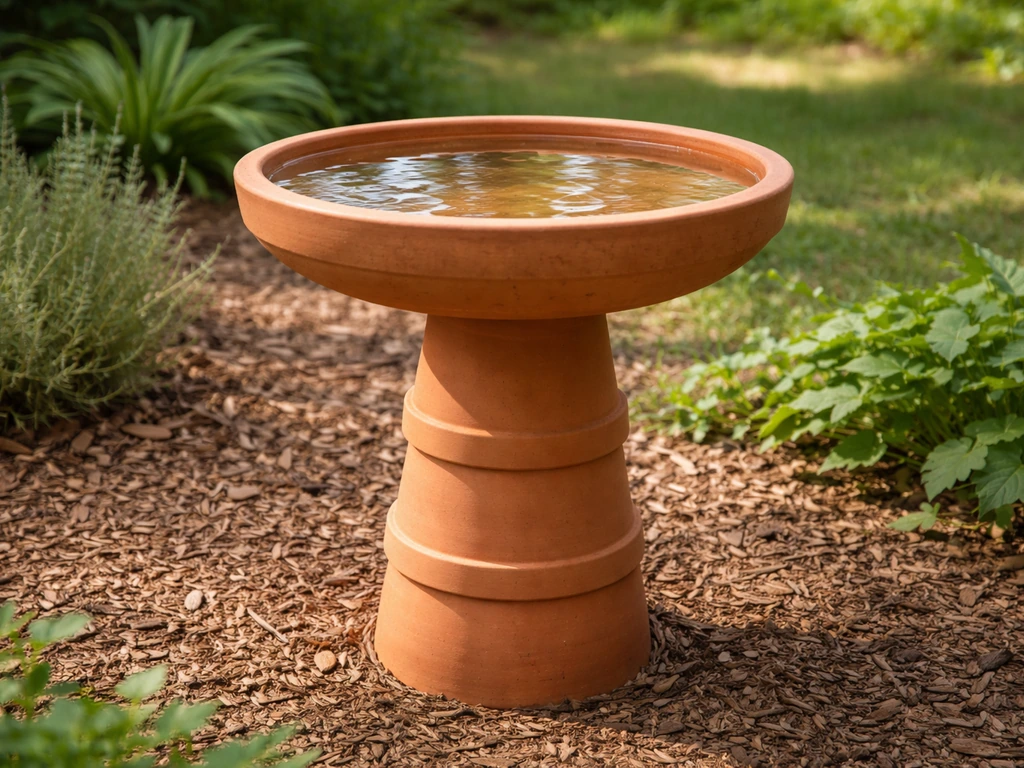
You can build a functional, bird-ready clay pot bird bath in an afternoon using two terracotta pieces: a large pot flipped upside down as the pedestal and a wide, shallow saucer or drip tray set on top as the basin. Seal the saucer with a bird-safe waterproofer, secure the pieces with construction adhesive, and you have a stable bath that costs under $30 and lasts for years. If you want a different look, you can use the same sealing and bird-safe waterproofing principles in how to make a brick bird bath. Here's exactly how to do it, from gathering materials to the first cleaning.
How to Make a Bird Bath Out of Clay Pots: DIY Guide

Marcus Henley
4 Jun 2026
What you'll need before you start
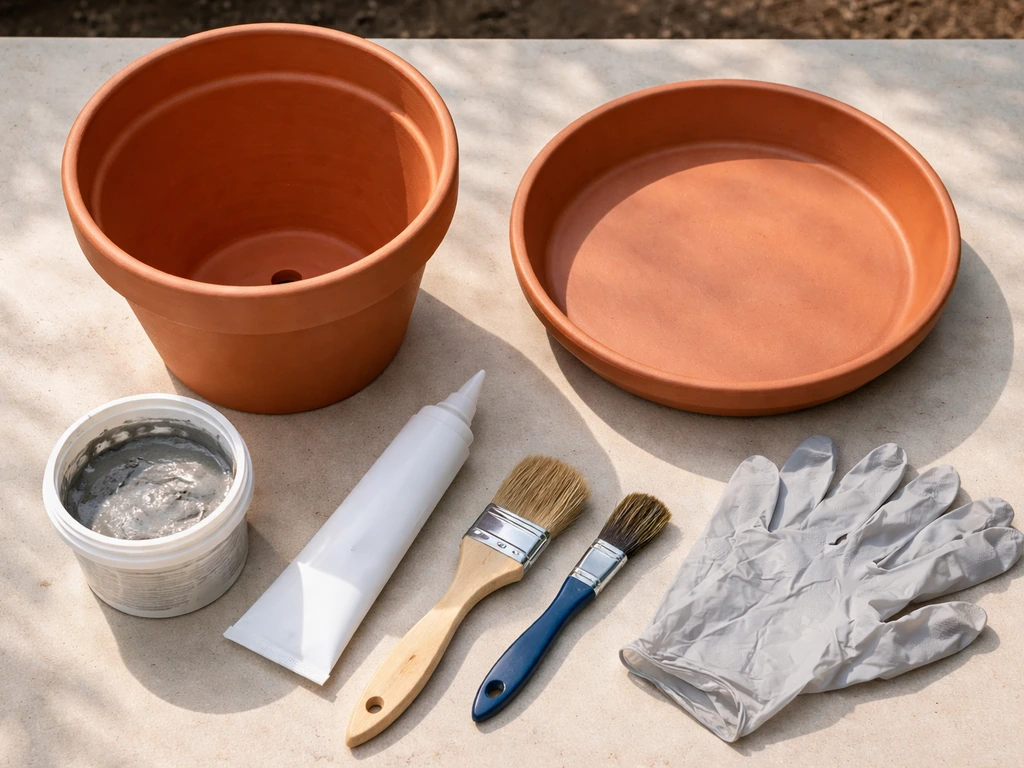
Most of what you need is available at any garden center or hardware store. I keep this list lean so you're not over-investing before you know the design works for your yard.
- One large terracotta or clay pot (8–14 inches tall, 10–14 inches diameter) for the pedestal
- One wide terracotta or glazed clay saucer/drip tray (12–24 inches diameter) for the basin
- Bird-safe waterproofing sealer: Pond Armor Pond Shield (non-toxic two-part epoxy, safe for fish and plants when cured) or Kingfisher Epoxy Pond Paint (water-based, non-toxic when cured)
- Exterior-grade construction adhesive (like Loctite PL Premium or similar) for bonding pedestal to basin
- Masonry/carbide-tipped drill bit and power drill (if you need to plug or seal the saucer's drainage hole)
- Rubber stopper or waterproof epoxy putty to plug the drainage hole
- Fine-grit sandpaper (120-grit) for light surface prep before sealing
- Mixing cups and disposable brushes for applying epoxy sealer
- Safety gloves and eye protection for mixing/applying epoxy
- A level to check your finished placement
- Dedicated scrub brush (kept only for the bird bath)
One important note on sealers: avoid PVA-based sealers and standard craft sealants like Mod Podge for the basin. They're not designed for continuous water immersion and can degrade quickly, clouding the water. Stick to dedicated pond-grade epoxy products. Pond Armor Pond Shield is my go-to because it's been specifically marketed and tested for water features and is described as safe for fish and plants once properly cured.
Choosing the right pot setup and size
The most common setup is a single pot pedestal with a saucer basin on top, and that's what I recommend for most people starting out. It's fast, stable, and easy to disassemble for winter storage. If you want more height (say, to put the bath at eye level from a nearby window or to make it harder for ground predators to approach unnoticed), you can stack two or three pots of descending size before topping with the saucer, which also gives you a more decorative tiered look.
| Setup | Best for | Height | Stability | Effort |
|---|---|---|---|---|
| Single pot + saucer | Beginners, small yards, easy storage | 8–14 inches | Very stable with adhesive | Low |
| Two stacked pots + saucer | More height, decorative look | 16–28 inches | Stable if pots are secured | Medium |
| Three stacked pots + saucer | Maximum height, tiered fountain look | 24–42 inches | Needs extra anchoring | Medium-high |
| Pot-as-bowl on a brick or stone base | Ground-level or low setup for smaller birds | 4–8 inches | Very stable | Low |
For the basin, size really matters to birds. A saucer between 12 and 24 inches in diameter gives most backyard species enough room to land, wade, and splash without crowding. Smaller than 12 inches and you'll mostly attract tiny birds; larger than 24 inches starts to feel more like a shallow pond and can be harder to keep clean. If you want to specifically attract larger birds like crows or pigeons, go toward the 18–24 inch end.
The depth of the basin matters just as much as the diameter. Most sources I trust, including the Ohio DNR and the Bird Conservancy of the Rockies, put the sweet spot at 1.5 to 2 inches deep at the center. The shallow edge (where birds initially step in) should be under an inch. Many standard terracotta saucers are already close to this profile. If yours is deeper, you can add a layer of clean gravel or flat stones to the center to bring the effective depth up to the safe zone.
Step-by-step build: base pot plus top basin
This walkthrough covers the standard single-pot pedestal with a saucer top. The same logic applies to stacked-pot variations: just add adhesive between each pot layer and let each bond cure before adding the next.
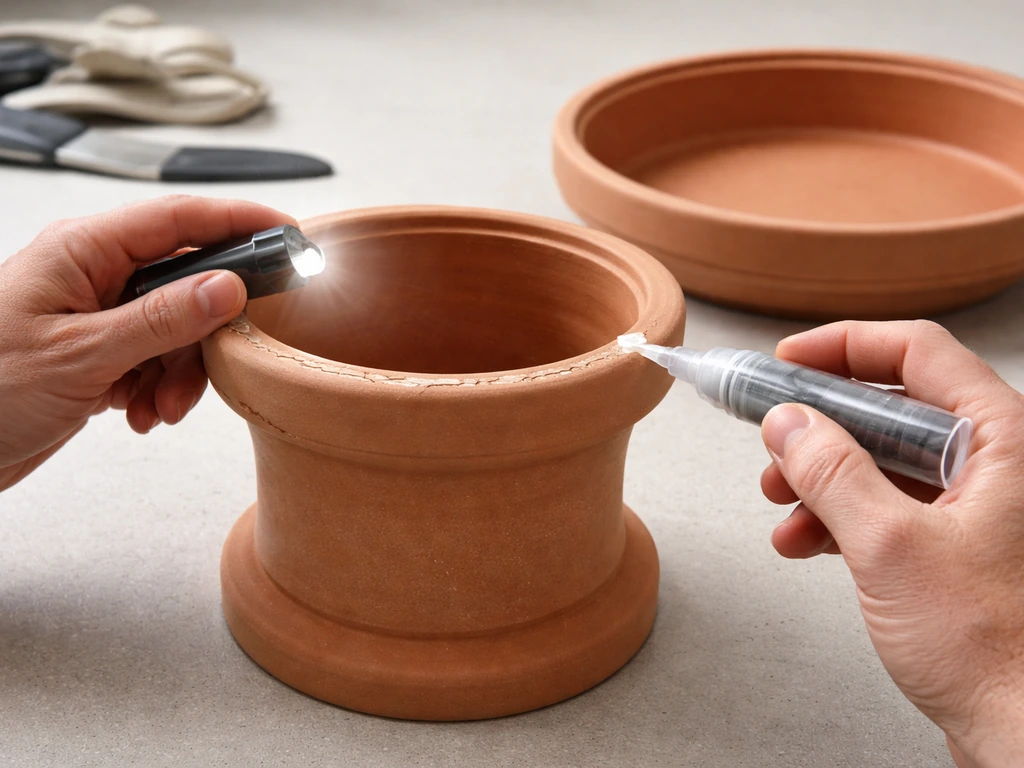
- Gather and inspect your pieces. Check both the pot and saucer for cracks before you invest time sealing them. A hairline crack in the saucer will leak no matter how well you seal the surface.
- Plug the saucer's drainage hole. This is the step most people skip and then wonder why the water drains out. Press a rubber stopper into the hole from below, or pack the hole with waterproof epoxy putty and let it cure fully (usually 24 hours) before moving on. For a terracotta saucer without a hole, skip this step.
- Lightly sand the interior of the saucer. A quick pass with 120-grit sandpaper gives the waterproofing sealer something to grip. Wipe away dust with a damp cloth and let it dry completely.
- Apply your waterproofing sealer to the saucer interior. Mix your Pond Armor Pond Shield (or equivalent pond-grade epoxy) per the manufacturer's instructions and brush it onto the inside of the saucer in one even coat. Get into the edges and up the sides. Let it cure as directed, typically 24–48 hours, in a warm, dry spot. Apply a second coat if the first looks thin or if the terracotta is very porous.
- Flip your base pot upside down. The flat drainage-hole end now faces up and will be the contact point for the saucer. If the top of the upturned pot is rough or uneven, sand it down lightly so the saucer sits flat.
- Apply construction adhesive to the top rim of the upturned pot. Run a bead of exterior-grade construction adhesive around the top rim, then set the sealed saucer on top and press firmly. Center it so the overhang is even all the way around.
- Let the adhesive cure. Most construction adhesives need at least 24 hours before you put any weight or water on the assembly. Leave it undisturbed on a flat surface.
- Test for leaks before placing in the yard. Fill the saucer with water and leave it for at least 24 hours. Check under the saucer and around the drainage plug for any drips. If you find a slow leak, drain and dry the area, apply another small bead of epoxy sealer or putty, and re-test.
- Move to your chosen location and add water to 1.5–2 inches depth.
For a stacked multi-pot version, repeat step 6 between each pot layer, always checking that each pot is centered and level before the adhesive grabs. A small torpedo level sitting on the top pot helps a lot here. For the flower pot variation (where a large decorative flower pot with a wide top opening acts as both stand and partial basin), the concept is the same but you'll need to seal the pot's interior walls and use a fitted saucer as a removable basin insert.
Sealing, waterproofing, and keeping it bird-safe
Terracotta is porous by nature, which means unsealed clay will slowly weep water through the walls. Sealing the basin is non-negotiable if you want the bath to hold water for more than a few hours. The good news is that with the right product, sealing is a one-time job that lasts a full season or more.
Pond Armor Pond Shield is the product I recommend most. It's a two-part epoxy specifically designed for water features, and it's rated non-toxic and safe for fish and aquatic plants once fully cured. That "fully cured" part matters: follow the manufacturer's cure time exactly (typically 48–72 hours depending on temperature) before introducing water, and don't let birds drink from it during that window. Kingfisher Epoxy Pond Paint is a solid UK-market alternative with similar non-toxic, non-taint credentials when cured.
What you want to avoid: PVA-based sealers, regular spray paint, acrylic craft sealants, or anything not rated for continuous water contact. These break down with prolonged water exposure and can leach chemicals into the water. If someone in a craft forum suggests Mod Podge or a general outdoor sealer, skip it for the basin interior. You can use decorative paint on the outside of the pot pedestal without issue, since birds aren't drinking from it.
Where to put it so birds actually show up
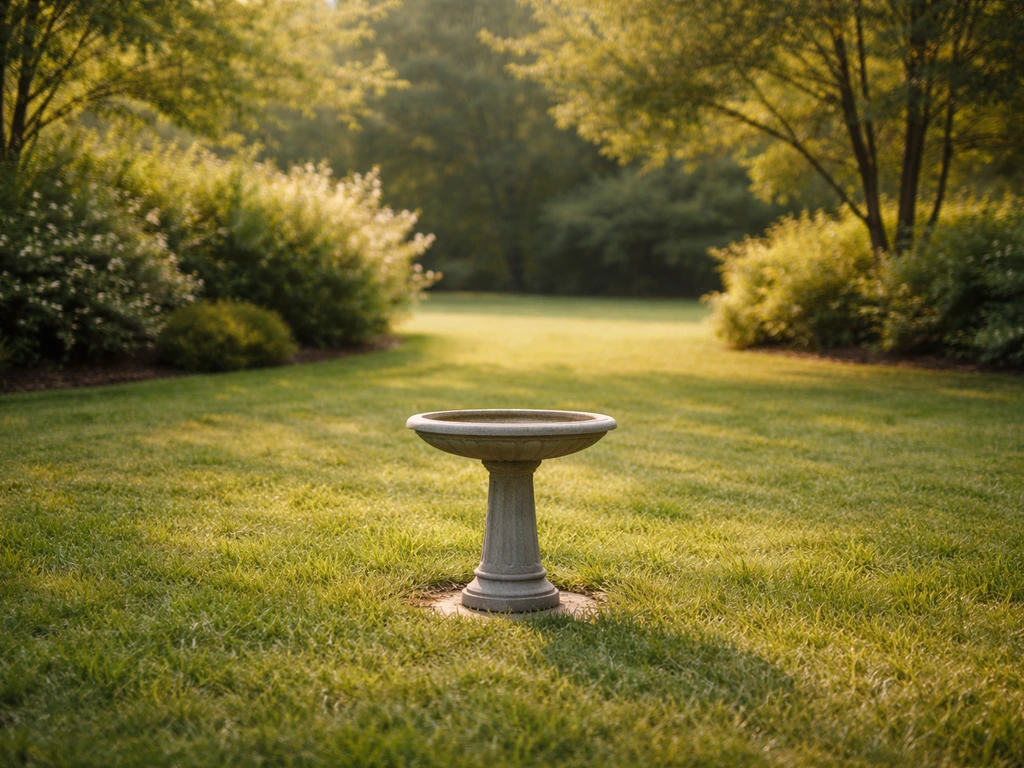
Placement makes or breaks bird bath usage. I've had baths go ignored for weeks until I moved them, and then suddenly they were getting used within a day. The key balance is: birds want to feel safe, but they also need to see the bath from where they perch.
- Place the bath roughly 10–15 feet from trees or shrubs. This gives birds a nearby perch to survey the area before coming down and a quick escape route if a predator appears, but keeps the bath far enough from dense cover that cats can't ambush from hiding.
- Aim for partial shade. Full sun heats the water fast and grows algae faster. Full shade keeps the water cool but makes the bath harder for birds to spot. Morning sun with afternoon shade is the sweet spot.
- Put it on level ground. A wobbly clay pot bath tips over, which is both a waste of water and a hazard. Use a flat paving stone or tamped soil as a base if your ground is uneven.
- Height around 2–3 feet off the ground works for most songbird species. This is roughly where an upturned 10–14 inch pot naturally puts the saucer, which is convenient.
- Keep it visible from a window if you can. You'll clean it more often if you can see it from inside, and you'll actually enjoy watching the birds.
Gardening Know How suggests that birds appreciate being 6 to 10 feet from cover as a general escape-distance rule, which aligns with the 10–15 foot shrub guideline. If you have a cat or notice local cat activity, push the bath toward the farther end of that range and consider setting it on a taller pedestal.
Filling, cleaning, and keeping the water fresh
Once the bath is placed and birds start using it, the ongoing job is keeping the water clean and at the right depth. This sounds simple but it's where most DIY bird baths fall short because people either let the water go stagnant or use cleaners that drive birds away.
Water depth and top-ups
Fill to about 1.5 to 2 inches in the center of the basin. Evaporation in summer means you may need to top it up every day or two. Refresh the water completely at least twice a week in warm weather, not just top it up. Stale water accumulates droppings, debris, and feathers fast.
Weekly cleaning routine
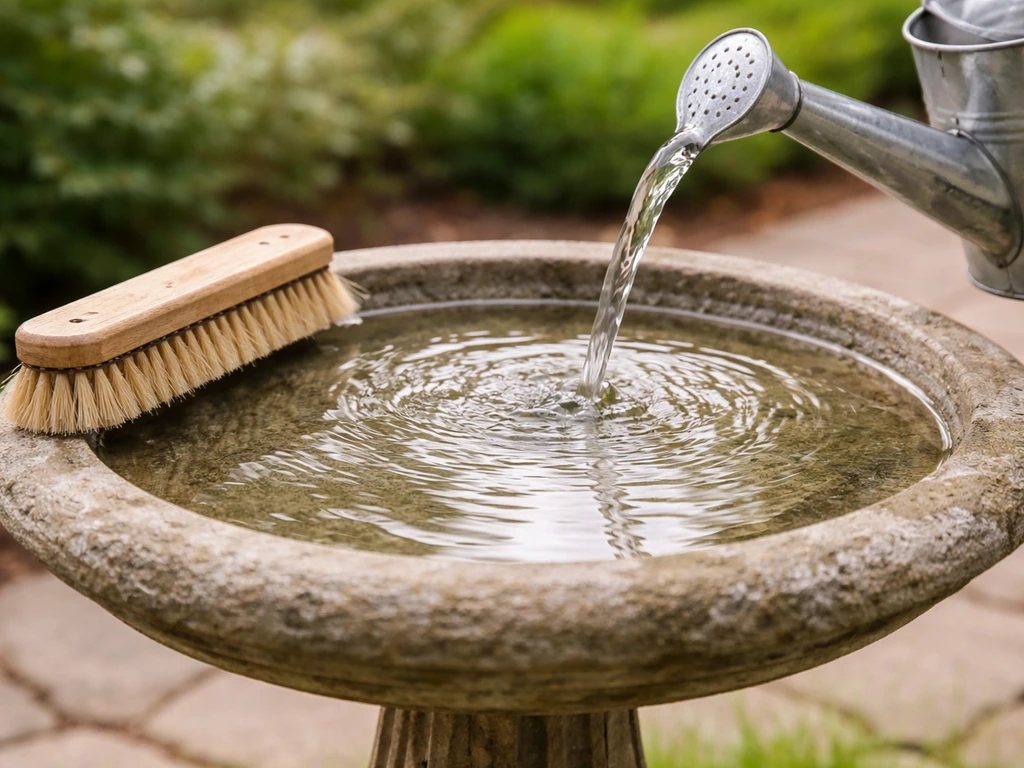
Once a week, dump the water, scrub the saucer with a stiff brush, rinse thoroughly, and refill. For regular cleaning, a diluted white vinegar solution works well and is safe for birds: mix 1 part white vinegar to 9 parts water, scrub the basin with your dedicated brush, let it sit for about 10 minutes if there's buildup, then rinse several times until you can't smell vinegar before refilling. Never leave birds access to the vinegar solution while it's soaking. In hot summer weather, bump cleaning to twice a week because algae builds much faster above 80°F.
Dealing with algae and mineral deposits
Green or brown discoloration is algae starting to colonize. If you catch it early, the vinegar scrub above handles it. If it's built up into a slimy coating, you can increase the vinegar concentration slightly (up to 1:4 vinegar to water) and let it soak longer, then scrub hard. For white crusty mineral deposits from hard water, the vinegar soak is also your best tool since the acidity dissolves calcium buildup. Avoid bleach: it kills algae effectively but is hard to rinse out completely from porous terracotta and risks harming birds.
Weatherproofing, freezing, and fixing problems
Freezing weather
This is the biggest durability issue with unglazed terracotta and clay: water gets into the pores, freezes, expands, and cracks the material. In climates with freezing winters, you have two real options. Option one is to bring the bath indoors or store it in a shed once nighttime temps consistently drop to freezing. Drain the basin completely before storing, since even residual moisture can crack clay during a hard freeze. Option two is to add a bird bath heater (a submersible heating element) that keeps the water just above freezing. This eliminates the need to store the bath and actually benefits birds, who struggle to find liquid water in winter. Note that a good waterproof seal reduces but doesn't eliminate freeze-crack risk for unglazed terracotta, since sealing the interior doesn't protect the exterior walls from absorbing moisture.
Mosquitoes
Mosquitoes need about 7 to 10 days of still water to complete their breeding cycle, so the twice-weekly water change you're already doing is your first line of defense. If you want extra insurance, a small solar-powered dripper or wiggler that keeps the water surface moving is very effective, since mosquitoes strongly prefer still water for egg-laying. It also attracts more birds, which is a bonus.
Cracks and leaks
If your saucer starts leaking after a few weeks, do the 24-hour fill test to confirm the location: fill it, mark the water level, and check after a day. If it drops, drain and dry the saucer completely (this takes a couple of days of sun), then apply another coat of Pond Armor or epoxy putty to the leaking area. A crack that goes all the way through the saucer wall usually can't be reliably repaired for water holding. At that point it's more practical to replace the saucer (which is cheap) than fight the crack. Keep the old saucer as a base weight under the new one if you want.
If the pedestal is wobbly
A wobbly base usually means the pot is sitting on uneven ground or the adhesive bond between pot and saucer wasn't given long enough to cure. For ground leveling, a flat concrete stepping stone under the pot solves the problem in about five minutes. For a bond that's already failed, clean and dry both surfaces, reapply construction adhesive, and clamp or weight the saucer in place for the full cure time.
Final checks and your first month maintenance schedule
Before you declare the project done, run through this quick checklist: the drainage hole is fully plugged and not dripping, the epoxy sealer has cured for the full manufacturer-specified time, the saucer is level and doesn't rock, and the adhesive bond between pot and saucer is solid. Do one last 24-hour fill test in place. If the water level holds, you're ready.
For the first month, keep a slightly closer eye on things than you will long-term. Check for any seeping around the drainage plug after the first rain or heavy fill. Clean and refill twice in the first week to make sure no sealer residue is affecting the water (if you see any film or oiliness, flush and scrub once more). After that, settle into the standard rhythm: top up water every day or two in warm weather, full water change and scrub twice a week, deep vinegar clean once a week, and a full inspection for cracks or loose joints at the start of each season.
If you enjoy the clay pot project, it's worth knowing there are related builds that go deeper on specific techniques: mosaic decoration, working with a bird bath mold for a fully custom shape, or hypertufa (a lightweight alternative to solid clay) for a different texture and weight. If you want the same bird-safe, water-holding foundation but with a decorative finish, you can also learn how to make a mosaic bird bath. Each has its own material logic, but the waterproofing and placement principles you've just learned apply to all of them. If you also want help with the “day-to-day” care after sealing, see the clay pot bird bath instructions for filling, cleaning, and keeping the water fresh.
FAQ
Can I leave the terracotta drainage hole in the saucer open, or should I plug it permanently?
For a working bird bath you want the basin to hold water, so plug the drainage hole firmly. After sealing, do a 24-hour fill test in the final location, then re-check for seepage after heavy rain, some holes weep even if they do not actively drip at first.
What’s the best way to choose a clay pot if mine is too tall, too small, or has odd shapes?
Pick a pedestal pot that can sit wide and stable on your saucer, then check that the underside contacts the basin evenly. If the pot rim rocks, do not rely on adhesive alone, level the contact using a thin shim material under the pedestal base, then re-bond and cure fully.
Is it safe to paint or glaze the inside of the clay pot pedestal, not just the basin?
Birds will drink from the basin, not the outer pedestal, so prioritize waterproofing where water pools or splashes. If you paint interior walls where water can run down, use only pond-rated products that are designed for continuous water contact, decorative outside paint is fine because it is not exposed to bird drinking.
How do I know the epoxy sealer is fully cured before I let birds use the bath?
Do not rely only on “dry to the touch.” Follow the full cure time listed by the product, and if temperatures are cool or the coating is thick, extend the wait. A practical check is to fill for a short test after cure, if you still see an oily film or strong odor, scrub and flush again before regular use.
Can I use hot tap water or add soap to clean the vinegar residue faster?
Rinse thoroughly with clean water, but avoid soap, detergents, or quick-rinse methods that leave residue. Birds are sensitive to smells and films, so rinse until you cannot detect vinegar odor and no soapy slick remains, then refill to the target depth.
My bath has white crust or pitting, is that from minerals, and how do I prevent it?
White crust typically comes from hard-water mineral buildup. Use the vinegar soak regularly, and if deposits return quickly, consider using bottled or filtered water for refills or place the bath so it does not concentrate runoff from nearby sprinklers onto the basin.
What should I do if algae keeps coming back even though I clean weekly?
Algae often accelerates with sun exposure or warm standing water. Try more frequent basin scrubs during hot spells, keep the water refreshed more than twice a week if temperatures exceed about 80°F, and remove any leaf debris daily so nutrients do not build up.
Will birds drink from the bath if the water is slightly cloudy or tinted?
Light discoloration can happen from mineral staining or early algae, but you should not leave it unaddressed if it is green, slimy, or odorous. Scrub, rinse, and refill with clear water, if the bath looks slick or algae-loaded, increase vinegar soaking or switch to a stronger soak schedule rather than “waiting it out.”
How can I reduce mosquitoes besides changing water frequently?
Moving water helps, so a solar-powered dripper or gentle surface agitation can reduce egg-laying. Also check nearby sources like buckets, planters, and clogged gutters, because mosquitoes will use any small still-water pocket even if your bath is clean.
What’s the safest way to winterize a terracotta bird bath in a freezing climate?
Drain completely before freezes and store covered to prevent water trapped in pores from expanding and cracking. If you use a heater, make sure it is designed for outdoor submersion and keep the bath topped for consistent coverage, also still inspect seals each season since waterproofing reduces but does not eliminate freeze-crack risk.
Why is my bath wobbling or leaking again after I already fixed it once?
Wobble usually means either uneven ground or a bond that was disturbed before full cure. Leaks often indicate partial failure at the epoxy patch or a porous crack edge. Clean and dry thoroughly, reapply epoxy or epoxy putty, then clamp or weight for the entire cure window, and repeat a 24-hour fill test before leaving it outside.
Can I make a version that holds more water by using a larger saucer or deeper basin?
A larger diameter can be beneficial, but deeper basins increase difficulty for birds and can trap debris, and very deep setups also take longer to clean. If you go bigger, keep the center depth close to the recommended range and plan on more frequent full refreshes so water does not go stagnant.
Citations
Pond Armor’s “Pond Shield” is a specialized, non-toxic two-part epoxy liner intended to create a seamless, waterproof barrier for water features including “bird baths,” and is described as safe for fish/plants when properly applied and cured.
https://pondarmor.com/
Pond Armor Pond Shield is described as a non-toxic two-part epoxy used to waterproof solid constructed water features, and is stated to be safe for fish and plants if applied/cured properly.
https://www.thepondguy.com/product/pond-pond-armor-pond-shield-non-toxic-epoxy-liner-3-gallons/
Pond Armor “Pond Shield” is marketed as a non-toxic epoxy liner system designed for pond/water feature use and described as “safe for fish and plants.”
https://pugetsoundponds.com/products/pond-shield-non-toxic-epoxy-liner
Kingfisher “Epoxy Pond Paint” is described as a water-based epoxy resin finish for waterproofing and, when cured, provides a “neutral coating” that is stated to be “not injurious” to fish/amphibians/aquatic plant life, and is labeled “non-taint & non-toxic.”
https://static.kingfisheruk.com/specs/data/epoxypondpaintdatasheet2019.pdf
G4 Pond Sealer documentation warns not to use P.V.A.-based sealer to seal/prime surfaces for pond liner work (“On no account use a P.V.A. based sealer…”).
https://www.watergardeningdirect.com/acatalog/pdf/misc/G4_Pond_Sealer.pdf
G4 is described as an “excellent sealer for brickwork” and includes instruction language oriented to pond/water feature sealing applications (supporting use of dedicated pond sealers rather than general craft sealants).
https://www.watergardeningdirect.com/acatalog/pdf/misc/G4_Pond_Sealer.pdf
One cited guidance target for bird-bath water depth is roughly ~0.5–1 inch at the shallow edge and ~1.5–2 inches toward the middle (for many backyard birds).
https://connectnest.net/bird-bath-depth/
Thayer Birding states ideal bird-bath water depth should be about 1 inch to 2 inches deep.
https://www.thayerbirding.com/how-deep-should-a-bird-bath-be/
BirdCoR’s backyard bird habitat guidance includes: bowl depth “should not be more than 1–2 inches deep,” and discusses bowl lip/edge usability for birds’ feet.
https://www.birdconservancy.org/wp-content/uploads/2020/04/BirdCoR-Book-FINAL-FINAL-v.-01APR2020.pdf
The Ohio DNR backyard bird attraction PDF states most birds prefer a shallow bird bath of about 1.5 to 2 inches of water.
https://dam.assets.ohio.gov/image/upload/ohiodnr.gov/documents/wildlife/backyard-wildlife/Attracting%20Birds%20in%20Ohio%20pub037.pdf
BirdBathHowTo specifies dimensions for a DIY bird bath bowl/basin: about 12–24 inches in diameter and around 1.5–2 inches deep at the deepest point, and suggests using plant saucers/terracotta dish-style basins.
https://birdbathhowto.com/diy-bird-bath-projects/how-to-make-a-bird-baths
The same guidance lists common build components: an easier build can be a shallow ceramic/plastic plant saucer set on an upturned terra cotta pot (top bowl + base stand concept).
https://birdbathhowto.com/diy-bird-bath-projects/how-to-make-a-bird-baths
A terracotta DIY build description mentions applying construction adhesive as part of securing a terracotta base/pedestal and top component assembly.
https://www.weekand.com/home-garden/article/make-birdbath-terracotta-18029893.php
HumaneWorld’s DIY birdbath instructions specify using a “clay plant saucer (drip tray)” for the base and a “large plant saucer” for the top (pot-to-saucer approach).
https://www.humaneworld.org/viet-nam/en/all-animals/diy-backyard-birdbath
DIY Joy describes a DIY terracotta birdbath approach that involves placing a small upside-down terracotta pot on the top of a saucer once set/secured with glue (variation of top-bowl/pedestal stacking).
https://diyjoy.com/diy-terracotta-birdbath/
BirdLife Cyprus provides a simplified DIY concept using a large terracotta plant pot (or more pots for additional height) as the base component.
https://birdlifecyprus.org/how-to-make-a-bird-bath/
BirdLife Cyprus advises avoiding coloring the top/base part of the pot (instruction aimed at visible finishing/accessibility and/or build design).
https://birdlifecyprus.org/how-to-make-a-bird-bath/
BirdBathHowTo cites Audubon’s practical target for water depth and notes it’s typically around 1 to 1.5 inches deep (and emphasizes shallow, walk-in edges).
https://birdbathhowto.com/bird-bath-garden-ideas/where-to-put-bird-bath
Gardening Know How recommends aiming for about 6 to 10 feet (1.8 to 3m) so birds have a vantage point and can make a quick escape if a predator approaches.
https://www.gardeningknowhow.com/garden-how-to/beneficial/bird-bath-placement-mistakes
AOSOM’s placement guidance suggests placing the bird bath in a partially shaded, open area on level ground, and positioning away from trees/shrubs (including a recommendation range of ~10–15 feet from trees or shrubs).
https://www.aosom.com/blog-where-to-place-a-bird-bath-for-maximum-bird-activity-and-safety.html
Oklahoma wildlife guidance notes bird water can be offered in “shallow receptacles” and mentions bird-bath depth operation commonly in the ~1 to 3 inches range; it also notes hanging methods to attract birds (context for attraction).
https://www.wildlifedepartment.com/outdoorok/ooj/birdbath-tips
BirdBathHowTo emphasizes that visible green/brown discoloration indicates algae starting and recommends vinegar wiping before algae takes hold (and promotes keeping a dedicated scrub brush just for the bird bath).
https://birdbathhowto.com/bird-bath-cleaning/how-often-to-clean-bird-bath
BobVila states a vinegar-and-water solution can provide safe and effective cleaning power for a bird bath and recommends using a scrub brush to remove droppings/algae/dirt/debris.
https://www.bobvila.com/articles/how-to-clean-a-bird-bath/
IERE says diluted vinegar is generally safe/effective for bird baths and provides a cleaning frequency suggestion: clean with vinegar solution at least once a week (more frequently in hot weather).
https://iere.org/will-vinegar-in-bird-bath-harm-birds/
Tom’s Guide recommends vinegar (mixed as 1 part white vinegar to 9 parts water), and suggests for stubborn algae/staining letting it sit about ~10 minutes while preventing birds from drinking the mixture; it also notes changing water at least twice weekly to reduce buildup risk.
https://www.tomsguide.com/home/gardening/never-use-bleach-in-your-birdbath-this-usd1-pantry-staple-is-safer-and-more-effective
Wikipedia’s bird bath overview includes mosquito-control guidance: change the bird bath water weekly to interrupt a mosquito breeding cycle (stated as ~7–10 days).
https://en.wikipedia.org/wiki/Bird_bath
Ideal Home reports mosquito control tips approved by pest-control experts: mosquitoes prefer still water for egg-laying, so keeping the water surface moving can help prevent breeding.
https://www.idealhome.co.uk/garden/garden-advice/-ways-to-keep-mosquitoes-out-a-bird-bath
A winterizing care guide warns that freezing/expansion can crack porous materials and notes using strategies like covering and preventing re-entry of water; it also mentions a bird bath heater as a way to prevent freezing (and reduce the need to store/cover most birdbaths).
https://www.moananursery.com/wp-content/uploads/2022/02/Care-Maintenance-Winterizing-Fountains-Pottery-Statuary-Bird-Baths.pdf
The same winterizing guide states bird bath heaters can prevent water from freezing, “eliminating the need to store or cover” most birdbaths (per the document’s language).
https://www.moananursery.com/wp-content/uploads/2022/02/Care-Maintenance-Winterizing-Fountains-Pottery-Statuary-Bird-Baths.pdf
SawsHub states drilling through clay is easier when the clay pot is wet, because water cools and lubricates the drill bit tip.
https://sawshub.com/how-to-drill-hole-in-clay-pot/
Garden Ponds Kauai’s ceramic pot sealing guidance includes a water-test approach: fill the pot and leave filled “at least 24 hours” and check water level if it’s leaking.
https://www.gardenpondskauai.com/how-to-seal-a-ceramic-pot/
The DIY ollas guide includes a technique concept for sealing a terracotta pot’s drainage hole to stop seepage—illustrating that drilling/plugs/sealing specific holes is a practical terracotta waterproofing step.
https://www.ambitiousharvest.com/learn/diy-ollas-sustainable-watering-made-simple
A birdbath build PDF emphasizes “shallow, watertight” construction and includes a step about choosing a spot for the bird bath (supporting the “shallow + watertight” requirements framing).
https://www.theparkstrust.com/media/c1jlck4f/build-a-birdbath.pdf
The Resene “Weekend Gardener” PDF (birdbath build) describes a terracotta bird bath assembly concept using a specified terracotta pot size (e.g., a 17cm terracotta pot upside down on/in a mortar-filled bowl) as part of a DIY method.
https://www.resene.co.nz/pdf/Weekend-Gardener/220-diy-bird-bath.pdf
A terracotta planter care PDF advises using a plastic liner inside the pot to help prevent damage to the paint and clay, and notes re-sealing as needed (useful when considering liners for water containment).
https://trendspotinc.com/wp-content/uploads/2022/08/Mexican-Terracotta-Planter-Care-Instructions.pdf
BirdBathHowTo suggests common basin options including terracotta dishes/bird-bath bowl replacements and provides a build recipe-style component list (useful for mapping to clay/terracotta/flower pot equivalents).
https://birdbathhowto.com/diy-bird-bath-projects/how-to-make-a-bird-baths
An application flyer for Pond Armor Pond Shield states it is “non-toxic” and safe for fish/plants and describes it as a waterproofing/protection system for water features once cured properly.
https://pondscape.com/products/easy-pro-pond-armor%C2%AE-pond-shield%C2%AE
Next Articles
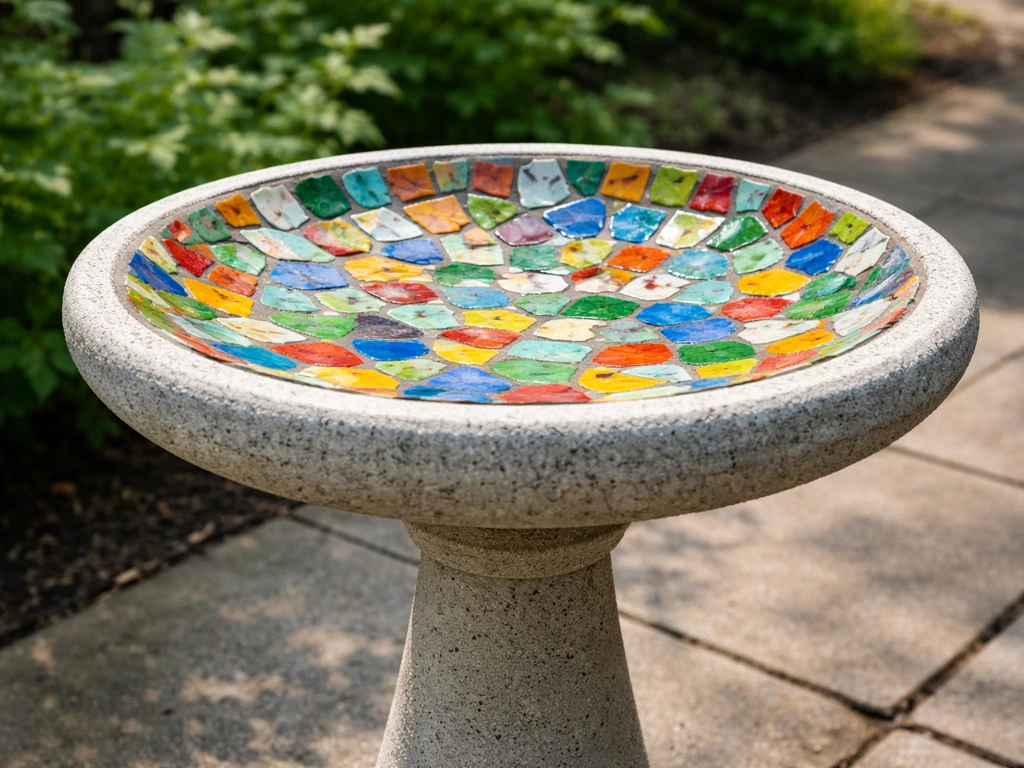
How to Make a Mosaic Bird Bath: DIY Concrete Guide
Step-by-step guide to build and mosaic a concrete bird bath, from prep and tile cutting to grouting, sealing, and instal
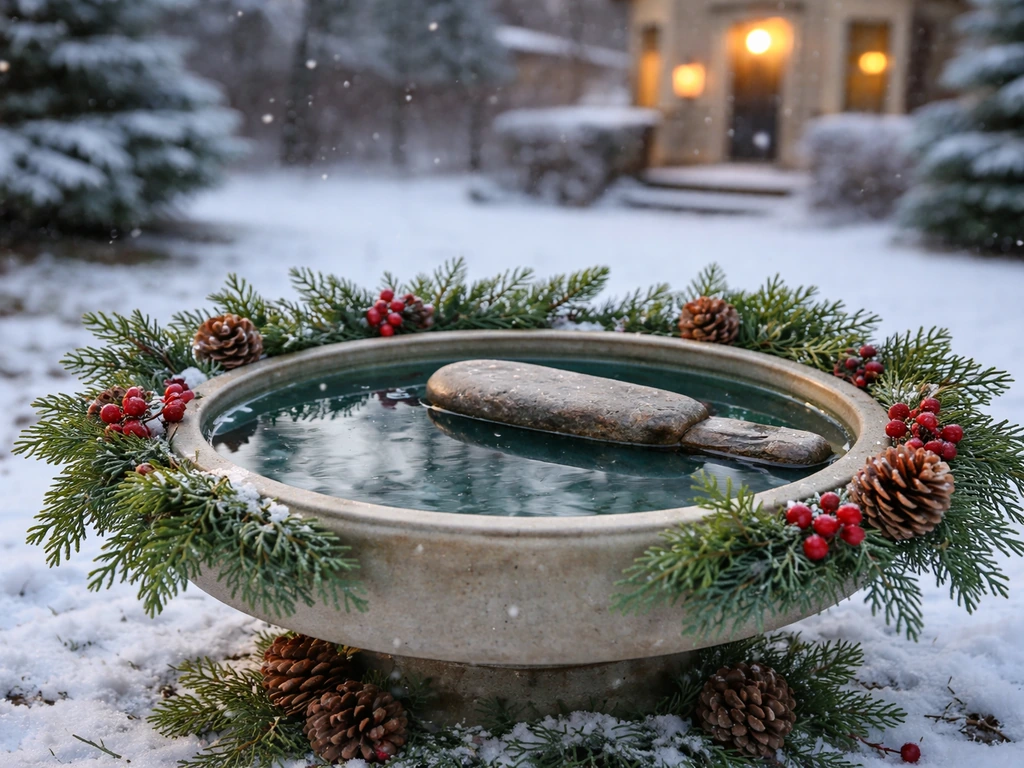
How to Decorate a Bird Bath for Christmas Safely
Step-by-step tips to decorate a Christmas bird bath with safe non-toxic accents, prevent freezing, and keep water clean.
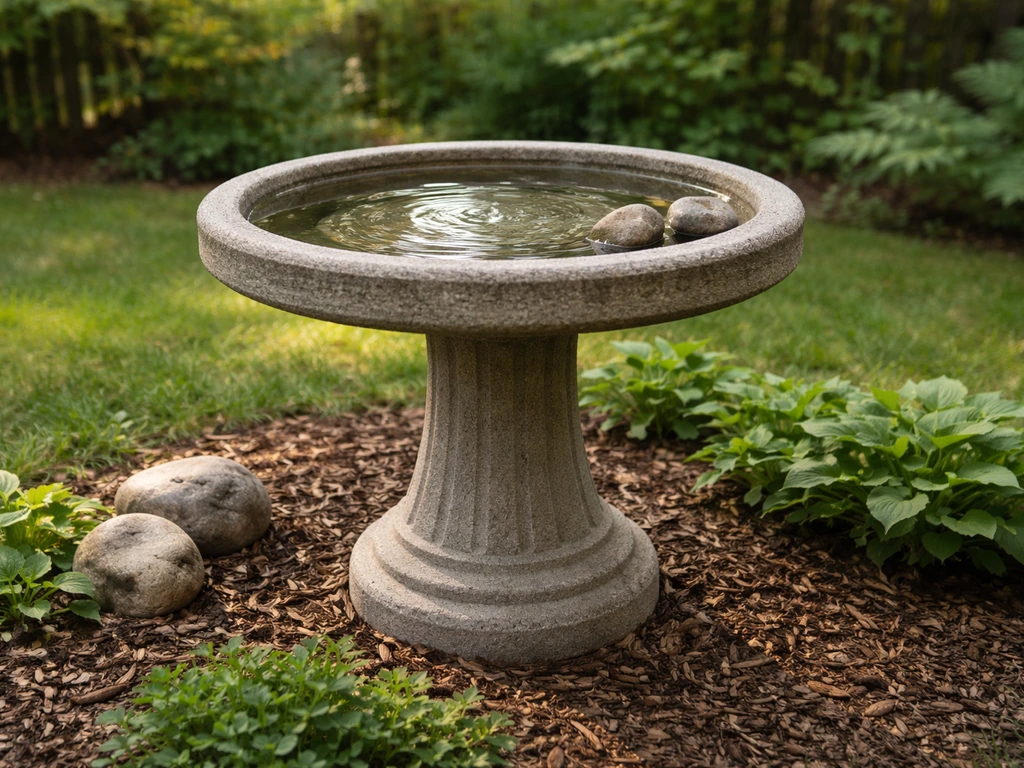
How to Decorate a Bird Bath: Step-by-Step Ideas
Step-by-step tips to decorate a bird bath safely, including concrete fixes, bird-friendly landscaping, and easy upkeep i