If your concrete bird bath top is cracked, chipped, or just plain worn out, the good news is you almost certainly do not need to replace the whole thing. In most cases, the basin top is a separate piece from the pedestal, and you can swap it out on its own. The tricky part is measuring correctly, finding a match, and getting it seated safely so it does not rock, tip, or crack again in the first hard frost. This guide walks through all of it, step by step.
Concrete Bird Bath Top Replacement Guide: Size, Fit, Steps

Marcus Henley
9 Apr 2026
What a concrete bird bath top actually is (and when replacing just the top makes sense)
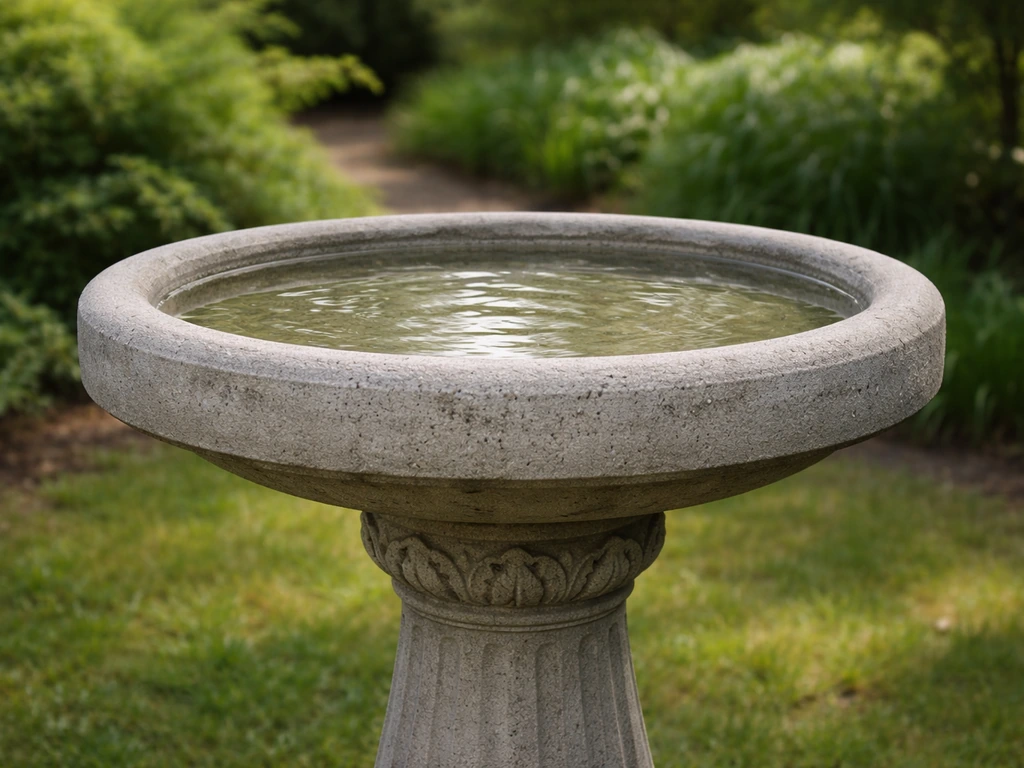
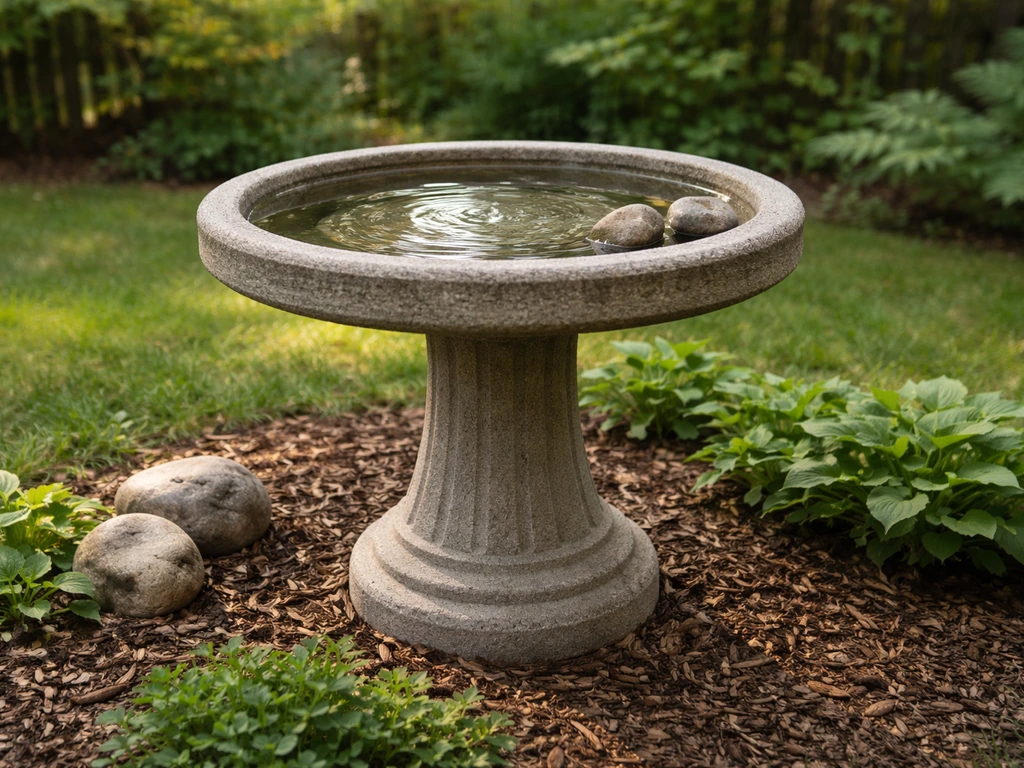
A concrete bird bath top is the basin bowl portion of the bird bath: the shallow dish that holds water. It sits on top of a pedestal or a ground-level base and is almost always a separate cast piece. Traditional concrete bird baths are designed this way on purpose, so the two components can be manufactured, shipped, and replaced independently. A standard precast design, for example, might specify a 27-inch diameter top basin paired with a 15-inch diameter base pedestal. The top does all the work of holding water and taking weather abuse, which is exactly why it tends to fail first.
You can replace just the top when the pedestal and base are still structurally solid, meaning no major cracks running through the column, no crumbling at the base, and no dangerous lean. If the pedestal has a clean, flat, level mounting surface and your main problem is a cracked or mossy basin, a replacement top for bird bath is the right fix. If the pedestal itself is compromised, you are better off replacing the full unit rather than putting a new top on an unstable column.
Concrete vs cement bird bath tops: what is actually different
These two terms get used interchangeably online, but there is a real distinction worth understanding before you buy. Cement is the binding ingredient, the powder that hardens when mixed with water. Concrete is cement plus aggregates like sand and gravel, which is what makes up the actual structural product. So technically, every concrete bird bath top is made with cement, but not every "cement" bird bath top is high-quality concrete.
For bird bath tops, what you want is a precast concrete piece with a good aggregate mix and ideally some fiber or wire reinforcement inside. Thin or low-aggregate mixes crack faster, especially in freeze-thaw climates. TDOT research materials on freeze-thaw durability discuss how voids in concrete, including entrained air voids and entrapped voids, affect performance [Thin or low-aggregate mixes crack faster, especially in freeze-thaw climates. ](https://www.
tn. gov/content/dam/tn/tdot/research/final-reports/2020-final-reports-and-summaries/RES2020-09FinalReport_Approved. pdf). A well-made precast concrete top will be noticeably heavy for its size, somewhere between 20 and 50 pounds for a typical 18- to 24-inch diameter basin.
If a replacement top feels surprisingly light, that is a warning sign it may be more cement slurry than real concrete, which tends to flake and crack after one or two winters.
Surface finish matters too. A smooth interior bowl holds water evenly but can be slippery for birds. A slightly textured or rough finish gives birds better footing and is actually easier to clean because algae has a harder time forming an impermeable biofilm on a matte surface. If you are considering alternatives, a ceramic bird bath top replacement can offer a smoother finish and is easier to sanitize, though it is generally less freeze-resistant than a thick concrete casting.
Getting the size right: small, standard, and large concrete bird bath tops
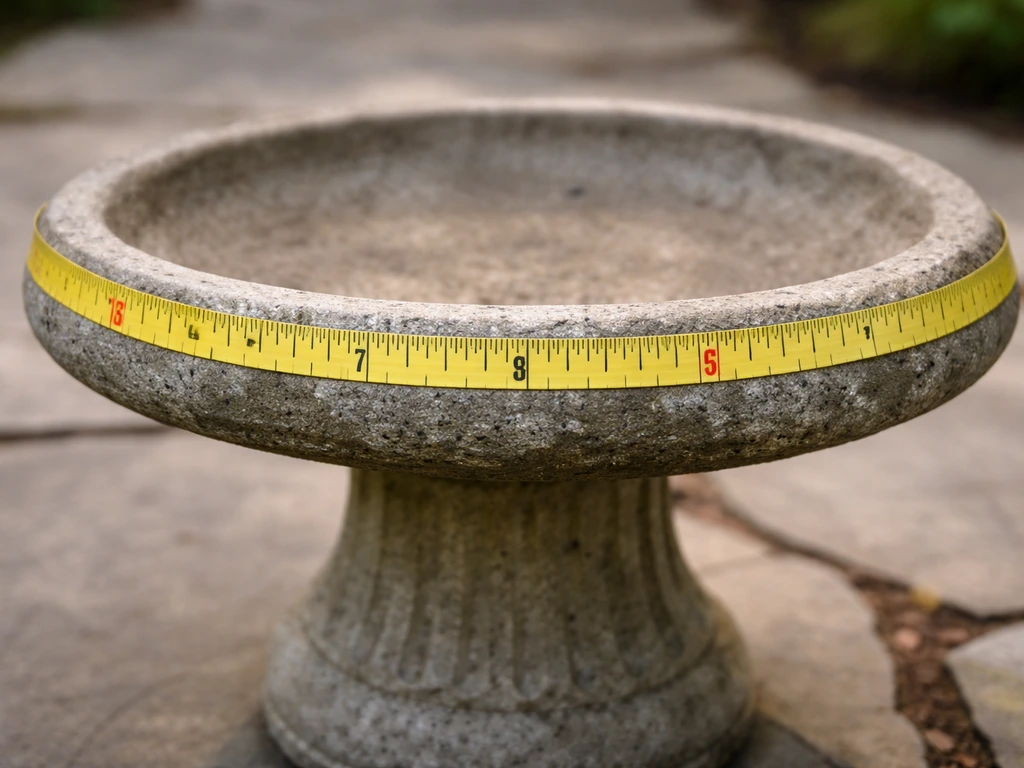
Sizing is where most replacement mistakes happen. Retailers typically sell concrete bird bath tops by diameter range, with medium tops covering roughly 16 to 22 inches in diameter. But "medium" at one supplier might be labeled "standard" at another, so always go by actual measurements rather than size names.
Before you order or go shopping, take three measurements from your existing top: the outer diameter, the inner basin diameter (the actual water-holding bowl), and the depth of the bowl at the center. Also measure the top surface of your pedestal, because the replacement top needs to either sit flush on it or have enough overlap to be stable. A top that overhangs the pedestal by more than a few inches on each side without proper adhesive is going to be a tipping hazard.
| Size Category | Typical Outer Diameter | Approximate Weight | Best For |
|---|---|---|---|
| Small | 12–15 inches | 10–18 lbs | Compact gardens, balconies, small songbirds |
| Medium | 16–22 inches | 20–35 lbs | Most standard pedestal baths, backyard songbirds |
| Large | 23–28+ inches | 35–60 lbs | Statement pieces, multiple birds at once, larger species |
| Extra-large / Custom | 30 inches+ | 60 lbs+ | Garden focal points, ground-level placement |
If you want to accommodate more birds or upgrade from your current basin, look at a large bird bath top only option rather than replacing the whole bath. Just make sure your pedestal can handle the added weight and surface area, and that the new top still centers well on the column.
Bowl depth is another measurement people overlook. Most songbirds prefer water that is no deeper than 1.5 to 2 inches at the center. If you are replacing a cracked top, this is your chance to get the depth right. A bowl that is too deep discourages bathing and can be a hazard for smaller birds.
How to remove the old top and install the new one
Removing the old concrete top
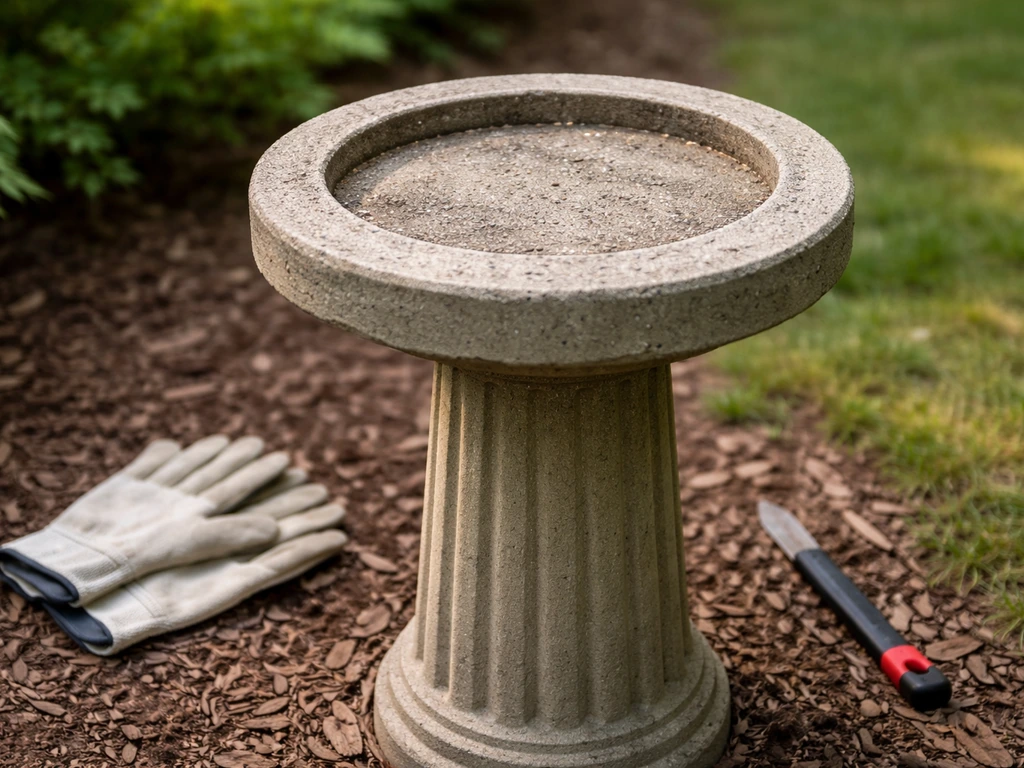
Most concrete bird bath tops just rest on the pedestal by gravity, sometimes with a small amount of old mortar or silicone that has long since crumbled. Lift straight up with both hands (get help if the top weighs more than 30 pounds) and set it aside. If it feels bonded, check around the edge for hardened mortar and chip it away gently with a putty knife or cold chisel before you try lifting again. Yanking a bonded top can crack the pedestal column, which is exactly what you are trying to avoid.
Once the old top is off, clean the top surface of the pedestal thoroughly. Scrape off any old mortar, silicone, or debris. Check for cracks or chips in the pedestal's mounting surface. If the surface is uneven, use a quick-set hydraulic cement or concrete patching compound to level it and let it cure fully before placing the new top.
Setting and securing the new concrete top
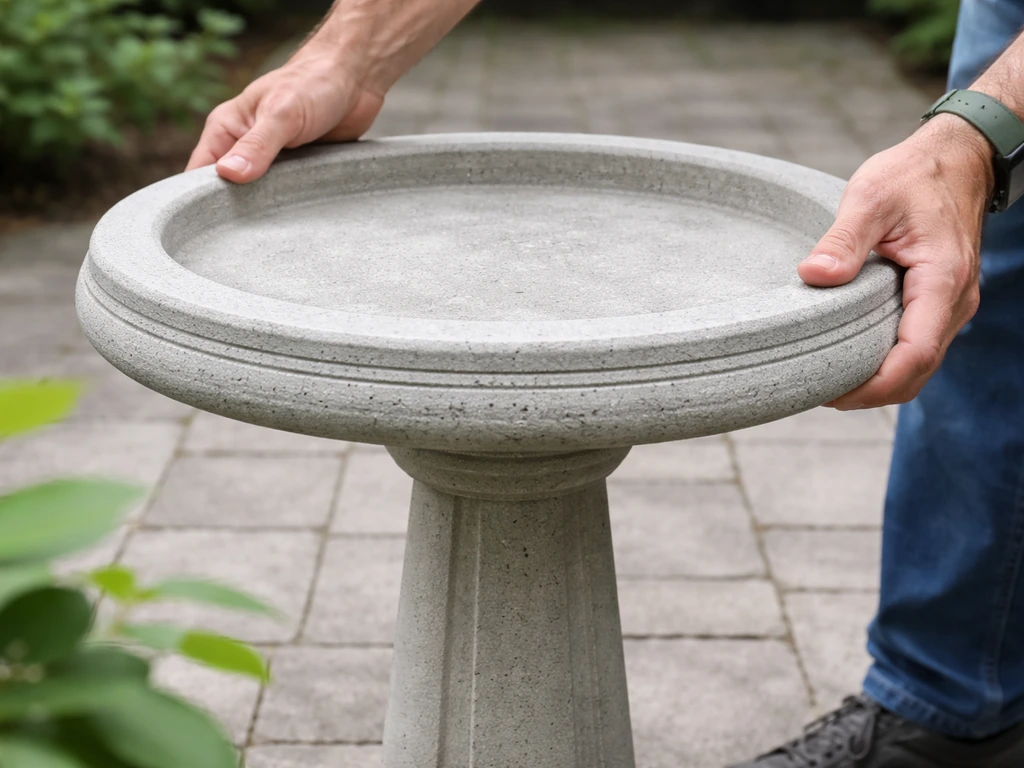
- Dry-fit the new top first: set it on the pedestal without any adhesive and check that it sits flat, centered, and stable. Wiggle it gently. If it rocks, find the high point and shim it or build up the low point with patching compound, then let it cure.
- Choose your bonding method: for most residential bird baths, a thin bed of exterior-grade construction adhesive (like a polyurethane or silicone-based product rated for masonry) is enough. For heavier tops over 40 pounds, a thin mortar bed provides better load distribution.
- Apply adhesive or mortar to the top of the pedestal in a pattern that covers the contact area evenly, not just a center blob. A few parallel beads of construction adhesive works well for smaller tops.
- Lower the new top carefully and center it. Press down firmly and twist slightly to seat it into the adhesive.
- Check level with a small bubble level placed across the basin. Adjust before the adhesive sets.
- Wipe away any squeeze-out from around the edges before it cures.
- Allow full cure time before filling with water: typically 24 hours for construction adhesive, 48 to 72 hours for a mortar bed, longer in cold or humid conditions.
One thing worth knowing: new concrete bird bath tops can leach lime, which raises the water pH and can irritate birds. Before putting your new top into service, fill it with water and let it sit for 24 hours, dump it, and repeat two or three times. Some people apply a concrete sealant rated as non-toxic once cured to reduce leaching and make cleaning easier going forward.
Finding a replacement near you: how to match the exact part
Searching for a concrete bird bath top replacement nearby is a smart instinct because concrete is heavy and shipping adds up fast. Your best local sources are garden centers, landscape supply yards, concrete garden suppliers, and sometimes big-box home improvement stores with outdoor garden sections. Call ahead and ask specifically about replacement tops or basin bowls, because staff may not intuitively connect the inventory to your search term.
When you go in person or contact a supplier, bring these four things: the outer diameter of your old top, the pedestal top surface diameter, the bowl depth, and if possible the brand name or any markings stamped on the underside of your existing top. Many precast concrete bird baths have a manufacturer's mark, date stamp, or mold number on the bottom. That information can help a supplier match a replacement from the same mold or product line.
If local options come up short, online retailers that specialize in concrete garden supply often categorize replacement tops by diameter range, making it easier to filter to your needed size. Factor in freight shipping costs for anything over 30 pounds, and check whether the seller ships to your area at all, since some precast suppliers are regional only.
If you want something more decorative or lightweight as an interim solution, a glass top bird bath is worth comparing on dimensions, though it will not have the same freeze resistance or weight stability as a poured concrete basin.
Picking the best concrete bird bath top: what actually matters
Not all precast concrete tops are equal. Here is what to look for and what to avoid when choosing a replacement:
- Thickness: A top that is at least 1.5 to 2 inches thick throughout the bowl area is much more crack-resistant than a thin-cast piece. Pick it up and check the underside, you should not see visible voids or honeycombing in the concrete.
- Weight: Heavier is generally better for stability, but match the weight to what your pedestal can safely support. A 50-pound top on a narrow 4-inch pedestal column is a tipping risk.
- Drainage and water-holding: The basin should hold 1 to 2 inches of water at the center with a gradual slope toward the edges. Avoid designs where the basin is perfectly flat all the way to the rim, as these tend to pool unevenly and overflow easily.
- Freeze resistance: Look for tops described as "air-entrained" concrete or rated for freeze-thaw cycling if you live in USDA hardiness zones 6 or colder. Thin or low-aggregate concrete can crack through in a single hard freeze.
- Surface texture: A slightly rough or matte interior finish is better for bird footing and easier to clean than a glassy-smooth surface.
- Fit and overhang: The top should overhang the pedestal by no more than 3 to 4 inches on each side, unless the design specifically accounts for cantilever loading.
- Avoid: Tops with a paint or glaze that chips easily (can introduce toxins into the water), any casting with visible cracks or spalling fresh out of the box, and decorative tops with very shallow bowls under 1 inch deep.
DIY vs professional installation, and how to maintain your new top
DIY or call someone in?
For the vast majority of standard concrete bird bath tops under 40 pounds, this is a confident DIY job. You need a level, a tube of exterior construction adhesive or a bag of ready-mix mortar, a putty knife, and a helper if the top is heavy. The whole swap takes less than an hour of active work plus cure time. Where I would suggest calling a professional (or at least a strong friend with masonry experience) is when the top weighs over 50 pounds, the pedestal needs significant repair first, or you are working with a large freestanding bath on uneven ground. Getting a 60-pound concrete basin dropped wrong can injure you or destroy the pedestal.
Maintenance after installation
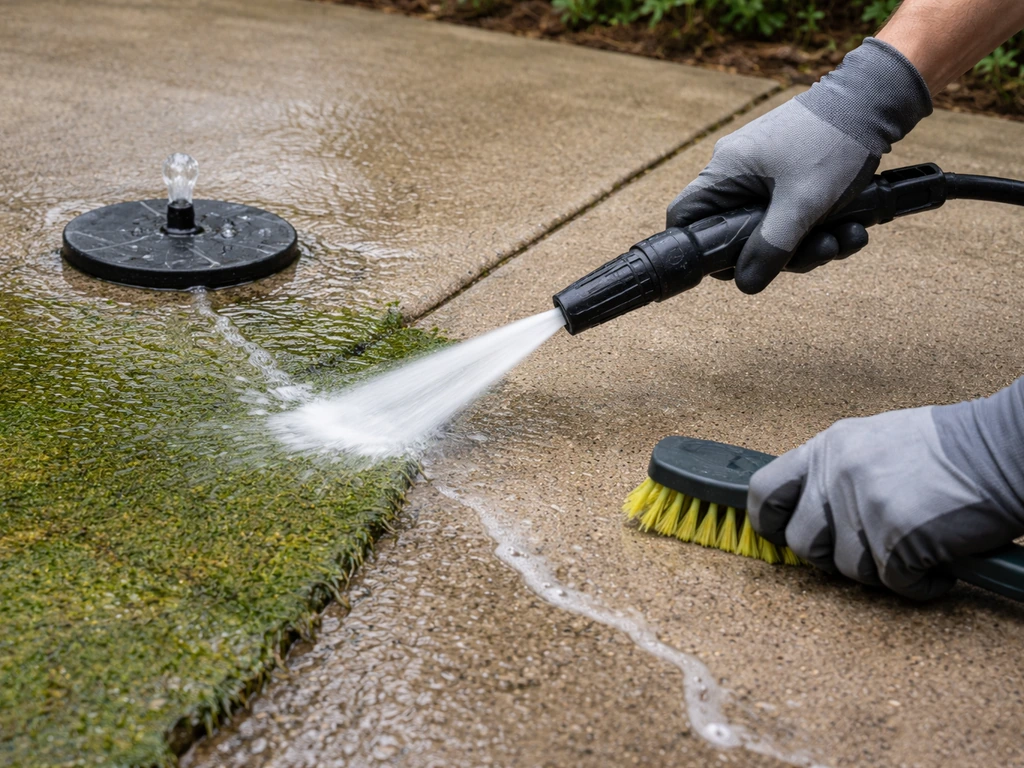
A new concrete top will not stay clean on its own. Algae growth on concrete is a near-certainty in warm weather, typically appearing within one to two weeks of setup. The simplest prevention is changing the water every two to three days and scrubbing the basin with a stiff brush each time. Do not use bleach or dish soap directly in the bath; instead, use a dilute white vinegar solution (one part vinegar to nine parts water) for routine cleaning, rinse thoroughly, and refill.
For mosquito prevention, moving water is your best tool. A small solar-powered fountain attachment keeps the surface agitated enough to prevent mosquito larvae from establishing. Stagnant water left sitting for more than four days in warm weather is all it takes for mosquitoes to breed.
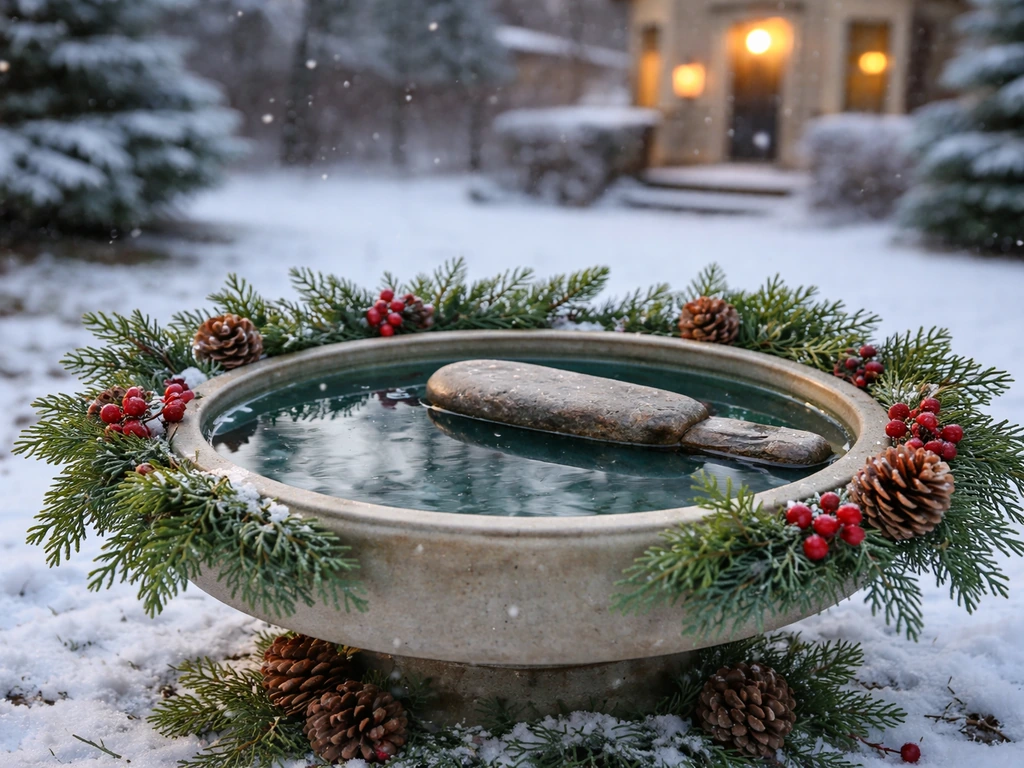
In freezing climates, the single most important thing you can do for your concrete top is not let water freeze solid inside it. Ice expands against the bowl walls and causes cracking, even in high-quality concrete. Either empty the basin before temperatures drop below freezing, add a small submersible bird bath heater rated for concrete baths, or place a floating de-icer in the water during winter months. If you do crack a brand new top in the first winter, it is almost always because water froze hard in the bowl overnight.
Seal the concrete surface once a year with a penetrating masonry sealant rated as non-toxic after full cure. This dramatically reduces water absorption into the concrete, slows algae attachment, and extends the life of the top considerably. Apply in dry weather, let it cure for 48 hours, and give the basin a thorough rinse before refilling. With that kind of care, a well-made concrete bird bath top should last a decade or more before you are looking at this process again.
FAQ
Can I glue a concrete bird bath top down permanently, or should it just rest on the pedestal?
Yes, if the pedestal is solid and the top is sized correctly. Use a thin, continuous bead of exterior construction adhesive on the pedestal’s mounting surface, then seat the basin and weight it evenly while curing. Avoid filling large gaps with thick mortar, it can create uneven support points and cause rocking or new stress cracks.
Is it safe to seal a concrete bird bath top right away after installing it?
A sealant can be helpful, but only after the replacement top has gone through the leaching flush (multiple water fills and dumps). Choose a penetrating, non-toxic masonry sealer rated for water-contact surfaces after full cure. Don’t use film-forming coatings that can peel, because bird-safe fragments can end up in the water bowl.
How can I tell if my concrete bird bath top will sit flush and not rock?
Measure the pedestal’s flat area, not just its overall diameter, because some pedestals have a decorative lip. The basin should contact the pedestal uniformly, if only the outer ring touches, the bowl can tip under wind or bird impact. Dry-fit the top, check for rocking by pushing gently at opposite sides, and correct unevenness before bonding.
What should I do if the replacement top doesn’t center correctly on the pedestal?
If the top is misaligned by even a small amount, you often get stress cracking near one edge during freeze-thaw cycles. Don’t “force” it into place with extra adhesive. Instead, level the pedestal mounting surface, then re-measure outer diameter, inner basin diameter, bowl depth, and required overlap, and only then re-seat.
How do I clean algae and moss safely without harming birds?
For moss and algae staining, use mechanical scrubbing first, then an acetic cleaner like dilute vinegar for routine maintenance. For heavy deposits, soak with vinegar briefly and scrub, rinse very thoroughly, then refill. Avoid bleach or dish soap in the bowl because residue can harm birds and it can leave slippery surfaces.
When is it not worth replacing just the concrete bird bath top and instead replacing the whole bath?
Cracks in the pedestal mounting surface are a stop sign. If you can see through-cracks, loose concrete at the base, or a noticeable lean, replacing only the concrete bird bath top can fail again quickly. In those cases, replace the full unit or have the pedestal repaired and structurally stabilized before installing the new top.
What are quick signs a replacement concrete bird bath top is low quality, beyond size and price?
If the top weighs around the same range as your old one, that’s a good sign, but weight alone isn’t perfect. Also inspect the underside for visible aggregate distribution and check whether the thickness is consistent around the rim. A noticeably lighter top that also has a thin rim or crumbly edges is usually a poor match for freeze-thaw durability.
How important is bowl depth when choosing a concrete bird bath top replacement?
If the bowl is too deep, small birds may avoid it, and they can struggle to perch safely at the waterline. Aim for about 1.5 to 2 inches of water at the center depth for many songbirds, and choose a top with the correct bowl depth rather than assuming all replacements match.
Do I really need to empty the concrete bird bath top in winter if I use a bird bath heater?
Use a heater sized for bird baths or a floating de-icer designed for wildlife, but keep the device below the water surface and away from the rim area where birds land. In winter, still empty the bowl if your area regularly reaches deep freezes, because even good heaters can’t always prevent solid freezing during long cold snaps.
What causes a new concrete bird bath top to crack again after installation?
If you see hairline cracks spreading from the rim or frequent cracking after reinstallation, the pedestal is often uneven or the top was bonded to a rocking base. Re-check level, scrape and remove old adhesive that may be creating high spots, level the mounting surface, and re-seat the replacement with uniform support.
How do hard water minerals affect concrete bird bath top maintenance?
In areas with hard water, mineral scaling can form faster and make cleaning harder. After each rinse and before refilling, scrub with a stiff brush, then do a vinegar clean occasionally to dissolve scale. Also ensure the water changes schedule remains consistent, because constant slow evaporation can concentrate minerals.